
ŚPIEWACZ M1000
Instrukcja obsługi maszyny do cerowania SINGER M1000
Your guide to setting up, operating, and maintaining your SINGER M1000 Mending Machine.
1. Wprowadzenie
The SINGER M1000 Mending Machine is designed for light to medium weight fabrics, offering portability and ease of use for basic mending and garment repairs. This manual provides essential information to help you operate and maintain your machine effectively.
2. Ważne informacje dotyczące bezpieczeństwa
Aby zminimalizować ryzyko pożaru, porażenia prądem lub obrażeń ciała, należy zawsze przestrzegać podstawowych zasad bezpieczeństwa podczas korzystania z urządzeń elektrycznych.
- Przeczytaj wszystkie instrukcje przed użyciem maszyny.
- Keep the machine away from water or wet surfaces.
- Odłączaj urządzenie od gniazdka elektrycznego, gdy nie używasz go, gdy wykonujesz czynności serwisowe lub wymieniasz akcesoria.
- Nie należy pozwalać dzieciom na obsługę urządzenia bez nadzoru.
- Używaj urządzenia wyłącznie zgodnie z jego przeznaczeniem opisanym w niniejszej instrukcji.
- Nigdy nie używaj urządzenia, jeśli przewód lub wtyczka są uszkodzone, jeśli urządzenie nie działa prawidłowo lub jeśli zostało upuszczone lub uszkodzone.
3. Zawartość opakowania
Sprawdź, czy w przesyłce znajdują się wszystkie elementy:
- SINGER M1000 Mending Machine
- Stopa uniwersalna
- Transparent Class 15 Bobbins
- Dodatkowa igła
- Ręczny nawlekacz igły
- Przewód zasilający

Image: The SINGER M1000 Mending Machine in blue, shown with its power cord, foot pedal, bobbins, and other accessories.
4. Koniec maszynyview
Familiarize yourself with the main components of your SINGER M1000 Mending Machine.

Image: This image highlights key features: the Easy Stitch Selection dial, a visual representation of 32 stitch applications, and the Reverse Lever for securing stitches.
- Pokrętło wyboru ściegu: Located on the front of the machine, used to choose desired stitch patterns.
- Dźwignia biegu wstecznego: Włącza ścieg wsteczny w celu zabezpieczenia szwów.
- Górna szpulka typu drop-in: Provides easy access for bobbin insertion and monitoring thread supply.
- Wolne ramię: Accessible by removing the accessory compartment, ideal for sewing cuffs and hems.
- Światło LED: Oświetla obszar szycia, zapewniając lepszą widoczność.
5. Konfiguracja
5.1 Połączenie zasilania
Connect the power cord to the machine and then to a suitable electrical outlet. Ensure the foot pedal is also connected.
5.2 Nawijanie szpulki
- Place an empty Class 15 transparent bobbin onto the bobbin winder spindle.
- Follow the threading guides for bobbin winding, typically indicated by dashed lines or numbers on the machine.
- Engage the bobbin winder and press the foot pedal to start winding.
- Stop when the bobbin is full and trim the thread.
5.3 Nawlekanie maszyny
Proper threading is crucial for correct stitch formation. Follow the numbered threading guides on the machine carefully.
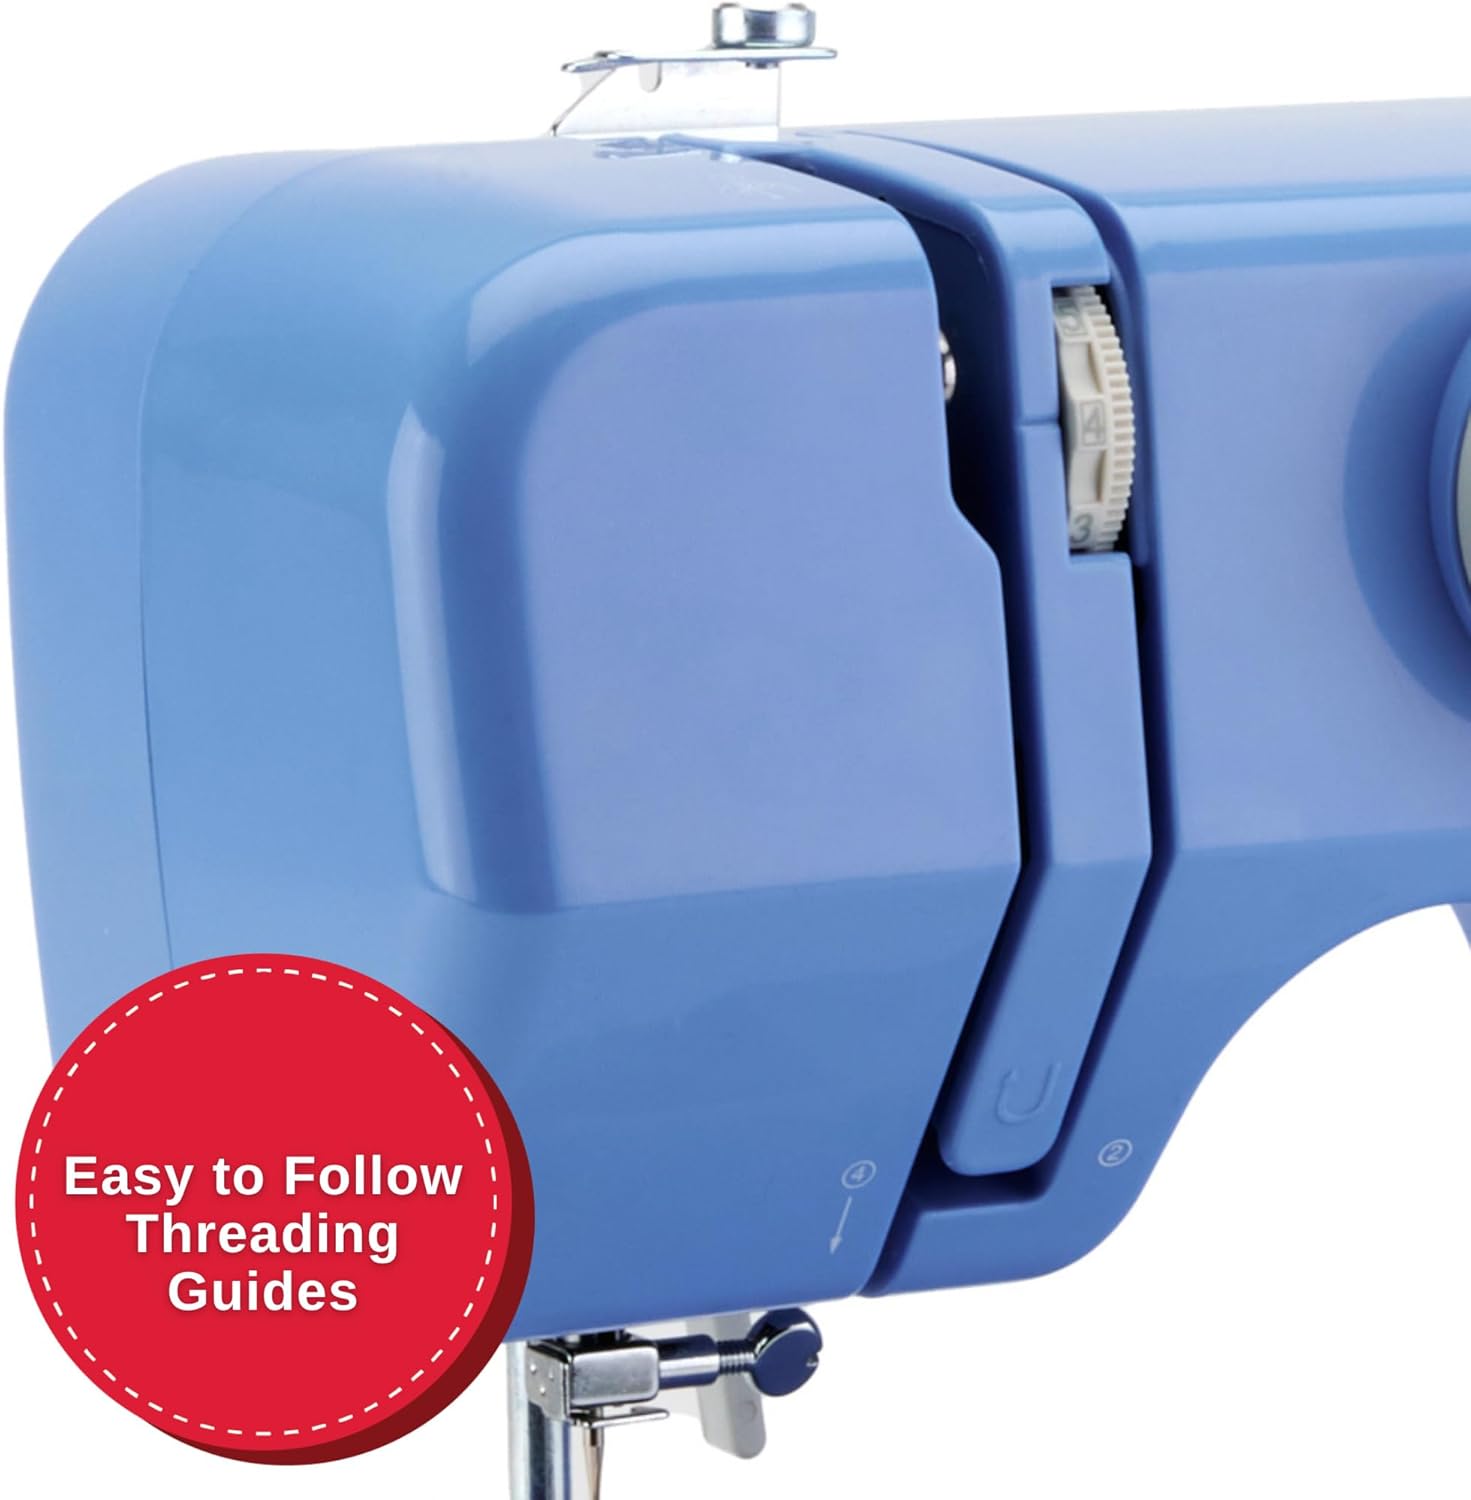
Obraz: szczegółowy view of the machine's side, illustrating the clear, numbered threading guides to ensure correct upper thread path.
- Podnieś dźwignię stopki dociskowej.
- Nawiń szpulkę nici na trzpień szpulki.
- Guide the thread through the upper threading path, following the numbered steps or arrows.
- Nawlecz igłę od przodu do tyłu.
- Insert the wound bobbin into the top drop-in bobbin case.
- Przeciągnij nić szpulkową przez otwór w płytce ściegowej.

Image: A close-up showing the transparent cover of the top drop-in bobbin, indicating easy access and visibility of the bobbin thread supply.
6. Instrukcja obsługi
6.1 Wybór ściegu
Turn the Stitch Selection Dial to choose one of the 32 available stitch applications. The machine automatically sets the optimal stitch width and length for the selected stitch.
- Ścieg prosty: Do podstawowych szwów i przeszyć.
- Ścieg zygzakowaty: For finishing raw edges, appliqué, and decorative purposes.
- Multi-step Zigzag: Suitable for elastic insertion and seam finishing.
- Ścieg kryty: Do tworzenia niewidocznych podwinięć.
6.2 Rozpoczęcie szycia
- Umieść materiał pod stopką.
- Opuść stopkę dociskową.
- Gently press the foot pedal to begin sewing. The machine operates at a single speed.
6.3 Using the Reverse Lever
To secure the beginning and end of a seam, press and hold the Reverse Lever while sewing. Release the lever to continue sewing forward.
6.4 Szycie na wolnym ramieniu
Remove the accessory compartment to expose the free arm. This feature is useful for sewing small, tubular items such as cuffs, pant hems, and necklines.
6.5 Adjustable Thread Tension
The machine's tension control allows you to adjust the balance between the upper and bobbin threads. Proper tension ensures a smooth, even stitch. Adjust as needed based on fabric type and thread thickness.
7. Konserwacja
Regular maintenance ensures optimal performance and longevity of your sewing machine.
- Czyszczenie: Okresowo czyść obszar szpulki i ząbki transportera z kłaczków i kurzu za pomocą małej szczoteczki. Zawsze odłączaj maszynę od zasilania przed czyszczeniem.
- Wymiana igły: Replace needles regularly, especially if they become bent or dull, to prevent skipped stitches and fabric damage.
- Typ szpulki: Use only SINGER Class 15 Transparent bobbins for best results.
8. Rozwiązywanie Problemów
W tej sekcji omówiono typowe problemy, z którymi możesz się spotkać. W przypadku bardziej złożonych problemów zapoznaj się z oficjalnymi materiałami pomocy technicznej SINGER.
| Problem | Możliwa przyczyna | Rozwiązanie |
|---|---|---|
| Pominięte ściegi | Incorrectly threaded needle, bent needle, wrong needle size for fabric. | Re-thread the machine, replace the needle, use appropriate needle for fabric type. |
| Zrywanie wątku | Niewłaściwe naprężenie, słaba jakość nici, nieprawidłowo nawinięta szpulka, zadziory na płytce ściegowej. | Adjust tension, use good quality thread, re-wind bobbin, check for burrs. |
| Tkanina nie jest podawana | Stopka dociskowa nie jest opuszczona, ząbki transportera są zapchane kłaczkami. | Opuść stopkę dociskową, wyczyść ząbki transportera. |
| Machine Runs Slowly / Stops | Overload (too thick fabric), motor issue, internal jam. | Ensure fabric is suitable for the machine (light to medium weight). If problem persists, contact support. |
9. Specyfikacje
- Model: M1000
- Wymiary: 5.1" gł. x 11.5" szer. x 9.4" wys.
- Waga: 5.5 funtów (2.5 kg)
- Zastosowania ściegów: 32
- Typ szpulki: Class 15 Transparent
- Przestrzeń szycia (od igły do wieży): 4.25 cali
- Moc: W zestawie przewód zasilający

Image: The SINGER M1000 Mending Machine, illustrating its compact dimensions of 11.5 inches width and 9.5 inches height, highlighting its portability.
10. Gwarancja i wsparcie
The SINGER M1000 Mending Machine comes with a warranty (1 year / 25 years, as per product description). For detailed warranty information and to register your product, please visit the official SINGER webstrona.
For additional support, tutorials, and troubleshooting guides, download the free Creativate app:

Image: A mobile phone displaying the Creativate app, which offers a user manual, quick start guide, tutorials, and troubleshooting assistance for SINGER machines.
Pobierz aplikację:
You can also download the PDF user manual directly: SINGER M1000 User Manual PDF
Powiązane dokumentyM1000


Ask a question about this manual
Ask about setup, troubleshooting, compatibility, parts, safety, or missing instructions. Manuals+ will review the question and use this page’s manual context to help answer it.