
1. Wprowadzenie
Thank you for choosing the MZZYG Automatic Window Cleaning Robot. This device is designed to simplify window cleaning tasks, providing an efficient and hands-free solution for various glass surfaces. Please read this manual thoroughly before operating the robot to ensure safe and optimal performance. Keep this manual for future reference.
2. Koniec produktuview i komponenty
Familiarize yourself with the components included in your MZZYG Window Cleaning Robot package.

Obraz 2.1: The MZZYG Window Cleaning Robot and its accompanying accessories. This includes the main robot unit, two sets of cleaning pads, two black rings for attaching pads, a power adapter, a remote control, a safety rope with a carabiner, and a bottle for cleaning solution.
2.1. Robot Parts Diagram
Refer to the diagram below to identify the different parts of your window cleaning robot.
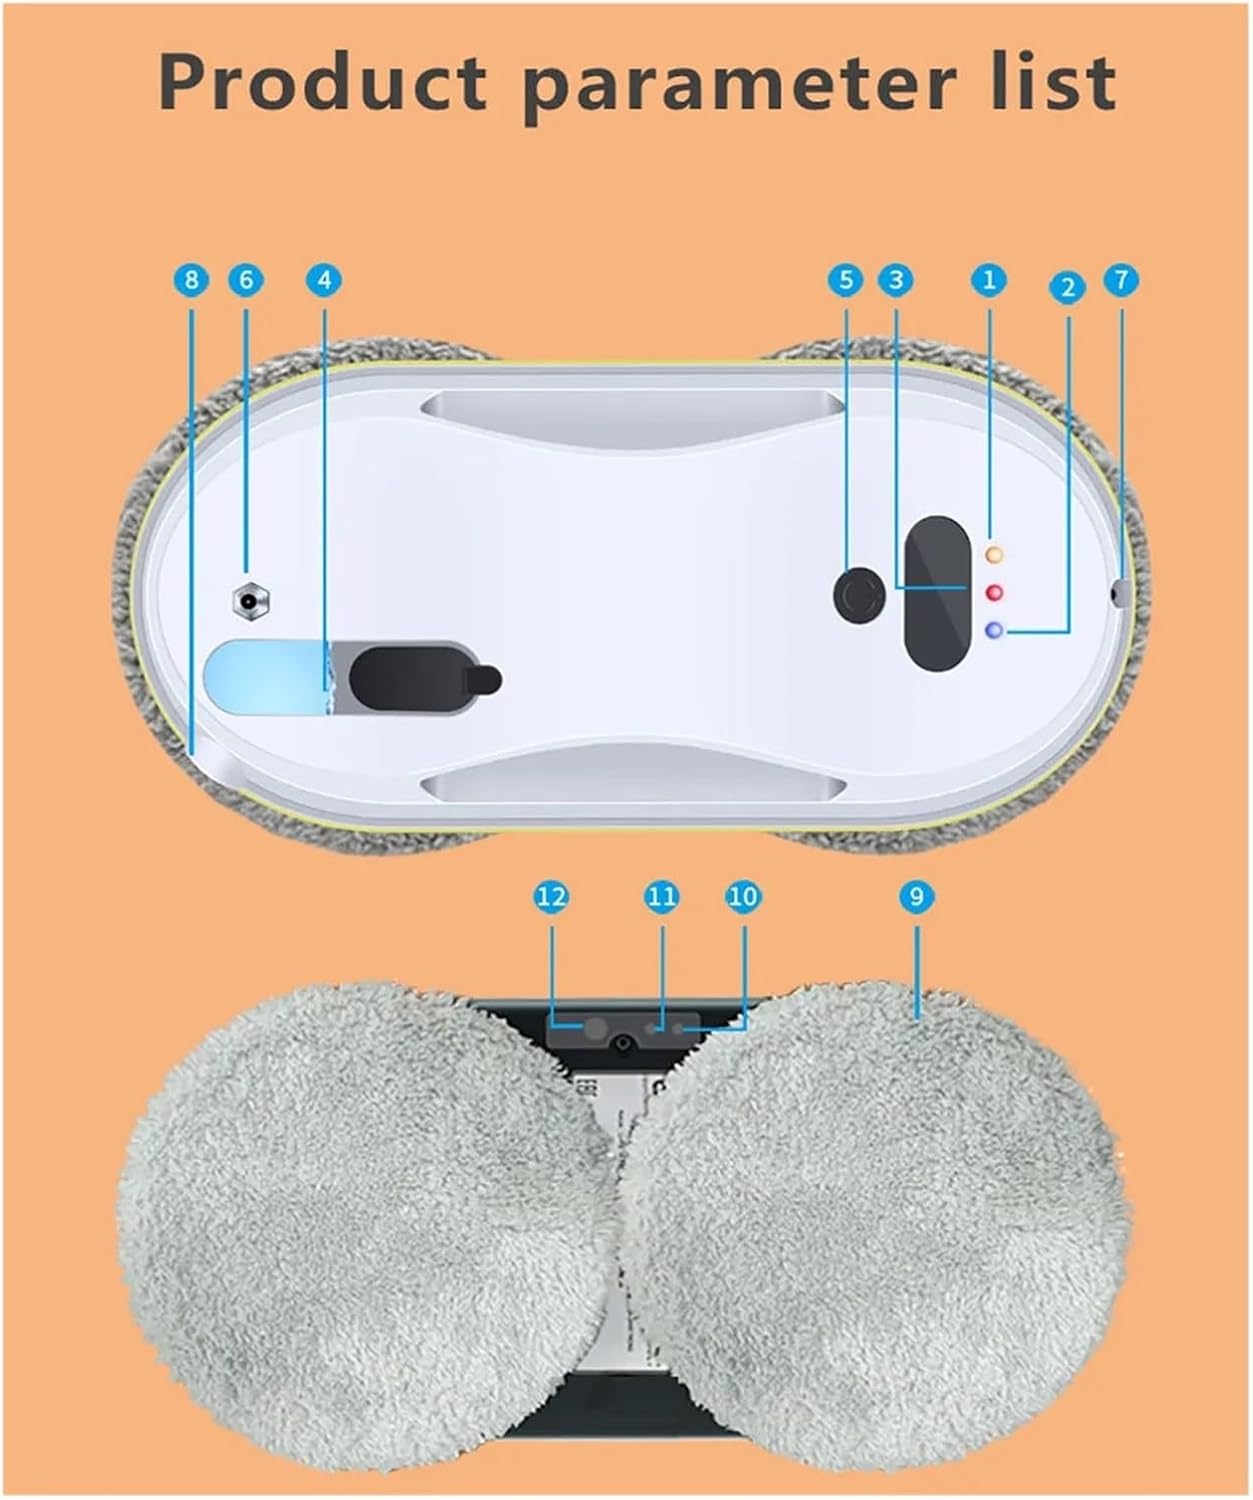
Obraz 2.2: A detailed diagram illustrating the various components of the MZZYG Window Cleaning Robot. Key parts are numbered for easy identification, including power indicators, control buttons, water spray nozzle, water tank, and cleaning pad attachment points.
2.2. Water Spray System
The robot features an intelligent water spray system for effective cleaning.
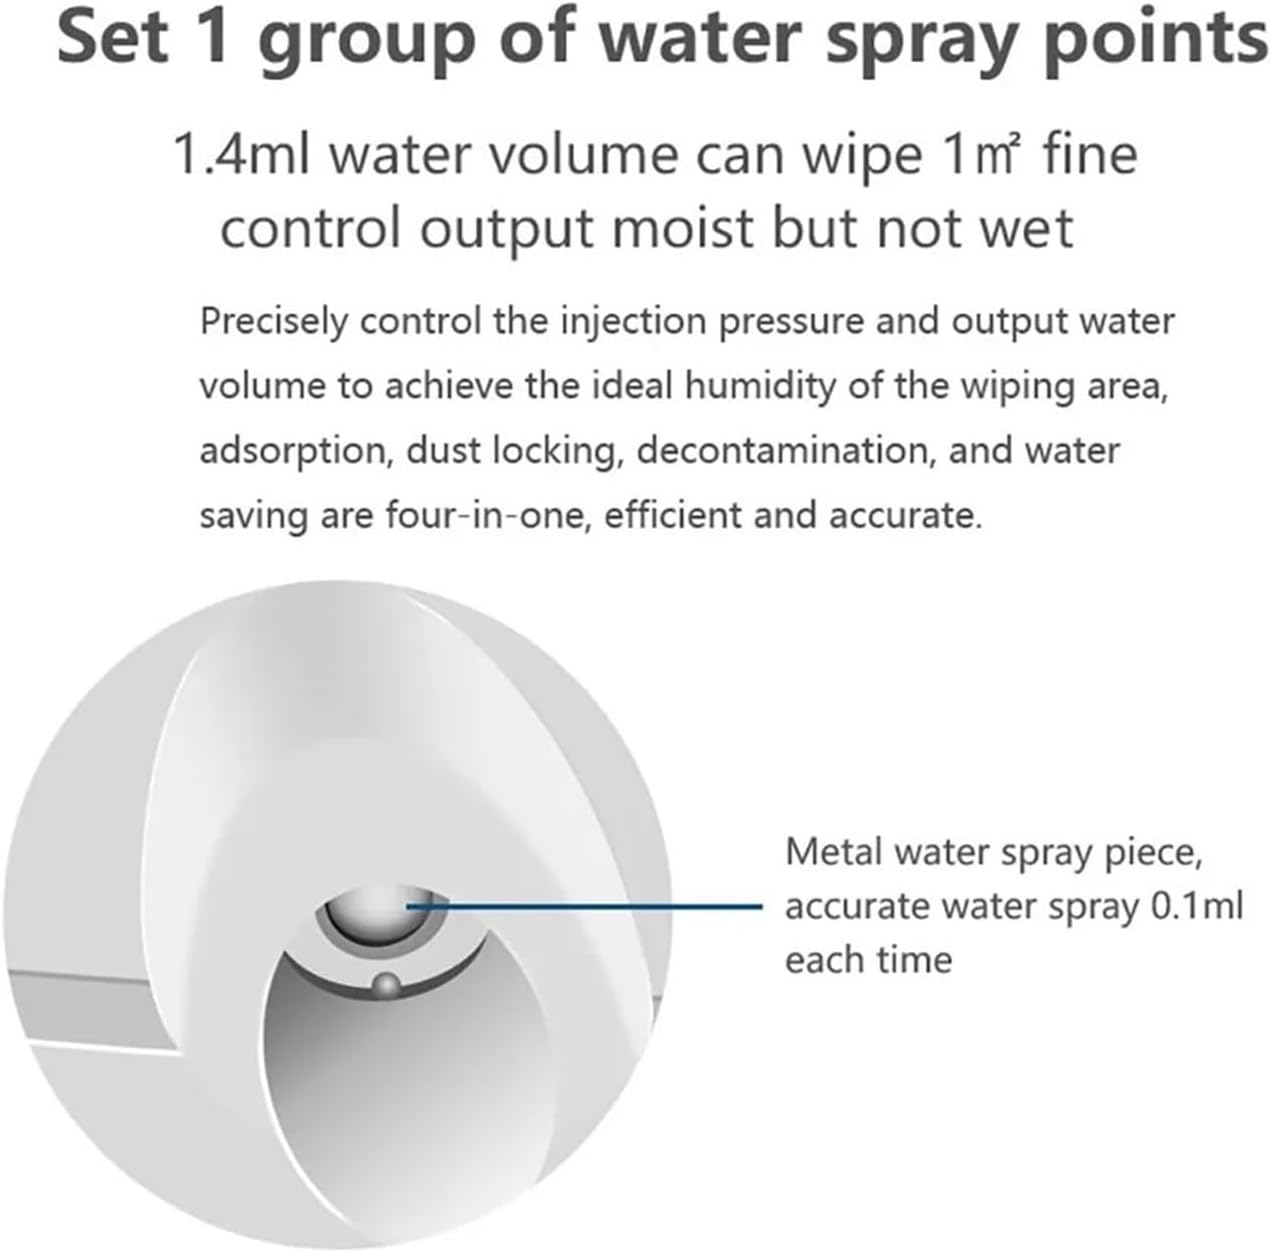
Obraz 2.3: Z bliska view of the robot's metal water spray nozzle. This nozzle precisely controls the output, delivering approximately 0.1ml of water each time to ensure optimal moisture for cleaning without over-wetting the surface.
The robot applies water in a controlled manner to achieve ideal humidity for wiping, ensuring efficient dust removal, decontamination, and water saving.

Obraz 2.4: Illustration of the robot's alternating water spray function. The robot accurately covers the entire cleaning path by strategically spraying water, ensuring thorough cleaning across the surface.
2.3. Cleaning Mechanism
The robot utilizes a unique alternating cycle for effective cleaning.

Obraz 2.5: Diagram showing the alternating suction and wiping motion of the robot's cleaning pads. The pads perform a twisting and swinging motion, similar to manual cleaning, to effectively suck up floating dust and wipe away stubborn stains.
3. Instrukcje bezpieczeństwa
OSTRZEŻENIE: Nieprzestrzeganie tych instrukcji bezpieczeństwa może spowodować obrażenia ciała lub uszkodzenie produktu.
- Always attach the safety rope to a secure anchor point before operating the robot, especially when cleaning high windows.
- Ensure the power adapter is securely connected and the power cord is not tangled or obstructing the robot's movement.
- Nie należy używać robota na popękanych, uszkodzonych lub nierównych powierzchniach szklanych.
- Trzymaj ręce, włosy i luźne ubrania z dala od ruchomych części robota.
- Nie należy pozwalać dzieciom i zwierzętom przebywać w pobliżu robota podczas jego działania.
- Use only the provided cleaning solution or distilled water in the water tank. Do not use corrosive liquids.
- The robot has a built-in UPS (Uninterruptible Power Supply) for power failure protection, allowing it to remain attached for approximately 20 minutes while alarming. However, always use the safety rope.

Obraz 3.1: This image highlights the robot's safety features, including the recommendation to tie up the safety rope before cleaning. It also illustrates the 20-minute UPS power failure protection and the robot's ultra-thin body design, which allows it to clean various window types.
4. Konfiguracja
- Załóż gąbki czyszczące: Securely attach the cleaning pads to the rotating wheels on the underside of the robot. Ensure they are flat and cover the entire surface of the wheels.
- Napełnij zbiornik na wodę: Open the water tank cap and fill it with clean water or a recommended window cleaning solution. Do not overfill.
- Podłącz zasilanie: Plug the power adapter into the robot and then into a power outlet. Ensure the connection is firm.
- Zamocuj linę bezpieczeństwa: Attach one end of the safety rope to the robot and the other end to a sturdy anchor point indoors, such as a heavy piece of furniture or a window frame. This is crucial for preventing falls.
- Umieść robota w oknie: Hold the robot firmly against the glass surface. Press the power button on the robot or the remote control to activate the suction. The robot should firmly adhere to the window.
5. Instrukcja obsługi
5.1. Włączanie/wyłączanie zasilania
- Włączanie: Press and hold the power button on the robot or the remote control until the indicator lights illuminate.
- Wyłączone: Press and hold the power button again. The robot will release suction after a few seconds. Carefully remove it from the window.
5.2. Korzystanie z pilota zdalnego sterowania
The remote control allows you to manage the robot's functions:
- Zacznij przerwę: Initiate or pause the cleaning cycle.
- Strzałki kierunkowe: Manually control the robot's movement (up, down, left, right).
- Tryby automatyczne: Select different automatic cleaning patterns (e.g., Z-path, N-path).
- Sprej wodny: Manually activate the water spray function.
5.3. Cleaning Modes and Path Planning
The robot is designed for intelligent path planning to ensure comprehensive cleaning.

Obraz 5.1: This image illustrates the robot's automatic cleaning path, showing a typical "Auto clean up and then down" pattern. The robot starts from a designated point, cleans upwards, then moves across and cleans downwards, ensuring systematic coverage of the window surface.
Upon starting, the robot will automatically detect the window edges and plan an optimal cleaning path, typically a bow-shaped or Z-shaped pattern, to cover the entire surface efficiently.
6. Konserwacja
Regular maintenance ensures the longevity and optimal performance of your robot.
6.1. Gąbki czyszczące
- Po każdym użyciu należy zdjąć nakładki czyszczące z robota.
- Wash the pads with mild detergent and water. They can typically be machine washed.
- Allow the pads to air dry completely before reattaching them or storing them.
- Replace worn or heavily soiled pads to maintain cleaning effectiveness.
6.2. Robot Body
- Przetrzyj zewnętrzną część robota miękką szmatką.amp płótno.
- Nie zanurzaj robota w wodzie i nie spryskuj wodą bezpośrednio jego podzespołów elektronicznych.
- Clean the suction vents and sensors regularly to ensure proper adhesion and navigation.
6.3. Zbiornik na wodę
- Po każdym użyciu opróżnij zbiornik z pozostałej wody.
- Okresowo płucz zbiornik czystą wodą, aby zapobiec gromadzeniu się zanieczyszczeń.
7. Rozwiązywanie Problemów
| Problem | Możliwa przyczyna | Rozwiązanie |
|---|---|---|
| Robot nie przylega do okna. |
|
|
| Robot stops during cleaning. |
|
|
| Słaba skuteczność czyszczenia. |
|
|
8. Specyfikacje
- Marka: MZZYG
- Numer modelu: 1005004493665374
- Wymiary opakowania: 2.54 x 2.54 x 2.54 cm (Note: This seems like placeholder data, actual product dimensions are likely larger)
- Waga przedmiotu: 10 g (Note: This seems like placeholder data, actual product weight is likely heavier)
- Ochrona przed awarią zasilania: UPS backup for approximately 20 minutes.
- Water Spray Volume: Approximately 0.1ml per spray.
9. Gwarancja i wsparcie
Information regarding product warranty and customer support is not available in the provided data. Please refer to the product packaging or contact your retailer for details on warranty coverage and technical assistance.