
1. Wprowadzenie
Thank you for choosing the RIKSION JF-H-40JD Under-Desk Treadmill. This manual provides essential information for the safe and effective use, setup, operation, and maintenance of your new fitness equipment. Please read this manual thoroughly before initial use and retain it for future reference.
The RIKSION JF-H-40JD is designed for home and office use, offering a compact and portable solution for walking, jogging, and light running. Its foldable design and transport wheels make it ideal for small spaces, allowing for convenient storage and movement.
2. Informacje dotyczące bezpieczeństwa
OSTRZEŻENIE: Aby zminimalizować ryzyko poważnych obrażeń, przed użyciem bieżni należy zapoznać się ze wszystkimi ważnymi środkami ostrożności i instrukcjami zawartymi w niniejszej instrukcji.
- Zawsze skonsultuj się z lekarzem przed rozpoczęciem jakiegokolwiek programu ćwiczeń.
- Trzymaj dzieci i zwierzęta z dala od bieżni podczas pracy.
- Bieżnię należy ustawić na płaskiej, stabilnej powierzchni, pozostawiając co najmniej 2 metry (6.5 stopy) wolnej przestrzeni za nią i 0.6 metra (2 stopy) po każdej stronie.
- Ensure the safety clip is properly attached to your clothing before starting the treadmill. In case of an emergency, the safety clip will stop the machine.
- Nie używaj bieżni, jeśli przewód zasilający lub wtyczka są uszkodzone lub bieżnia nie działa prawidłowo.
- Noś odpowiednie obuwie i odzież sportową. Unikaj luźnych ubrań, które mogłyby zostać wciągnięte przez ruchome części.
- Nie wchodź na bieżnię ani nie schodź z niej, gdy pas się porusza.
- Maksymalna waga użytkownika tej bieżni wynosi 120 kg (264 funtów).
- Odłącz bieżnię od gniazdka elektrycznego, gdy jej nie używasz, przed czyszczeniem oraz przed przystąpieniem do konserwacji.
3. Koniec produktuview
3.1 Składniki
- Running Belt (100 cm x 40 cm)
- Wyświetlacz LED
- Control Panel (on armrest)
- Zdalne sterowanie
- Foldable Armrests with Device Holder
- Klip bezpieczeństwa
- Koła transportowe
- Przewód zasilający
3.2 Główne cechy
- Regulowane nachylenie: Features a manual incline adjustment of 5% and 10% (2 to 4 degrees) to simulate uphill training, enhancing workout intensity and calorie burn.
- Podwójna amortyzacja: Equipped with a 5-layer anti-slip running belt and 2 soft rubber cushions for a stable and comfortable experience, reducing joint impact.
- Cicha praca: Designed with multiple layers of anti-slip textures and noise-absorbing coatings, ensuring quiet operation (under 45dB) suitable for home or office environments.
- Kompaktowa i składana konstrukcja: Ready to use out of the box with no installation required. Armrests fold down, reducing dimensions to 136.5 x 64.5 x 13 cm for easy storage under tables or sofas.
- Koła transportowe: Integrated wheels allow for easy relocation and vertical storage, making it ideal for small apartments or offices.
- Wyświetlacz LED i pilot zdalnego sterowania: Clearly displays distance, speed, time, and calorie data. Speed can be adjusted, and the treadmill can be started, stopped, or paused via the remote control or the Fitshow app.
- Funkcjonalność 3 w 1: Supports walking (1-6 km/h), jogging/workstation mode (1-6 km/h), and running (1-14 km/h).
4. Konfiguracja
4.1 Rozpakowywanie i umieszczanie
- Carefully remove the treadmill from its packaging. The unit comes pre-assembled.
- Place the treadmill on a firm, level surface. Ensure adequate clearance around the unit as described in the Safety Information section.
4.2 Rozkładanie bieżni
- Gently lift the armrests from their folded position until they lock securely into place.
- Przed użyciem należy sprawdzić, czy wszystkie mechanizmy blokujące są włączone.
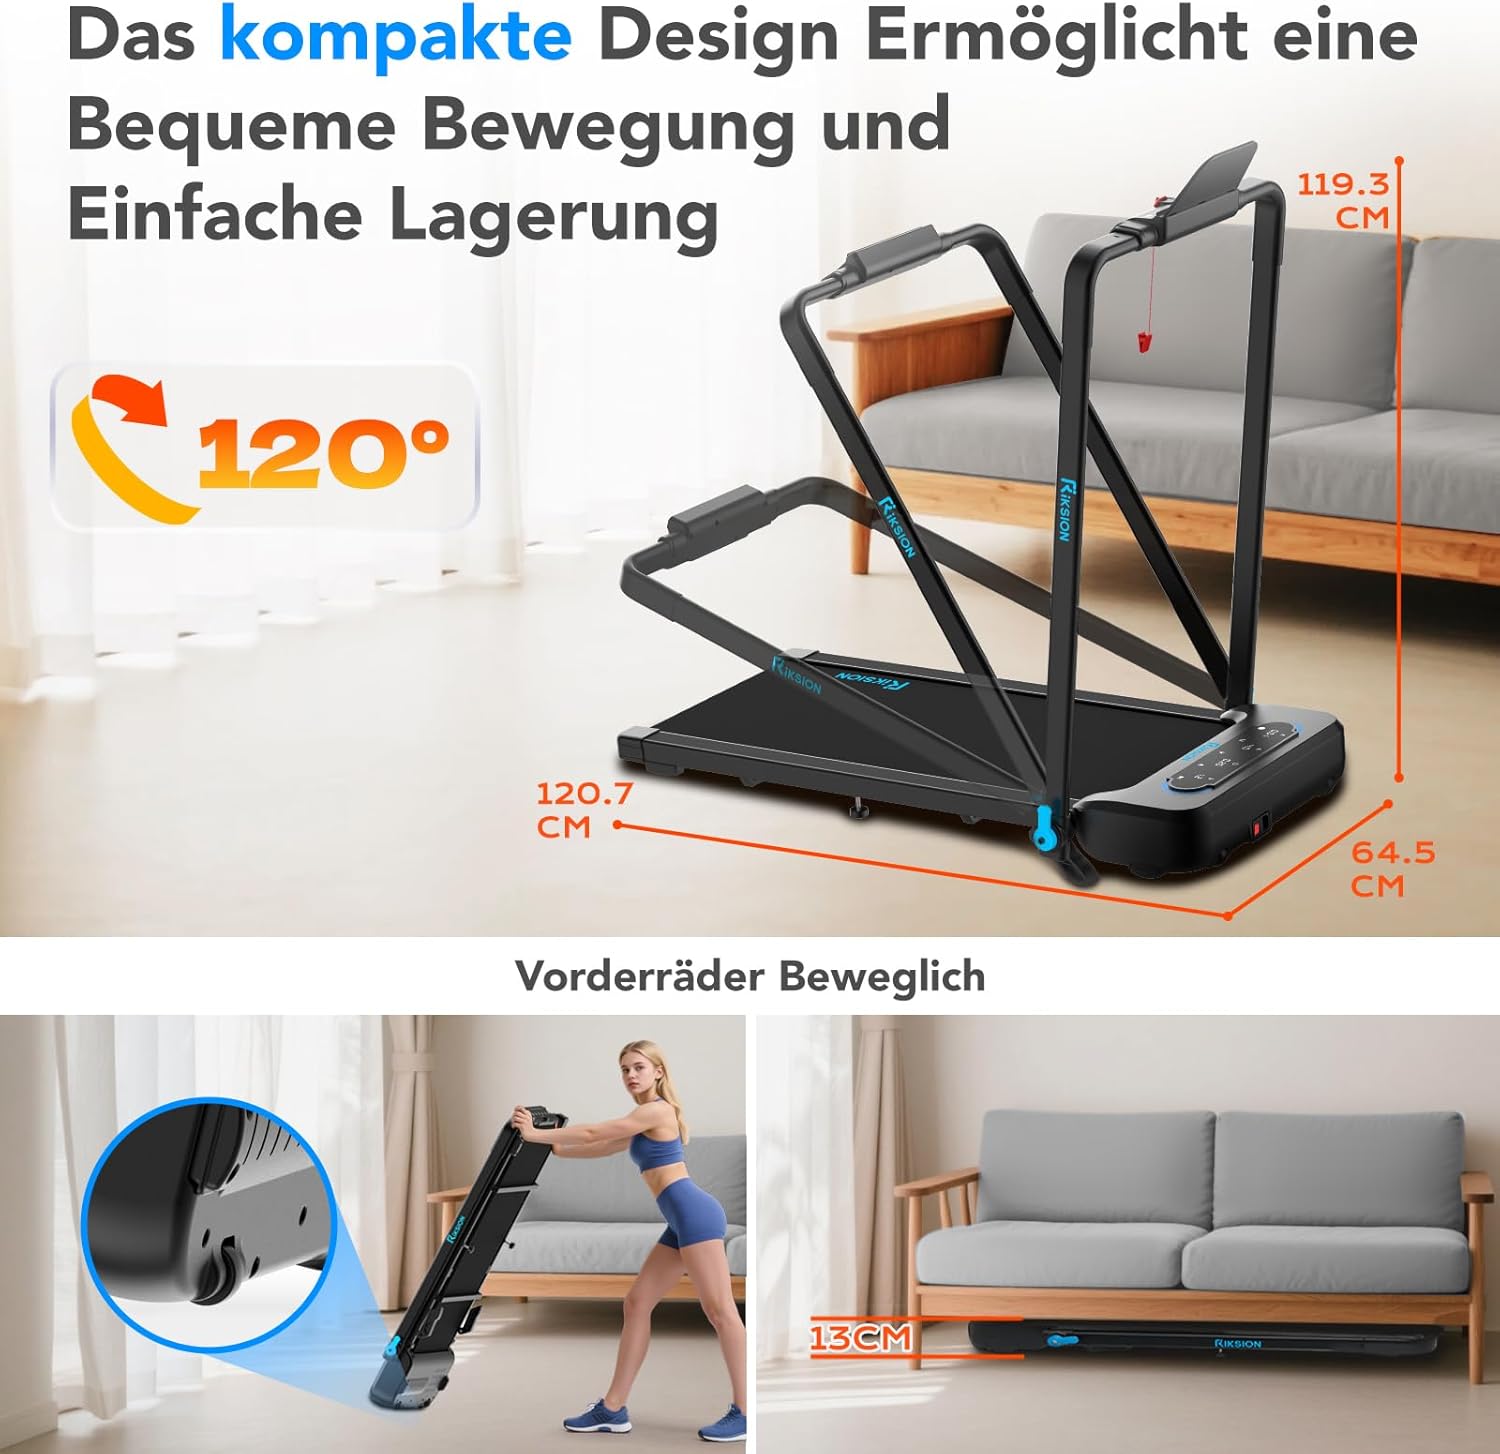
Image: The compact design allows for easy movement and storage. The treadmill can be folded to a height of 13 cm and features front wheels for transport.
4.3 Połączenie zasilania
- Podłącz przewód zasilający do gniazda zasilania bieżni.
- Podłącz drugi koniec przewodu zasilającego do uziemionego gniazdka elektrycznego.
4.4 Regulacja nachylenia
The incline is manually adjustable. To change the incline, lift the rear of the treadmill and adjust the support legs to the desired 5% or 10% incline level. Ensure both sides are set equally.

Image: Illustration of the manual incline feature, demonstrating 5% and 10% incline settings and their impact on calorie expenditure.
5. Instrukcja obsługi
5.1 Włączanie/wyłączanie
- Press the power button on the treadmill's control panel or remote control to turn the unit on.
- To turn off, press the power button again or unplug the unit.
5.2 Attaching the Safety Clip
Before each use, attach the safety clip to the designated slot on the control panel and secure the other end to your clothing. The treadmill will not operate without the safety clip in place.
5.3 Korzystanie z panelu sterowania i pilota zdalnego sterowania

Image: The treadmill's LED display shows workout data, and the remote control provides convenient speed adjustment and start/stop functions.
- Uruchom/zatrzymaj: Use the 'Start' and 'Stop' buttons on the control panel or remote to begin and end your workout.
- Regulacja prędkości: Use the '+' and '-' buttons on the control panel or remote to increase or decrease the speed. The treadmill offers a speed range of 1-14 km/h.
- Wybór trybu: The treadmill supports different modes: walking (1-6 km/h), workstation (1-6 km/h), and running (1-14 km/h). Select the appropriate mode based on your activity.
5.4 wyświetlacz LED
The integrated LED display automatically shows your workout data, including:
- Dystans
- Prędkość
- Czas
- Spalone kalorie
5.5 App Connectivity (Fitshow)
The treadmill can connect to the Fitshow application. Refer to the Fitshow app's instructions for pairing and advanced control features.

Image: A user exercising on the RIKSION treadmill, demonstrating the device holder for tablets and the remote control for operation.
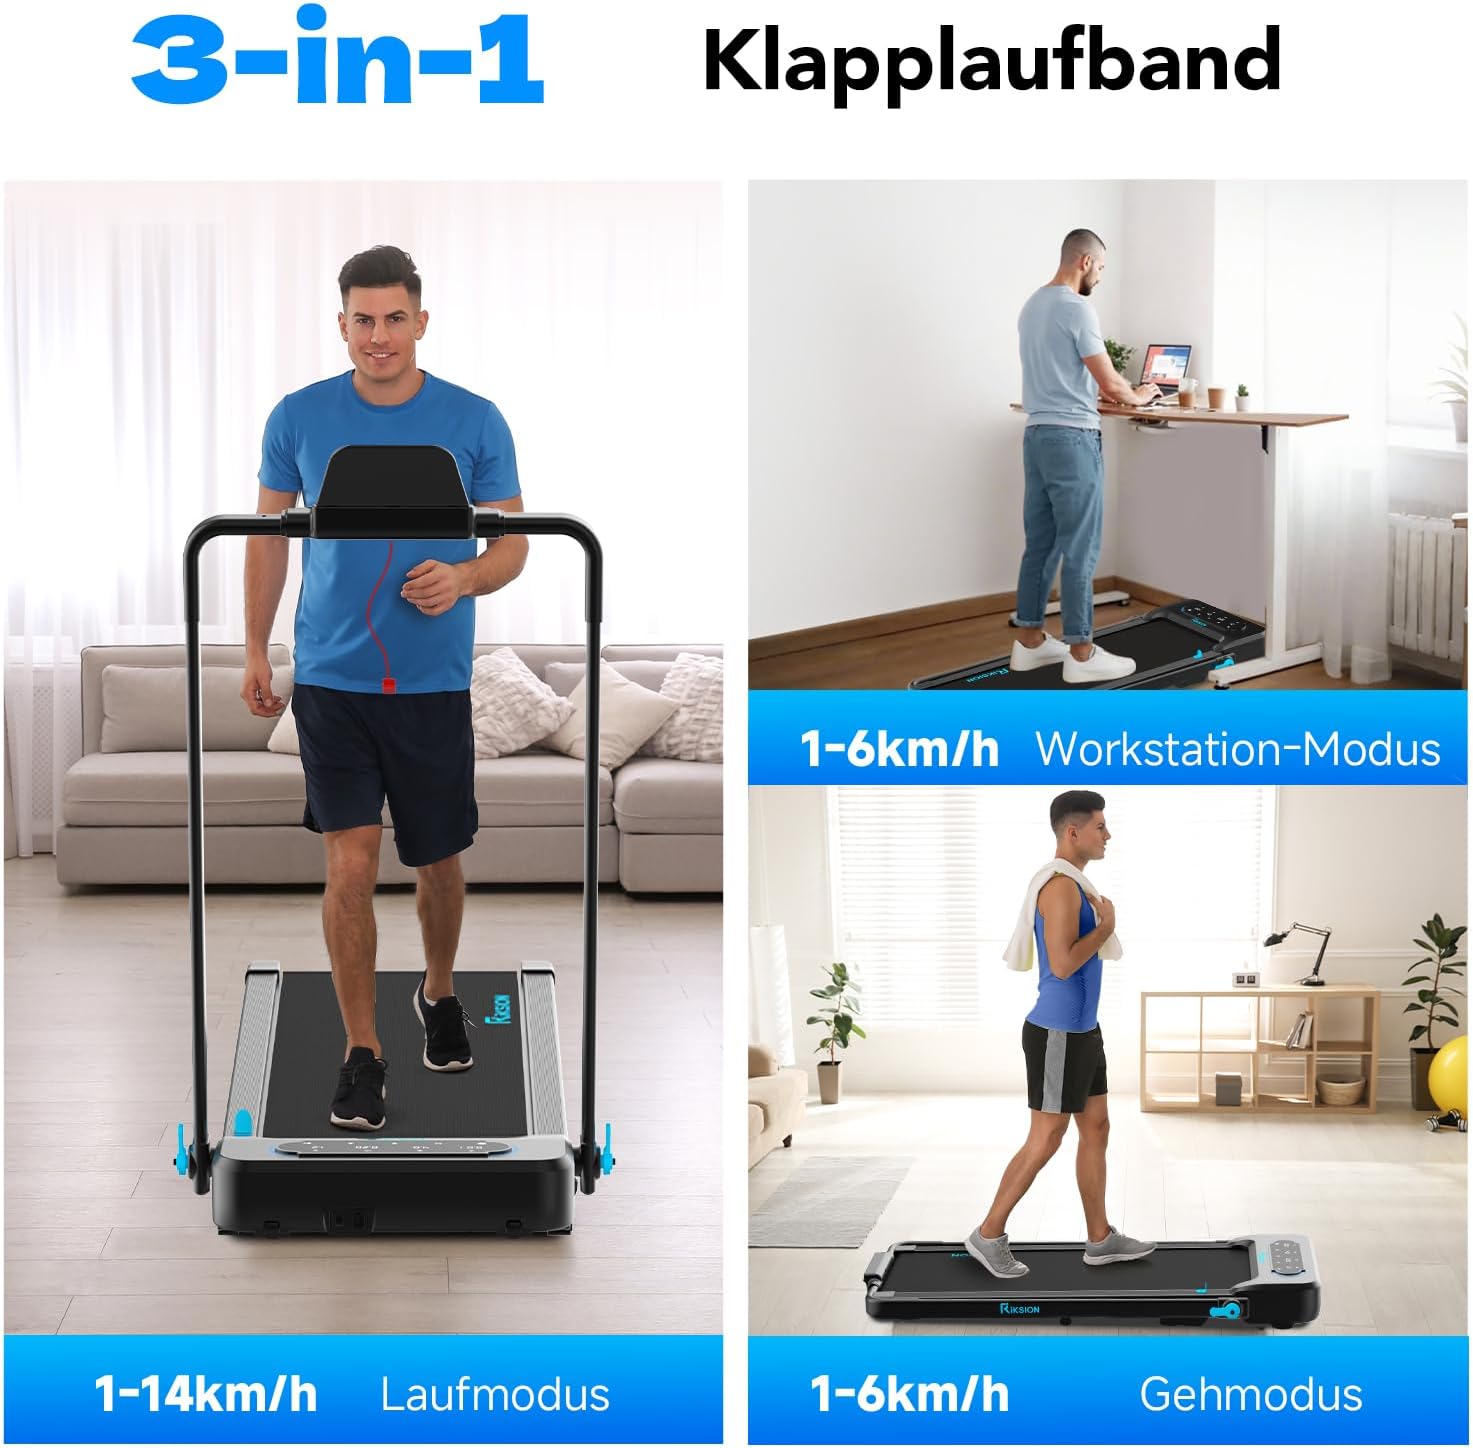
Image: Illustration of the treadmill's versatility, showcasing its use for running, as an under-desk walking pad, and for general walking.
6. Konserwacja
Regularna konserwacja zapewnia długowieczność i optymalną wydajność bieżni.
- Czyszczenie: Wytrzyj bieżnię reklamąamp Po każdym użyciu przetrzyj szmatką pot i kurz. Nie używaj środków czyszczących ani rozpuszczalników o działaniu ściernym.
- Smarowanie paska: The running belt requires periodic lubrication to reduce friction and extend its lifespan. Refer to the specific instructions provided with your lubricant or contact customer support for guidance. Generally, apply silicone lubricant under the belt every 3-6 months depending on usage.
- Naciąg i ustawienie paska: Check the running belt tension and alignment regularly. If the belt slips or drifts to one side, adjust it according to the instructions in the troubleshooting section or consult customer support.
- Składowanie: When not in use, fold the treadmill and store it in a dry, cool place away from direct sunlight.
7. Rozwiązywanie Problemów
If you encounter any issues with your RIKSION treadmill, refer to the following common problems and solutions:
- Bieżnia się nie włącza:
- Ensure the power cord is securely plugged into a grounded outlet and the treadmill.
- Check if the safety clip is properly inserted.
- Sprawdź, czy wyłącznik zasilania jest w pozycji „ON”. - Pas bieżny ślizga się lub zatrzymuje:
- The running belt may be too loose. Refer to the manual for instructions on adjusting belt tension.
- The belt may require lubrication. See the Maintenance section. - Running belt drifts to one side:
- The running belt may be misaligned. Use the adjustment bolts at the rear of the treadmill to center the belt. Turn the bolt on the side the belt is drifting towards clockwise, or the opposite side counter-clockwise, in small increments (quarter turns) while the treadmill is running at a low speed. - Nietypowy hałas podczas pracy:
- Check for any loose parts or foreign objects under the belt.
- The belt may need lubrication.
- Ensure the treadmill is on a level surface. - Wyświetlacz LED nie działa:
- Check all cable connections.
- Power cycle the treadmill (turn off, unplug, wait 30 seconds, plug in, turn on).
Jeśli po wypróbowaniu tych rozwiązań problem nadal występuje, skontaktuj się z obsługą klienta.
8. Specyfikacje
| Funkcja | Specyfikacja |
|---|---|
| Numer modelu | JF-H-40JD |
| Marka | Ryksion |
| Moc silnika | 2.25 KM |
| Zakres prędkości | 1 - 14 kilometrów na godzinę |
| Maksymalna nośność | 120 kilograma |
| Poziomy nachylenia | Manual 5% and 10% (2-4 degrees) |
| Wymiary pasa bieżnego | Wymiary: 100cm x 40cm |
| Typ wyświetlacza | PROWADZONY |
| Wymiary po złożeniu (dł. x szer. x wys.) | Wymiary 136.5 x 64.5 x 13 cm |
| Wymiary po rozłożeniu (dł. x szer. x wys.) | 120.7 x 64.5 x 115.3 cm (approximate, based on image) |
| Waga przedmiotu | 22.5 kilograma |
| Tworzywo | Stal stopowa |
| Cechy specjalne | Foldable, LED Display, Double Shock Absorption, Armrests with Device Holder |
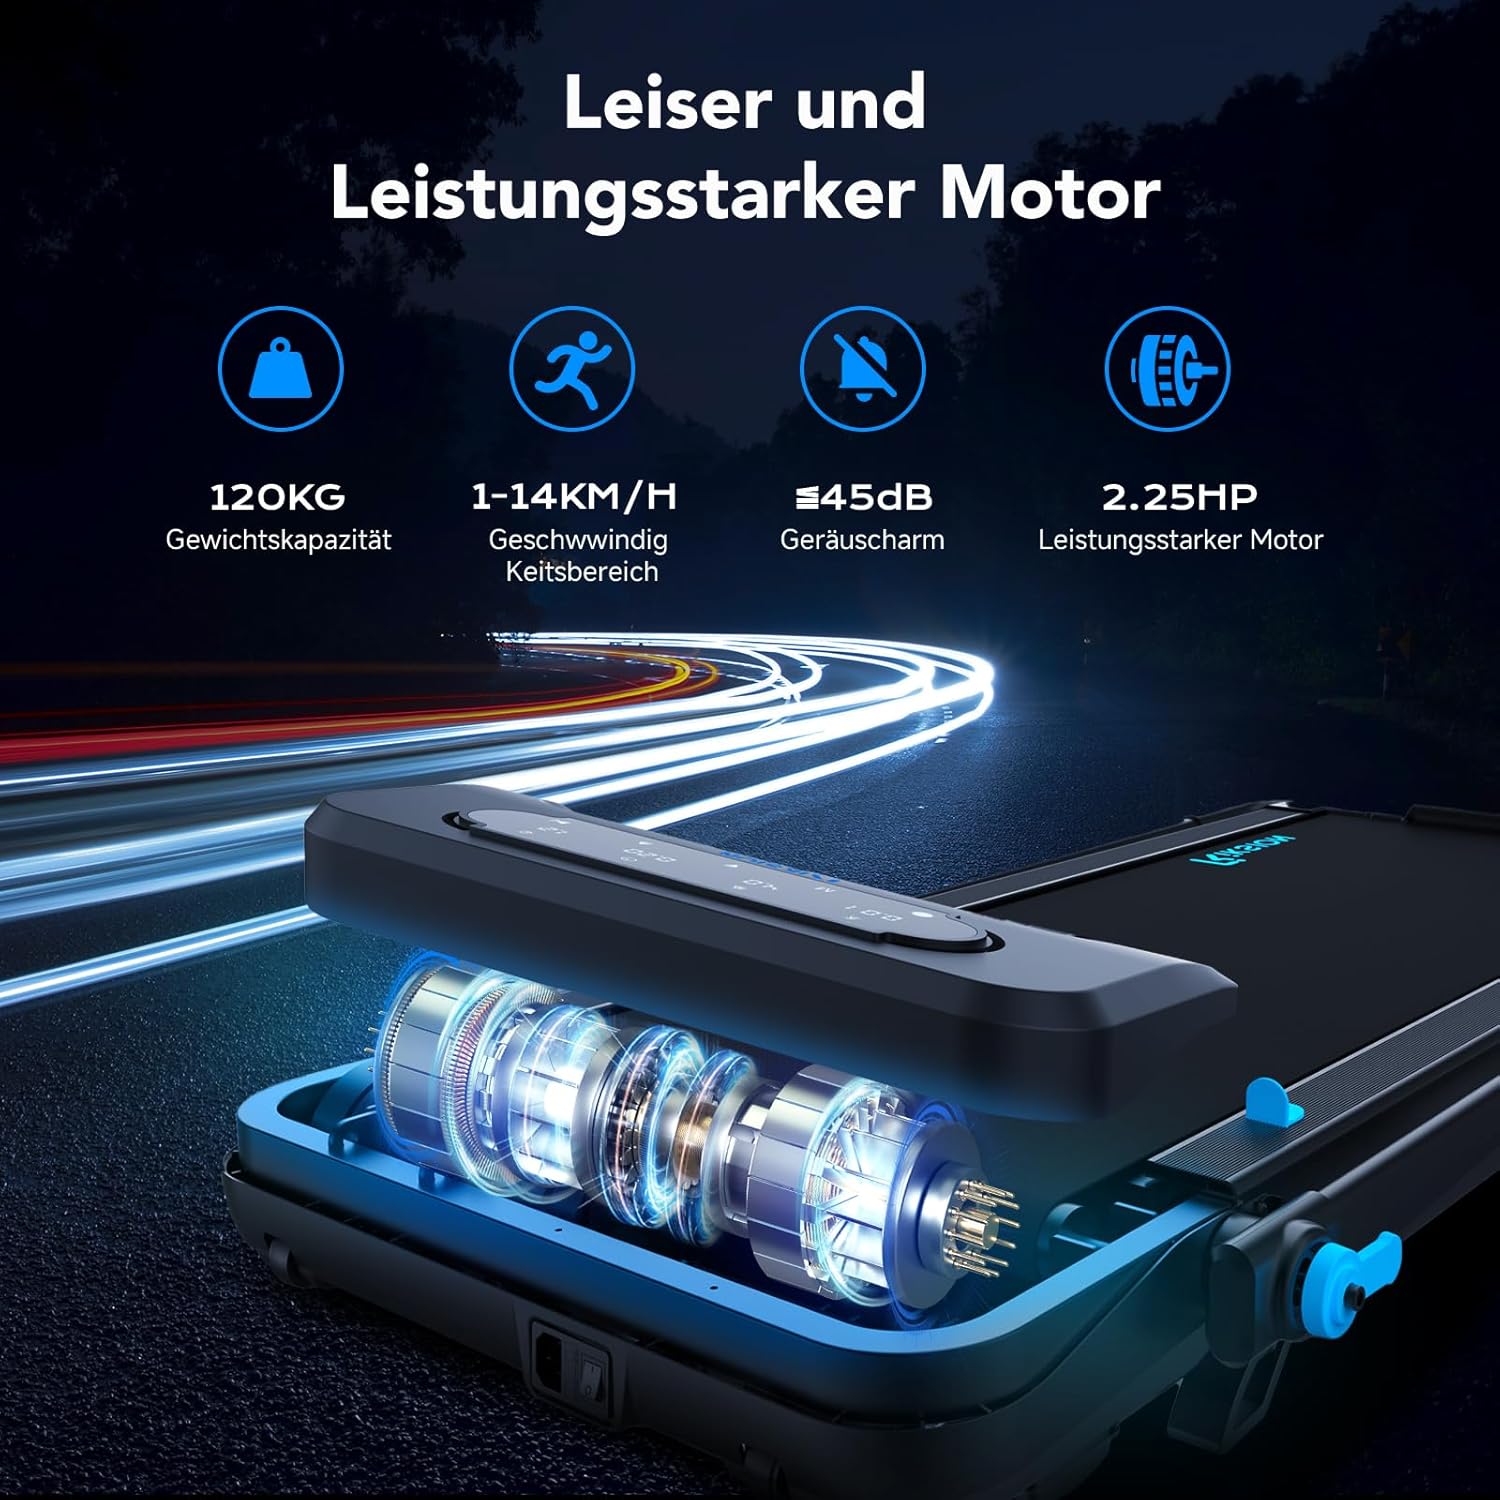
Image: Illustration of the treadmill's quiet and powerful 2.25 HP motor, capable of speeds up to 14 km/h and supporting up to 120 kg.

Obraz: Szczegółowy view of the running belt's construction, highlighting its five layers for abrasion resistance, noise reduction, reinforcement, EVA cushioning, and high-strength compression.
9. Gwarancja i wsparcie
Aby uzyskać informacje o gwarancji i obsłudze klienta, zapoznaj się z dokumentacją dołączoną do produktu lub skontaktuj się bezpośrednio ze sprzedawcą/producentem. Zachowaj dowód zakupu na wypadek roszczeń gwarancyjnych.