
1. Wprowadzenie
This manual provides detailed instructions for the installation, operation, and maintenance of your Reobiux D20-1P 2K Outdoor Surveillance Camera. Please read this manual thoroughly before using the product to ensure proper functionality and safety.
2. Zawartość opakowania
Sprawdź, czy wszystkie wymienione poniżej elementy znajdują się w Twojej paczce. Jeśli brakuje któregokolwiek z nich lub jest on uszkodzony, skontaktuj się z obsługą klienta.
- 1x Reobiux D20-1P Solar PTZ Camera
- 1x Solar Collector
- 1x Instrukcja obsługi
- 1x Podstawa montażowa
- 1x Power Supply (for initial charging)
- 1x woreczek ze śrubami (do montażu)
- 1x Type-C Charging Line
3. Koniec produktuview
The Reobiux D20-1P is a 2K outdoor surveillance camera designed for comprehensive home security. It features dual lenses, 360° Pan-Tilt-Zoom (PTZ) capabilities, and operates wirelessly via Wi-Fi. Key features include PIR motion detection, color night vision, two-way audio, and an IP66 weatherproof rating, powered by a solar panel and rechargeable battery.
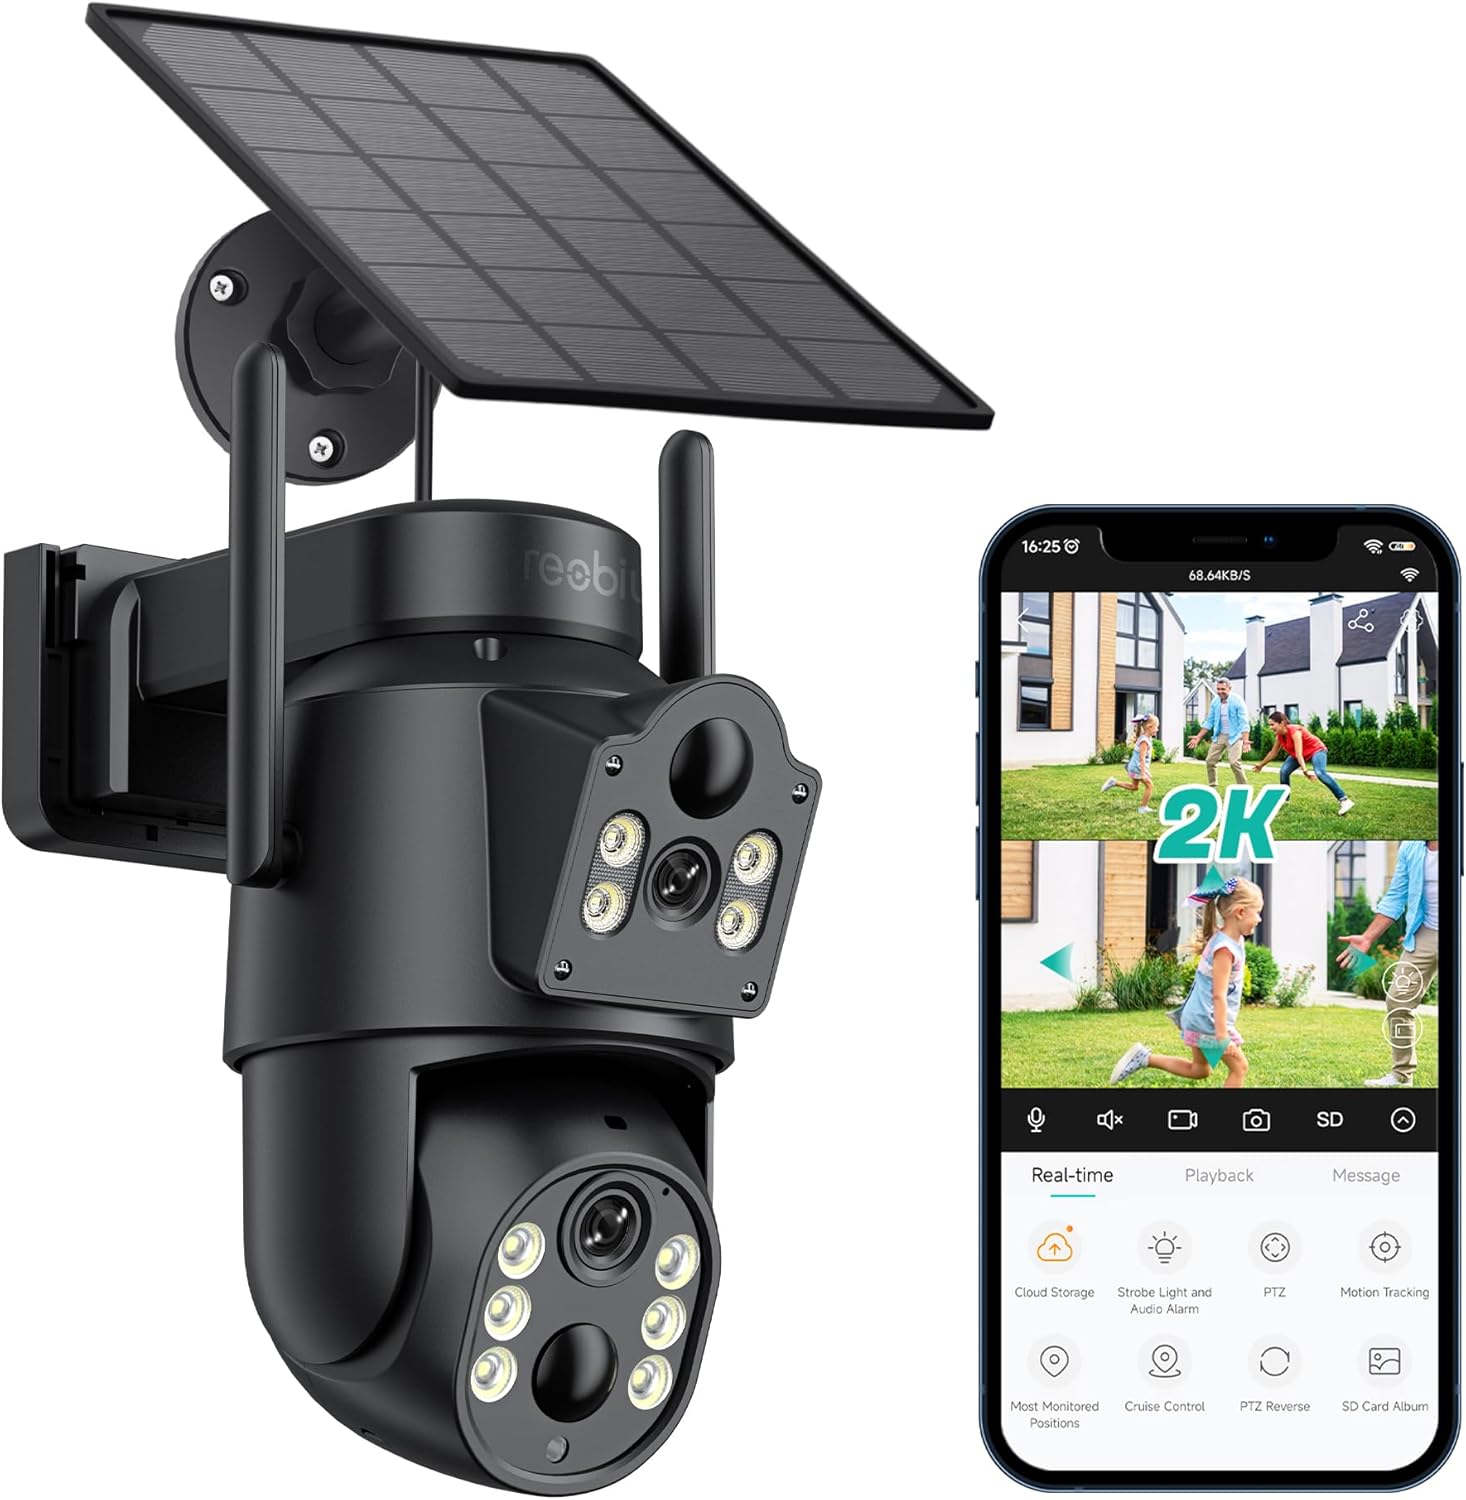
Rysunek 3.1: Reobiux D20-1P Solar PTZ Camera and its mobile application interface showing real-time monitoring, playback, and various control options.
Główne cechy:
- 2K QHD High Resolution: Zapewnia wyraźny i szczegółowy obraz wideotage.
- Konstrukcja z dwoma soczewkami: Combines a fixed lens with a rotating lens for comprehensive coverage.
- Funkcjonalność PTZ 360°: Allows remote control of pan, tilt, and zoom for flexible viewkąty.
- Solar Powered with Rechargeable Battery: Ensures continuous operation with minimal manual charging.
- Detekcja ruchu PIR: Intelligently detects human movement to reduce false alarms.
- Kolorowe widzenie nocne: Offers full-color video even in low-light conditions, alongside infrared night vision.
- Dwukierunkowy dźwięk: Umożliwia komunikację z gośćmi lub odstraszanie intruzów.
- Odporność na warunki atmosferyczne IP66: Zaprojektowane tak, aby wytrzymać różne warunki atmosferyczne.
- Wireless Wi-Fi Connectivity: Easy setup and remote access via smartphone.
4. Przewodnik konfiguracji
4.1 Pierwsze ładowanie
Before first use, fully charge the camera's internal battery using the provided Type-C charging line and power supply. This ensures the camera has sufficient power for initial setup and operation, especially if solar charging conditions are not optimal immediately after installation.
4.2 Instalacja aplikacji i tworzenie konta
- Pobierz iCSee aplikację ze sklepu z aplikacjami na Twoim smartfonie (iOS App Store lub Google Play Store).
- Zainstaluj aplikację i otwórz ją.
- Follow the on-screen instructions to create a new account or log in if you already have one.
4.3 Połączenie kamery z siecią Wi-Fi
- Sprawdź, czy kamera jest włączona.
- In the iCSee app, tap the "+" icon to add a new device.
- Select the option for "Wi-Fi Camera" or "Add Device by AP Hotspot" (refer to app for exact wording).
- Follow the app's instructions to connect the camera to your 2.4GHz Wi-Fi network. You may need to scan a QR code displayed on your phone with the camera, or listen for a sound prompt.
- Po nawiązaniu połączenia możesz nadać nazwę kamerze i rozpocząć monitorowanie.
4.4 Montaż kamery
Choose a location that provides optimal surveillance coverage and receives direct sunlight for the solar panel. Ensure the camera is within range of your Wi-Fi network.
- Wybierz lokalizację: Identify a suitable wall or surface for mounting. Consider the camera's viewing angle (355° pan, 90° tilt) and the solar panel's exposure to sunlight.
- Zaznacz punkty wiercenia: Use the mounting base as a template to mark the screw holes on the wall.
- Wiercenie otworów: Drill pilot holes at the marked positions. Insert wall anchors if necessary.
- Zamontuj podstawę montażową: Przymocuj podstawę montażową do ściany za pomocą dołączonych śrub.
- Podłącz kamerę: Mount the camera onto the secured base.
- Dostosuj panel słoneczny: Position the solar panel to maximize sunlight exposure throughout the day.

Rysunek 4.1: Illustration of the camera mounted with its solar panel, highlighting the fixed and rotating lenses and the benefit of continuous solar power.
5. Instrukcja obsługi
5.1 Na żywo View i odtwarzanie
Open the iCSee app and select your camera to access the live viewStąd możesz:
- Monitorowanie na żywo: View transmisja wideo na żywo.
- Sterowanie PTZ: Use the on-screen joystick to pan (355°) and tilt (90°) the camera.
- Zoom cyfrowy: Pinch to zoom on the live feed.
- Odtwarzanie nagranego dźwięku: Uzyskaj dostęp do nagranego pliku footagsą przechowywane na karcie SD lub w chmurze.

Rysunek 5.1: Demonstrates the superior clarity of 2K QHD resolution compared to 1080P, providing more details for monitoring.
5.2 Detekcja ruchu i alerty
The camera utilizes PIR (Passive Infrared) intelligent detection to identify human movement, minimizing false alarms from pets or swaying branches.
- Włącz/Wyłącz: Activate or deactivate motion detection in the app settings.
- Regulacja czułości: Adjust the PIR sensor's sensitivity to suit your environment.
- Powiadomienia alarmowe: Otrzymuj natychmiastowe powiadomienia push na swój smartfon po wykryciu ruchu.
- Alarm dźwiękowy i świetlny: Configure the camera to trigger a strobe light and audible alarm upon detection.

Rysunek 5.2: The camera's PIR intelligent detection distinguishes human movement from other objects, reducing unnecessary alerts.

Rysunek 5.3: When motion is detected, the camera can send real-time push notifications and activate a sound and light alarm to deter intruders.
5.3 Tryby widzenia nocnego
The camera offers two night vision modes for clear visibility in the dark:
- Spotlight Full Color Night Vision: Utilizes built-in spotlights to provide full-color video in low-light conditions.
- Spotlight Infrared Night Vision: Uses infrared LEDs for black-and-white video in complete darkness, with a range of up to 30 meters.
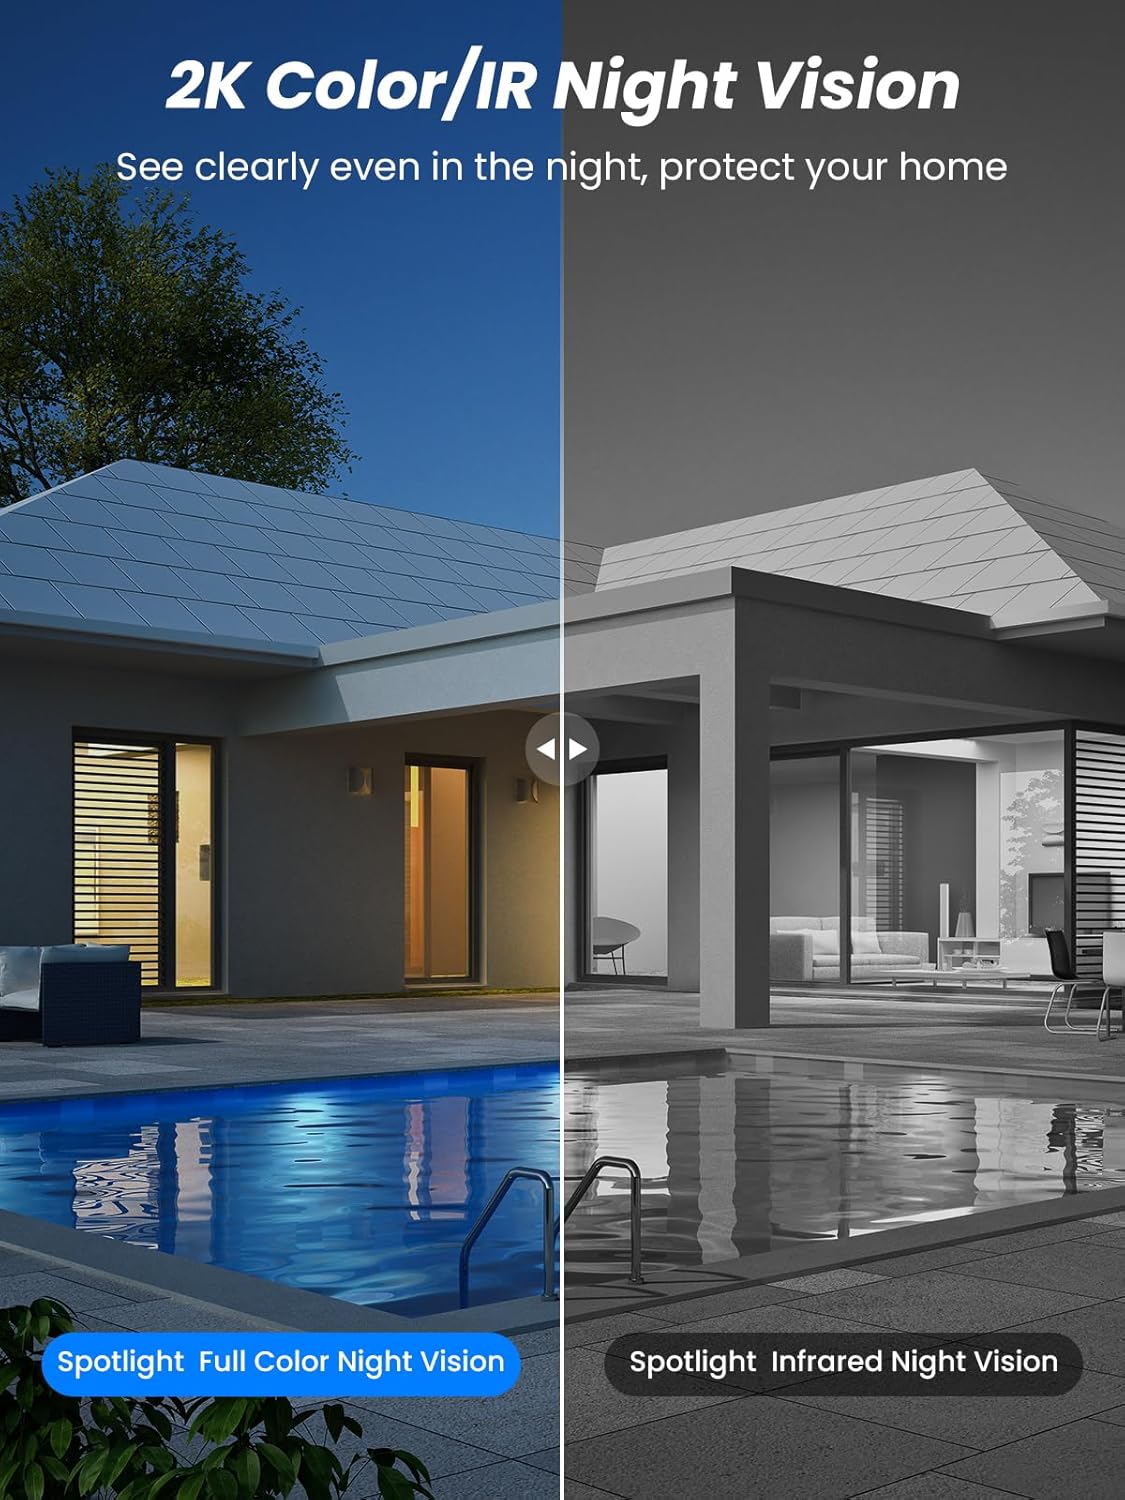
Rysunek 5.4: Illustrates the difference between full-color night vision, enabled by spotlights, and traditional infrared night vision.
5.4 Dźwięk dwukierunkowy
The integrated microphone and speaker allow for two-way communication.
- Mówić: Kliknij ikonę mikrofonu w aplikacji, aby mówić przez głośnik kamery.
- Słuchać: The camera's microphone captures audio from its surroundings.

Rysunek 5.5: The two-way audio function allows for direct communication through the camera, useful for interacting with visitors or delivery personnel.
6. Konserwacja
- Czyszczenie: Okresowo czyść obiektyw aparatu i panel słoneczny miękką, miękką szmatką.amp Aby zapewnić optymalną wydajność i jakość obrazu, należy używać ściereczki. Unikać środków czyszczących o działaniu ściernym.
- Stan baterii: While solar-powered, extreme weather or prolonged periods of low sunlight may require manual charging. Monitor battery levels via the app.
- Aktualizacje oprogramowania układowego: Check the iCSee app regularly for available firmware updates to ensure your camera has the latest features and security enhancements.
- Ochrona przed warunkami atmosferycznymi: The camera is IP66 weatherproof, designed to withstand rain, snow, and sun. However, ensure all connections are secure to maintain water resistance.

Rysunek 6.1: The IP66 rating ensures the camera's durability and functionality in various outdoor weather conditions, including snow, rain, and direct sunlight.
7. Rozwiązywanie Problemów
- Kamera nie łączy się z siecią Wi-Fi:
- Ensure the camera is within range of your 2.4GHz Wi-Fi network. 5GHz networks are not supported.
- Sprawdź, czy hasło Wi-Fi jest prawidłowe.
- Uruchom ponownie router i kamerę.
- If issues persist, try resetting the camera (refer to app or product for reset button location).
- Akumulator nie ładuje się lub rozładowuje się szybko:
- Upewnij się, że panel słoneczny jest czysty i wystawiony na bezpośrednie działanie promieni słonecznych przez kilka godzin dziennie.
- Sprawdź połączenie między panelem słonecznym a kamerą.
- If in a low-light environment, manually charge the camera using the Type-C cable.
- Częste zdarzenia wykrywania ruchu lub transmisji na żywo view streaming can consume battery faster. Adjust settings if needed.
- Fałszywe alarmy wykrycia ruchu:
- Adjust the PIR motion detection sensitivity in the iCSee app.
- Upewnij się, że kamera nie jest skierowana na obszary, w których panuje ciągły ruch (np. ruchliwe ulice, kołyszące się drzewa), jeśli nie jest przeznaczona do monitorowania.
- Słaba jakość obrazu:
- Wyczyść obiektyw aparatu.
- Aby uzyskać optymalne zdjęcia, należy zadbać o odpowiednie oświetlenie, zwłaszcza w nocy.
- Sprawdź siłę sygnału Wi-Fi. Słaby sygnał może mieć wpływ na jakość przesyłania strumieniowego wideo.
8. Specyfikacje
| Funkcja | Szczegół |
|---|---|
| Nazwa modelu | D20-1P |
| Rozdzielczość przechwytywania wideo | 2.5 tys. |
| Efektywna rozdzielczość wideo | 2K QHD |
| Technologia komunikacji bezprzewodowej | Wi-Fi (2.4 GHz) |
| Współczynnik kształtu | Kopuła |
| Viewing kąt | 355 stopni (obrót), 90 stopni (pochylenie) |
| Typ instalacji | Naścienny |
| Zakres noktowizora | 30 metrów |
| Szybkość klatek | 25 klatek na sekundę |
| Tworzywo | Plastikowy |
| Tomtage | 12 V (prąd stały) |
| Cotage | 5 watów |
| Źródło zasilania | Zasilany bateryjnie, zasilany energią słoneczną |
| Baterie | 3 baterie litowo-jonowe (w zestawie) |
| Protokół łączności | Wi-Fi |
| Typ kontrolera | Aplikacja iCSee |
| Cechy specjalne | Night Vision (Color/IR), PIR Motion Detection, Two-Way Audio, IP66 Weatherproof |
| Waga przedmiotu | 1.06 kilogramów |
| Wymiary paczki | Wymiary 21.7 x 19.5 x 13.8 cm |
9. Gwarancja i wsparcie
Reobiux offers a 1-letnia gwarancja for this product. For any issues or inquiries, please do not hesitate to reach out to our customer service. We provide 20 hours of online service to assist you.
For support, please refer to the contact information provided with your purchase or within the iCSee application.