1. Wprowadzenie
This manual provides detailed instructions for the installation, operation, and maintenance of your Vikye KYZ-20A Intelligent PWM Solar Charge Controller. This device is designed to manage the power flow from your solar panels to your battery bank, ensuring efficient charging and protecting your batteries from overcharge and over-discharge. It features a 3-stage PWM charge management system, an industrial microcontroller, and a clear LCD display with a backlight for easy monitoring and adjustment of parameters.
2. Ważne instrukcje bezpieczeństwa
- Upewnij się, że bateria ma wystarczającą pojemnośćtage aby kontroler rozpoznał typ baterii przed pierwszą instalacją.
- Kabel akumulatora powinien być jak najkrótszy, aby zminimalizować straty mocy.
- The charge controller is designed for regulating solar modules only. Do not connect any other charging source to the controller.
- The controller will generate heat during operation. Ensure adequate ventilation around the unit.
- Zawsze podłączaj najpierw akumulator, potem panel słoneczny, a na końcu obciążenie. Odłączaj w odwrotnej kolejności.
- Avoid short circuits on the battery, solar panel, and load terminals.
- This device is for indoor use only. Protect it from water, moisture, and direct sunlight.
- Jeśli masz wątpliwości co do jakiejkolwiek części instalacji, skonsultuj się z wykwalifikowanym elektrykiem.
3. Koniec produktuview
The Vikye KYZ-20A Solar Charge Controller features a robust design with an intuitive LCD display and multiple protection functions. It supports both 12V and 24V battery systems and offers a 2A USB output for charging small devices.
3.1 Główne cechy
- Industrial microcontroller for adjustable charge and discharge parameters.
- Full 3-stage Zarządzanie ładowaniem PWM.
- Comprehensive protection functions: over-current, short circuit, open circuit, reverse connection.
- Large LCD display with backlight for clear visibility, especially at night.
- Switchable charging function for lithium and lead-acid batteries.
- Integrated 5V/2A USB output.
3.2 Identyfikacja komponentów

Rycina 1: Przód view of the KYZ-20A Solar Charge Controller. This image displays the front of the controller, highlighting the LCD screen, control buttons, and the six terminal connections at the bottom.

Rysunek 2: Strona view of the KYZ-20A Solar Charge Controller terminals. This image shows the six screw terminals for connecting the battery, solar panel, and DC load, along with the DC output port.
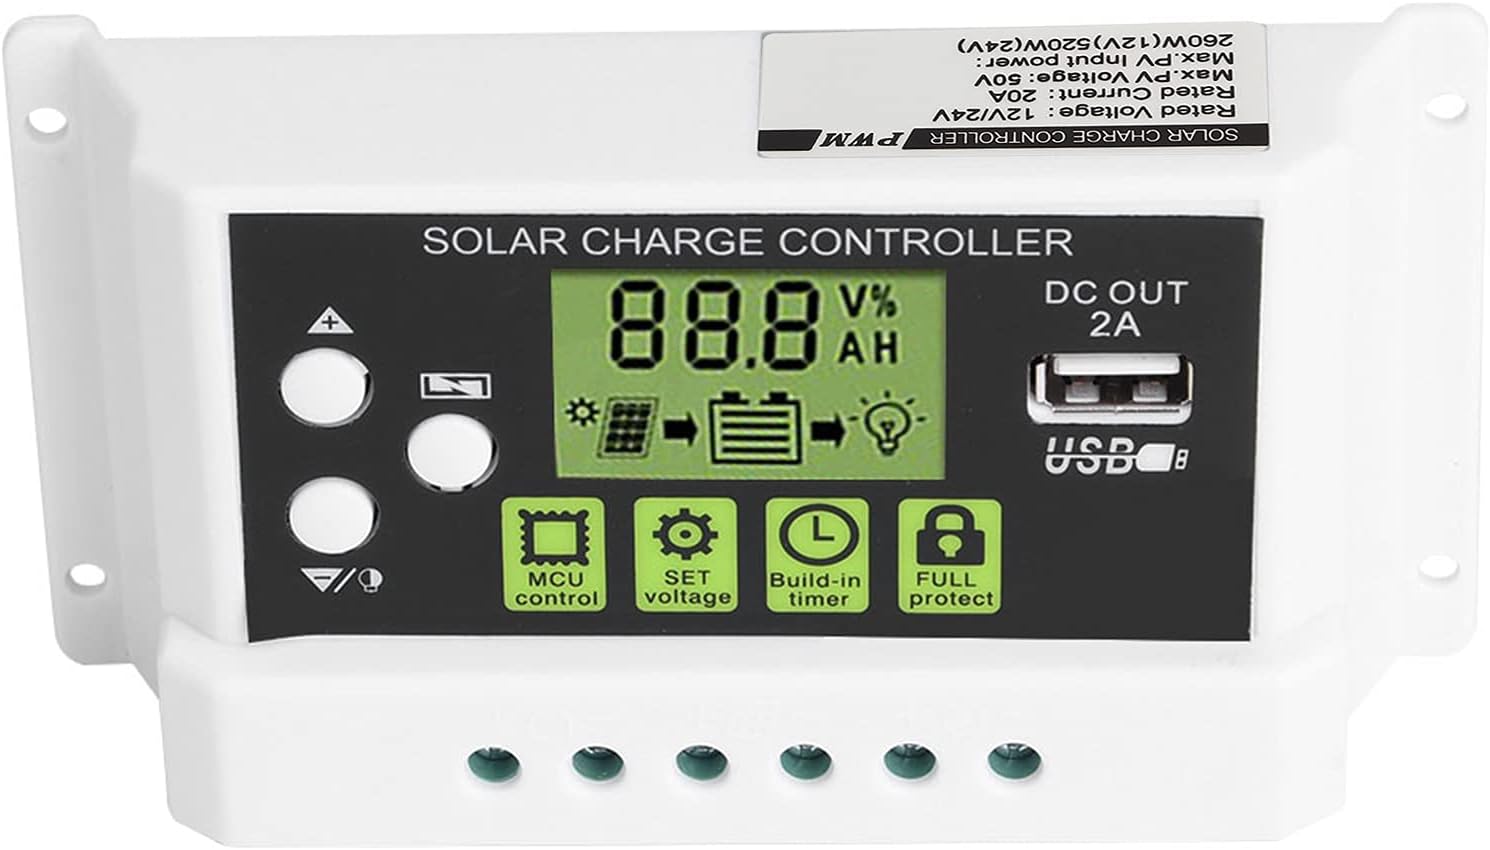
Rysunek 3: Zbliżenie wyświetlacza LCD i przycisków sterujących. Na tym obrazie przedstawiono szczegółowo view of the LCD screen, showing battery voltage, charge/discharge status, and icons for MCU control, SET voltage, Build-in timer, and Full protect functions. The USB output port is also visible.

Figure 4: LCD display with backlight function. This image illustrates the controller's screen with its backlight active, enhancing visibility in low-light conditions.
4. Instalacja
Follow these steps carefully to install your solar charge controller. Incorrect installation can damage the device or other components.
- Przygotuj miejsce instalacji: Choose a dry, well-ventilated indoor location away from direct sunlight, high temperatures, and moisture. Ensure there is enough space around the controller for heat dissipation.
- Podłącz akumulator: Connect the battery to the charge controller first. Ensure the battery has sufficient voltage (at least 10V for 12V systems, 20V for 24V systems) for the controller to recognize the battery type. Connect the positive (+) and negative (-) terminals correctly. The battery cable should be as short as possible to minimize voltagkropla.
- Podłącz panel słoneczny: Connect the solar panel to the charge controller. Ensure correct polarity (+ to + and - to -). The controller is designed for solar modules only; do not connect other power sources.
- Podłącz obciążenie DC (opcjonalnie): If you have a DC load, connect it to the load terminals of the controller. Ensure correct polarity.
- Sprawdź połączenia: Double-check all connections for correct polarity and secure fastening.
Ważna uwaga: Disconnect components in the reverse order: first the load, then the solar panel, and finally the battery.
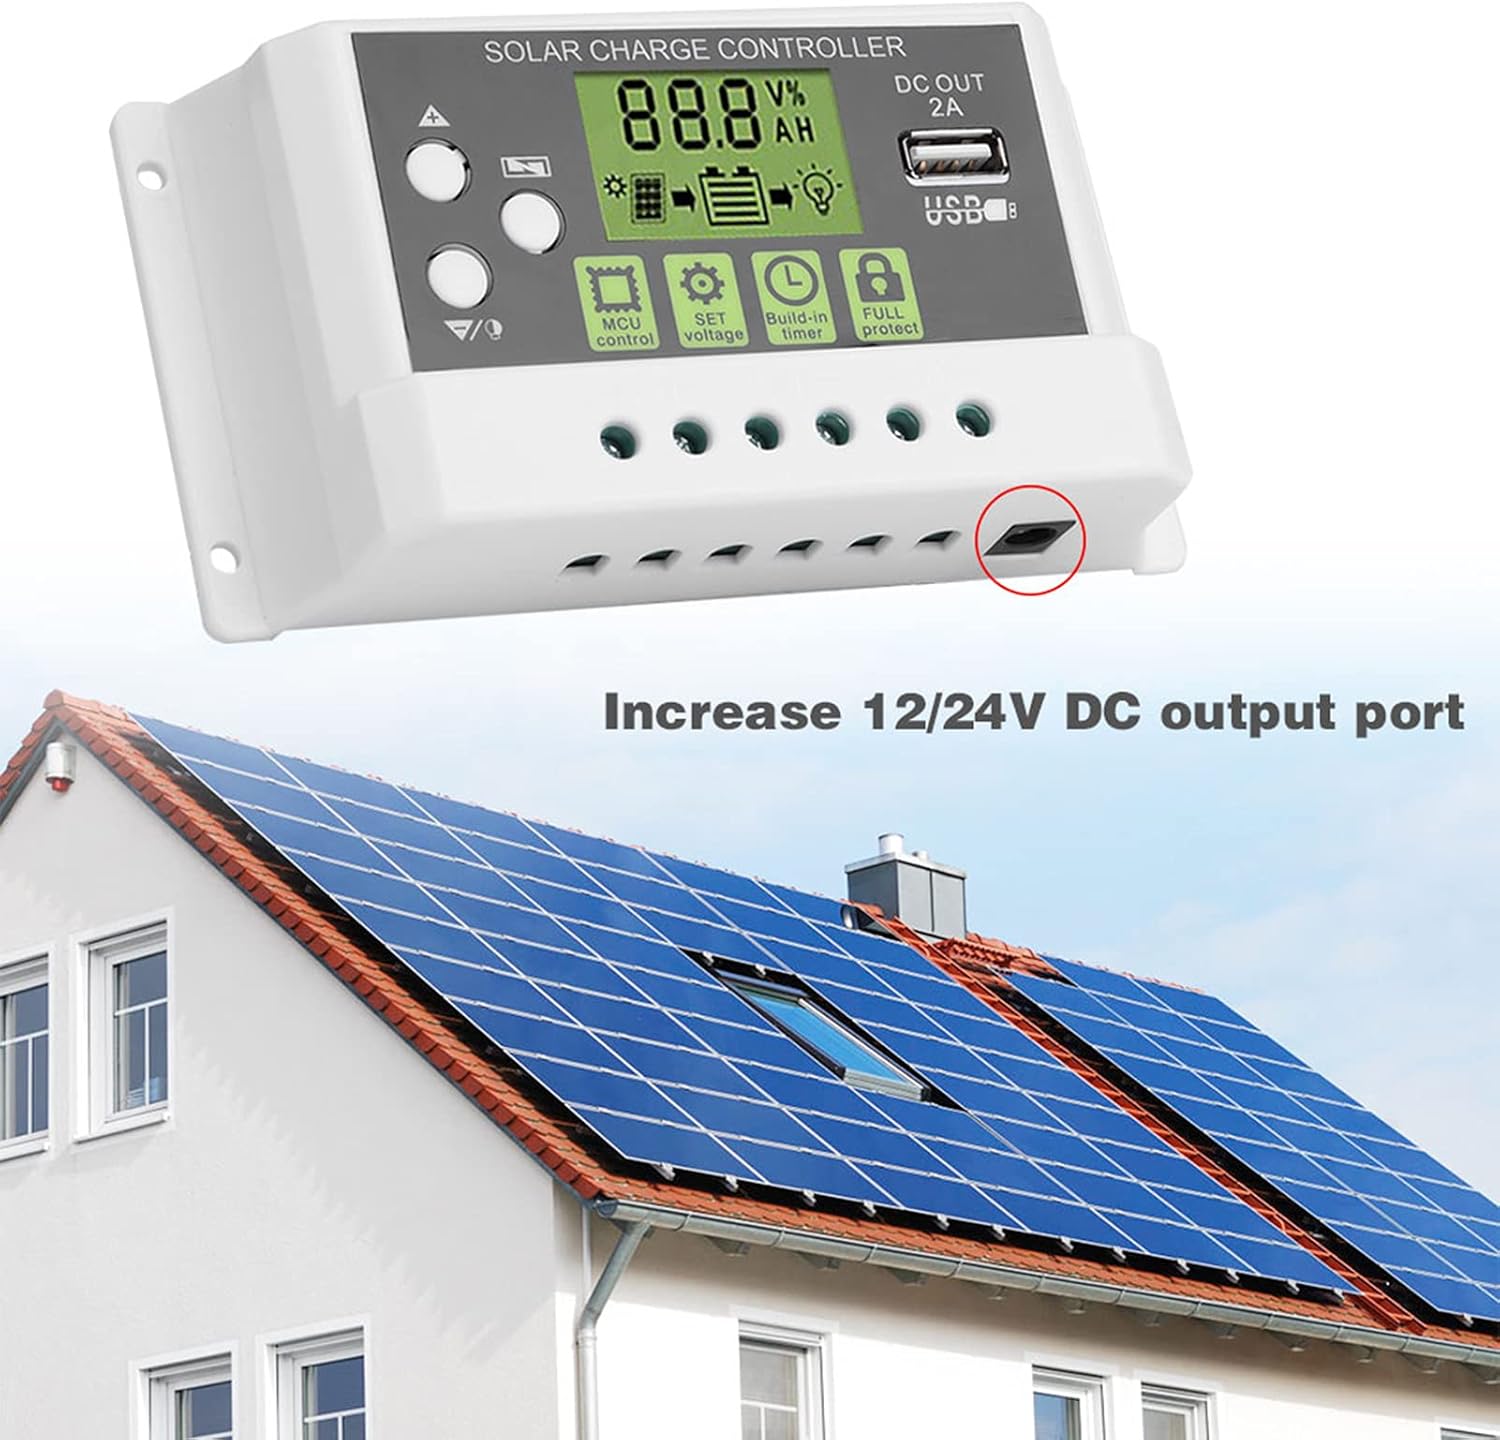
Rysunek 5: Example installation diagram. This image illustrates the general setup of the solar charge controller within a solar power system, connecting to solar panels and a battery bank, and highlighting the DC output port.
5. Działanie
The controller's LCD display provides real-time system information, and the buttons allow for parameter adjustments.
5.1 Wyświetlacz LCD i przyciski
Na ekranie LCD wyświetlane są różne parametry, takie jak pojemność bateriitage, charging current, discharging current, and battery state of charge. The backlight function improves visibility in dark environments.
- Przyciski w górę/w dół: Used to navigate through display menus and adjust parameter values.
- Przycisk SET: Służy do wejścia w tryb ustawiania parametrów i potwierdzania wyborów.
- MCU Control: Indicates the microcontroller is actively managing the system.
- ZESTAW Tomtage: Allows adjustment of various voltage parameters (e.g., float voltage, niska objętośćtage disconnect).
- Build-in Timer: Configures load control based on time settings.
- Full Protect: Indicates active protection features (e.g., overcharge, short circuit).
5.2 Ustawienia parametrów
To enter parameter setting mode, press and hold the SET button for a few seconds. Use the Up/Down buttons to navigate through parameters and adjust values. Press SET again to confirm and save changes. Refer to the specifications section for default voltage wartości.
- Wybór typu baterii: The controller supports both lithium and lead-acid batteries. Ensure the correct battery type is selected in the settings for optimal charging.
- Kontrola załadunku: The controller can manage the DC load output. This can be set to always on, always off, or controlled by a timer (e.g., dusk to dawn).
5.3 wyjście USB
The integrated 5V/2A USB output port can be used to charge small electronic devices. This output is active when the battery has sufficient charge.
6. Konserwacja
Regularna konserwacja zapewnia długowieczność i optymalną wydajność regulatora ładowania słonecznego.
- Czyszczenie: Periodically clean the controller's exterior with a dry cloth to remove dust and dirt. Do not use liquid cleaners.
- Kontrola połączenia: Annually inspect all wiring connections to ensure they are tight and free from corrosion. Loose connections can lead to power loss or overheating.
- Wentylacja: Aby zapewnić właściwe odprowadzanie ciepła, należy upewnić się, że otwory wentylacyjne nie są zablokowane.
- Warunki środowiskowe: Verify that the controller remains in a dry, well-ventilated environment within its specified operating temperature range.
7. Rozwiązywanie Problemów
Jeśli masz problemy z regulatorem ładowania słonecznego, zapoznaj się z poniższymi typowymi problemami i ich rozwiązaniami:
- Brak wyświetlacza/brak zasilania:
- Sprawdź połączenia akumulatora i upewnij się, że biegunowość jest prawidłowa.
- Sprawdź pojemność bateriitage is above the minimum operating threshold (e.g., 10V for 12V systems).
- Inspect battery fuse (if applicable).
- Akumulator nie ładuje się:
- Sprawdź połączenia i biegunowość paneli słonecznych.
- Upewnij się, że panele słoneczne otrzymują odpowiednią ilość światła słonecznego.
- Sprawdź pojemność panelu słonecznegotage mieści się w zakresie wejściowym kontrolera.
- Sprawdź, czy panele słoneczne nie są zacienione.
- Ładowanie nie działa:
- Sprawdź połączenia i polaryzację obciążenia.
- Verify load settings in the controller (e.g., timer, always on).
- Upewnij się, że akumulator voltage jest powyżej niskiego poziomu głośnościtage disconnect (LVD) threshold.
- Check for overcurrent or short circuit on the load.
- Przegrzanie kontrolera:
- Należy zapewnić odpowiednią wentylację wokół kontrolera.
- Jeśli to możliwe, zmniejsz obciążenie.
- Verify that the ambient temperature is within the operating range.
Jeśli po sprawdzeniu tych punktów problem nadal występuje, skontaktuj się z obsługą klienta.
8. Specyfikacje
Technical specifications for the Vikye KYZ-20A Solar Charge Controller:
| Parametr | Value (KYZ-20A) |
|---|---|
| Pojemność bateriitage | 12V/24V (self-adaptive) |
| Prąd ładowania | 20A |
| Prąd rozładowania | 10A |
| Maksymalne wejście słoneczne | <41 V |
| Equality Charge (Lithium) | 12.8 V |
| Equality Charge (Lead-acid) | 14.4 V |
| Floating Charge (Lithium) | 12.0V (default, adjustable 11.5-12.8V) |
| Floating Charge (Lead-acid) | 13.7V (default, adjustable 13-15V) |
| Objętość poniżejtage Protection (Lithium) | 10.7V (default, adjustable 9.0-11.0V) |
| Objętość poniżejtage Protection (Lead-acid) | 10.7V (default, adjustable 9.0-11.5V) |
| Discharge Reconnect (Lithium) | 11.6V (default, adjustable 11.0-11.7V) |
| Discharge Reconnect (Lead-acid) | 12.6V (default, adjustable 11.5-13V) |
| Prąd czuwania | <10mA |
| Wyjście USB | Maksymalnie 5V/2A |
| Temperatura pracy | -35~60℃ |
| Wymiary | 133 x 70 x 35 mm (5.2 x 2.7 x 1.3 cala) |
| Waga | Około. 205 g (7.2 uncji) |
Note: All red voltage values are for 12V systems; double them for 24V systems.