
Techmade TM-URI01
Techmade Universal 3-in-1 Remote Control (Model TM-URI01) Instruction Manual
Wstęp
This manual provides comprehensive instructions for the setup, operation, and maintenance of your Techmade Universal 3-in-1 Remote Control, Model TM-URI01. This remote is designed to consolidate control of up to three infrared devices, including televisions, set-top boxes (digital terrestrial and satellite), and DVD players, offering broad compatibility with brands such as Samsung, LG, and Sony.
1. Konfiguracja
1.1 Instalacja baterii
Do pilota potrzebne są dwie baterie AAA (brak w zestawie). Aby je zainstalować, wykonaj następujące kroki:
- Znajdź pokrywę komory baterii z tyłu pilota.
- Naciśnij zakładkę i przesuń pokrywę.
- Włóż dwie baterie AAA, upewniając się, że bieguny dodatni (+) i ujemny (-) są prawidłowo ustawione względem oznaczeń wewnątrz komory.
- Przesuń pokrywę komory baterii z powrotem na miejsce, aż zatrzaśnie się pewnie.
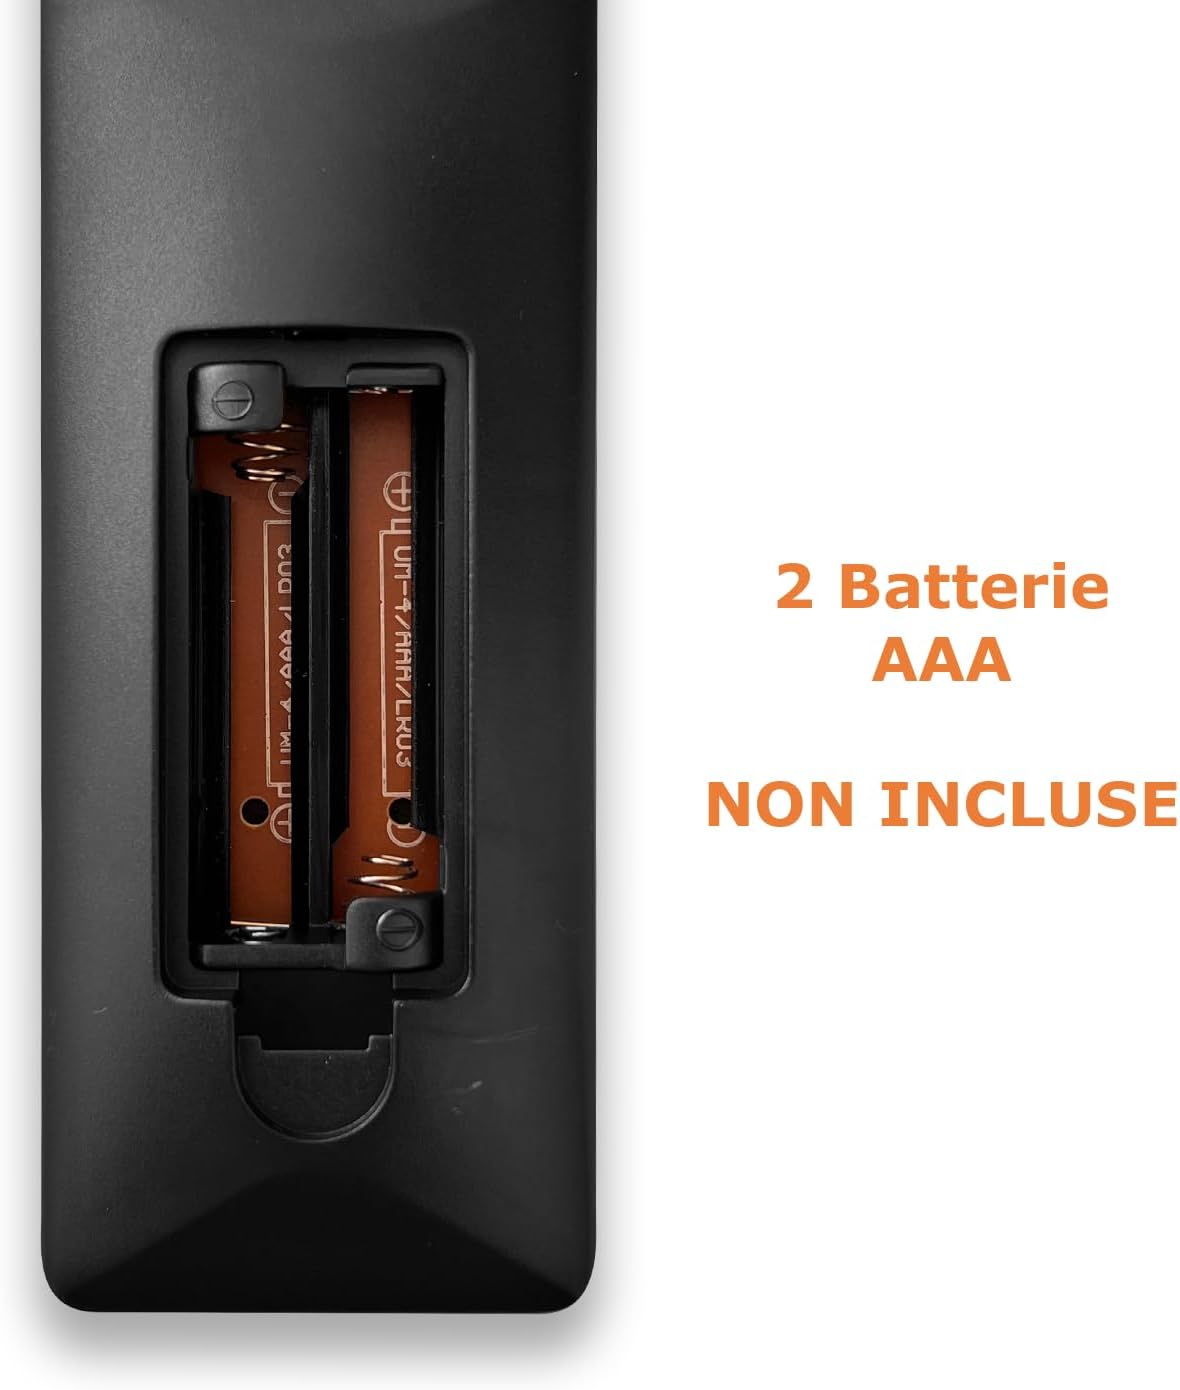
Image: Back of the remote control with the battery compartment open, indicating where to insert two AAA batteries.
1.2 Programowanie pilota
The Techmade TM-URI01 remote control can be programmed to operate up to three different devices (TV, SAT/DVB-T, DVD). The remote retains its settings even when batteries are removed, thanks to its permanent memory.
Method 1: Direct Code Entry (Recommended)
- Turn on the device you wish to control (e.g., TV, Set-top box, DVD player).
- Naciśnij i przytrzymaj odpowiedni przycisk urządzenia na pilocie (np. TV, OSOBA, płyta DVD) for approximately 3 seconds until the indicator light (usually the power button LED) illuminates and stays on.
- Enter the 4-digit code for your device's brand. A list of common codes is typically provided in a separate code booklet (not included in this manual). For example, for Samsung TVs, try codes like 0001, 0002, etc.
- If the indicator light turns off, the code has been accepted. Test the remote by pressing the Power button. If the device turns off, the programming was successful.
- Jeżeli urządzenie nie zareaguje, powtórz proces, używając kolejnego kodu dla swojej marki.
Metoda 2: Wyszukiwanie kodu automatycznego
- Włącz urządzenie, którym chcesz sterować.
- Press and hold the corresponding device button (e.g., TV, OSOBA, płyta DVD) przez około 3 sekund, aż kontrolka zaświeci się i pozostanie zapalona.
- Naciśnij Moc button once. The indicator light will start flashing, indicating the remote is searching for a code.
- Point the remote at your device. When the device turns off, immediately press the device button (e.g., TV) again to save the code.
- Test the remote's functions. If not all functions work, repeat the auto-search process to find a more compatible code.

Image: The remote control's button layout, highlighting device selection and power buttons for programming.
2. Obsługa pilota
Once programmed, your Techmade TM-URI01 remote control functions similarly to your original device remotes. Here are the basic operations:

Obraz: Przód view of the Techmade TM-URI01 remote control, showing its complete 48-button layout.
- Wybór urządzenia: Naciśnij TV, OSOBA, Lub płyta DVD button to select the device you wish to control. The remote will then send commands to that specific device.
- Moc: Ten Moc button (usually red) turns the selected device on or off.
- Regulacja głośności: Użyj Objętość + I TOM- Przyciski do regulacji głośności.
- Kontrola kanału: Użyj CH+ I CH- przyciski do zmiany kanałów.
- Klawiatura numeryczna: Use the number buttons (0-9) to directly input channel numbers or other numerical selections.
- Nawigacja: The directional arrow buttons (UP, W DÓŁ, LEWY, PRAWIDŁOWY) I OK button are used for menu navigation and selection.
- Menu/Przewodnik: Przyciski takie jak MENU I PRZEWODNIK access the respective functions on your device.
- Sterowanie odtwarzaniem: Przyciski takie jak Grać, Pauza, Zatrzymywać się, Przewiń do przodu, I Przewijać are available for DVD or media player control.
Refer to your device's original manual for specific functions that may be mapped to the universal remote's buttons.
3. Konserwacja
Aby zapewnić długą żywotność i optymalną wydajność pilota, należy przestrzegać poniższych wskazówek dotyczących konserwacji:
- Czyszczenie: Regularnie przecieraj pilota miękką, suchą ściereczką. W przypadku uporczywych zabrudzeń delikatnie przetrzyj.ampNamocz ściereczkę wodą lub łagodnym środkiem czyszczącym, a następnie natychmiast wytrzyj do sucha. Unikaj stosowania środków czyszczących o działaniu ściernym i rozpuszczalników.
- Wymiana baterii: Replace batteries when the remote's response becomes sluggish or the indicator light fails to illuminate. Always replace both batteries at the same time with new AAA batteries. Do not mix old and new batteries, or different types of batteries.
- Składowanie: Przechowuj pilota w chłodnym, suchym miejscu, z dala od bezpośredniego światła słonecznego i ekstremalnych temperatur. Jeśli pilot nie będzie używany przez dłuższy czas, zaleca się wyjęcie baterii, aby zapobiec ich wyciekaniu.
- Unikaj kropli: Protect the remote from drops and impacts, as this can damage internal components.
4. Rozwiązywanie Problemów
If you experience issues with your Techmade TM-URI01 remote control, consult the following troubleshooting tips:
- Pilot nie działa:
- Sprawdź, czy baterie zostały prawidłowo zainstalowane, zwracając uwagę na właściwą biegunowość (+/-).
- Wymień stare baterie na nowe baterie AAA.
- Make sure you have selected the correct device (TV, SAT, DVD) using the device selection buttons.
- Point the remote directly at the device's infrared receiver, ensuring no obstructions are in the way.
- Verify that the remote is within the effective operating range (up to 10 meters).
- Device Not Responding After Programming:
- The code entered may be incorrect or not fully compatible. Try another code from the code list for your device's brand.
- Perform the auto code search method again.
- Ensure the device was turned on before starting the programming process.
- Some Functions Not Working:
- Not all functions of your original remote may be available or mapped to the universal remote.
- Try programming the remote with a different code for your device, as some codes offer better compatibility for specific functions.
- Indicator Light Not Illuminating:
- Sprawdź instalację baterii i w razie potrzeby wymień baterie.
- If the issue persists after replacing batteries, the remote may be faulty.
5. Specyfikacje
| Funkcja | Szczegół |
|---|---|
| Marka | Techmade |
| Numer modelu | TM-URI01 |
| Technologia łączności | Podczerwony |
| Liczba obsługiwanych urządzeń | Up to 3 (TV, SAT/DVB-T, DVD) |
| Kompatybilne urządzenia | TVs (Samsung, LG, Sony, and others), Set-top boxes, DVD/Blu-ray players |
| Liczba przycisków | 48 |
| Maksymalny zasięg | 10 metrów |
| Typ baterii | 2 x AAA alkaliczne (brak w zestawie) |
| Waga | 200 gram |
| Funkcja specjalna | Lightweight, Permanent Memory (retains settings without batteries) |
| Kolor | Czarny |
6. Informacje o gwarancji
Specific warranty details for the Techmade Universal 3-in-1 Remote Control (Model TM-URI01) are not provided within this instruction manual. Please refer to the retailer's purchase terms or the official Techmade webstrona z informacjami o zakresie gwarancji i jej warunkach.
7. Obsługa klienta
For further assistance, technical support, or inquiries regarding your Techmade Universal 3-in-1 Remote Control, please visit the official Techmade website or contact your retailer. Contact information is not provided directly in this manual.
Ask a question about this manual
Ask about setup, troubleshooting, compatibility, parts, safety, or missing instructions. Manuals+ will review the question and use this page’s manual context to help answer it.