
1. Wprowadzenie
Thank you for choosing the TURN RAISE AT040 210° Two-Way Articulating Borescope. This industrial endoscope is designed for detailed visual inspection in hard-to-reach areas, featuring a dual-lens system, a 7-inch IPS display, and a flexible articulating probe. This manual provides essential information for the safe and effective operation, maintenance, and troubleshooting of your device. Please read it thoroughly before use.
2. Koniec produktuview
2.1 Główne cechy
- 210° Two-Way Articulating Probe: Allows precise control and locking of the probe tip for optimal viewkąty.
- System dwusoczewkowy: Front and side cameras for comprehensive inspection, supporting split-screen display.
- 7-calowy wyświetlacz IPS: Provides a wide and clear view of inspection areas.
- 0.25-inch (6.5mm) Slim Probe: Designed for access into small diameter gaps.
- Regulowane oświetlenie LED: Integrated lights on the probe with adjustable brightness for clear visibility in dark environments.
- Nagrywanie zdjęć i filmów: Capture images and videos to a 32GB memory card.
- Ergonomiczna konstrukcja: Facilitates comfortable one-hand operation.
- Wbudowana bateria 4000mAh: Offers up to 4 hours of continuous operation.
- IP67 Rated Probe: Water-resistant for use in damp lub w wilgotnych warunkach.
2.2 Zawartość opakowania
- Borescope with light (Main Unit) x1
- Futerał do przenoszenia x1
- Kabel ładujący typu C x1
- Instrukcja obsługi x1
- 32GB Memory Card (pre-installed or separate) x1
2.3 Komponenty urządzenia

Figure 1: Main components of the TURN RAISE AT040 Borescope, including the display unit, articulating probe, and protective carrying case.
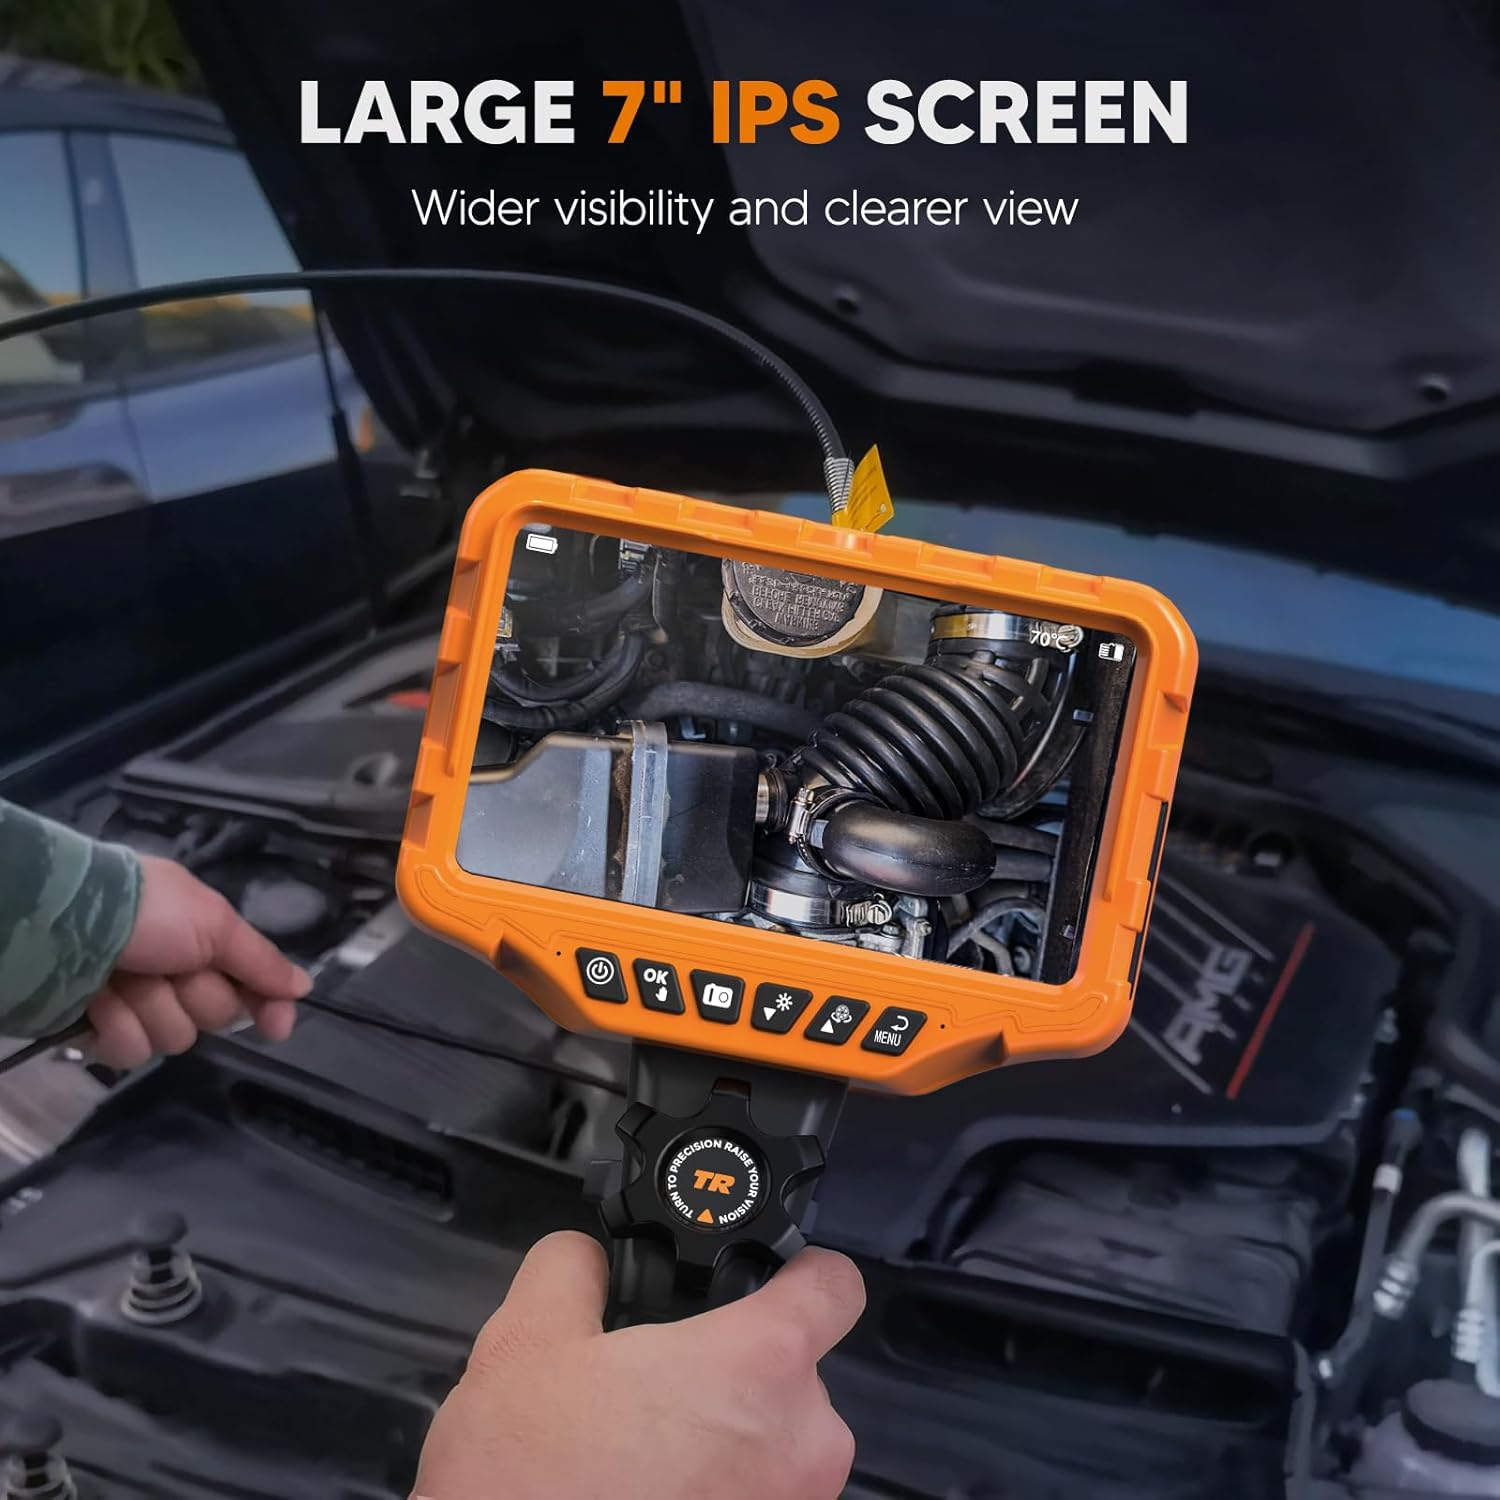
Figure 2: The large 7-inch IPS screen provides a clear and detailed view podczas inspekcji.
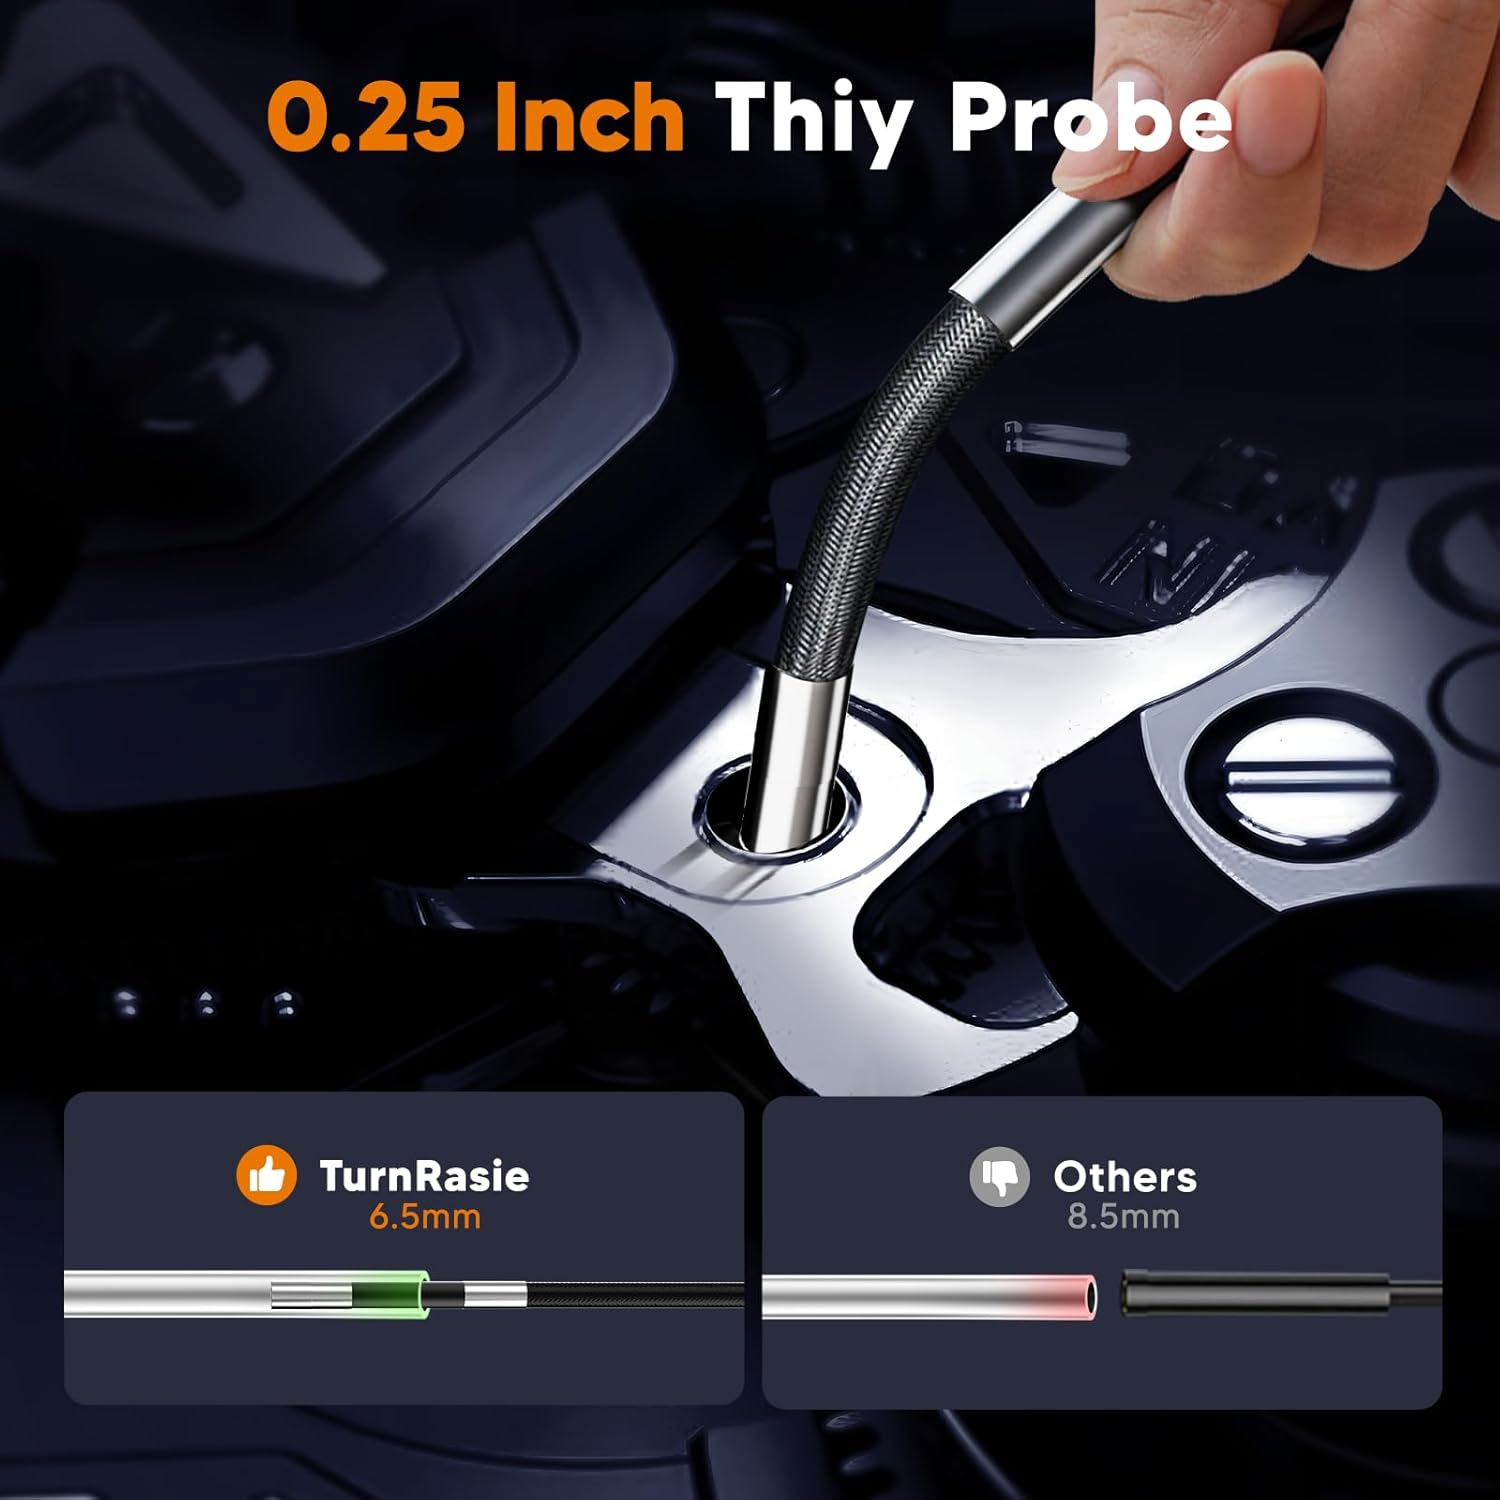
Figure 3: The ultra-slim 0.25-inch (6.5mm) probe allows access into very narrow spaces.
3. Konfiguracja
3.1 Ładowanie urządzenia
- Connect the provided Type-C charging cable to the charging port on the borescope unit.
- Podłącz drugi koniec kabla do standardowego zasilacza USB (nie ma go w zestawie) lub do portu USB komputera.
- The charging indicator will illuminate. A full charge typically takes approximately 4 hours. Ensure the device is fully charged before first use for optimal battery life.
3.2 Wkładanie karty pamięci
The device supports a 32GB memory card for storing images and videos. If not pre-installed, locate the memory card slot (usually on the side of the display unit) and gently insert the card until it clicks into place. Ensure the card is inserted in the correct orientation.
3.3 Podłączanie sondy
The articulating probe is typically pre-attached. If it needs to be connected, align the connector on the probe cable with the port on the main unit and secure it firmly. Do not force the connection.
4. Instrukcja obsługi
4.1 Włączanie/wyłączanie zasilania
- Włączanie: Naciśnij i przytrzymaj przycisk zasilania (⏻) przez kilka sekund, aż ekran się zaświeci.
- Aby wyłączyć: Naciśnij i przytrzymaj przycisk zasilania (⏻) ponownie, aż ekran się wyłączy.
4.2 Basic Navigation and Menu
Use the directional buttons and the 'OK' button to navigate through menus and confirm selections. The 'Menu' button typically accesses settings such as resolution, date/time, and language.
4.3 Articulating Probe Control
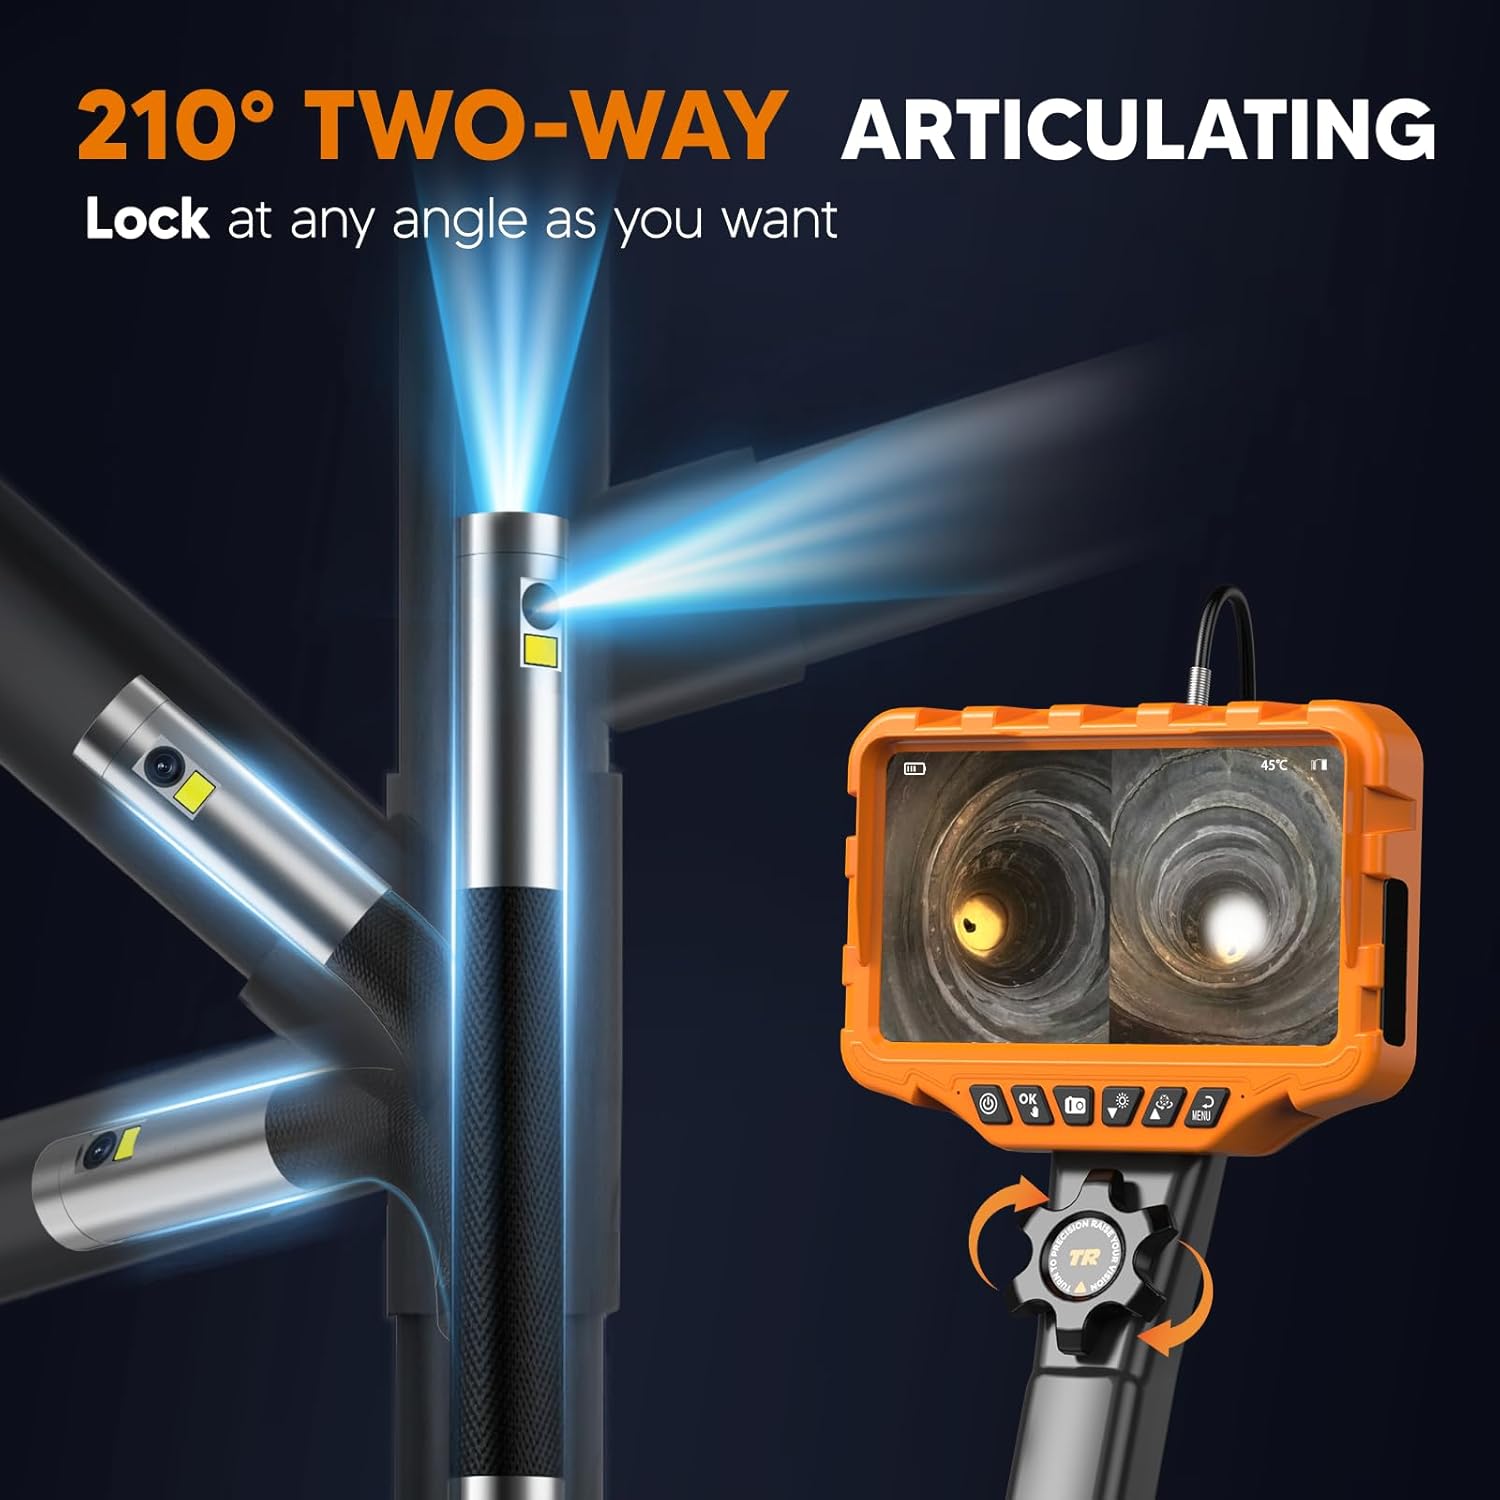
Figure 4: The probe tip can be articulated up to 210 degrees in two directions using the control wheel.
The AT040 features a 210° two-way articulating probe. To control the probe tip:
- Locate the control wheel on the handle of the borescope.
- Rotate the wheel to bend the probe tip in the desired direction.
- The probe tip can be locked at any angle by holding the wheel in position, allowing for stable viewing.
4.4 Dual-Lens and Split-Screen Functionality

Rysunek 5: Eksplodowany view of the dual-lens camera system, providing 1080P HD imaging.
The borescope is equipped with both a front-facing and a side-facing lens. To utilize this feature:
- Press the dedicated dual-lens button (refer to device interface for icon, typically two overlapping squares or similar) to switch between single front view, single side viewlub wyświetlania na podzielonym ekranie.
- In split-screen mode, both camera feeds are shown simultaneously on the 7-inch IPS screen, enhancing inspection efficiency.
4.5 Regulacja jasności diod LED
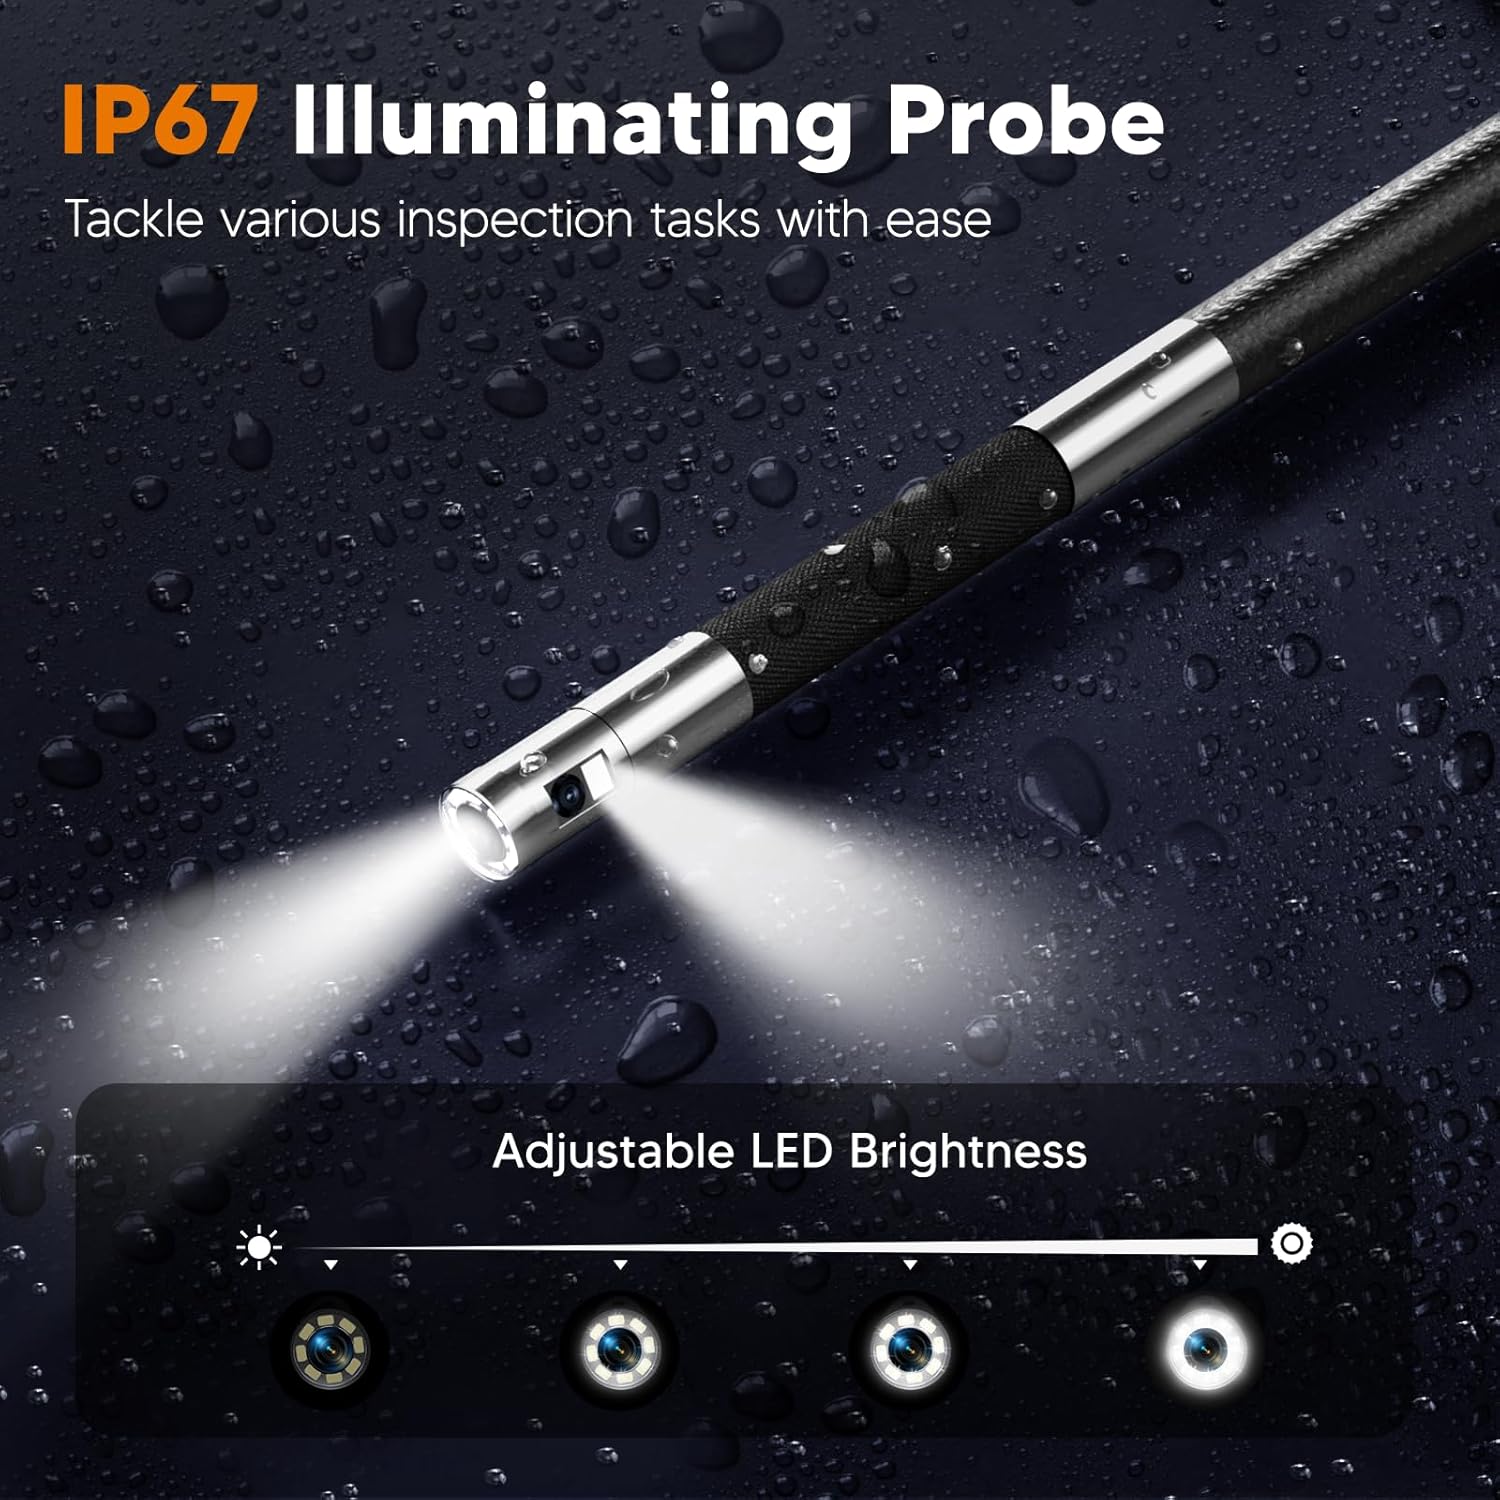
Figure 6: The IP67 rated probe features adjustable LED lights for optimal illumination in various conditions.
To adjust the brightness of the LED lights on the probe tip:
- Locate the LED brightness control button (often indicated by a light bulb icon).
- Press the button repeatedly to cycle through different brightness levels or use a dedicated dial if available.
4.6 Robienie zdjęć i nagrywanie filmów
The borescope supports capturing JPG images and AVI video recordings.
- Aby zrobić zdjęcie: Press the 'Photo' button (typically a camera icon). The image will be saved to the inserted memory card.
- Aby nagrać film: Press the 'Video' button (typically a video camera icon) to start recording. Press it again to stop recording. Videos are saved to the memory card.
- The device also supports audio recording via a built-in microphone during video capture.
4.7 Flexible Rigid Gooseneck

Figure 7: The flexible rigid gooseneck probe can be bent and shaped to suit various inspection needs.
The probe cable is designed to be flexible yet rigid enough to hold its shape. This allows you to bend, shape, and extend the probe to navigate complex pathways and maintain the desired viewing angle during inspection.
5. Konserwacja
5.1 Czyszczenie
- Probe and Lens: After each use, especially in dirty environments, gently wipe the probe and camera lenses with a soft, dry cloth. For stubborn dirt, a slightly damp cloth can be used, followed by drying. Ensure no liquid enters the probe tip.
- Ekran wyświetlacza: Clean the IPS screen with a soft, lint-free cloth. Avoid abrasive cleaners.
- Jednostka główna: Przetrzyj jednostkę główną suchą lub lekko zwilżoną szmatką.amp płótno. Nie zanurzaj jednostki głównej w wodzie.
5.2 Pielęgnacja baterii
- Aby przedłużyć żywotność baterii, należy unikać częstego całkowitego rozładowywania baterii.
- Aby zachować sprawność baterii, ładuj urządzenie regularnie, nawet jeśli go nie używasz.
- Przechowuj urządzenie w chłodnym i suchym miejscu, jeśli nie będziesz go używać przez dłuższy czas.
5.3 Przechowywanie
Store the borescope and its accessories in the provided carrying case to protect it from dust, impacts, and environmental damage. Keep it away from extreme temperatures and direct sunlight.
6. Rozwiązywanie Problemów
| Problem | Możliwa przyczyna | Rozwiązanie |
|---|---|---|
| Urządzenie nie włącza się | Niski poziom naładowania baterii; przycisk zasilania nie został prawidłowo naciśnięty | Charge the device fully. Press and hold the power button for several seconds. |
| Niska jakość obrazu | Dirty lens; Insufficient lighting; Incorrect focus distance | Clean the camera lens. Adjust LED brightness. Ensure the object is within the camera's optimal focal range. |
| Artykulacja sondy nie działa | Control wheel jammed; Internal damage | Check for obstructions around the control wheel. If the issue persists, contact support. |
| Nie można nagrywać zdjęć/filmów | Memory card full or not inserted; File błąd systemu | Check if the 32GB memory card is correctly inserted and has free space. Format the card if necessary (this will erase all data). |
| Krótki czas pracy baterii | Battery not fully charged; High brightness settings; Aging battery | Ensure the device is fully charged. Reduce LED brightness if possible. Battery performance may degrade over time. |
7. Specyfikacje
| Funkcja | Specyfikacja |
|---|---|
| Model | AT040 |
| Średnica sondy | 0.25 cala (6.5 mm) |
| Kąt artykulacji | 210° Dwukierunkowy |
| Rozmiar ekranu | 7-calowy wyświetlacz IPS |
| Rozdzielczość kamery | 1080P HD (for both lenses) |
| Długość kabla | 5.3 stopy (ok. 1.6 metra) |
| Pojemność baterii | 4000mAh |
| Czas działania | Do 4 godzin (po pełnym naładowaniu) |
| Karta pamięci | 32 GB (w zestawie) |
| Format obrazu | Plik JPG |
| Format wideo | Plik AVI |
| Wodoodporność sondy | IP67 |
| Temperatura pracy | Refer to device for specific range (often includes temperature sensor at tip) |
| Waga | 1.78 kg (ok. 3.9 funta) |
| Producent | OBRÓT PODNOSZENIA |
8. Gwarancja i wsparcie
For warranty information, technical support, or service inquiries, please refer to the documentation included with your purchase or contact the TURN RAISE customer support directly. Keep your purchase receipt as proof of purchase.