
1. Wprowadzenie
This manual provides detailed instructions for the installation, operation, and maintenance of the Novastar TU15PRO LED Vision Controller. Please read this manual thoroughly before using the device to ensure proper and safe operation. The TU15PRO is designed for controlling LED displays, offering robust performance and versatile connectivity.
2. Informacje dotyczące bezpieczeństwa
- Zasilanie: Use only the specified power adapter (AC100-240V 50/60Hz). Ensure the power source is stable and matches the device's requirements.
- Środowisko: Operate the device in a dry, well-ventilated area. Avoid exposure to extreme temperatures, humidity, dust, or direct sunlight.
- Obsługiwanie: Do not drop, disassemble, or modify the device. Refer all servicing to qualified personnel.
- Kable: Ensure all cables are securely connected. Avoid placing heavy objects on cables or bending them sharply.
- Czyszczenie: Przed czyszczeniem odłącz zasilanie. Użyj miękkiej, suchej ściereczki. Nie używaj środków czyszczących w płynie ani aerozolu.
3. Zawartość opakowania
Proszę sprawdzić zawartość opakowania po rozpakowaniu. Jeśli brakuje któregokolwiek elementu lub jest on uszkodzony, prosimy o natychmiastowy kontakt ze sprzedawcą.
- Novastar TU15PRO LED Vision Controller
- Zasilacz
- Kabel USB
- Instrukcja obsługi (ten dokument)
4. Koniec produktuview
The Novastar TU15PRO is a compact and powerful LED vision controller designed for various display applications. It features multiple input and output ports for flexible connectivity.
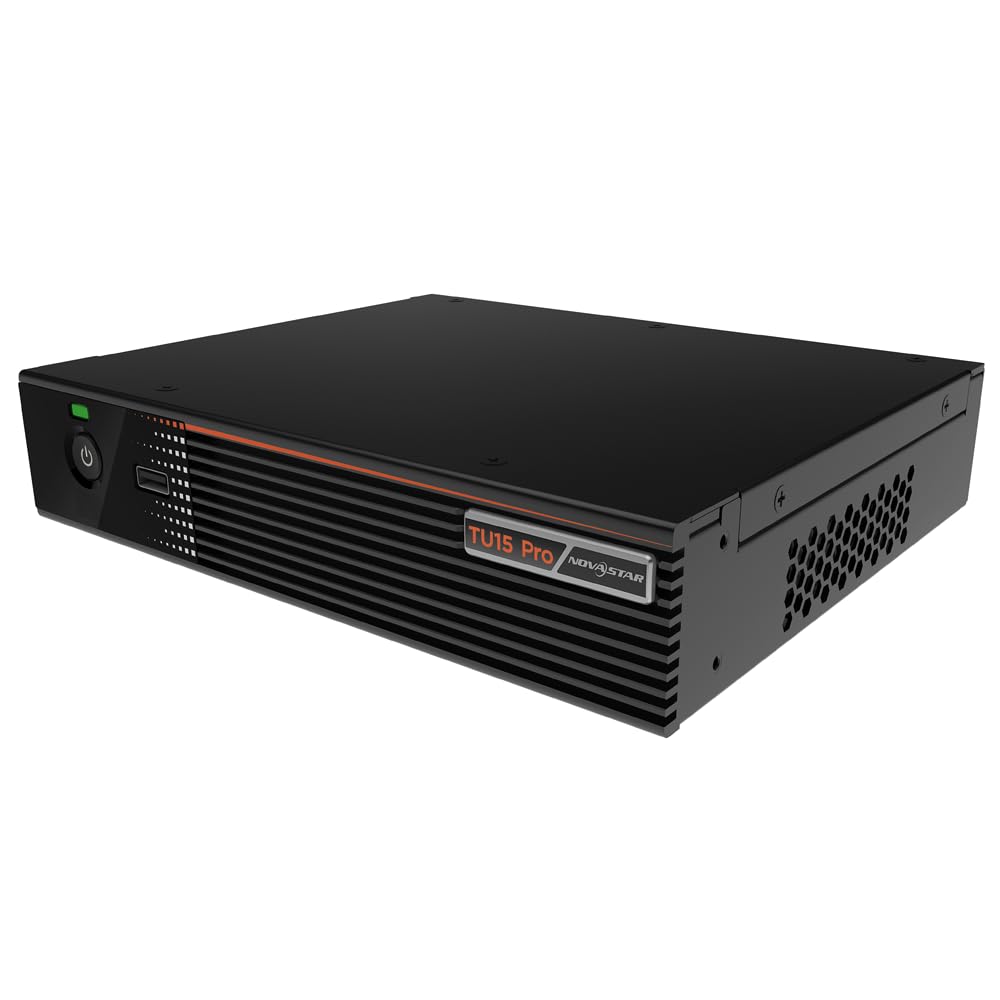
Rysunek 4.1: Kątowy view of the Novastar TU15PRO LED Vision Controller, highlighting the rear panel with various input and output ports.

Rysunek 4.2: Widok z góry na dół view of the Novastar TU15PRO, showing the front panel with power button and USB port, and a detailed view połączeń tylnego panelu.
4.1. Panel przedni
- Przycisk zasilania: Służy do włączania i wyłączania urządzenia.
- Port USB 2.0: For connecting USB devices, such as a mouse or keyboard for control, or for firmware updates.
4.2. Panel tylny
- WIFI-AP (1, 2): Wi-Fi Access Point antennas for wireless control or network extension.
- WIFI-STA: Wi-Fi Station antenna for connecting the device to an existing Wi-Fi network.
- CZUJNIK: Port for connecting an external sensor.
- IR / I/O G RELAY: Input/Output General Purpose Relay terminal block for external control signals.
- ETERNET: Ethernet port for network connection and control.
- USB 2.0 (x2): Additional USB ports for peripherals or data transfer.
- HDMI IN (x2): HDMI input ports for video sources.
- WYJŚCIE HDMI: HDMI output port for monitoring or cascading.
- SPDIF: Cyfrowe wyjście audio.
- AUDIO 12V === 3A: Power input port (DC 12V, 3A).
5. Konfiguracja
- Rozpakować: Carefully remove the TU15PRO controller from its packaging.
- Podłącz anteny: Attach the Wi-Fi antennas to the WIFI-AP and WIFI-STA ports on the rear panel.
- Podłącz źródło wideo: Connect your video source (e.g., computer, media player) to one of the HDMI IN ports using an HDMI cable.
- Connect to LED Display: Connect the controller's Network Ports (1-4) to your LED display receiving cards using Ethernet cables.
- Podłącz zasilanie: Podłącz dostarczony zasilacz do AUDIO 12V === 3A port and then plug it into a power outlet.
- Włączanie: Aby włączyć urządzenie, naciśnij przycisk zasilania na panelu przednim.
- Network Configuration (Optional): For network control, connect an Ethernet cable to the ETHERNET port or configure Wi-Fi settings.
6. Instrukcja obsługi
Once the device is set up, you can begin operating it. Detailed operation typically involves using dedicated software on a connected computer or through a web interfejs.
- Instalacja oprogramowania: Install the Novastar control software on your computer. Refer to the software's documentation for installation and usage.
- Rozpoznawanie urządzenia: Ensure the software recognizes the TU15PRO controller. This may require network configuration or direct USB connection.
- Konfiguracja ekranu: Configure your LED screen parameters within the software, including resolution, cabinet layout, and connection method.
- Wybór źródła wejściowego: Select the desired HDMI input source within the control software.
- Wyświetl zawartość: Use the software to manage and display content on your LED screen.
7. Konserwacja
- Regularne czyszczenie: Keep the device free from dust. Use a soft, dry cloth to wipe the exterior. Do not use harsh chemicals or abrasive materials.
- Wentylacja: Upewnij się, że otwory wentylacyjne nie są zablokowane, aby zapobiec przegrzaniu.
- Aktualizacje oprogramowania układowego: Periodically check the Novastar official website for firmware updates to ensure optimal performance and access to new features. Follow the update instructions carefully.
- Zarządzanie kablami: Keep cables organized and free from kinks or damage to prevent signal loss or power issues.
8. Rozwiązywanie Problemów
- Brak zasilania:
- Sprawdź, czy zasilacz jest prawidłowo podłączony do urządzenia i gniazdka elektrycznego.
- Sprawdź, czy gniazdko elektryczne jest sprawne.
- Brak wyjścia wyświetlacza:
- Ensure HDMI input source is active and correctly connected.
- Verify Ethernet cables to the LED display are properly connected.
- Check screen configuration in the control software.
- Device Not Recognized by Software:
- Confirm network settings (IP address, subnet mask) are correct if using Ethernet.
- Ensure USB cable is connected if using direct USB control.
- Temporarily disable firewall or antivirus software to check for interference.
- Sygnał przerywany:
- Sprawdź wszystkie połączenia kablowe pod kątem luzu i uszkodzeń.
- Ensure cables are of appropriate quality and length for the signal type.
9. Specyfikacje
| Funkcja | Opis |
|---|---|
| Marka | Nowostar |
| Model | TU15PRO |
| Moc wejściowa | AC100-240V 50 / 60Hz |
| Body Size (L×W×H) | 211.7 mm × 185.0 mm × 50.6 mm |
| Control Dots | 2,600,000 |
| Output LAN | Network Port × 4 |
| Maksymalna szerokość wyjściowa | 4096 XNUMX pikseli |
| Maksymalna wysokość wyjściowa | 1920 XNUMX pikseli |
| ASIN | B0D791C3C7 |
10. Gwarancja i wsparcie
For warranty information and technical support, please refer to the official Novastar webOdwiedź witrynę lub skontaktuj się z autoryzowanym dealerem. Zachowaj paragon jako dowód zakupu na wypadek roszczeń gwarancyjnych.
Zasoby internetowe: For the latest drivers, software, and additional documentation, please visit the official Novastar support page.