
Wstęp
This manual provides essential information for the setup, operation, maintenance, and troubleshooting of your GIGABYTE MO34WQC2 34-inch QD-OLED Curved Gaming Monitor. Please read this manual thoroughly before using the product to ensure correct usage and optimal performance.
The GIGABYTE MO34WQC2 monitor features a 34-inch curved QD-OLED display, offering a 0.03ms GTG response time and a 240 Hz refresh rate for smooth visual experiences. It includes Type-C KVM functionality, allowing seamless switching between multiple devices.
Główne cechy:
- 3rd Gen QD-OLED Panel: Delivers high image quality and gaming performance.
- GIGABYTE OLED Care: AI-based algorithm to minimize burn-in risks with adjustable settings.
- Częstotliwość odświeżania 240 Hz i czas reakcji 0.03 ms: Ensures ultra-smooth motion clarity and responsiveness.
- Life-Like Colors: Features 1.5M:1 contrast ratio, 99% DCI-P3 color gamut, and 10-bit color depth.
- VESA DisplayHDR True Black 400 & ClearMR 13000: Provides realistic contrast and top-tier motion clarity.
- Technologia AMD FreeSync Premium Pro: Reduces screen tearing and stuttering, especially in HDR content.
- Cechy taktyczne: Includes Game Assist (timer, crosshairs, PIP/PBP), Black Equalizer 2.0, and Dashboard for enhanced gameplay.
- 3-letnia gwarancja: Covers panel burn-in (terms may vary by region).
Instrukcje konfiguracji
1. Rozpakowanie i montaż
Carefully remove the monitor and all components from the packaging. Place the monitor face down on a soft, clean surface to prevent scratches.

This image shows the GIGABYTE MO34WQC2 monitor with its stand, viewed from the front. The monitor is curved and displays a vibrant, colorful image.
Mocowanie stojaka:
- Przymocuj podstawę do panelu monitora. Upewnij się, że jest pewnie zamocowana.
- Przymocuj podstawę stojaka do szyjki stojaka i dokręć śrubę u dołu podstawy.
Alternatively, the monitor supports VESA 100x100mm wall mounts. Refer to the image below for VESA mounting points.

This image illustrates the adjustable stand of the GIGABYTE MO34WQC2 monitor, showing its tilt range (-5° to +20°) and height adjustment (130mm). A close-up inset highlights the VESA 100x100mm mounting area on the back of the monitor.
2. Podłączanie kabli
Connect the necessary cables to the monitor's I/O ports. Ensure all connections are firm.

This diagram shows the input/output ports on the back of the GIGABYTE MO34WQC2 monitor. Ports include HDMI 2.1 (in), DP 1.4 (in), USB Type-C (DP Alt), Mic, Headphone, USB 3.2 (Upstream), and USB 3.2 (Downstream).
- Przewód zasilający: Podłącz kabel zasilający do monitora i gniazdka elektrycznego.
- Wejście wideo: Connect your PC or gaming console using an HDMI 2.1, DisplayPort 1.4, or USB Type-C cable.
- Przesyłanie USB: For KVM functionality and USB hub use, connect a USB 3.2 Upstream cable from your PC to the monitor.
- Audio: Connect headphones or external speakers to the Headphone jack if desired.
Instrukcja obsługi
1. Włączanie/wyłączanie zasilania
Naciśnij przycisk zasilania, zazwyczaj znajdujący się z tyłu lub na spodzie monitora, aby go włączyć lub wyłączyć. Kontrolka zasilania zaświeci się, gdy monitor jest włączony.
2. Nawigacja za pomocą wyświetlacza ekranowego (OSD)
The monitor features a joystick control for navigating the OSD menu. This joystick is typically located on the back of the monitor.
- Naciskać: Wejdź do menu OSD / Potwierdź wybór.
- Góra dół: Poruszaj się po opcjach menu.
- Lewo/Prawo: Adjust settings / Navigate sub-menus.
3. Funkcjonalność KVM
The built-in KVM (Keyboard, Video, Mouse) switch allows you to control multiple devices (e.g., a desktop PC and a laptop) with a single keyboard and mouse connected to the monitor. To use KVM, ensure both devices are connected to the monitor via video input (HDMI/DP/USB-C) and the USB Upstream cable from the primary device.

This image shows the GIGABYTE MO34WQC2 monitor connected to a desktop PC via HDMI/DP and a laptop via USB Type-C, illustrating how the Type-C KVM feature allows switching between devices with a single button press.
Switch between connected devices using the dedicated KVM button or through the OSD menu.
4. Ustawienia wyświetlania
Access the OSD menu to adjust various display settings:
- Zdjęcie: Jasność, kontrast, ostrość, temperatura barwowa.
- Kolor: Gamma, Hue, Saturation.
- Hazard: Overdrive, FreeSync Premium Pro, Black Equalizer 2.0, Crosshair, Timer.
- Wejście: Select input source (HDMI, DisplayPort, USB-C).
- System: Language, OSD Timeout, Power LED.
5. GIGABYTE OLED Care
The monitor includes AI-based OLED Care features to prevent burn-in. These settings can be accessed and adjusted via the OSD menu. It is recommended to keep these features enabled for optimal panel longevity.
Konserwacja
1. Czyszczenie monitora
- Przed czyszczeniem należy zawsze wyłączyć monitor i odłączyć przewód zasilający.
- Delikatnie użyj miękkiej, niestrzępiącej się szmatki dampCzyścić wodą lub nieściernym środkiem do czyszczenia ekranów.
- Nie rozpylać środka czyszczącego bezpośrednio na ekran.
- Unikaj stosowania silnych środków chemicznych, rozpuszczalników i materiałów ściernych.
2. Pielęgnacja panelu OLED
To prolong the life of your QD-OLED panel and minimize the risk of burn-in, utilize the GIGABYTE OLED Care features available in the OSD menu. These features include pixel shift, static image detection, and pixel refresh cycles. Regular use of these functions is recommended.
Rozwiązywanie problemów
Jeśli masz problemy z monitorem, zapoznaj się z poniższymi typowymi problemami i ich rozwiązaniami:
| Problem | Możliwe rozwiązanie |
|---|---|
| Brak obrazu na ekranie | Ensure the power cable is securely connected and the monitor is powered on. Verify the video input cable (HDMI, DP, USB-C) is properly connected to both the monitor and the source device. Select the correct input source via the OSD menu. |
| Migotanie lub zniekształcenie obrazu | Check video cable connections. Ensure the graphics card drivers are up to date. Try a different video cable or port. Disable or adjust FreeSync Premium Pro settings in the OSD if experiencing issues. |
| Kolory są nieprawidłowe | Adjust color settings (brightness, contrast, color temperature) in the OSD menu. Ensure HDR is correctly configured on your source device and monitor. |
| Burn-in or image retention | Utilize the GIGABYTE OLED Care features in the OSD menu, such as Pixel Refresh or Static Image Detection, to mitigate these issues. Avoid displaying static images for extended periods. |
| KVM nie przełącza urządzeń | Ensure the USB Upstream cable is connected from the primary device to the monitor. Verify all video inputs are correctly connected. Check KVM settings in the OSD menu. |
Specyfikacje
| Funkcja | Szczegół |
|---|---|
| Marka | GIGABAJT |
| Numer modelu | MO34WQC2-SA |
| Rozmiar ekranu | 34 cali |
| Rezolucja | Rozdzielczość WQHD 3440 x 1440 |
| Proporcje obrazu | 21:9 |
| Typ wyświetlacza | QD-OLED |
| Częstotliwość odświeżania | 240 Hz |
| Czas reakcji | 0.03 Milliseconds (GtG) |
| Współczynnik kontrastu | 1,500,000:1 |
| Gama kolorów | 99% DCI-P3 |
| Obsługa HDR | VESA DisplayHDR True Black 400 |
| Adaptacyjna synchronizacja | Technologia AMD FreeSync Premium Pro |
| Łączność | 2x HDMI 2.1, 1x DisplayPort 1.4, 1x USB Type-C (DP Alt Mode), 2x USB 3.2 (Downstream), 1x USB 3.2 (Upstream), Headphone Jack |
| Dostosowania | Wysokość, pochylenie |
| Mocowanie VESA | 100x100mm |
| Wymiary (szer. x gł. x wys.) | 31.96" x 9.65" x 23.42" (z podstawą) |
| Waga | 21.7 funtów |
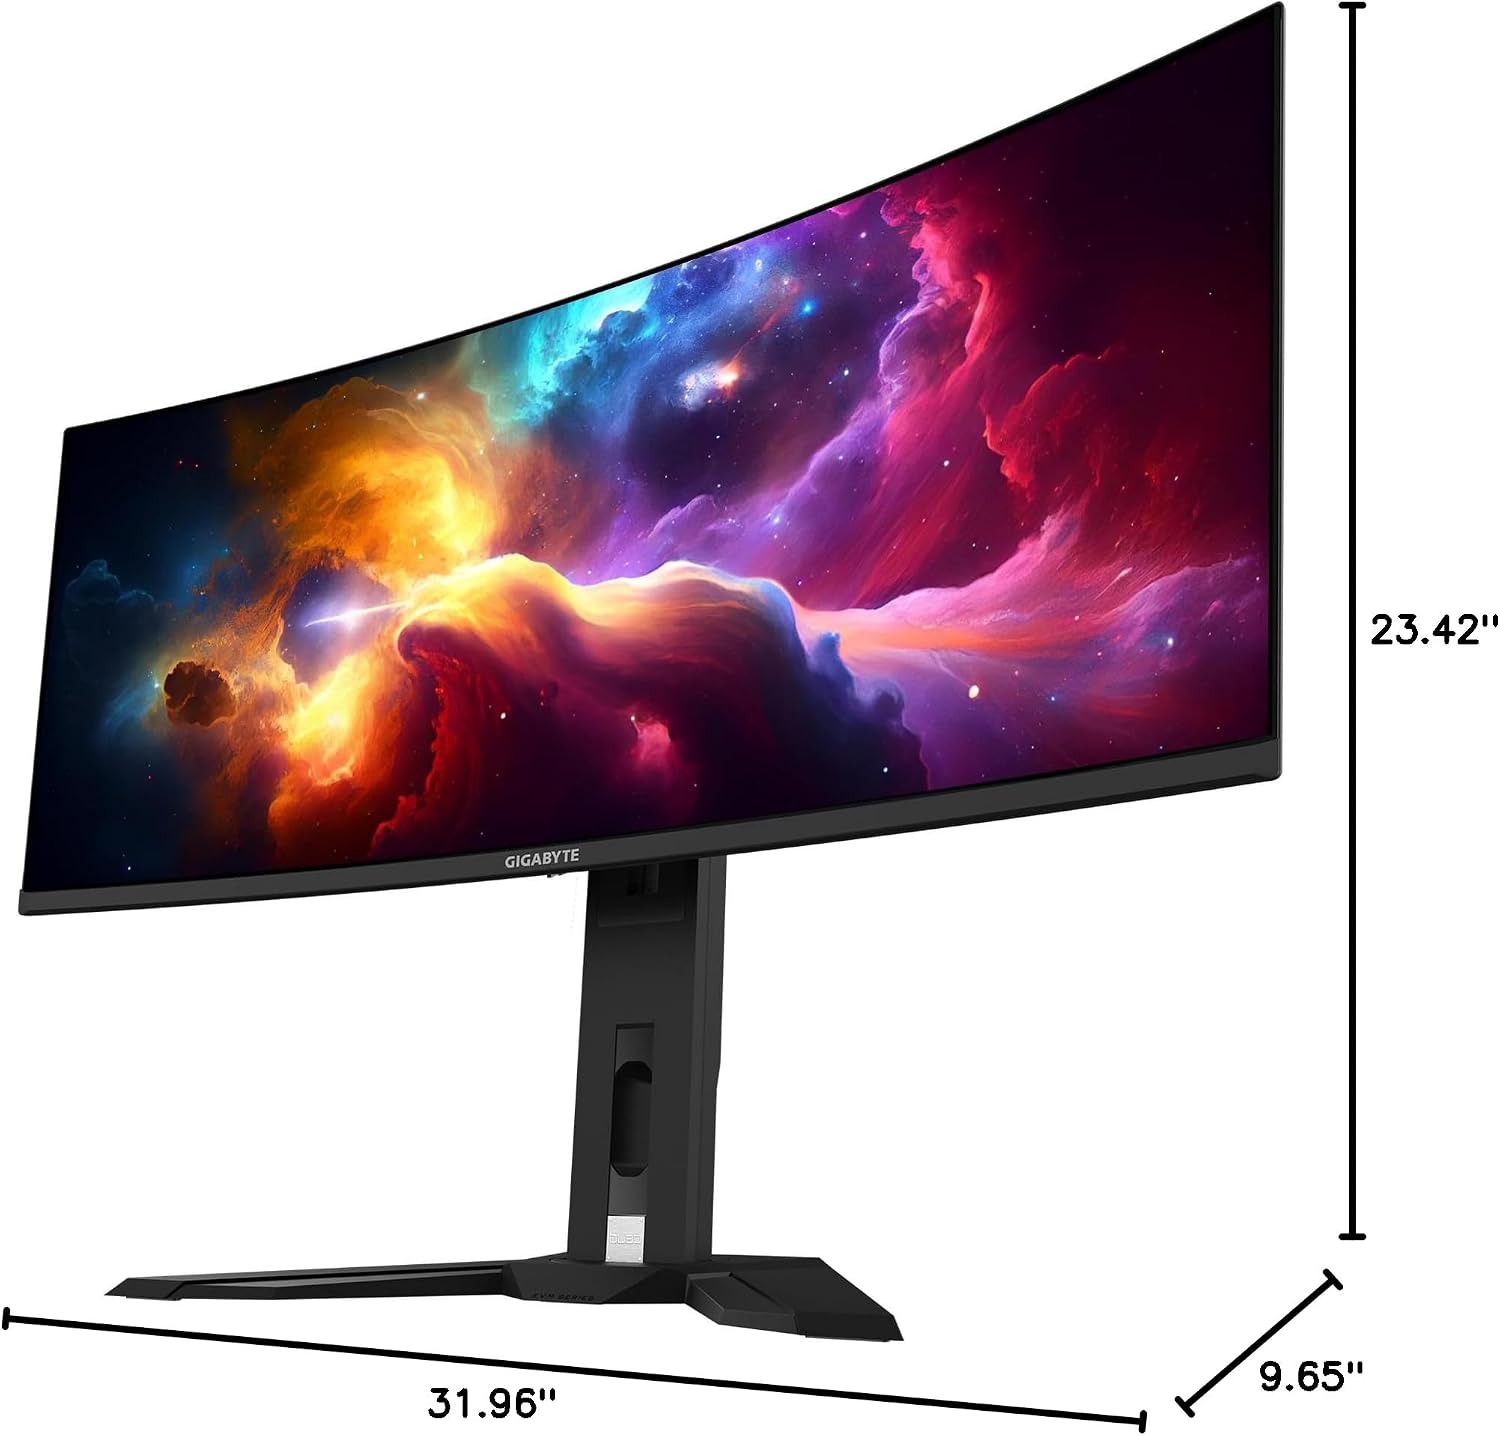
This image provides a diagram of the GIGABYTE MO34WQC2 monitor's dimensions, showing a width of 31.96 inches, a depth of 9.65 inches, and a height of 23.42 inches (including the stand).
Gwarancja i wsparcie
Informacje o gwarancji
Your GIGABYTE MO34WQC2 monitor comes with an extended 3-year manufacturer warranty. This warranty includes coverage for panel burn-in, supported by the AI-based GIGABYTE OLED Care protection. Please note that warranty terms may vary by region.
Obsługa klienta
For technical assistance, warranty claims, or further inquiries, please visit the official GIGABYTE support website or contact their customer service department. Refer to the product packaging or GIGABYTE's official website for specific contact details and support resources in your region.