Wstęp
This manual provides detailed instructions for the assembly, operation, and maintenance of your Maupvit Large Shoe Storage Cabinet with 4 Flip Drawers. Please read all instructions carefully before beginning assembly or use to ensure safe and proper functionality.
Ważne informacje dotyczące bezpieczeństwa
OSTRZEŻENIE: Nieprzestrzeganie tych instrukcji bezpieczeństwa może spowodować obrażenia ciała lub uszkodzenie produktu.
- Always secure the cabinet to the wall using the anti-tipping device provided to prevent tipping and protect children's safety.
- Do not overload the cabinet, as this may cause instability and tipping.
- Aby uniknąć ryzyka zadławienia, podczas montażu małe części należy trzymać z dala od dzieci.
- Przed użyciem upewnij się, że wszystkie śruby i elementy mocujące są mocno dokręcone. Regularnie sprawdzaj i dokręcaj w razie potrzeby.
- Nie stawać i nie wspinać się na szafkę.
- Ustaw szafkę na płaskiej i stabilnej powierzchni.
Zawartość opakowania
Przed rozpoczęciem montażu sprawdź, czy wszystkie elementy są obecne. Jeśli brakuje którejkolwiek części lub jest ona uszkodzona, skontaktuj się z obsługą klienta.
- Panele szafkowe (różne rozmiary)
- 4 Flip Drawers with Metal Hinges
- Nogi drewniane (5 sztuk)
- Assembly Hardware (screws, dowels, anti-tipping device)
- Metal Handles (4 pieces)
- Adjustable/Removable Internal Panels
Konfiguracja i montaż
Ten produkt wymaga montażu. Zaleca się, aby do montażu zaangażowano dwie osoby. Prosimy o dokładne wykonanie poniższych kroków.
- Rozpakuj komponenty: Carefully remove all parts from the packaging. Lay them out on a clean, soft surface to prevent scratches. Identify each part using the provided parts list.
- Attach Wooden Legs: Secure the 5 wooden legs to the base of the cabinet using the designated screws. Ensure they are tightened firmly for stability.
- Złóż ramę szafki: Follow the diagram in the separate assembly guide to connect the main cabinet panels. Use dowels and screws as indicated.
- Montaż szuflad Flip: Attach the metal hinges to the flip drawers and then secure the drawers into the cabinet frame. Ensure smooth operation.
- Insert Internal Panels: Each flip drawer contains two layers of storage space. The internal panel can be adjusted or removed using the two grooves to accommodate different shoe heights.
- Zamontuj uchwyty: Secure the metal handles to the front of each flip drawer.
- Mocowanie do ściany (kluczowe): Attach the anti-tipping device to the top rear of the cabinet and secure it to a wall stud using appropriate hardware. This step is essential for safety.

Figure 1: Fully assembled Maupvit Large Shoe Storage Cabinet, demonstrating its appearance and functionality in an entryway.

Rysunek 2: Szczegółowy view of the adjustable internal panels within the flip drawers, allowing customization for various shoe sizes and types.
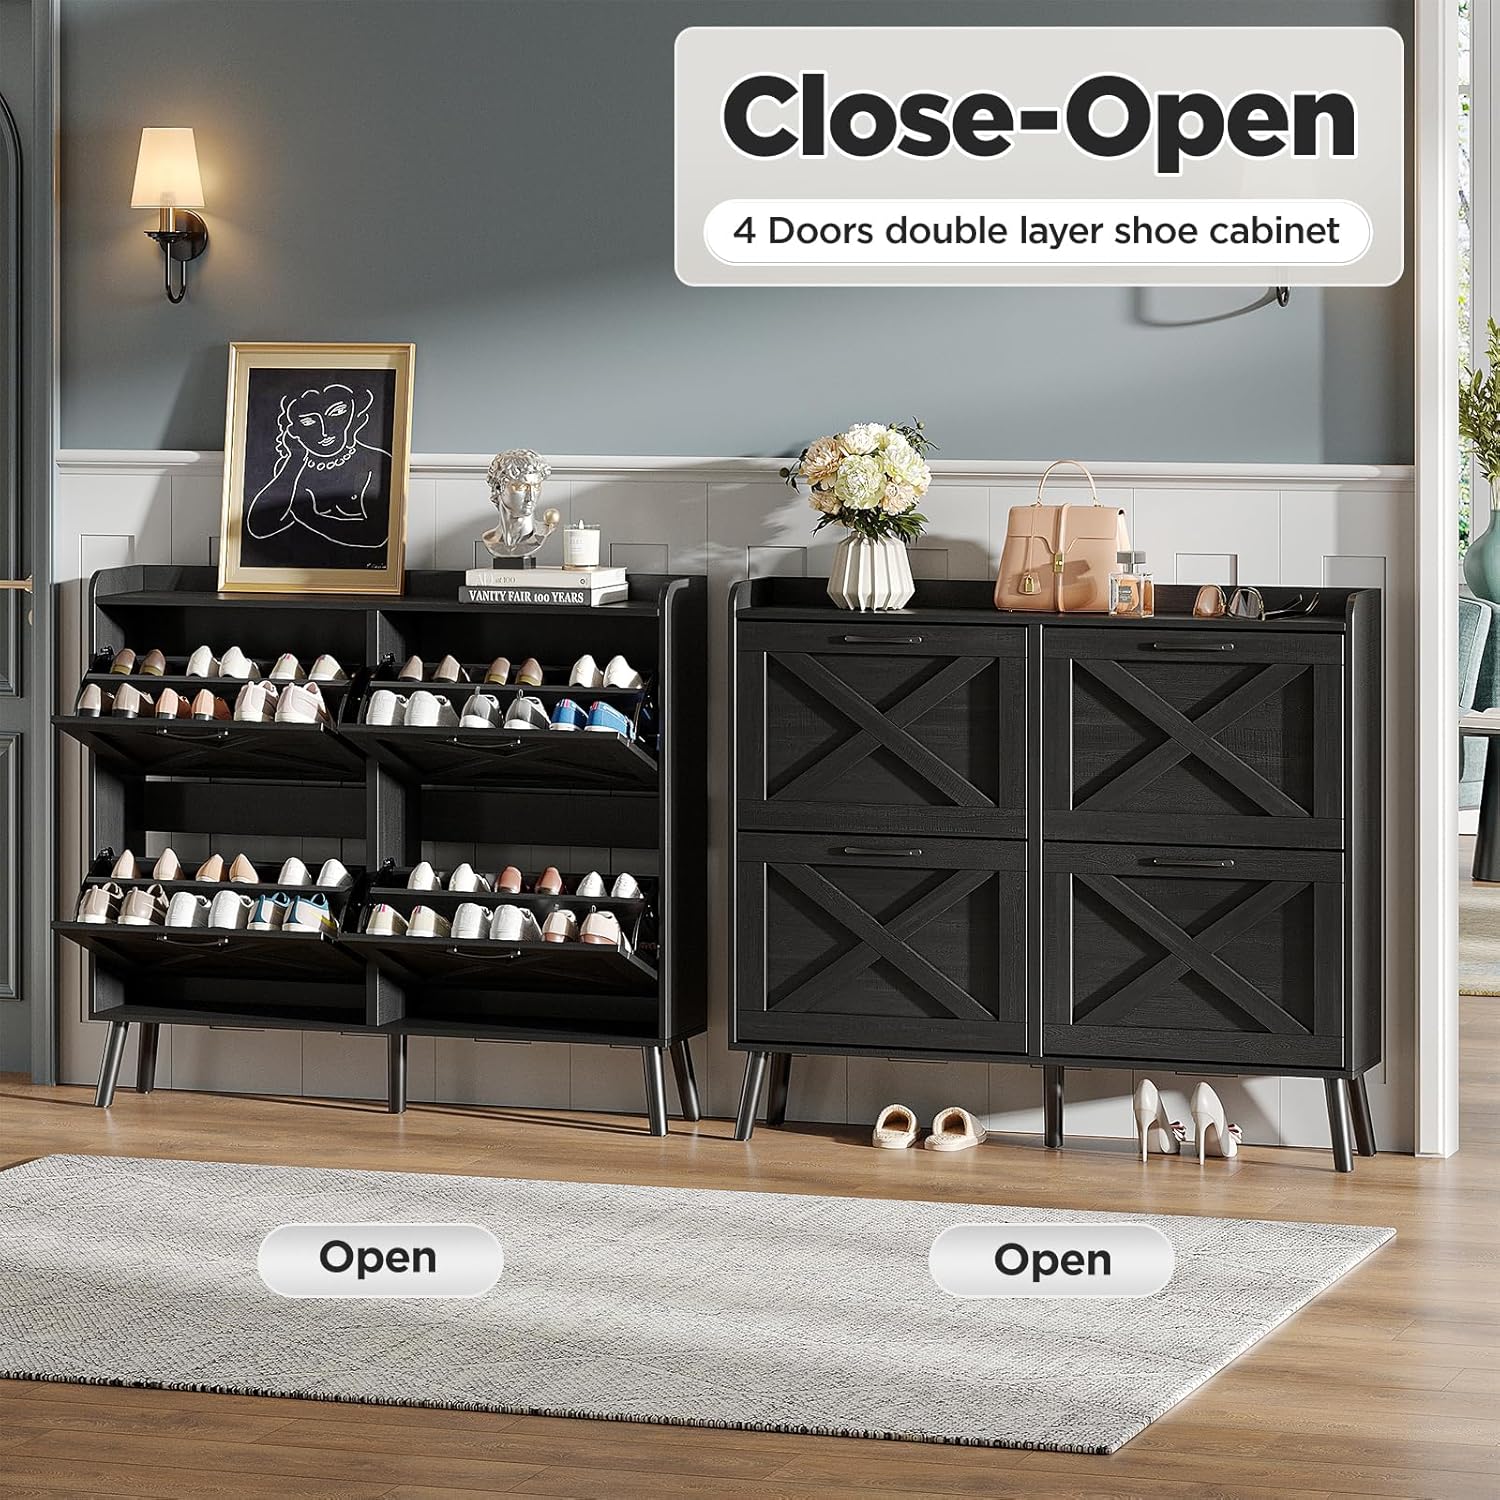
Figure 3: Safety diagram demonstrating the correct installation of the anti-tipping device to prevent accidental tipping.
Działanie
Storing Shoes
- Gently pull the metal handle of a flip drawer to open it. The drawer will tilt forward, revealing two storage compartments.
- Place shoes into the compartments. For optimal space utilization, place shoes with the toes facing inwards.
- Adjust the internal panel if necessary to accommodate taller shoes like heels or mid-boots. The panel can also be removed entirely for larger items or boots.
- To close, push the drawer back into the cabinet until it is flush with the cabinet front.
Top Surface Usage
The top surface of the cabinet features a fence to prevent items from falling. It is suitable for placing lightweight decorative items, keys, or small potted plants.

Figure 4: The shoe cabinet with its flip drawers open, showcasing the internal storage and the functional top surface.
Konserwacja i pielęgnacja
- Czyszczenie: Przetrzyj powierzchnie szafki miękką,amp szmatką. Unikaj stosowania silnych środków chemicznych lub ściernych środków czyszczących, ponieważ mogą one uszkodzić wykończenie.
- Zasypka: Regularnie przecieraj obudowę suchą, miękką ściereczką, aby zapobiec gromadzeniu się kurzu.
- Kontrola: Okresowo sprawdzaj wszystkie śruby i elementy mocujące, aby upewnić się, że są dobrze dokręcone. Dokręć je ponownie, jeśli wykryjesz jakiekolwiek luzy.
- Unikaj wilgoci: Nie należy narażać obudowy na działanie nadmiernej wilgoci lub bezpośredniego światła słonecznego, ponieważ może to spowodować odkształcenie lub blaknięcie.
Rozwiązywanie problemów
| Problem | Możliwa przyczyna | Rozwiązanie |
|---|---|---|
| Szafka jest chwiejna. | Luźne elementy złączne lub nierówna podłoga. | Ensure all screws are tightened. Adjust the cabinet's position on a level surface or use shims under the legs if necessary. Verify the anti-tipping device is securely installed. |
| Flip drawers do not open/close smoothly. | Hinges are misaligned or obstructed. | Check hinge alignment and ensure no shoes or objects are blocking the mechanism. Re-adjust hinges if needed. |
| Buty nie mieszczą się w przegródkach. | Internal panel is set too high or shoes are too bulky. | Adjust the internal panel to a lower groove or remove it entirely for larger shoes. Place shoes with toes facing inwards for maximum space. |
Specyfikacje
- Marka: Maupvit
- Model: J9P002HS0M
- Kolor: Czarny
- Wymiary produktu: 9.45" gł. x 47.24" szer. x 41.34" wys.
- Tworzywo: High-quality MDF wood, Metal legs, Metal handles
- Liczba szuflad: 4 (each with 2 layers of storage)
- Pojemność: Up to 32-40 pairs of shoes (depending on size and type)
- Typ montażu: Floor Mount (with anti-tipping wall anchor)
- Wymagany montaż: Tak
Gwarancja i wsparcie
Maupvit offers a 10-year quality commitment and lifetime maintenance for this product. For warranty claims, missing parts, or technical support, please contact Maupvit customer service through the retailer where the product was purchased or visit the official Maupvit webstrona.
Wsparcie online: Visit the Maupvit Store on Amazon