
1. Ważne informacje dotyczące bezpieczeństwa
Please read these instructions carefully before using your VonHaus Pedestal Fan. Keep this manual for future reference.
- Upewnij się, że wentylator jest umieszczony na stabilnej i równej powierzchni.
- Nie wkładaj palców ani obcych przedmiotów do kratki wentylatora.
- Keep the fan away from water or other liquids.
- Unplug the fan from the power outlet before cleaning or maintenance.
- Urządzenie to nie jest przeznaczone do użytku przez osoby (w tym dzieci) o ograniczonej sprawności fizycznej, sensorycznej lub umysłowej, a także osoby nieposiadające odpowiedniego doświadczenia lub wiedzy, chyba że znajdują się one pod nadzorem osoby odpowiedzialnej za ich bezpieczeństwo lub otrzymały od niej instrukcje dotyczące korzystania z urządzenia.
- Dzieci powinny znajdować się pod nadzorem, aby mieć pewność, że nie bawią się urządzeniem.
2. Zawartość opakowania
Przed montażem należy sprawdzić, czy wszystkie elementy są obecne.
- Fan Head Assembly (with 5 blades)
- Przednia i tylna kratka
- Słupek cokołowy (regulowana wysokość)
- Opierać
- Pilot zdalnego sterowania (z baterią)
- Instrukcja obsługi
3. Instalacja i montaż
Follow these steps to assemble your VonHaus Pedestal Fan.
- Zamontuj podstawę: Securely attach the pedestal pole to the base using the provided screws.
- Złóż głowicę wentylatora:
- Place the rear grille onto the motor housing, aligning the notches.
- Attach the fan blades to the motor shaft, ensuring they are firmly in place.
- Secure the front grille to the rear grille using the clips or screws provided, ensuring it is tightly closed.
- Mount Fan Head to Pedestal: Attach the assembled fan head to the top of the pedestal pole. Ensure it clicks into place or is secured with the locking mechanism.
- Dostosuj wysokość: Loosen the height adjustment knob on the pedestal pole, extend or retract the pole to your desired height (up to 128 cm), and then tighten the knob securely.

Image: This diagram illustrates the adjustable features of the fan, including its height range of 110-128 cm, a tilting range of +7 to -15 degrees, and an 80-degree left/right oscillation capability. The fan base is 42 cm wide.
4. Instrukcja obsługi
Your VonHaus Pedestal Fan offers multiple settings for personalized comfort.
Panel sterowania i pilot zdalnego sterowania
The fan can be operated using the touch-sensitive LED display on the unit or the included remote control.

Image: This image displays the fan's LED touch panel, which includes controls for power, speed, mode, timer, and oscillation. It also shows the remote control, which allows for convenient adjustment of all fan functions from a distance.
Włączanie/wyłączanie zasilania
Naciśnij Moc przycisk na panelu sterowania lub pilocie, aby włączyć lub wyłączyć wentylator.
Ustawienia prędkości
Wentylator posiada: Regulowane prędkości 24. Użyj + I - buttons on the control panel or remote to increase or decrease the airflow intensity.

Image: This image highlights the fan's powerful DC motor and its capability to provide 24 different airflow speeds, allowing users to select their desired cooling level. It also references a 15-hour timer function.
Tryby pracy
Wybierz z 3 programmed modes to suit your preference:
- Tryb komfortowy: Zapewnia stały, równomierny przepływ powietrza.
- Tryb naturalny: Imituje naturalny wiatr poprzez zmianę prędkości wentylatora.
- Tryb nocny: Operates at a lower speed with reduced noise (minimum 35 dB) and dims the LED display for undisturbed sleep.

Image: This image depicts the fan in a bedroom, illustrating its three programmed modes: Comfort, Natural, and Night. It emphasizes that the digital display dims in Night mode and the fan operates at a minimum noise level of 35 dB.
Oscylacja
Naciśnij Oscylacja button to activate or deactivate the 80° left-to-right oscillation feature, distributing air across a wider area.
Funkcja timera
The fan includes a 15-godzinny timer. Naciśnij Regulator czasowy button repeatedly to set the desired operating duration in 1-hour increments. The fan will automatically turn off after the set time.
Regulowany kąt nachylenia
Manually adjust the fan head's vertical tilt within a range of +7° to -15° to direct airflow precisely where needed.
5. Konserwacja
Regularne czyszczenie i konserwacja zapewnią optymalną wydajność i długowieczność wentylatora.
Czyszczenie
- Zawsze odłączaj wentylator od zasilania przed czyszczeniem.
- Użyj miękkiego, damp Do przecierania powierzchni zewnętrznych należy używać ściereczki. Nie należy używać środków czyszczących o właściwościach ściernych ani rozpuszczalników.
- To clean the fan blades, carefully remove the front grille (refer to assembly instructions for reverse steps). Wipe the blades with a damp cloth. Ensure blades are dry before reattaching the grille.
- Nie zanurzaj wentylatora w wodzie ani nie pozwól, aby woda kapała do obudowy silnika.
Składowanie
Jeśli wentylator nie będzie używany przez dłuższy czas, należy go przechowywać w chłodnym i suchym miejscu, najlepiej w oryginalnym opakowaniu, aby uchronić go przed kurzem i uszkodzeniami.
6. Rozwiązywanie Problemów
Jeśli masz jakiekolwiek problemy z wentylatorem, zapoznaj się z poniższymi, często spotykanymi problemami i ich rozwiązaniami.
- Wentylator nie włącza się:
- Sprawdź, czy przewód zasilający jest prawidłowo podłączony do sprawnego gniazdka elektrycznego.
- Sprawdź, czy przycisk zasilania został naciśnięty.
- Verify that the remote control battery is not depleted.
- Słaby przepływ powietrza:
- Zwiększ ustawienie prędkości.
- Upewnij się, że kratka i łopatki wentylatora są czyste i nie ma na nich nagromadzonego kurzu.
- Check for any obstructions blocking the airflow.
- Wentylator jest głośny:
- Upewnij się, że wentylator jest umieszczony na stabilnej i równej powierzchni.
- Check if any parts are loose or vibrating. Tighten if necessary.
- Clean the fan blades and grilles to remove any debris that might cause imbalance.
- Pilot nie działa:
- Wymień baterię w pilocie.
- Upewnij się, że nie ma żadnych przeszkód między pilotem a odbiornikiem wentylatora.
- Point the remote directly at the fan's control panel.
If the problem persists after trying these solutions, please contact VonHaus customer support.
7. Specyfikacje
| Funkcja | Szczegół |
|---|---|
| Numer modelu | 8100085 |
| Marka | Dom |
| Wymiary (dł. x szer. x wys.) | Wymiary 42 x 42 x 128 cm |
| Waga | 6.22 kilogramów |
| Moc | 50 watów |
| Liczba prędkości | 24 |
| Tryby pracy | 3 (Comfort, Natural, Night) |
| Oscylacja | 80° (Left/Right) |
| Regulacja nachylenia | +7° / -15° |
| Regulator czasowy | Do 15 godzin |
| Metoda kontroli | Pilot zdalnego sterowania, panel dotykowy |
| Liczba ostrzy | 5 |
| Tworzywo | Metal |
| Kolor | Biały |
| Do użytku wewnątrz/na zewnątrz | Wnętrz |
| Zawarte komponenty | Zdalne sterowanie |
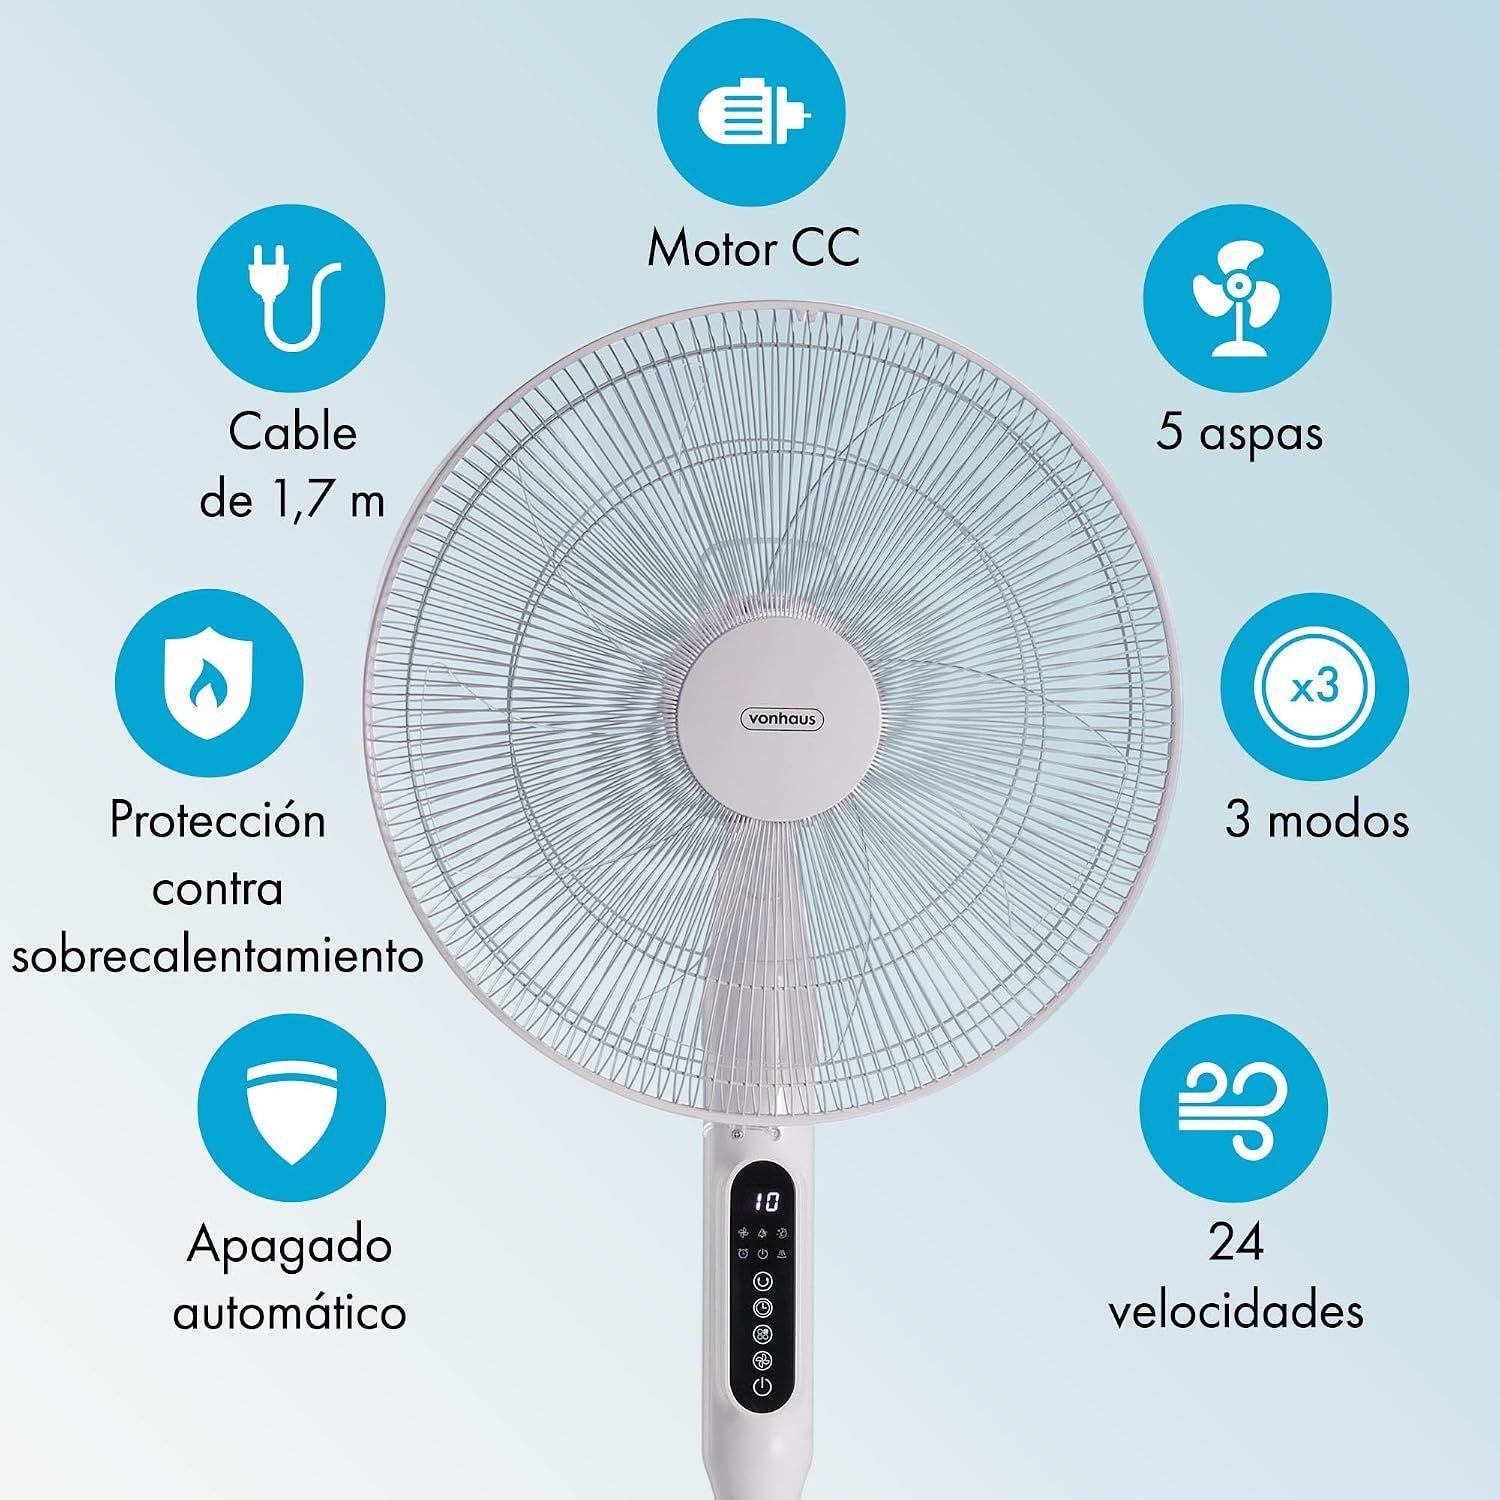
Image: This graphic summarizes the fan's main features, including a DC motor, 5 blades, 3 operating modes, 24 speeds, 1.7m cable, overheat protection, and automatic shut-off.
8. Gwarancja i wsparcie
All VonHaus products come with a minimum 2-letnia gwarancja. This warranty covers manufacturing defects and ensures that we are available to assist you if any issues arise with your product.
For technical support, troubleshooting assistance, or warranty claims, please contact VonHaus customer service through the retailer where you purchased the product or visit the official VonHaus webwitryna do informacji kontaktowych.
Prosimy zachować dowód zakupu w celach gwarancyjnych.