Wstęp
This manual provides essential information for the installation, operation, and maintenance of your new Mini PC CPU Fan, specifically designed for the ACEPC AK2 Mini PC. Please read this manual thoroughly before installation to ensure proper function and longevity of the product.
Informacje dotyczące bezpieczeństwa
- Always disconnect power from the Mini PC before installing or removing the fan.
- Handle the fan by its edges to avoid damaging the blades or electronic components.
- Należy zadbać o prawidłowe uziemienie, aby zapobiec uszkodzeniom wrażliwych podzespołów spowodowanym wyładowaniami elektrostatycznymi (ESD).
- Trzymaj małe części poza zasięgiem dzieci.
- Do not attempt to modify the fan or its wiring. This may void the warranty and cause damage.
Produkt ponadview
The Mini PC CPU Fan for ACEPC AK2 is a compact cooling solution designed to maintain optimal operating temperatures for your Mini PC's central processing unit. It features a blower-style design with a 3-pin or 4-pin power connector for compatibility.
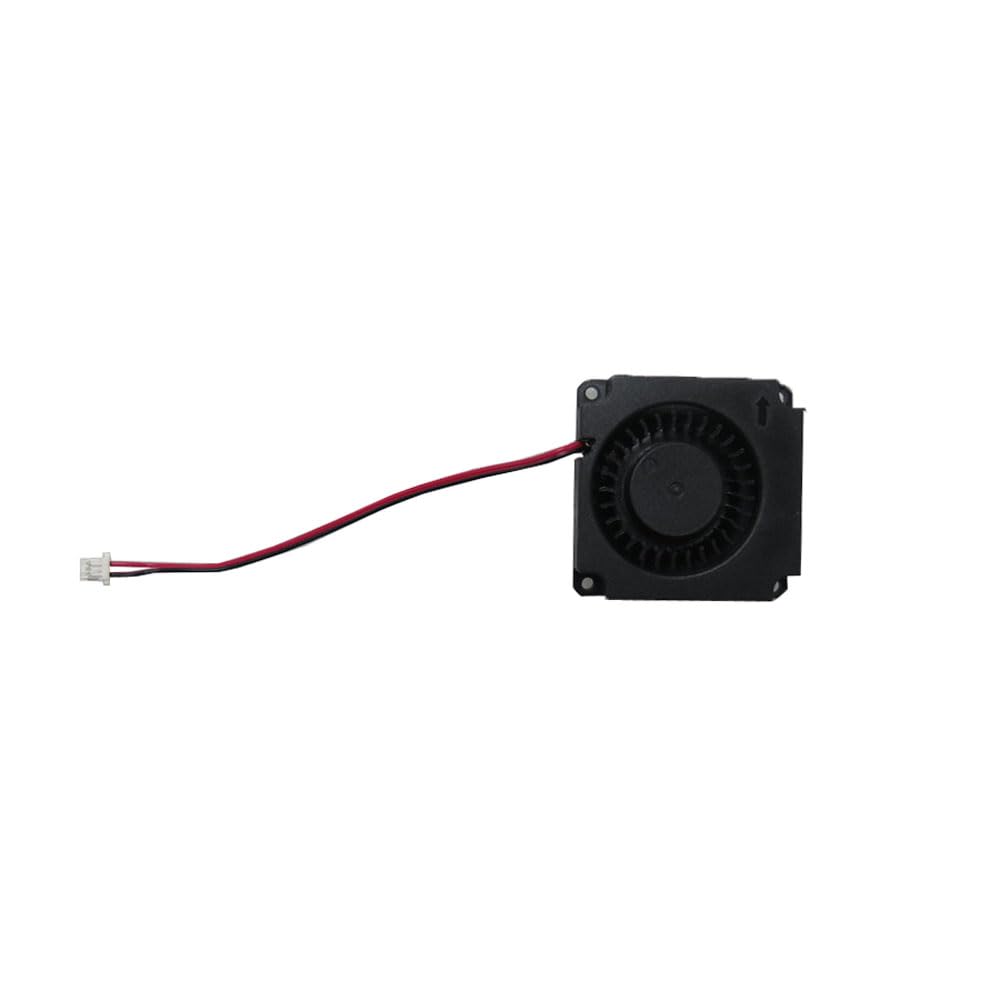
Rysunek 1: Nadview of the Mini PC CPU Fan. This image shows the compact black fan unit with its attached red and black wires leading to a white 3-pin or 4-pin connector.
Konfiguracja i instalacja
Follow these steps carefully to install the CPU fan into your ACEPC AK2 Mini PC:
- Przygotuj Mini PC: Ensure the Mini PC is powered off and unplugged from the wall outlet.
- Otwórz Casing: Ostrożnie otwórz casing of your ACEPC AK2 Mini PC according to its specific service manual or instructions. This usually involves removing screws from the bottom or back panel.
- Locate the CPU Fan Slot: Identify the existing CPU fan or the designated mounting area for the new fan.
- Remove Old Fan (if applicable): If replacing an old fan, gently disconnect its power cable from the motherboard and unscrew any mounting screws. Carefully lift the old fan out.
- Zainstaluj nowy wentylator: Position the new Mini PC CPU Fan in the designated slot. Ensure the airflow direction (often indicated by an arrow on the fan housing) is correct for optimal cooling.
- Zabezpiecz wentylator: Use the appropriate screws to secure the fan to the Mini PC's chassis or motherboard. Do not overtighten.
- Podłącz zasilanie: Carefully connect the fan's 3-pin or 4-pin power connector to the corresponding fan header on the Mini PC's motherboard. Ensure the connector is fully seated and oriented correctly.
- Zamknij Casing: Carefully reassemble the Mini PC's casing, ensuring all screws are replaced and the case is securely closed.
- Funkcjonalność testu: Plug in and power on the Mini PC. Verify that the new CPU fan spins and operates quietly. Monitor CPU temperatures to confirm effective cooling.
Instrukcja obsługi
Once installed, the Mini PC CPU Fan operates automatically, controlled by the Mini PC's motherboard based on CPU temperature. No manual intervention is typically required for its operation.
- Ensure adequate ventilation around your Mini PC to allow for efficient heat dissipation.
- Avoid blocking the air intake or exhaust vents of the Mini PC.
Konserwacja
Regular maintenance helps ensure the longevity and efficiency of your CPU fan:
- Usuwanie kurzu: Periodically (e.g., every 3-6 months), power off and unplug your Mini PC. Open the casing and use compressed air to gently blow dust out of the fan blades and heatsink fins. Hold the fan blades to prevent them from spinning rapidly during cleaning, which can damage the bearings.
- Kontrola: Visually inspect the fan for any signs of damage, loose wires, or excessive dust buildup.
- Do not use liquid cleaners directly on the fan or internal components.
Rozwiązywanie problemów
| Problem | Możliwa przyczyna | Rozwiązanie |
|---|---|---|
| Wentylator nie kręci się |
|
|
| Wentylator wydaje nietypowy dźwięk |
|
|
| Mini PC overheating |
|
|
Specyfikacje
| Numer modelu | AK2 |
| Marka | Ogólny |
| Wymiary produktu | 11.81 x 7.87 x 3.94 cala; 1.32 funta |
| Typ złącza zasilania | 3-Pin or 4-Pin |
| Metoda chłodzenia | Wymuszony obieg powietrza |
| Kompatybilne urządzenia | Desktop (specifically ACEPC AK2 Mini PC) |
| Opis przedmiotu | Laptop Parts (as per product listing, though it's for Mini PC) |
Informacje o gwarancji
Ten produkt jest dostarczany z 90-dniowa gwarancja from the date of purchase. This warranty covers defects in materials and workmanship under normal use. For warranty claims, please retain your proof of purchase.
Dodatkowo, 30-dniowa polityka zwrotu/wymiany may apply as per the seller's terms. Please refer to your purchase platform for specific return instructions.
Obsługa klienta
For technical assistance, troubleshooting beyond this manual, or warranty inquiries, please contact the seller or manufacturer directly. The seller for this product is Gaocheng NBpart.
Please have your product model number (AK2) and purchase details ready when contacting support.