
1. Wprowadzenie
This manual provides detailed instructions for the installation, operation, and maintenance of your NAOEVO 4 Inch LED Pod Lights. Please read this manual thoroughly before installation and use to ensure proper function and safety. These LED pod lights are designed for various applications, including off-road vehicles, trucks, boats, ATVs, and UTVs, providing enhanced illumination with a spot and flood combo beam pattern.
2. Co znajduje się w pudełku
Przed rozpoczęciem instalacji sprawdź, czy wszystkie komponenty są obecne.
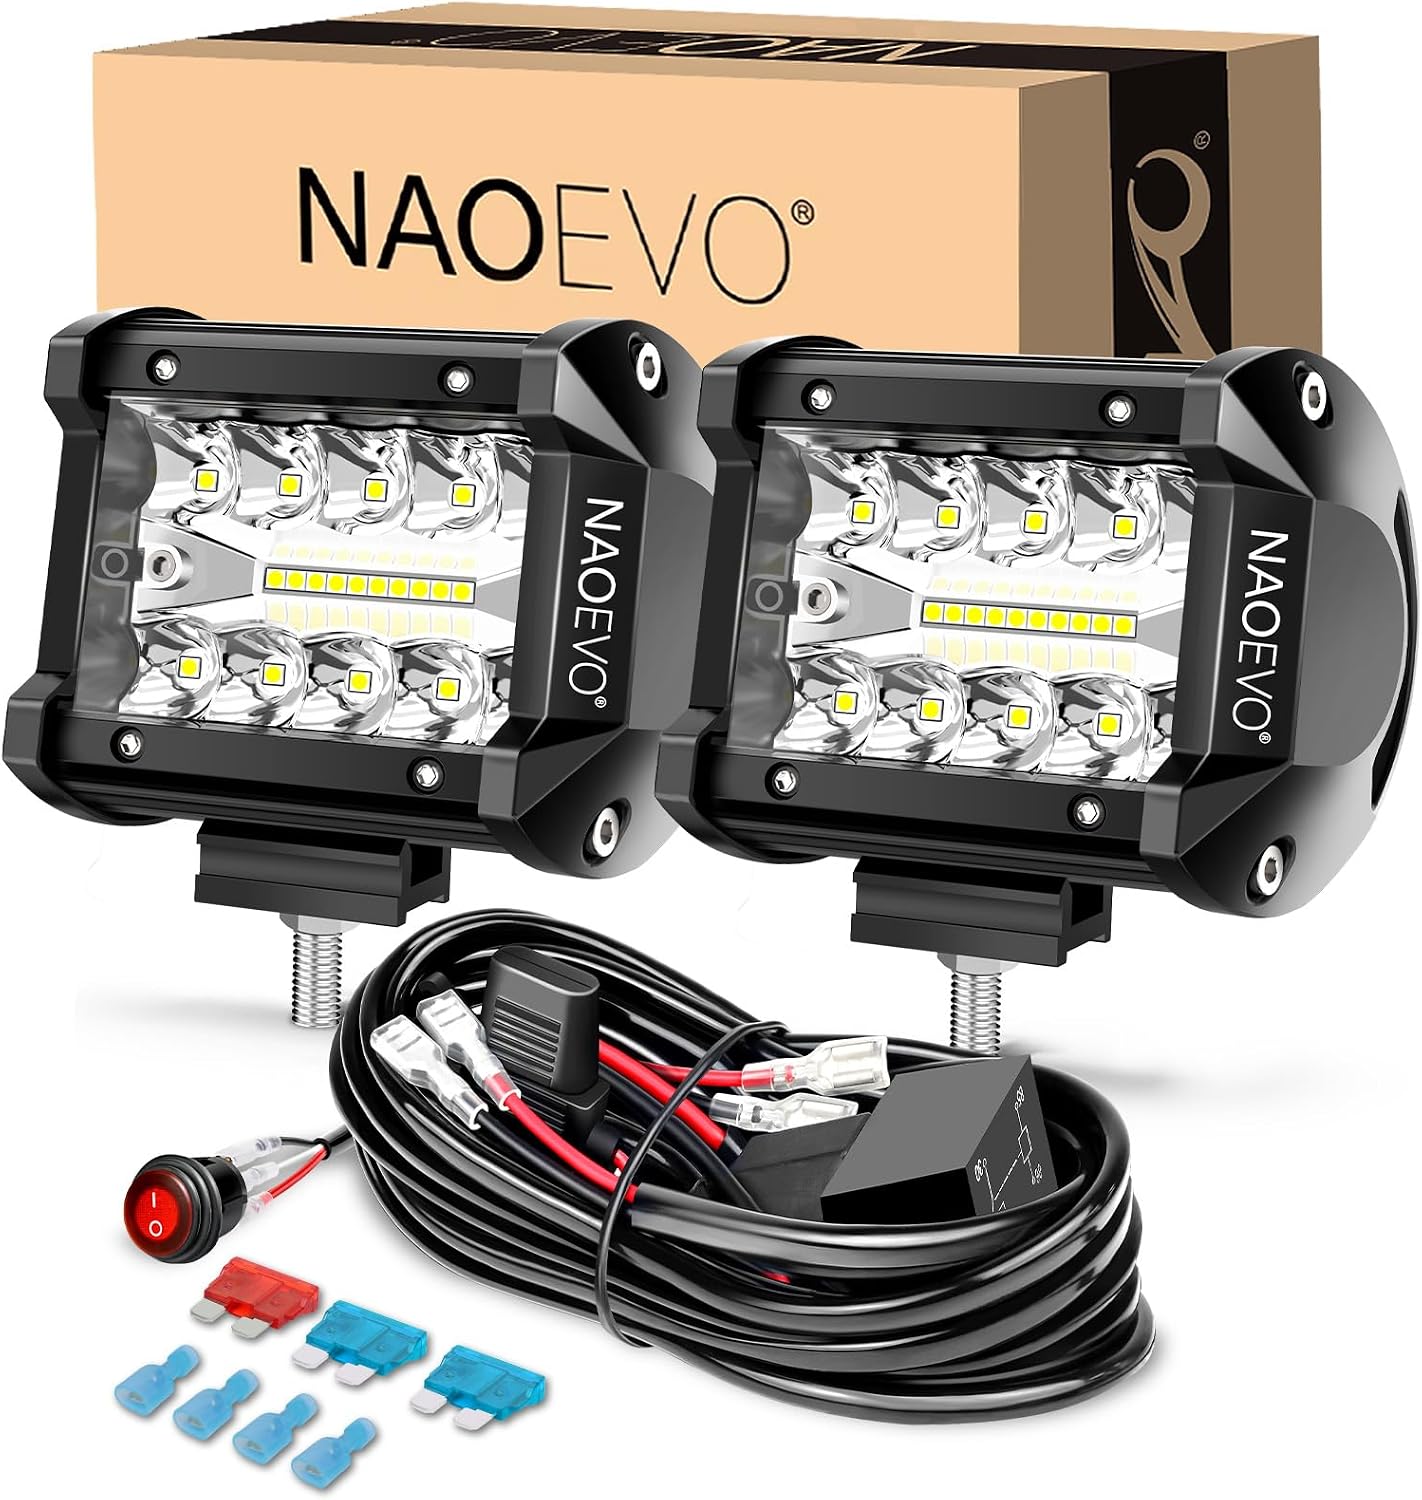
Image: Contents of the NAOEVO 4 Inch LED Pod Lights package, showing two LED pod lights, a wiring harness with switch and relay, and various installation accessories.
- 1 Pair (2 Pcs) 4 Inch LED Light Pods
- 1 Set 10ft Wiring Harness (includes 40A power relay, inline blade fuses, and toggle switch)
- 1 Set Installation Parts (brackets, screws, nuts)
- Spare Male Connectors
- Extra Blade Fuses
3. Funkcje produktu
- Spot Flood Combo Beam Pattern: Features a 15° spotlight beam for focused, long-range visibility and a 120° floodlight beam for broader coverage. This combination provides versatile lighting for various driving conditions.
- High Brightness LED Chips: Each 4-inch LED cube light utilizes 20 high-end SMD3030 LED chips, emitting a bright 6500K white light for effective darkness penetration.
- Trwała konstrukcja: Features an aluminum housing and advanced sealing technology, achieving an IP68 waterproof rating. Equipped with a long-lasting PC lens to withstand harsh environmental conditions.
- Efektywne odprowadzanie ciepła: Incorporates 10 cooling fins for effective heat dissipation, extending the lifespan of the lights up to 50,000 hours.
- Kompletna wiązka okablowania: Includes a 10ft, 2-lead wiring harness with a 40A power relay, inline blade fuses, and a toggle switch for easy and safe installation.
- Regulowany uchwyt montażowy: The 45° adjustable irradiation bracket allows for precise adjustment of the light beam direction.

Image: Illustration of the spot and flood beam patterns, highlighting the 15-degree spotlight for distance and 120-degree floodlight for wide area illumination.

Obraz: Szczegółowy view of the LED chips inside the light pod, indicating 20 high-intensity SMD3030 LED chips per unit.

Image: Diagram illustrating the waterproof design of the LED pod light, including the aluminum housing, rubber pads, and sealed PC lens, ensuring IP68 water resistance.

Image: Illustration of the heat dissipation system, showing 10 cooling fins designed to maintain optimal operating temperature and extend product life.

Image: The complete 10ft 2-lead wiring harness, featuring a toggle switch, 40A relay, and inline blade fuses for comprehensive protection.

Obraz: Szczegółowy view of the adjustable bracket, demonstrating how it allows for 45-degree angle adjustments for optimal light positioning.
4. Specyfikacje
| Funkcja | Specyfikacja |
|---|---|
| Pozycja Wymiary (dł. x szer. x wys.) | 4 x 2.6 x 4 cala |
| Marka | NAOEVO |
| Kolor | Biały |
| Automatyczne położenie części | Przód |
| Funkcja specjalna | Spot Flood Combo beam pattern, efficient heat dissipation with 10 cooling fans |
| Waga przedmiotu | 1.5 funtów |
| Tworzywo | Aluminium |
| Poziom wodoodporności | Wodoodporny (IP68) |
| Liczba sztuk | 2 |
| Numer modelu przedmiotu | 4 Inch Led Light Pods |
| Kształt | Kwadrat |
| Konkretne zastosowania | Fog Lights, Off Road, Driving |
5. Konfiguracja i instalacja
5.1 Środki ostrożności
- Przed rozpoczęciem jakichkolwiek prac elektrycznych należy odłączyć akumulator pojazdu.
- Aby zapobiec zwarciom, należy upewnić się, że wszystkie połączenia są solidne i właściwie zaizolowane.
- Mount lights in a location that does not obstruct the driver's view or interfere with vehicle safety systems.
- Jeśli masz wątpliwości co do jakiegokolwiek etapu procesu instalacji, skonsultuj się ze specjalistą.
5.2 Schemat okablowania
The included wiring harness is designed to connect two LED lights simultaneously. Follow the diagram below for correct electrical connections.

Image: Detailed wiring diagram showing connections from the battery to the relay, switch, and then to the two LED light pods. Labels indicate wire lengths for different sections.
- Connect the main power wire (red, labeled 1) from the harness to the positive terminal of your vehicle's battery.
- Connect the ground wire (black) from the harness to the negative terminal of your vehicle's battery or a suitable chassis ground point.
- Mount the toggle switch (labeled 2) in a convenient location within the vehicle's cabin.
- Connect the two output leads (labeled 3 and 4) from the harness to your LED light pods. Ensure the positive and negative terminals match.
- Secure all wiring using cable ties to prevent chafing or interference with moving parts.
5.3 Montaż świateł
Use the provided adjustable brackets and hardware to mount the LED pod lights securely.
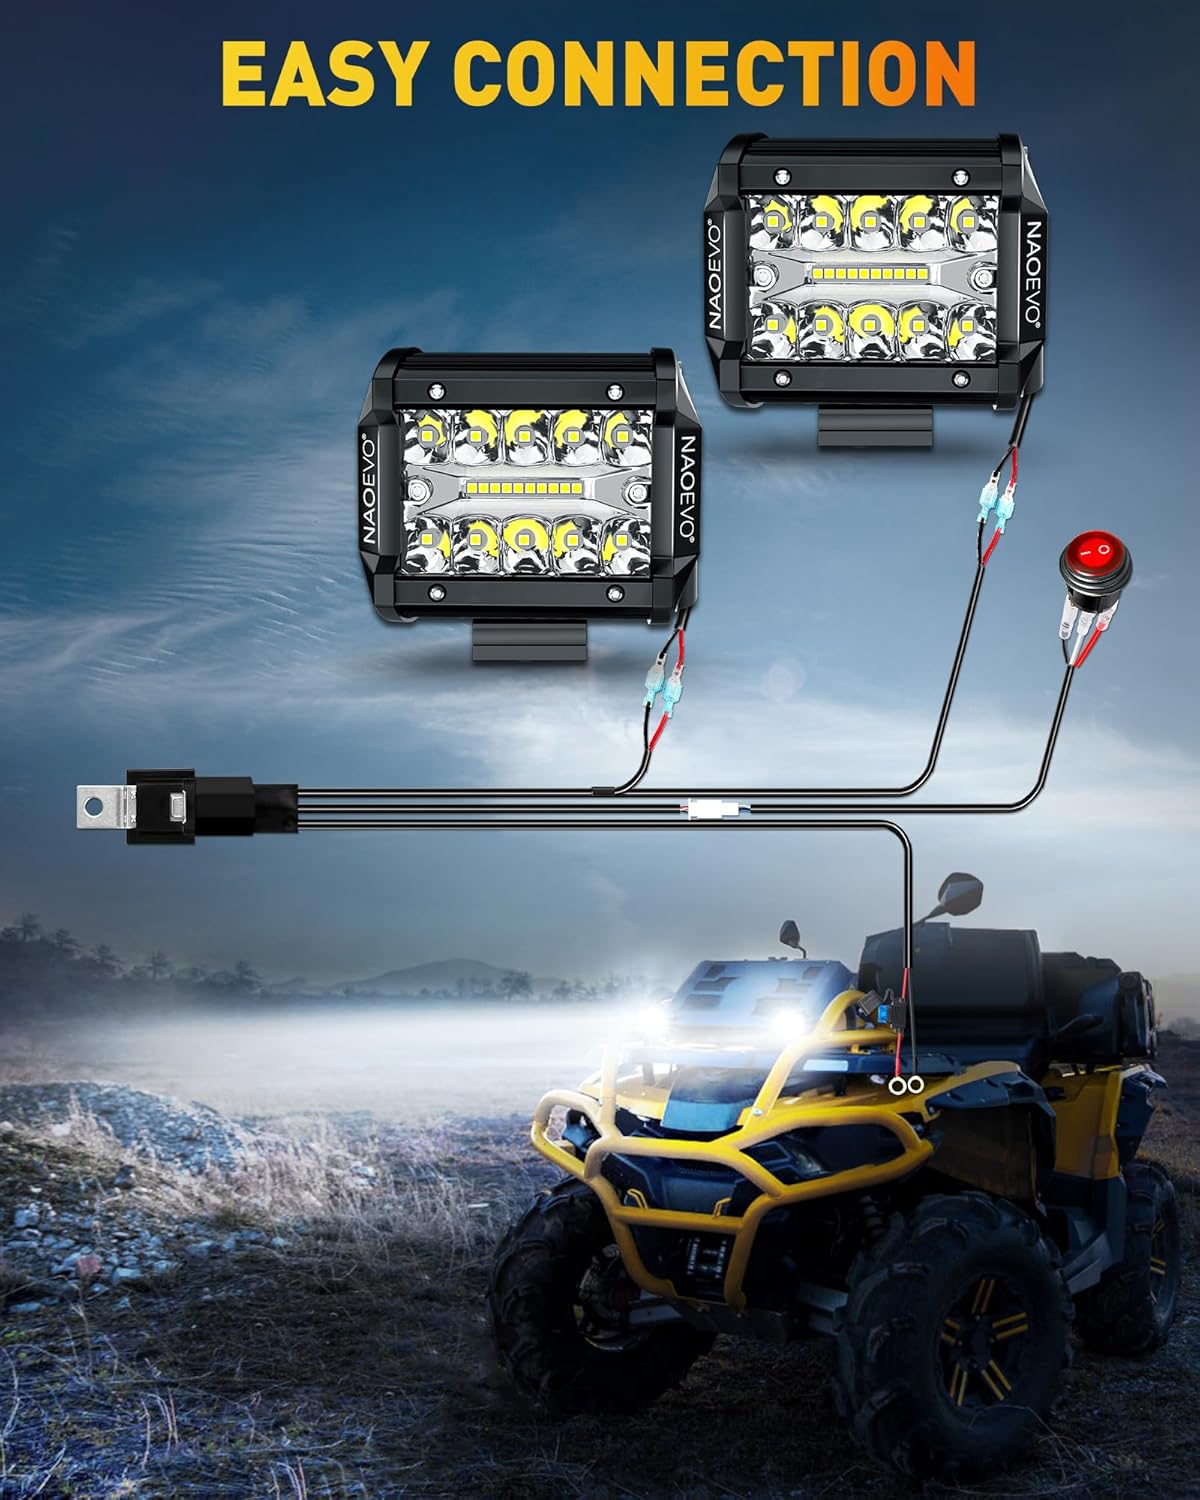
Obraz: Byłyample of LED pod lights installed on an ATV, demonstrating a typical mounting scenario and wiring connection.
- Attach the mounting brackets to the LED pod lights using the supplied screws.
- Choose a suitable mounting location on your vehicle (e.g., bumper, roof rack, ditch light brackets).
- Secure the brackets to the vehicle using appropriate bolts and nuts.
- Adjust the angle of the lights using the 45° adjustable bracket to achieve the desired beam direction. Tighten all fasteners once the desired angle is set.
6. Instrukcja obsługi
Once installed, operate the LED pod lights using the included toggle switch.
- Turn the ignition key to the 'ON' position (or ensure battery power is available).
- Press the toggle switch to turn the LED pod lights ON. The switch will illuminate to indicate the lights are active.
- Press the toggle switch again to turn the LED pod lights OFF.

Image: Details of the ON/OFF toggle switch, showing its design and red indicator light when active.
7. Konserwacja
Regular maintenance ensures optimal performance and longevity of your LED pod lights.
- Czyszczenie: Periodically clean the lens with a soft cloth and mild soap and water. Avoid abrasive cleaners that could scratch the lens.
- Kontrola: Regularly check all wiring connections for corrosion or damage. Ensure mounting hardware remains tight.
- Wymiana bezpiecznika: If the lights stop working, check the inline blade fuse in the wiring harness. Replace with a fuse of the same rating if blown.
8. Rozwiązywanie Problemów
| Problem | Możliwa przyczyna | Rozwiązanie |
|---|---|---|
| Światła się nie włączają | No power to the harness, blown fuse, loose connection, faulty switch | Check battery connections, inspect and replace fuse if necessary, verify all wiring connections are secure, test the switch. |
| Światła migoczą lub są słabe | Poor ground connection, insufficient power, loose wiring | Ensure a solid ground connection, check battery voltage, tighten all wiring connections. |
| Wilgoć wewnątrz soczewki | Seal compromise, extreme temperature changes | If minor condensation, it may dissipate. If persistent or significant, contact support for assistance. |
9. Gwarancja i pomoc techniczna
NAOEVO stands behind its products. If you encounter any issues with your LED light bar, please contact NAOEVO customer support for assistance. Refer to your purchase documentation for specific warranty terms and duration.
For support, please visit the official NAOEVO store or contact their customer service through the platform where the product was purchased.
NAOEVO Store Link: Visit the NAOEVO Store on Amazon
10. Zastosowanie
These LED pod lights are versatile and suitable for a wide range of vehicles and uses.

Obraz: Byłyamples of diverse applications for the LED pod lights, such as off-road driving, marine use, heavy machinery, and general outdoor illumination.
- Off-road vehicles (Jeeps, SUVs)
- Ciężarówki
- ATVs and UTVs
- Boats and marine vessels
- Heavy-duty equipment
- Światła robocze
- Camping and outdoor lighting