
Wstęp
Dziękujemy za zakupasing the RAF Garment Steamer R.3037. This manual provides essential information for the safe and efficient operation, maintenance, and troubleshooting of your new appliance. Please read these instructions carefully before use and retain them for future reference.
Ważne instrukcje bezpieczeństwa
Aby zmniejszyć ryzyko pożaru, porażenia prądem lub obrażeń, zawsze przestrzegaj podstawowych zasad bezpieczeństwa podczas korzystania z urządzeń elektrycznych. Obejmuje to:
- Read all instructions before using the garment steamer.
- Używaj urządzenia wyłącznie zgodnie z jego przeznaczeniem opisanym w niniejszej instrukcji.
- Nie zanurzaj steamera w wodzie ani innych płynach.
- Always unplug the steamer from the electrical outlet when filling with water, emptying, or when not in use.
- Nie należy używać parownicy, jeśli przewód zasilający lub wtyczka są uszkodzone, ani jeśli urządzenie upadło lub uległo uszkodzeniu.
- Keep the steam hose and nozzle away from children and pets.
- Never direct steam at people or animals. Steam is hot and can cause burns.
- Należy zachować ostrożność podczas obchodzenia się z gorącymi częściami, gorącą wodą lub parą.
- Do not use extension cords unless absolutely necessary. If an extension cord is used, it must be rated for the appliance's power.
- Store the appliance indoors in a cool, dry place when not in use.
Składniki produktu
Familiarize yourself with the parts of your RAF Garment Steamer R.3037:
- Main Steamer Unit (Base)
- Zbiornik na wodę
- Wąż parowy
- Dysza parowa
- Regulowany słupek podporowy
- Garment Hanger Attachment
- Przewód zasilający i wtyczka
- Power Switch/Dial
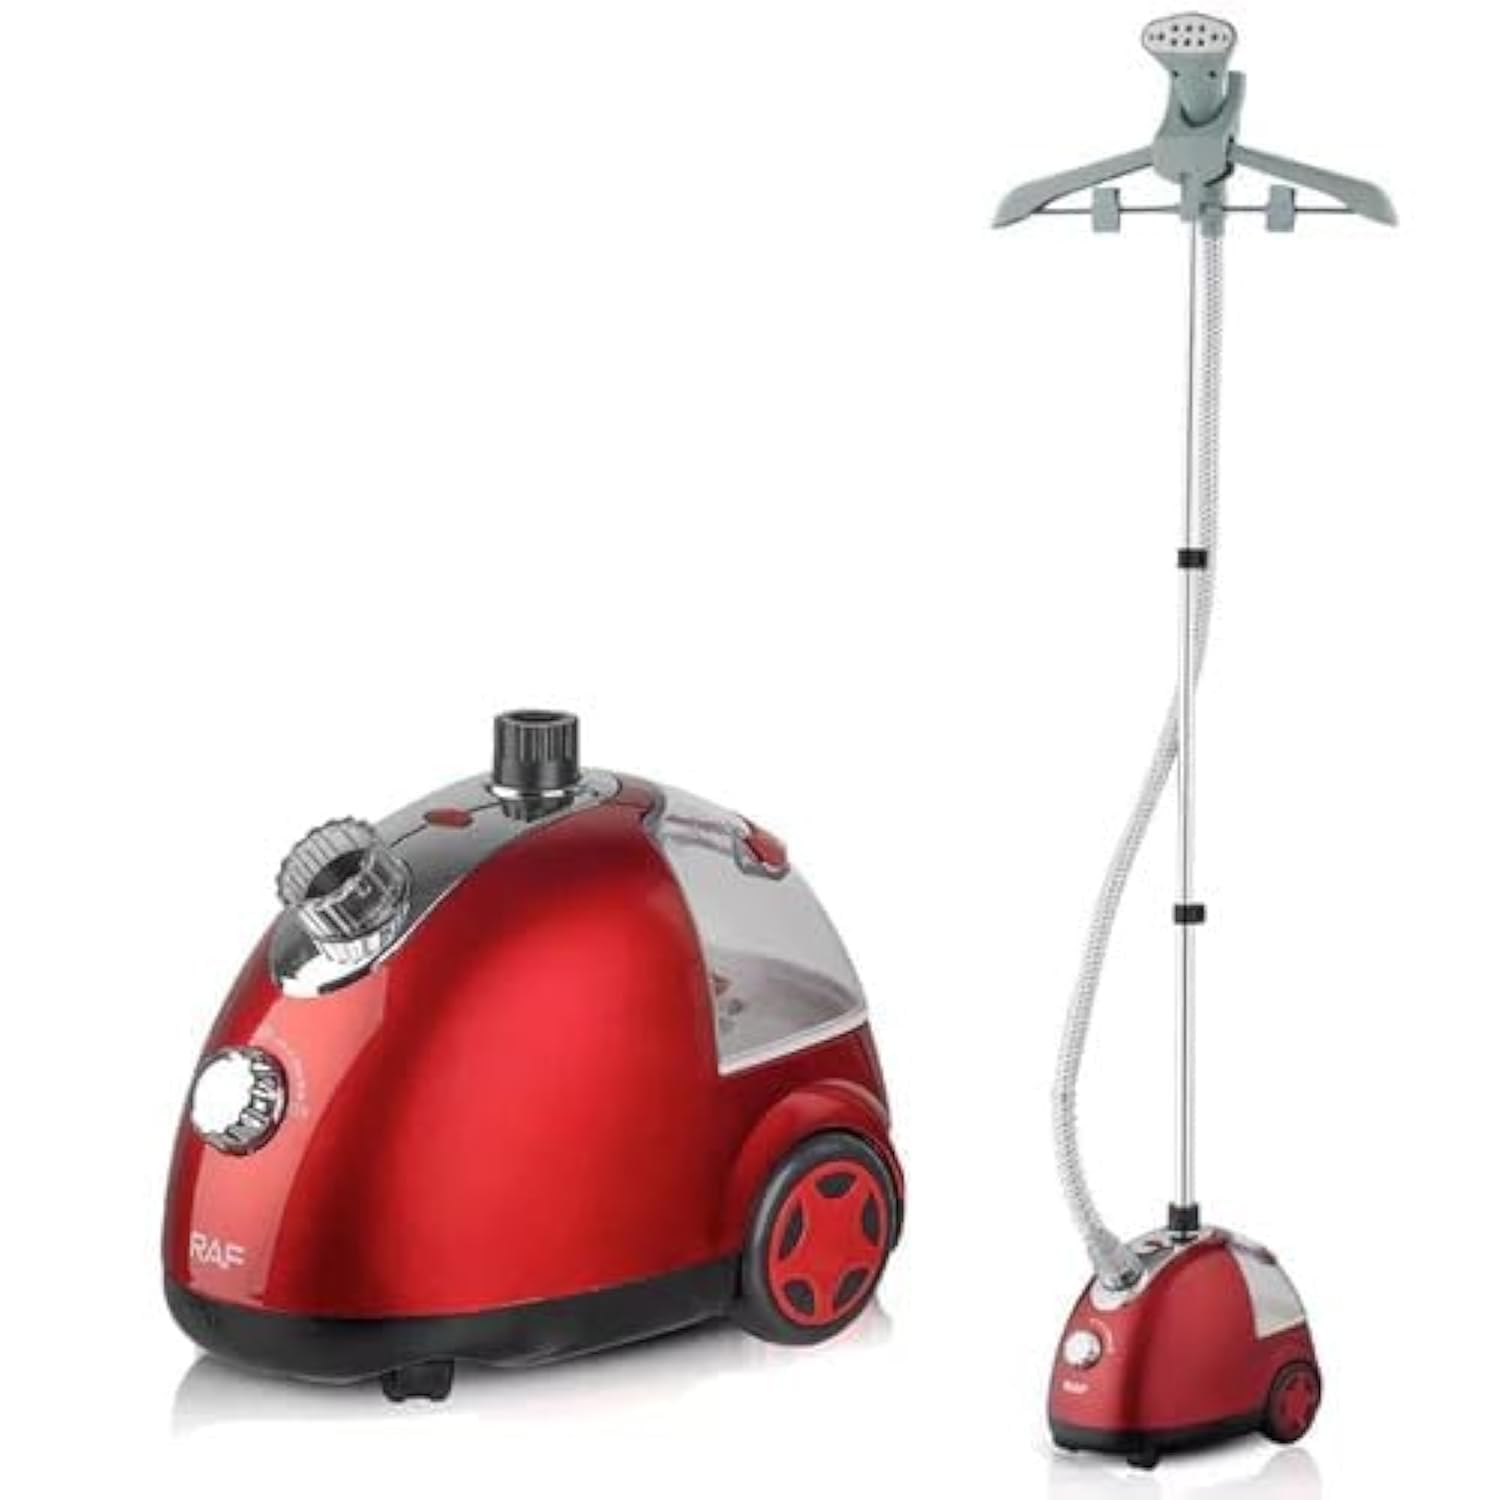
Obraz: Ponadview of the RAF Garment Steamer R.3037, showing the main unit, adjustable pole, and garment hanger.
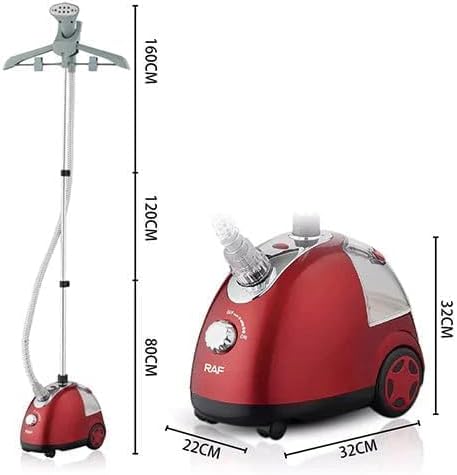
Obraz: Szczegółowy view of the steamer unit and stand, illustrating key components and approximate dimensions.
Przewodnik po konfiguracji
Follow these steps to assemble and prepare your garment steamer for first use:
- Rozpakować: Ostrożnie wyjmij wszystkie elementy z opakowania. Zachowaj opakowanie do przechowywania lub transportu w przyszłości.
- Złóż słup: Insert the adjustable support pole into the designated slot on the main steamer unit. Ensure it is securely locked in place.
- Zamontuj wieszak: Slide the garment hanger attachment onto the top of the adjustable pole.
- Podłącz wąż: Dokładnie podłącz wąż parowy do wylotu pary w jednostce głównej. Upewnij się, że połączenie jest szczelne, aby zapobiec wyciekaniu pary.
- Napełnij zbiornik na wodę: Remove the water tank from the main unit. Open the cap and fill with distilled or demineralized water up to the MAX fill line. Do not overfill. Replace the cap and reinsert the water tank into the main unit, ensuring it clicks into place.
- Pozycja parowca: Place the steamer on a flat, stable surface. Ensure the power cord can reach an electrical outlet without being stretched.
Instrukcja obsługi
Once assembled and filled, your garment steamer is ready for use:
- Włączać do kontaktu: Podłącz przewód zasilający do uziemionego gniazdka elektrycznego 220 V, 50 Hz.
- Włączanie: Turn the power switch or dial to the "ON" position. The indicator light will illuminate, signaling that the steamer is heating up.
- Ogrzewanie wstępne: Allow the steamer to preheat for approximately 45-60 seconds, or until steam begins to emit steadily from the nozzle.
- Przygotuj ubranie: Hang the garment you wish to steam on the provided hanger. Gently pull the fabric taut with one hand.
- Prasowanie odzieży parą: Hold the steam nozzle a few inches away from the fabric. Move the nozzle slowly up and down the garment, allowing the steam to penetrate the fibers and release wrinkles. For stubborn wrinkles, you may gently press the nozzle against the fabric.
- Refill Water (if needed): If the water tank runs dry, the steamer will stop producing steam. Turn off the steamer, unplug it, and allow it to cool for a few minutes before refilling the water tank.
- Zakończenie gotowania na parze: Once you have finished steaming, turn the power switch or dial to the "OFF" position and unplug the steamer from the outlet.
Wskazówki dotyczące uzyskania najlepszych wyników:
- Zawsze należy najpierw przetestować środek w niewidocznym fragmencie tkaniny.
- For delicate fabrics, hold the nozzle further away.
- Steam from the inside of the garment for a smoother finish on certain materials.
Konserwacja i pielęgnacja
Proper maintenance ensures the longevity and optimal performance of your steamer:
- Pusty zbiornik na wodę: After each use, allow the steamer to cool completely. Remove the water tank and empty any remaining water. This prevents mineral buildup.
- Czysty wygląd zewnętrzny: Wipe the exterior of the steamer unit and nozzle with a soft, damp ściereczka. Nie używaj środków czyszczących o właściwościach ściernych.
- Odkamienianie (co miesiąc): To prevent mineral buildup, especially if using tap water, descale the steamer monthly. Mix equal parts white vinegar and water, fill the tank, and run the steamer until half the solution is used. Turn off, unplug, let cool, then empty and rinse thoroughly with fresh water. Repeat with fresh water to flush out any vinegar residue.
- Składowanie: Store the steamer in a cool, dry place. Ensure the hose is not kinked or bent sharply during storage.
Rozwiązywanie problemów
Aby zapoznać się z typowymi problemami i ich rozwiązaniami, zapoznaj się z poniższą tabelą:
| Problem | Możliwa przyczyna | Rozwiązanie |
|---|---|---|
| Brak pary lub bardzo mała ilość pary. | Water tank empty; Steamer not heated sufficiently; Mineral buildup. | Refill water tank; Allow more time to preheat; Descale the steamer. |
| Wyciek wody z dyszy. | Overfilled water tank; Condensation in hose; Hose not securely attached. | Do not overfill water tank; Hold hose upright to drain condensation; Re-attach hose securely. |
| Parowar się nie włącza. | Not plugged in; Power outlet not working; Faulty power cord/plug. | Ensure plug is fully inserted; Test outlet with another appliance; Contact customer support if cord/plug is damaged. |
| Garment still wrinkled after steaming. | Not enough steam; Steaming too quickly; Fabric type. | Ensure full steam output; Move nozzle slower; Some fabrics require more passes or different techniques. |
Dane techniczne
| Funkcja | Szczegół |
|---|---|
| Marka | Królewskie Siły Powietrzne |
| Numer modelu | 3037 zł |
| Moc | 1700 watów |
| Tomtage | 220 wolty |
| Częstotliwość | 50 Hz |
| Kolor | Czerwony |
| Cechy specjalne | Lightweight, Efficient Wrinkle Removal |
| Waga przedmiotu | 600 gramów |
| Wymiary wysyłkowe | Wymiary 39.7 x 32 x 24.9 cm |
Gwarancja i wsparcie
This product comes with a standard manufacturer's warranty. Please refer to the warranty card included in your product packaging for specific terms and conditions. For technical support, service, or replacement parts, please contact your retailer or the RAF customer service department.
Zachowaj paragon jako dowód zakupu na wypadek reklamacji.