
1. Informacje dotyczące bezpieczeństwa
Przed instalacją i uruchomieniem należy uważnie przeczytać wszystkie instrukcje. Nieprzestrzeganie tych instrukcji może spowodować uszkodzenie produktu, pojazdu lub obrażenia ciała. Zachowaj tę instrukcję do wykorzystania w przyszłości.
- Aby zapobiec zwarciom elektrycznym, przed montażem należy upewnić się, że zapłon pojazdu jest wyłączony, a ujemny zacisk akumulatora jest odłączony.
- Jeśli nie jesteś pewien któregokolwiek kroku, skonsultuj się ze specjalistą w sprawie instalacji.
- Nie używaj urządzenia w sposób, który odwraca Twoją uwagę od prowadzenia pojazdu. Zawsze priorytetowo traktuj bezpieczeństwo na drodze.
- Unikaj wystawiania urządzenia na działanie ekstremalnych temperatur, bezpośredniego światła słonecznego i wilgoci.
- Należy używać wyłącznie określonych kabli zasilających i akcesoriów.
2. Zawartość opakowania
Przed przystąpieniem do instalacji sprawdź, czy w opakowaniu znajdują się wszystkie elementy.

Image: Components included in the UNITOPSCI A3612A3 package, including the main unit, wiring harnesses, and accessories.
- UNITOPSCI A3612A3 Car Stereo Unit
- Power Cable & Speaker Cable Harnesses
- Zdalne sterowanie z kierownicy
- Mikrofon
- 12-diodowa kamera tylna
- Antena
- Instrukcja obsługi (ten dokument)
- Uchwyty montażowe
3. Instalacja
Proper installation is crucial for optimal performance. Refer to the wiring diagram and consult a professional if needed.
3.1 Schemat okablowania

Image: Detailed wiring connections for the car stereo unit.
Connect the power and speaker cables according to the diagram. Ensure all connections are secure to prevent malfunctions.
- Czerwony (ACC): Connect to ignition switch +12V.
- Yellow (BATTERY+): Connect to constant +12V.
- Czarny (GND): Connect to vehicle ground.
- Niebieski (MRÓWKA): Connect to antenna power.
- Pomarańczowy (OŚWIETLENIE): Connect to vehicle illumination wire.
- Różowy (ODWRÓCONY): Connect to reverse light signal for backup camera activation.
- Brązowy (KLUCZ): Connect to steering wheel control wire.
- Speaker wires (White, Gray, Green, Purple) should be connected to corresponding vehicle speakers (Front Left, Front Right, Rear Left, Rear Right).
3.2 Montaż urządzenia
Use the provided mounting brackets to secure the double din unit into your vehicle's dashboard opening. Ensure a snug fit to prevent vibrations.
3.3 Instalacja kamery cofania
Mount the backup camera at the rear of your vehicle. Connect its video output to the 'CAM IN' input on the stereo and its power to the reverse light circuit.
4. Konfiguracja
4.1 Pierwsze włączenie zasilania
After installation, reconnect the vehicle battery. Turn on the ignition. The unit should power on and display the main interface.
4.2 Ustawienia podstawowe
Navigate to the 'Settings' menu to configure basic parameters such as language, time, and date.
4.3 Display Backlight Adjustment
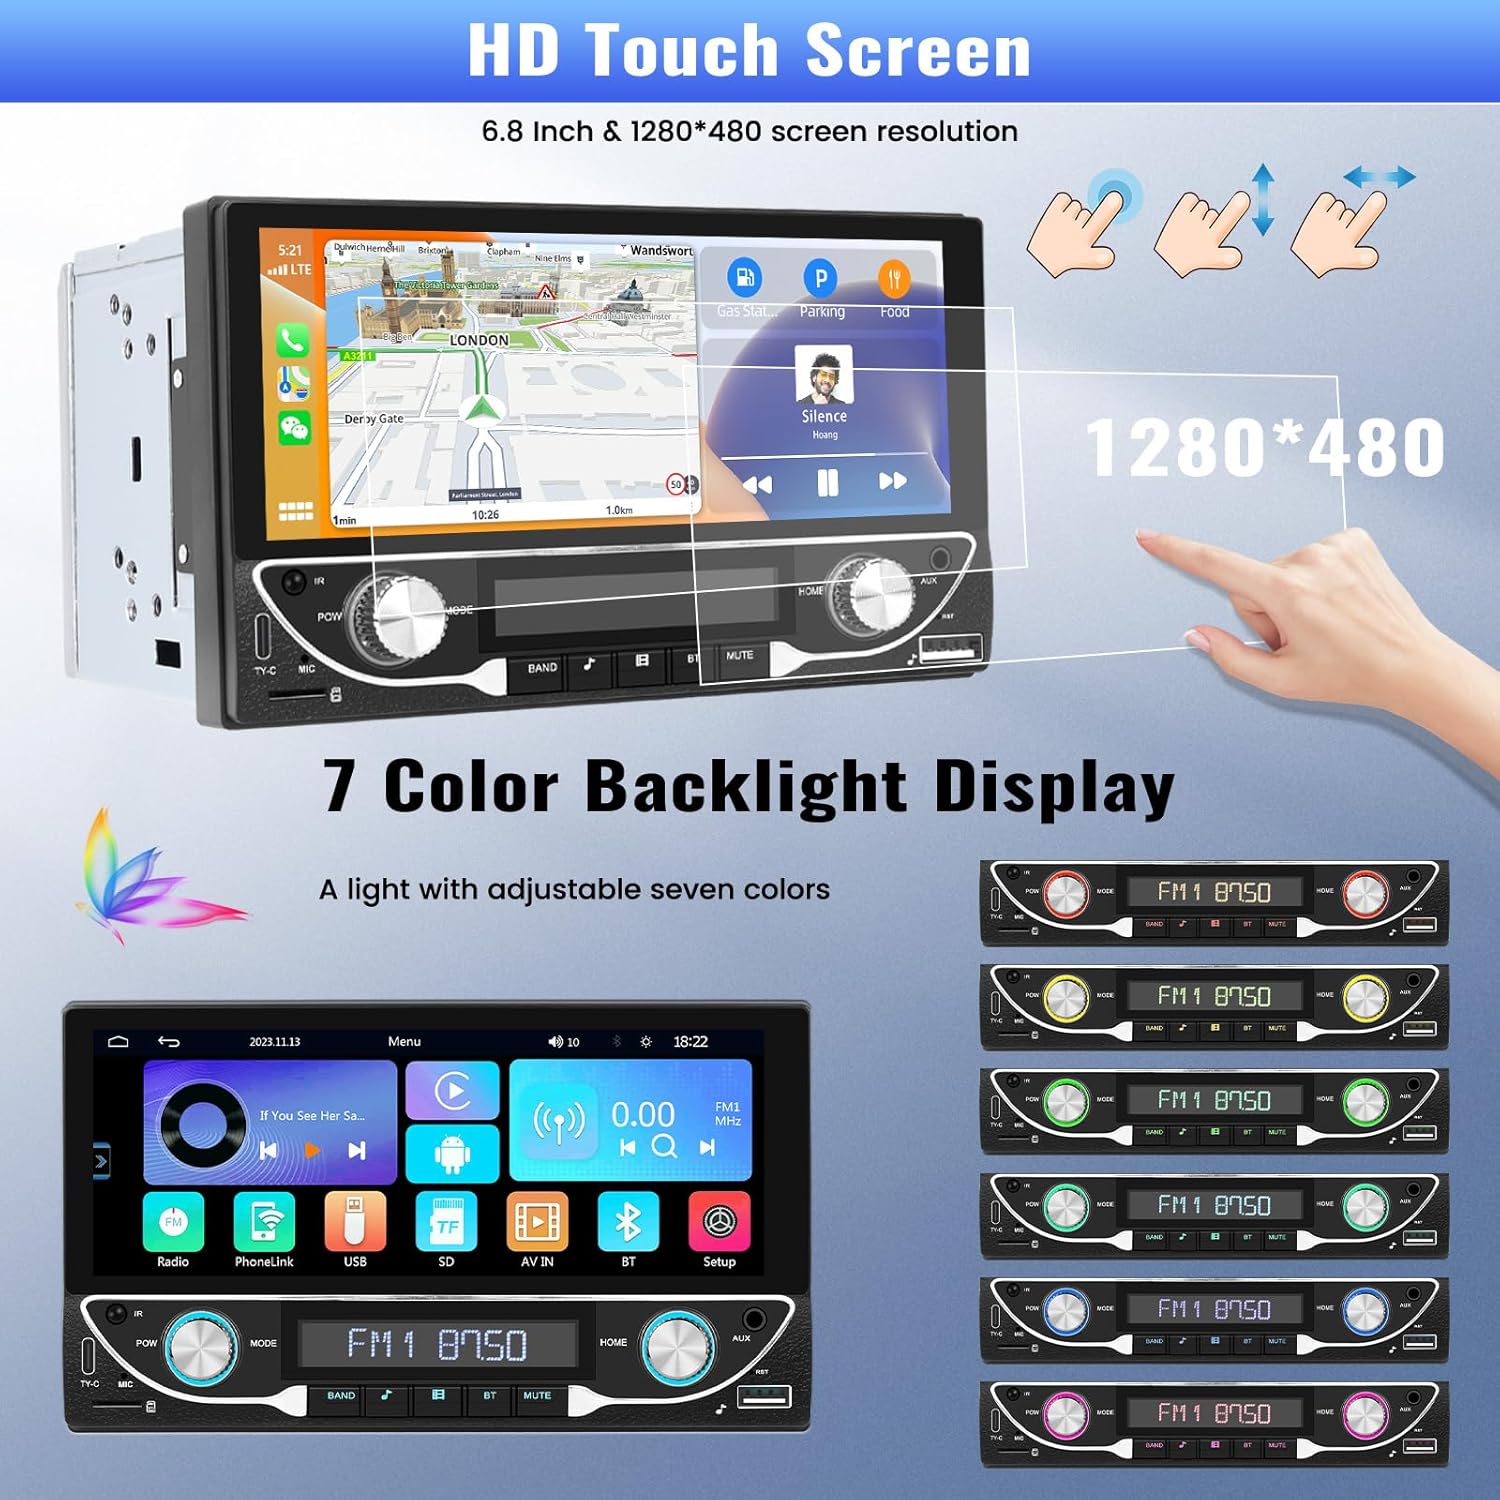
Image: The HD touchscreen and customizable 7-color backlight display options.
Access the display settings to adjust brightness and select from 7 available backlight colors for the physical buttons.
5. Instrukcja obsługi
5.1 Bezprzewodowy Apple CarPlay i Android Auto
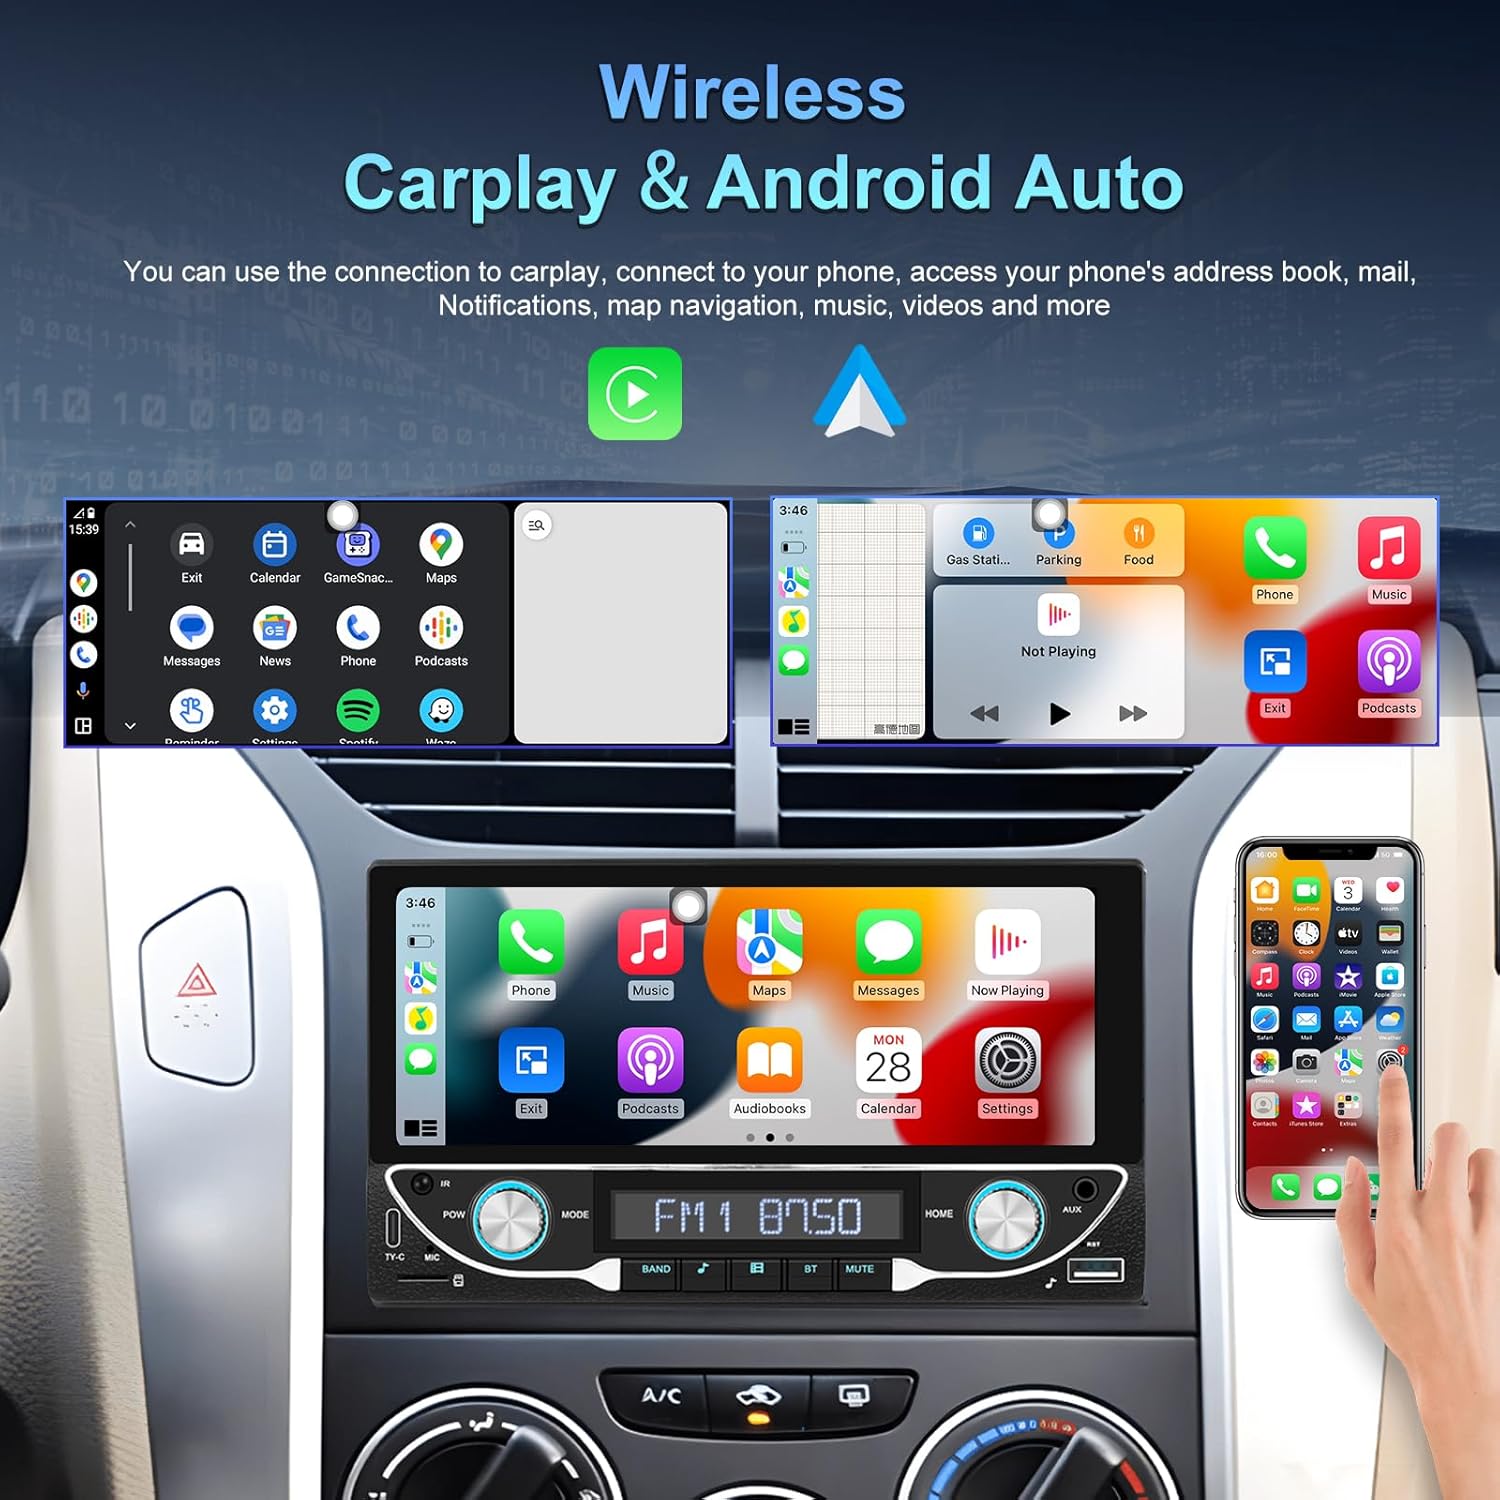
Image: The car stereo displaying both Apple CarPlay and Android Auto interfaces.
Connect your smartphone wirelessly to access Apple CarPlay or Android Auto. This allows for navigation, music, calls, and messages directly from the car stereo display.
- Upewnij się, że w smartfonie są włączone Bluetooth i Wi-Fi.
- Na radiu samochodowym wybierz ikonę CarPlay lub Android Auto.
- Postępuj zgodnie z instrukcjami wyświetlanymi na ekranie, aby sparować urządzenie.
5.2 Łączność Bluetooth 5.1
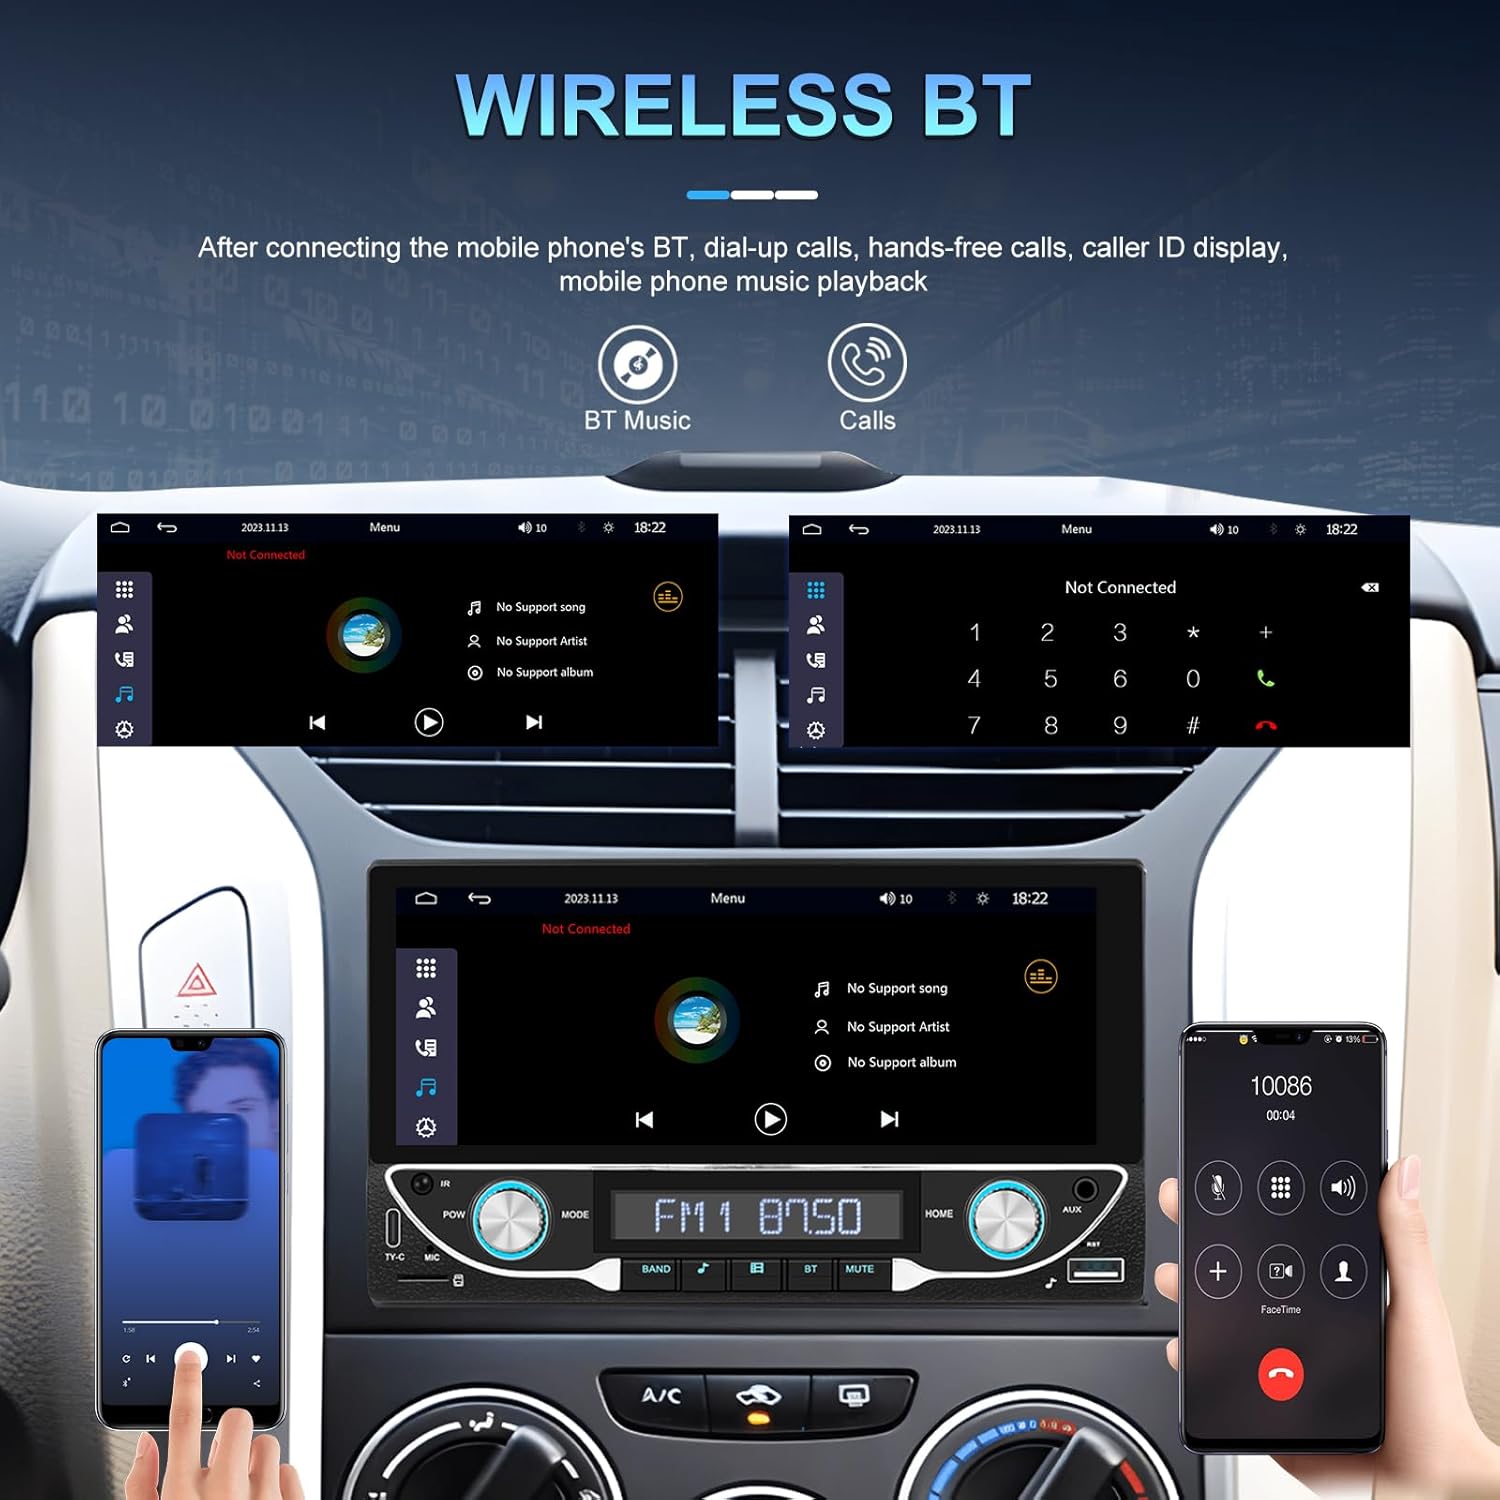
Image: Bluetooth interface for hands-free calling and music streaming.
Sparuj swój telefon przez Bluetooth, aby móc wykonywać połączenia w trybie głośnomówiącym i przesyłać strumieniowo muzykę bezprzewodowo.
- Przejdź do menu „Bluetooth” w zestawie stereo.
- Włącz Bluetooth w telefonie i wyszukaj dostępne urządzenia.
- Select 'UNITOPSCI A3612A3' (or similar name) from your phone's list and confirm pairing.
- Use the built-in microphone for calls and stream music from your phone.
5.3 Obsługa radia FM

Image: FM radio interface with frequency display and sound quality DSP/EQ settings.
Select the 'FM' icon to access the radio tuner. Use the on-screen controls or physical buttons to scan for stations, save presets, and adjust frequency.
5.4 Audio & Video Playback (USB/TF/AUX/Type-C)

Image: Available input options for audio and video playback: USB, TF Card, Type-C, and AUX-in.
The unit supports various media inputs for audio and video playback:
- Wejście USB: Connect a USB drive with media files.
- Slot karty TF: Insert a TF (MicroSD) card with media files.
- Wejście AUX: Connect external audio devices using a 3.5mm audio cable.
- Port typu C: For charging compatible devices and potentially data transfer.
Select the corresponding input source from the main menu to access your media.
5.5 Sterowanie z kierownicy

Image: Steering wheel control setup interface on the car stereo.
If your vehicle supports steering wheel controls, connect the 'KEY' wire during installation. Access the 'Steering Wheel Control' settings to program the buttons for functions like volume, track change, and mode selection.
5.6 Tył View Camera / HD Reversing Video
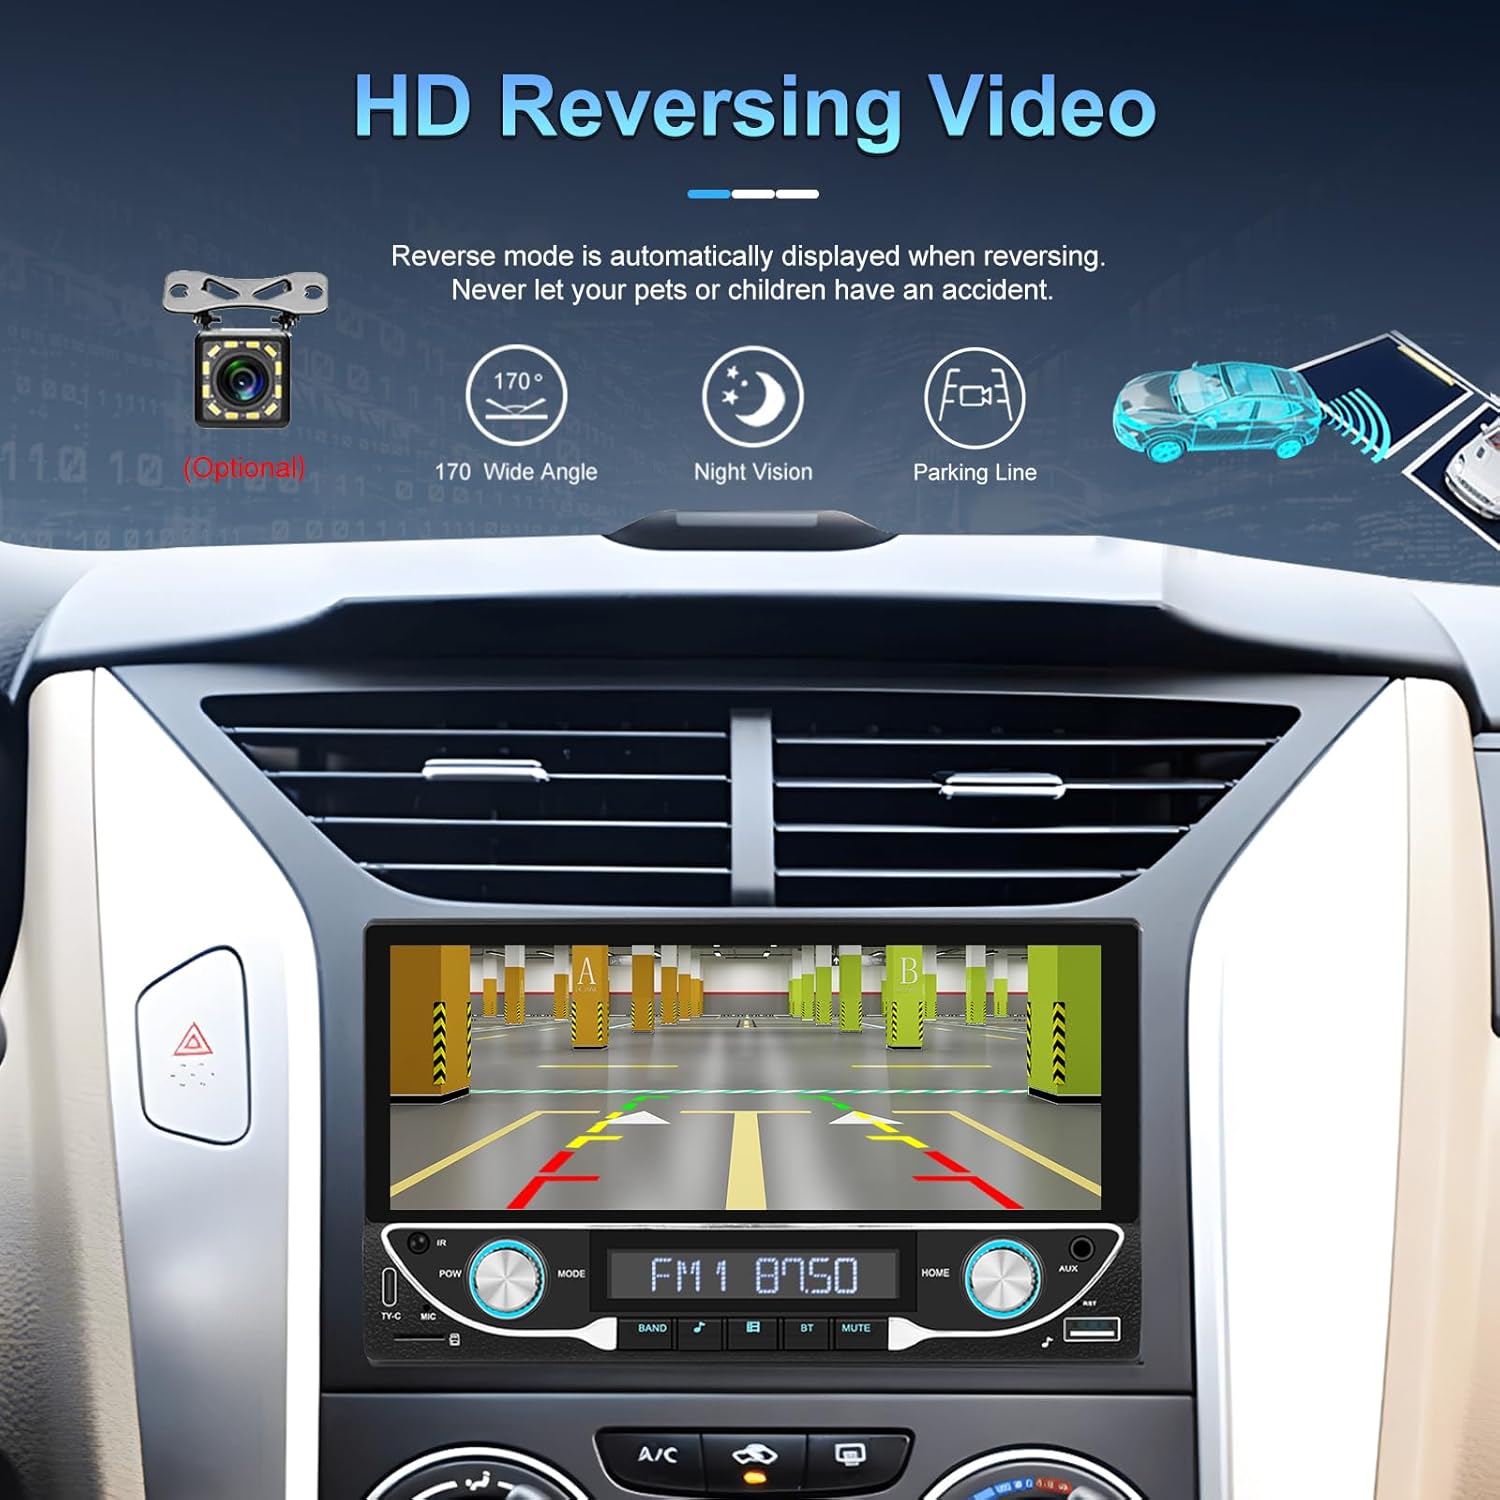
Image: High-definition reversing video display with parking guidelines.
When the vehicle is shifted into reverse, the stereo automatically displays the rear view camera feed. The included camera offers a 170-degree wide angle and night vision capabilities, along with parking lines for assistance.
5.7 DVR Function Support
The unit supports an optional DVR (Digital Video Recorder) function. Connect a compatible USB DVR camera to the dedicated USB input on the rear of the car radio to record driving footage.
5.8 Funkcja łącza lustrzanego
Use the Mirror Link function to display your smartphone's screen directly on the car stereo. This feature is compatible with both Android and iOS devices, allowing you to view apps and content from your phone on the larger display.
5.9 Voice Control & GPS Navigation
When connected via Apple CarPlay or Android Auto, you can utilize voice commands (e.g., Siri, Google Assistant) for navigation, making calls, sending messages, and controlling music, enhancing driving safety and convenience.
5.10 Sound Quality (DSP & EQ)
The built-in Digital Sound Processor (DSP) and Equalizer (EQ) allow for precise audio customization. Access the 'EQ Setup' menu to adjust bass, treble, and other frequency bands to match your audio preferences. Pre-set EQ modes (e.g., Jazz, Rock, Pop) are also available.
6. Konserwacja
Aby zapewnić długą żywotność i optymalną pracę radia samochodowego, należy przestrzegać poniższych wskazówek dotyczących konserwacji:
- Czyszczenie ekranu: Use a soft, lint-free cloth to gently wipe the touchscreen. Avoid abrasive cleaners or solvents that could damage the display.
- Ogólne sprzątanie: Keep the unit free from dust and debris. Use a soft brush or compressed air for hard-to-reach areas.
- Aktualizacje oprogramowania:Okresowo sprawdzaj producenta webodwiedź tę witrynę, aby sprawdzić, czy są dostępne aktualizacje oprogramowania sprzętowego, które poprawią wydajność i dodadzą nowe funkcje.
- Unikaj płynów: Do not spill liquids on the unit. If accidental spillage occurs, power off the unit immediately and allow it to dry completely before use.
7. Rozwiązywanie Problemów
If you encounter issues with your UNITOPSCI A3612A3 car stereo, refer to the following common problems and solutions:
| Problem | Możliwa przyczyna | Rozwiązanie |
|---|---|---|
| Brak zasilania | Nieprawidłowe okablowanie; Przepalony bezpiecznik; Luźne połączenie. | Check power cable connections (ACC, BATTERY+, GND). Verify vehicle fuse and unit's fuse. Ensure all wires are securely connected. |
| Brak dźwięku | Odłączone przewody głośnikowe; Głośność zbyt niska; Funkcja wyciszenia aktywna; Nieprawidłowe źródło dźwięku. | Check speaker wire connections. Increase volume. Deactivate mute. Select correct audio source (FM, USB, BT, etc.). |
| Brak połączenia Bluetooth | Bluetooth off on phone/stereo; Device not in pairing mode; Interference. | Ensure Bluetooth is enabled on both devices. Put stereo in pairing mode. Delete previous pairings and try again. Move closer to the unit. |
| CarPlay/Android Auto nie działa | Wi-Fi/Bluetooth off; Phone not compatible; App issues. | Ensure Wi-Fi and Bluetooth are active on your phone. Restart phone and stereo. Check phone's settings for CarPlay/Android Auto permissions. |
| Tylna kamera nie wyświetla się | Kamera nie jest zasilana; Kabel wideo jest luźny; Przewód wyzwalacza biegu wstecznego nie jest podłączony. | Check camera power connection. Ensure video cable is securely connected to 'CAM IN'. Verify Pink (REVERSE) wire connection. |
| Ekran dotykowy nie reaguje | Zawieszenie systemu; brud na ekranie. | Restart the unit (if possible, by briefly disconnecting power). Clean the screen. |
If the problem persists after trying these solutions, please contact UNITOPSCI customer support for further assistance.
8. Specyfikacje
Key technical specifications for the UNITOPSCI A3612A3 car stereo:
- Numer modelu: A3612A3
- Rozmiar wyświetlacza: 6.86 cale
- Rozdzielczość wyświetlacza: 1280 x 480 pikseli
- Moc wyjściowatage: 180 Watts (4 channels)
- Wersja Bluetooth: 5.1
- Obsługiwane usługi internetowe: Maps (via CarPlay/Android Auto)
- Typ wyjścia audio: Wewnętrzny
- Obsługiwane formaty multimediów: AVI, WAV, WMA
- Wejścia: USB, TF Card, AUX, Type-C
- Cechy: Wireless Apple CarPlay, Wireless Android Auto, FM Radio, Mirror Link, DSP, EQ, Steering Wheel Control, Backup Camera Input, DVR Function Support, 7-Color Backlight.
Image: Front, rear, and side dimensions of the UNITOPSCI A3612A3 car stereo.
Wymiary (przybliżone):
- Front Panel: 17.8cm (7.0in) width x 10.3cm (4.0in) height
- Chassis: 17.8cm (7.0in) width x 10.0cm (3.9in) height x 11cm (4.3in) depth
9. Gwarancja i wsparcie
UNITOPSCI products are designed for reliability and performance. For warranty information and technical support, please refer to the warranty card included in your package or visit the official UNITOPSCI webstrona.
When contacting support, please have your product model number (A3612A3) and purchase details ready.


