Wstęp
This manual provides detailed instructions for the safe and effective use of your Andoer Portable Digital Camera. Please read this manual thoroughly before operating the device and retain it for future reference.
Zawartość opakowania
Sprawdź, czy w przesyłce znajdują się wszystkie elementy wymienione poniżej:
- 1 x aparat cyfrowy Andoer
- Karta pamięci 1 x 32GB
- 1 x kabel USB (typ C)
- 1 x ściereczka czyszcząca
- 1 x Smycz
- 1 x Torba do przechowywania
- 1 x Instrukcja obsługi
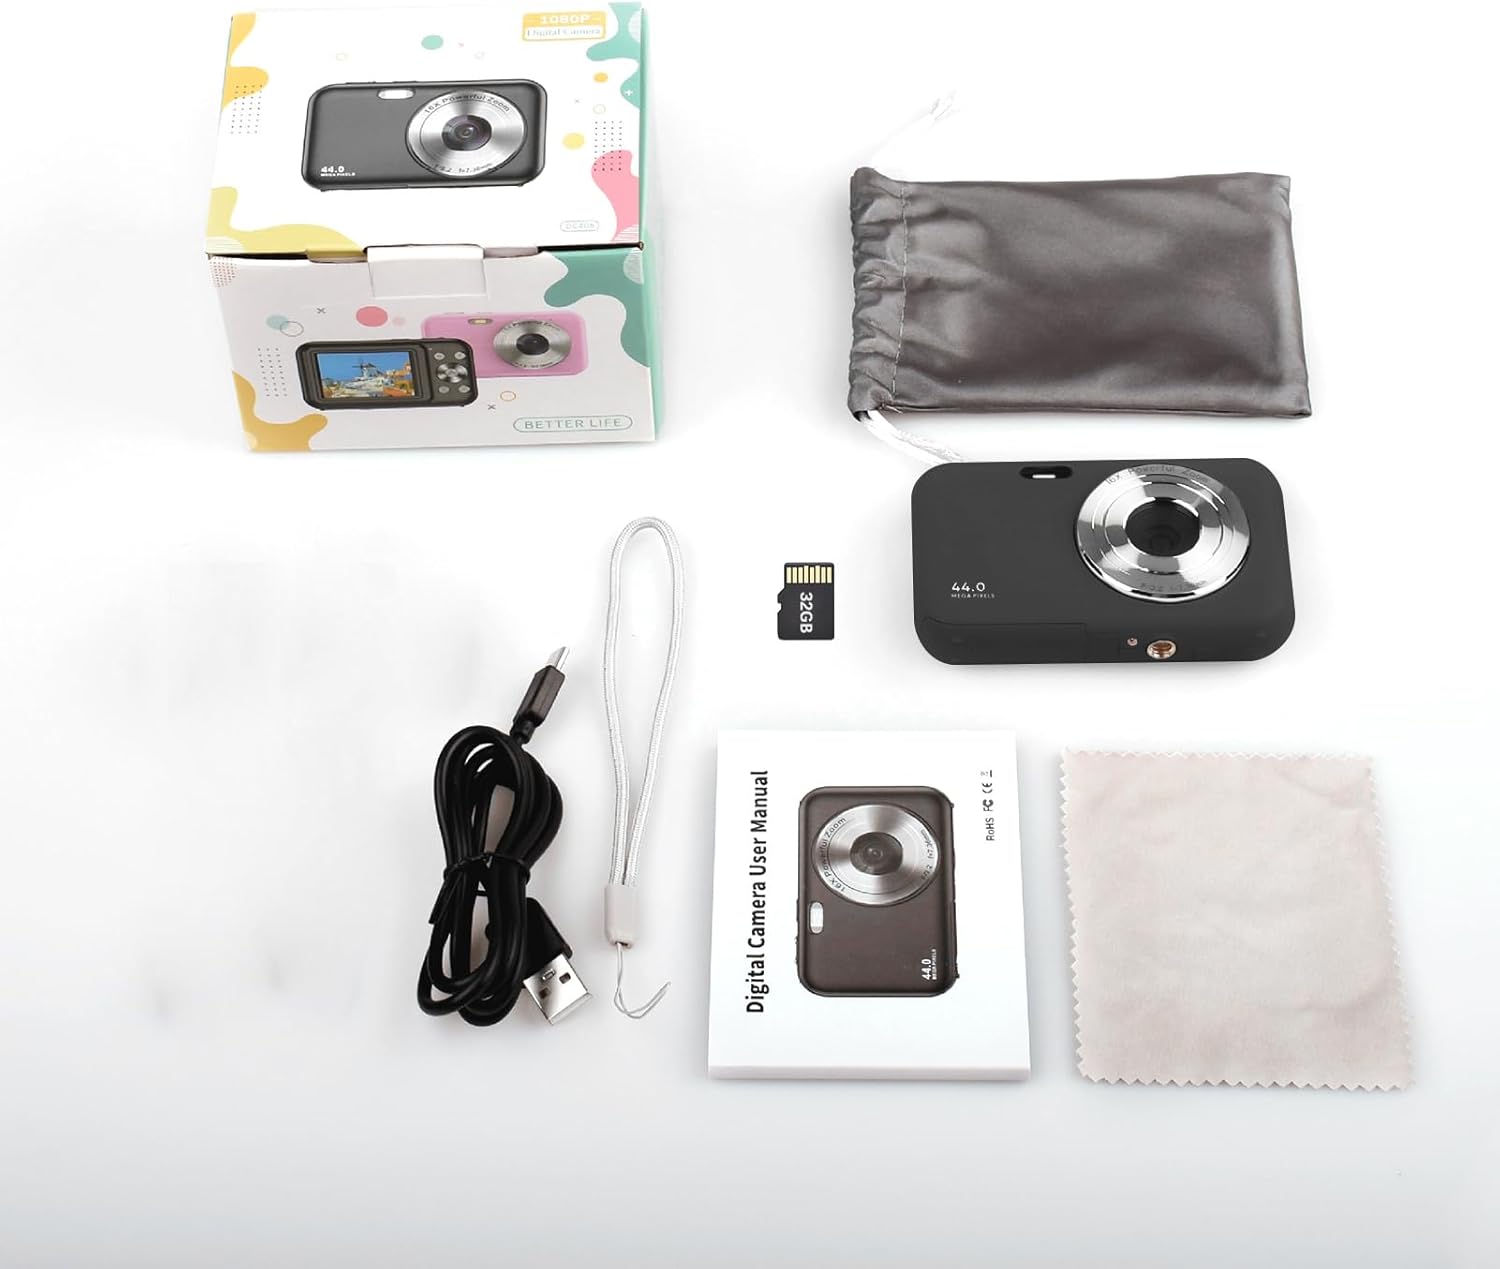
Image: Contents of the Andoer Digital Camera package.
Koniec kameryview
Zapoznaj się z różnymi częściami swojego aparatu.

Image: Multi-angle view of the Andoer Digital Camera, highlighting its compact design and button layout.
- Przód: Lens, Flash, Microphone.
- Szczyt: Power Button, Shutter Button.
- Z powrotem: 2.4-inch IPS Screen, Navigation Buttons (Up, Down, Left, Right, OK), Menu Button, Mode Button, Zoom (W/T).
- Strona: USB Type-C Port.
- Spód: Battery/Memory Card Compartment.
Organizować coś
1. Ładowanie akumulatora
The camera is equipped with a built-in 700mAh rechargeable lithium battery. Before first use, fully charge the battery.
- Connect the included USB Type-C cable to the camera's USB port.
- Podłącz drugi koniec kabla USB do zasilacza USB (nie ma go w zestawie) lub do portu USB komputera.
- Zaświeci się kontrolka ładowania. Po zakończeniu ładowania zgaśnie lub zmieni kolor.
Notatka: The camera can be used while charging. A full charge provides approximately 150 minutes of continuous shooting or 90 minutes of video recording.

Image: Battery life information for the 700mAh battery.
2. Wkładanie karty pamięci
The camera supports a 32GB memory card (included). Ensure the camera is powered off before inserting or removing the memory card.
- Znajdź pokrywę komory baterii/karty pamięci na spodzie aparatu.
- Otwórz pokrywę.
- Insert the 32GB memory card into the designated slot with the metal contacts facing the correct direction (refer to the diagram inside the compartment if available) until it clicks into place.
- Zamknij dokładnie pokrywę komory.
Ważny: Format the memory card in the camera's settings menu before first use to ensure optimal performance.
Instrukcja obsługi
1. Włączanie/wyłączanie zasilania
- Aby włączyć, naciśnij i przytrzymaj Przycisk zasilania on the top of the camera.
- Aby wyłączyć, naciśnij i przytrzymaj Przycisk zasilania again. The camera also features an auto power-off function (configurable in settings).
2. Robienie zdjęć
The camera captures photos up to 44MP resolution.
- Włącz kamerę.
- Ensure the camera is in photo mode (indicated on the 2.4-inch IPS screen). If not, press the Przycisk trybu przełączyć.
- Skadruj ujęcie korzystając z ekranu IPS.
- Naciśnij Przycisk migawki halfway down to focus, then press it fully to take the picture.

Obraz: Byłyample of a high-resolution photo taken with the 44MP camera.
3. Nagrywanie filmów
The camera records videos in 1080P resolution.
- Włącz kamerę.
- Naciśnij Przycisk trybu aby przełączyć się na tryb nagrywania wideo.
- Naciśnij Przycisk migawki to start recording. A red indicator will typically appear on the screen.
- Naciśnij Przycisk migawki ponownie, aby zatrzymać nagrywanie.

Obraz: Ekran view during 1080P video recording.
4. Korzystanie z zoomu cyfrowego
Aparat wyposażony jest w 16-krotny zoom cyfrowy.
- In photo or video mode, press the Przycisk T (teleobiektyw) aby powiększyć.
- Naciśnij W (Wide-angle) button aby pomniejszyć.

Image: Comparison of 1x and 16x digital zoom effects.
5. Inne funkcje
- Samowyzwalacz: Set a delay (e.g., 2s, 5s, 10s) before a photo is taken. Access this option in the camera's menu.
- Ciągłe strzelanie: Take multiple photos in quick succession. This setting is also found in the menu.
- Anti-Wstrząsy: Digital image stabilization helps reduce blur from camera movement. This feature is typically enabled by default or can be toggled in settings.
- Odtwarzanie nagranego dźwięku: Naciśnij Przycisk odtwarzania (often indicated by a triangle icon) to view photos and videos. Use the navigation buttons to browse.
- Ustawienia menu: Naciśnij Przycisk menu to access various camera settings, including resolution, white balance, exposure, date/time, and formatting the memory card.
Przenoszenie Files to a Computer or Phone
You can transfer photos and videos from the camera to a computer or a mobile phone.
1. Via USB Cable (to Computer)
- Podłącz kamerę do komputera za pomocą dołączonego kabla USB typu C.
- Włącz kamerę.
- The camera should appear as a removable disk or media device on your computer.
- Otwórz folder aparatu i skopiuj żądany plik files do twojego komputera.
2. Via Memory Card Reader (to Computer/Phone)
For direct transfer from the memory card, you can use a card reader.
- Remove the memory card from the camera.
- Insert the memory card into a compatible card reader.
- Connect the card reader to your computer or mobile phone (via an OTG adapter if necessary).
- Uzyskaj dostęp do files on the memory card and transfer them.

Image: OTG usage diagram for transferring files from memory card to phone.
Konserwacja
- Czyszczenie korpusu aparatu: Do czyszczenia korpusu aparatu użyj miękkiej, suchej ściereczki. W przypadku uporczywych zabrudzeń delikatnie przetrzyj.ampPrzetrzyj szmatkę wodą. Unikaj silnych środków chemicznych.
- Czyszczenie obiektywu: Use the included cleaning cloth or a specialized lens cleaning cloth. Gently wipe the lens in a circular motion. Do not use abrasive materials.
- Pielęgnacja ekranu: The 2.4-inch IPS screen can be cleaned with a soft, lint-free cloth. Avoid pressing too hard.
- Składowanie: When not in use for extended periods, store the camera in the provided storage bag in a cool, dry place, away from direct sunlight and extreme temperatures.
- Pielęgnacja baterii: Recharge the battery regularly, even if the camera is not used frequently, to maintain battery health. Avoid fully discharging the battery for long periods.
Rozwiązywanie problemów
| Problem | Możliwa przyczyna | Rozwiązanie |
|---|---|---|
| Kamera się nie włącza. | Bateria jest rozładowana lub nieprawidłowo włożona. | Naładuj akumulator do pełna. Upewnij się, że akumulator jest prawidłowo włożony. |
| Nie można robić zdjęć/nagrywać filmów. | Karta pamięci jest pełna, nie została włożona lub jest uszkodzona. | Check memory card insertion. Delete unnecessary files or replace the card. Format the card (this will erase all data). |
| Obrazy są niewyraźne. | Obiektyw jest brudny, światło jest niewystarczające lub aparat się trzęsie. | Clean the lens. Ensure adequate lighting. Hold the camera steady or enable anti-shaking. |
| Kamera zawiesza się lub przestaje reagować. | Błąd oprogramowania lub niski poziom naładowania baterii. | Remove and reinsert the battery (if possible) or press and hold the power button for 10 seconds to force a shutdown. Recharge the battery. |
| Nie można przenieść files do komputera. | Nieprawidłowe połączenie USB lub problem ze sterownikiem. | Ensure the USB cable is securely connected. Try a different USB port or computer. Check if the camera is recognized as a device. |
Specyfikacje
| Funkcja | Szczegół |
|---|---|
| Wyświetlacz | 2.4 calowy ekran IPS |
| Rozdzielczość wideo | 1080P/720P/480P |
| Rozdzielczość obrazu | 44MP/42MP/36MP/24MP (Effective Still Resolution: 44 MP) |
| File Format | JPG (Image), AVI (Video) |
| Zoom elektroniczny | 16X |
| Port USB | Typ C |
| Bateria | 3.7V/ 700mAh Rechargeable Lithium Battery |
| Długość ogniskowej | f=7.36 mm |
| Otwór | F/3.2 |
| Oszczędzanie energii | Auto power off in 1Min/2Mins/3Mins/4Mins/5Mins/10Mins |
| Obsługiwany system | Windows XP, Vista, 7, 8, 10, Mac 10.2 and above |
| Pojemność pamięci masowej | 32 GB (w zestawie) |
| Technologia automatycznego ustawiania ostrości | Wykrywanie kontrastu |
| Stabilizacja obrazu | Cyfrowy |
| Opis przedziału wiekowego | Dziecko |
Gwarancja i wsparcie
For warranty information and technical support, please refer to the contact details provided with your purchase documentation or visit the official Andoer webZachowaj dowód zakupu na wypadek roszczeń gwarancyjnych.