1. Wprowadzenie
This manual provides essential information for the safe and efficient operation, maintenance, and troubleshooting of your DayPlus 18V Cordless Impact Wrench. Please read these instructions carefully before using the tool and retain them for future reference.
The DayPlus Cordless Impact Wrench is designed for tightening and loosening nuts, bolts, and screws, offering high torque and versatility for various applications, including automotive work and construction projects.
2. Instrukcje bezpieczeństwa
OSTRZEŻENIE: Przeczytaj wszystkie ostrzeżenia dotyczące bezpieczeństwa, instrukcje, ilustracje i dane techniczne dołączone do tego elektronarzędzia. Niezastosowanie się do wszystkich poniższych instrukcji może spowodować porażenie prądem, pożar i/lub poważne obrażenia.
- Bezpieczeństwo w miejscu pracy: Utrzymuj swoje miejsce pracy w czystości i dobrym oświetleniu. Zagracone lub ciemne pomieszczenia sprzyjają wypadkom. Nie używaj elektronarzędzi w atmosferach wybuchowych, takich jak łatwopalne ciecze, gazy lub pyły.
- Bezpieczeństwo elektryczne: Unikaj kontaktu ciała z uziemionymi powierzchniami, takimi jak rury, grzejniki, kuchenki i lodówki. Istnieje zwiększone ryzyko porażenia prądem, jeśli Twoje ciało jest uziemione.
- Bezpieczeństwo osobiste: Always wear eye protection. Use appropriate safety equipment such as dust masks, non-skid safety shoes, hard hats, or hearing protection when necessary. Dress properly. Do not wear loose clothing or jewelry. Keep your hair and clothing away from moving parts.
- Używanie i konserwacja narzędzia: Nie używaj elektronarzędzia na siłę. Używaj elektronarzędzia odpowiedniego do danego zastosowania. Wykona ono zadanie lepiej i bezpieczniej, z szybkością, do której zostało zaprojektowane. Odłącz akumulator od elektronarzędzia przed dokonywaniem jakichkolwiek regulacji, wymianą akcesoriów lub przechowywaniem elektronarzędzia.
- Użytkowanie i konserwacja akumulatora: Ładuj tylko za pomocą ładowarki określonej przez producenta. Ładowarka odpowiednia dla jednego typu akumulatora może stwarzać ryzyko pożaru, jeśli będzie używana z innym akumulatorem. Elektronarzędzi należy używać wyłącznie ze specjalnie przeznaczonymi akumulatorami.
3. Składniki produktu
Familiarize yourself with the parts of your DayPlus Cordless Impact Wrench for proper operation and maintenance.

Obraz 3.1: Nadview of the DayPlus Cordless Impact Wrench components. Key parts include the sleeve, brushless motor, heat dissipation vent, forward and reverse switch, stepless speed regulation button, soft rubber coated handle, mode adjustment and power quantity display, battery removal button, and large capacity battery.
- Rękaw: The attachment point for sockets and other accessories.
- Silnik bezszczotkowy: Zapewnia wydajną moc i dłuższą żywotność narzędzia.
- Otwór odprowadzający ciepło: Zapewnia odpowiednie chłodzenie podczas pracy.
- Przełącznik jazdy do przodu i do tyłu: Steruje kierunkiem obrotu.
- Stepless Speed Regulation Button: Allows for variable speed control based on trigger pressure.
- Soft Rubber Coated Handle: Zapewnia wygodny i pewny chwyt.
- Mode Adjustment and Power Quantity Display: Shows current power level and allows selection of operating modes.
- Battery Removal Button: Odłącza akumulator od narzędzia.
- Bateria o dużej pojemności: Zapewnia zasilanie narzędzia.
4. Specyfikacje
| Funkcja | Specyfikacja |
|---|---|
| Wał wyjściowy | Napęd kwadratowy 1/2" |
| Moment znamionowy | 420 Nm |
| Prędkość bez obciążenia | 0-3200 obr./min |
| Typ baterii | Litowo-jonowy 6000 mAh (18 V) |
| Czas ładowania | 1.5 - 2 hours for full charge |
| Częstotliwość uderzeń | 0-4400 IPM |
| Dołączone gniazda | 14mm, 17mm, 19mm, 22mm |
| Tworzywo | Akrylonitryl-butadien-styren (ABS) |
| Kolor | Niebieski |
5. Konfiguracja
5.1. Ładowanie baterii
- Sprawdź, czy akumulator jest prawidłowo włożony do ładowarki.
- Podłącz ładowarkę do standardowego gniazdka elektrycznego.
- Allow 1.5 to 2 hours for a full charge. The charger's indicator light will typically change color or turn off when charging is complete.
- Po naładowaniu odłącz ładowarkę od gniazdka elektrycznego i wyjmij akumulator.
Note: Always use the original DayPlus charger provided with the tool. Do not attempt to charge damaged batteries.
5.2. Podłączanie/wyjmowanie akumulatora
- Załączyć: Align the battery pack with the base of the impact wrench and slide it in until it clicks securely into place.
- Aby usunąć: Press the battery removal button (refer to Image 3.1) and slide the battery pack out.
5.3. Attaching Sockets and Accessories
- Przed przystąpieniem do podłączania lub zdejmowania akcesoriów należy upewnić się, że narzędzie jest wyłączone, a akumulator wyjęty.
- Align the square drive of the socket with the 1/2" square drive shaft of the impact wrench.
- Push the socket firmly onto the shaft until it locks into place.
- To remove, pull the socket off the shaft. Some sockets may require a slight twist or a release pin mechanism if present.
6. Instrukcja obsługi
6.1. Włączanie/wyłączanie i kontrola prędkości
The tool is powered on by pressing the trigger switch. The speed of the impact wrench is controlled by the pressure applied to the trigger. Pressing gently results in lower speed, while pressing harder increases the speed up to the maximum 3200 rpm.
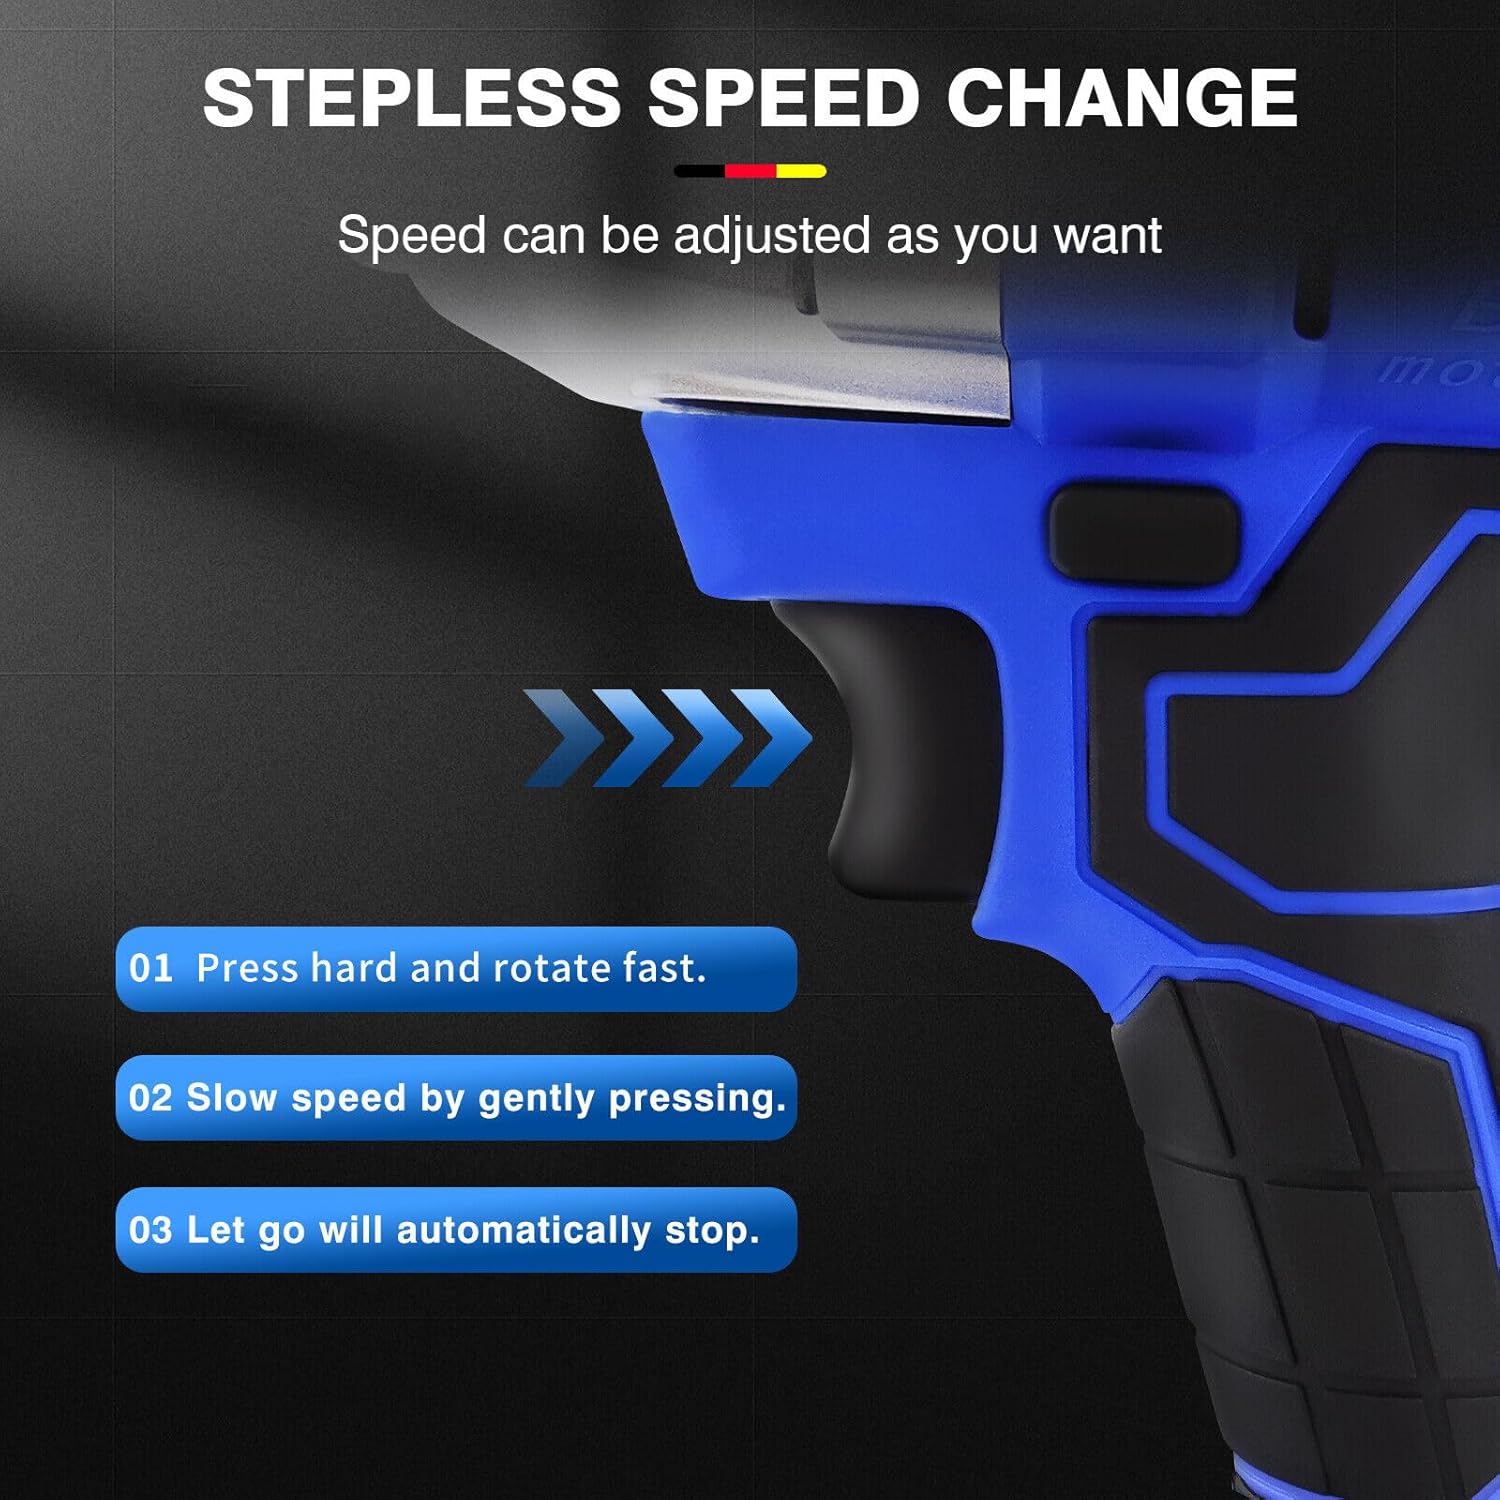
Obraz 6.1: Illustration of the stepless speed change. Pressing hard rotates fast, pressing gently slows speed, and releasing the trigger stops the tool.
- Press hard: For fast rotation and maximum torque.
- Press gently: For slower speed and controlled operation.
- Let go: The tool will automatically stop.
6.2. Przełącznik do przodu i do tyłu
The forward/reverse switch controls the direction of rotation, allowing for both tightening and loosening applications.

Obraz 6.2: The forward button is used for screwing (tightening), and the reverse button is used for removing screws (loosening).
- Przycisk do przodu: Push the switch to the left for clockwise rotation (tightening).
- Przycisk cofania: Push the switch to the right for counter-clockwise rotation (loosening).
- Ensure the switch is in the central (locked) position when not in use to prevent accidental starting.
6.3. Mode Adjustment and Power Display
The tool features a display for real-time power indication and mode adjustment.

Obraz 6.3: Close-up of the mode adjustment and power quantity display. This allows users to monitor battery life and select appropriate torque settings.
- The display shows the remaining battery charge, allowing you to plan your work effectively.
- Use the mode adjustment button (if present, typically integrated with the display) to select between different torque settings or operating modes for various tasks.
6.4. Integrated Work Light
The impact wrench is equipped with a scattering light feature to illuminate the work area, especially useful in low-light conditions.

Obraz 6.4: The integrated work light provides illumination for dark corners, enabling one-hand operation without an additional flashlight.
- The light typically activates when the trigger is pressed and remains on for a short period after release.
- This feature enhances visibility and safety during operation in dimly lit environments.
6.5. Versatile Applications (Drill/Wrench)
The DayPlus impact wrench can be adapted for various tasks, functioning as both an electric drill and an electric wrench with appropriate accessories.
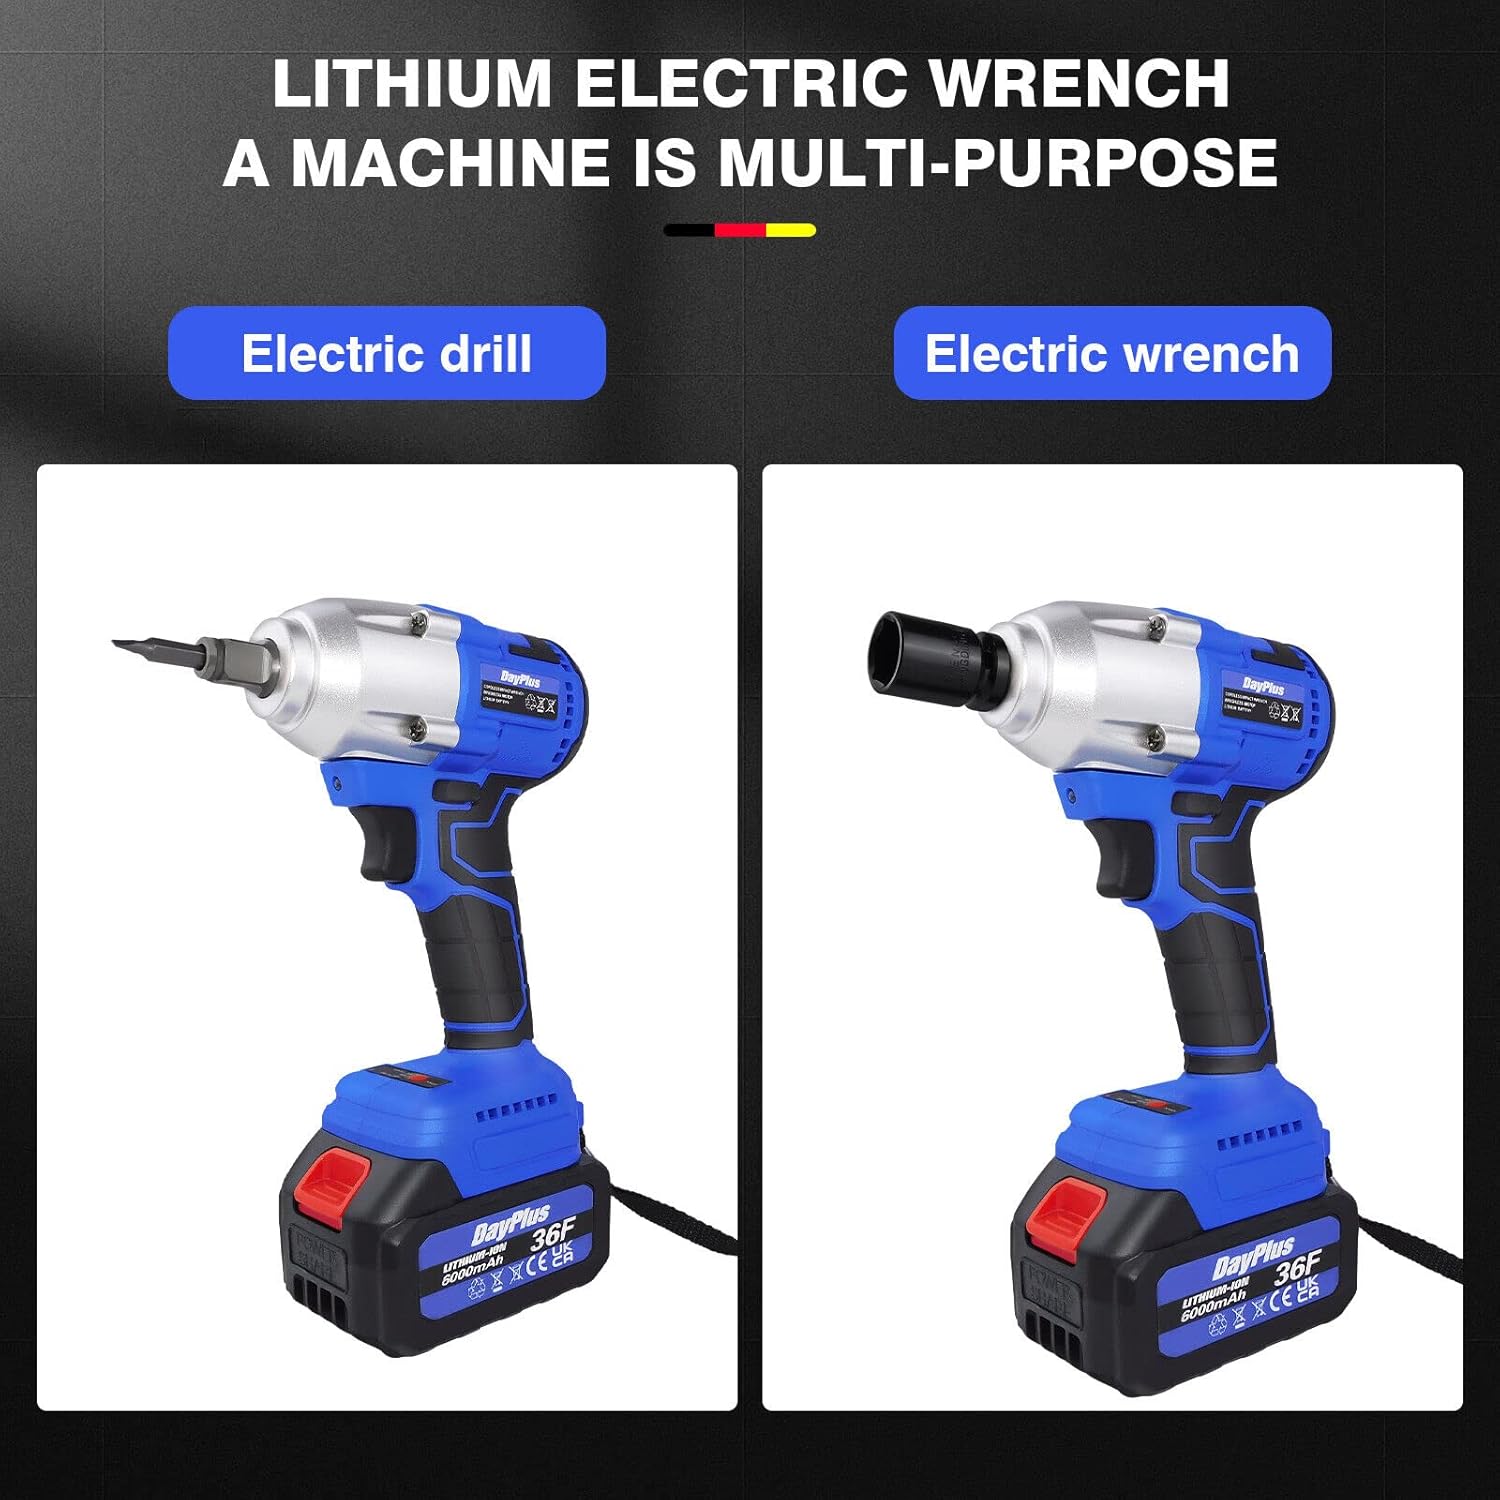
Obraz 6.5: The tool's versatility allows it to be used as an electric drill with a drill bit adapter or as an electric wrench with sockets.
- Electric Wrench: Use with square drive sockets for tightening and loosening nuts and bolts.
- Wiertarka elektryczna: Attach a drill chuck adapter (sold separately) and drill bits for drilling applications.
7. Konserwacja
Regularna konserwacja zapewnia długowieczność i optymalną wydajność klucza udarowego.
- Czyszczenie: Utrzymuj otwory wentylacyjne narzędzia w czystości, aby zapobiec przegrzaniu. Używaj miękkiej,amp Do czyszczenia obudowy należy używać ściereczki. Nie należy używać rozpuszczalników ani środków czyszczących o właściwościach ściernych.
- Otwory wentylacyjne odprowadzające ciepło: Regularly check and clear the heat dissipation vents to ensure effective cooling during continuous operation.
- Pielęgnacja baterii: Przechowuj baterie w chłodnym, suchym miejscu, z dala od bezpośredniego światła słonecznego. Nie przechowuj całkowicie rozładowanych baterii przez dłuższy czas.
- Składowanie: When not in use, store the impact wrench and its accessories in a dry, secure location out of reach of children.
- Kontrola: Okresowo sprawdzaj narzędzie pod kątem uszkodzeń, luźnych śrub lub zużytych części. Nie używaj uszkodzonego narzędzia.

Obraz 7.1: The air outlet design facilitates effective heat dissipation, crucial for continuous work without overheating the machine.
8. Rozwiązywanie Problemów
| Problem | Możliwa przyczyna | Rozwiązanie |
|---|---|---|
| Narzędzie nie uruchamia się | Battery not charged or improperly inserted. Forward/reverse switch in central (locked) position. | Charge battery fully and ensure it is securely inserted. Move the forward/reverse switch to either forward or reverse position. |
| Zmniejszona moc lub prędkość | Niski poziom naładowania akumulatora. Zadziałało zabezpieczenie przed przeciążeniem. | Recharge the battery. Reduce the load on the tool; allow it to cool down if it has been used continuously. |
| Nadmierne ciepło podczas pracy | Blocked ventilation vents. Continuous heavy use. | Clean ventilation vents. Allow the tool to cool down periodically during heavy use. |
| Gniazdo nie jest pewnie zamocowane | Incorrect socket size. Debris on the square drive. | Ensure the socket is 1/2" square drive. Clean the square drive and the socket. |
9. Gwarancja i wsparcie
DayPlus products are manufactured to high-quality standards. For information regarding warranty coverage, please refer to the warranty card included with your purchase or contact DayPlus customer support.
For technical assistance, spare parts, or service, please contact your retailer or the DayPlus customer service department. Keep your purchase receipt as proof of purchase.