1. Wprowadzenie
This manual provides essential information for the safe and effective operation, assembly, maintenance, and troubleshooting of your NEOTEC 52CC 2-Stroke Gas Powered Earth Auger. Please read this manual thoroughly before operating the equipment to ensure proper use and to prevent injury or damage.
The NEOTEC 52CC Earth Auger is designed for efficiently drilling holes in the earth for various applications, including setting fence posts, planting trees and shrubs, and other landscaping tasks. It is equipped with a 52CC gasoline engine and is suitable for use by one or two individuals.

Opis obrazu: A collage showing various applications for the earth auger, such as planting in an orchard, drilling for an engineering pole, afforestation, and creating holes for ice fishing. This illustrates the versatility of the tool.
2. Informacje dotyczące bezpieczeństwa
OSTRZEŻENIE: Nieprzestrzeganie tych instrukcji bezpieczeństwa może spowodować poważne obrażenia lub śmierć.
- Zawsze należy nosić odpowiedni sprzęt ochrony osobistej (PPE), obejmujący okulary ochronne, ochronniki słuchu, rękawice i solidne obuwie.
- Upewnij się, że w miejscu pracy nie ma osób postronnych, zwłaszcza dzieci i zwierząt domowych.
- Never operate the auger when fatigued, under the influence of alcohol, drugs, or medication.
- Inspect the auger and drill bits for damage or loose parts before each use. Do not operate damaged equipment.
- Handle fuel with extreme care. Refuel in a well-ventilated area with the engine off and cool. Avoid spilling fuel.
- Maintain a firm grip on the handles with both hands during operation. Be prepared for kickback if the auger encounters obstacles.
- Do not modify the auger or its components. Use only genuine replacement parts.
- Trzymaj ręce i stopy z dala od obracających się części.
- In case of emergency, immediately release the throttle and engage the engine stop switch.
3. Zawartość opakowania
Your NEOTEC 52CC Earth Auger package includes the following components:
- 52CC Auger Powerhead
- Wiertło ślimakowe 4-calowe
- Wiertło ślimakowe 6-calowe
- Wiertło ślimakowe 8-calowe
- Zestaw narzędzi (do montażu i konserwacji)
- Butelka do mieszania paliwa

Opis obrazu: An image illustrating the multi-pack delivery, showing the 52CC auger powerhead in one box and the auger drill bits in a separate box, indicating that the product ships in two packages.

Opis obrazu: Szczegółowy view of the three included auger drill bits, clearly labeled as 4-inch, 6-inch, and 8-inch, highlighting their different diameters.
4. Instalacja i montaż
4.1 Assembling the Auger Bit
- Select the desired auger drill bit (4-inch, 6-inch, or 8-inch) for your task.
- Align the shaft of the auger bit with the 20mm auger mount on the powerhead.
- Insert the auger bit shaft into the mount and secure it using the provided pin and clip. Ensure it is firmly seated and locked in place.

Opis obrazu: Zbliżenie view of the solid 20mm auger mount, which is the connection point for attaching the drill bits to the powerhead.
4.2 Przygotowanie paliwa
The NEOTEC 52CC Earth Auger uses a 2-stroke engine and requires a specific gasoline-to-oil mixture. Refer to the engine specifications for the exact mixing ratio (typically 25:1 or 50:1, depending on the oil type). Use fresh, unleaded gasoline and high-quality 2-stroke engine oil.
- Using the provided fuel mixing bottle, measure the correct amounts of gasoline and 2-stroke oil.
- Dokładnie wymieszać.
- Carefully pour the mixed fuel into the auger's fuel tank. Do not overfill.
- Dokładnie zamknij korek wlewu paliwa.
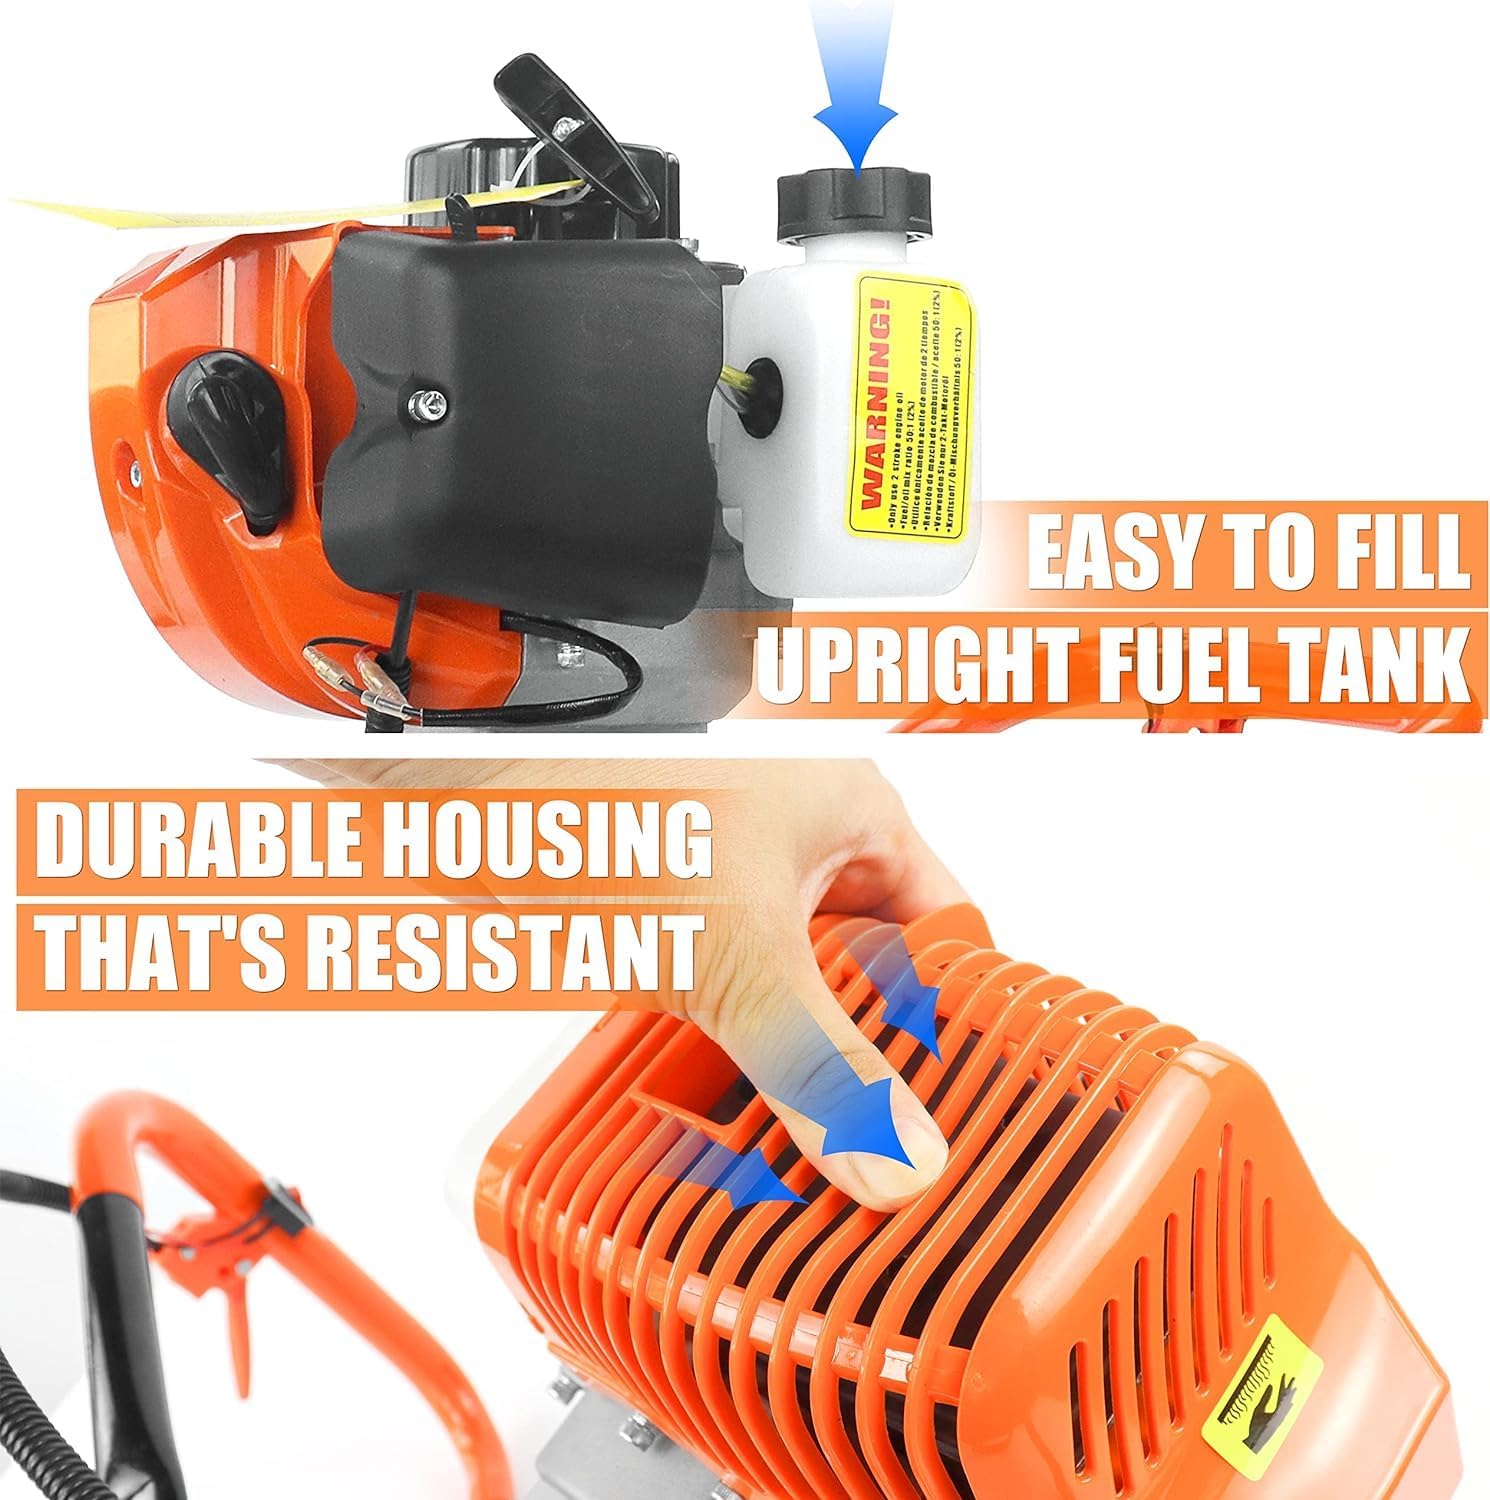
Opis obrazu: A detailed image of the auger's upright fuel tank, designed for easy and convenient filling.
5. Instrukcja obsługi
5.1 Uruchomienie silnika
- Place the auger on a flat, stable surface.
- Upewnij się, że wyłącznik silnika jest w pozycji „ON”.
- Włącz ssanie (w przypadku zimnego rozruchu).
- Naciśnij pompkę paliwa kilka razy, aż paliwo stanie się widoczne.
- Pull the starter handle firmly and smoothly until the engine starts.
- Once the engine starts, gradually disengage the choke. Allow the engine to warm up for a few moments before operating.

Opis obrazu: A hand demonstrating the easy-start feature by pulling the starter cord on the auger's engine.
5.2 Procedura wiercenia
- Hold the auger firmly with both hands on the ergonomic handles.
- Position the auger bit over the desired drilling location.
- Slowly engage the throttle to begin rotation. Apply gentle downward pressure.
- Allow the auger to bore into the soil. If resistance is met, slightly lift and re-engage to clear debris.
- For deeper holes, periodically lift the auger partially out of the hole to clear loose soil and prevent the bit from binding.
- Once the desired depth is reached, release the throttle and allow the bit to stop rotating before removing it from the hole.

Opis obrazu: A close-up of a hand on the ergonomic handle, showing the finger throttle and switch control for enhanced user power and speed control.

Opis obrazu: A user demonstrating the operation of the 52CC gas-powered earth auger, drilling a hole in the ground.
6. Konserwacja
Regular maintenance ensures the longevity and safe operation of your earth auger.
- Czyszczenie: After each use, clean the auger bit and powerhead of dirt, debris, and grass. Use a brush or cloth. Do not use high-pressure water directly on the engine.
- Układ paliwowy: If storing for an extended period, drain the fuel tank or use a fuel stabilizer to prevent fuel degradation. Run the engine until it stops to clear the carburetor.
- Świeca: Inspect the spark plug periodically. Clean or replace if fouled or worn.
- Filtr powietrza: Check and clean the air filter regularly, especially in dusty conditions. A clogged air filter can reduce engine performance.
- Smarowanie: Ensure all moving parts and the gearbox are adequately lubricated as per manufacturer recommendations.
- Składowanie: Store the auger in a clean, dry, and well-ventilated area, away from direct sunlight and sources of ignition. Keep it out of reach of children.

Opis obrazu: Koszty ogólne view of the auger's powerhead, with labels pointing to important components such as the enlarged cooling hole, oil pot, engine stop switch, bold handle, air door switch, and starting handle, useful for maintenance and operation.
7. Rozwiązywanie Problemów
This section addresses common issues you might encounter with your earth auger.
| Problem | Możliwa przyczyna | Rozwiązanie |
|---|---|---|
| Silnik nie uruchamia się | Brak paliwa lub nieprawidłowa mieszanka paliwowa Engine stop switch OFF Ssanie nie jest włączone (zimny start) Spark plug fouled/loose Zapchany filtr powietrza | Check fuel level and mix Turn engine stop switch to 'ON' Engage choke for cold start Oczyść lub wymień świecę zapłonową Wyczyść filtr powietrza |
| Silnik pracuje słabo/brakuje mu mocy | Nieprawidłowa mieszanka paliwa Zatkany filtr powietrza Zabrudzona świeca zapłonowa Carburetor issues | Ensure correct fuel mix Wyczyść filtr powietrza Oczyść lub wymień świecę zapłonową Consult a service technician |
| Auger bit gets stuck | Hitting a rock or root Too much downward pressure Accumulation of soil | Release throttle, reverse rotation if possible, or manually clear obstruction Apply less pressure, allow auger to do the work Periodically lift auger to clear soil |
| Throttle sticks | Debris in throttle mechanism Damaged throttle cable/spring | Immediately engage engine stop switch. Inspect and clear debris. If damage is suspected, do not operate and contact support. |
8. Specyfikacje
| Funkcja | Szczegół |
|---|---|
| Producent | NEO-TEC |
| Numer modelu | ET520-EABA |
| Typ silnika | 52CC 2-Stroke Gasoline Engine |
| Included Auger Bits | 4 cali, 6 cali, 8 cali |
| Waga przedmiotu | 21.2 funta |
| Wymiary produktu | 12 x 11 x 10 inches (Powerhead) |
| Auger Mount Diameter | 20mm |
9. Gwarancja i wsparcie
NEO-TEC stands behind the quality of its products.
- Gwarancja: All NEOTEC machines come with a 12-month replacement motor part warranty at no additional cost.
- Obsługa klienta: We have professional local after-sales maintenance personnel available to assist you. If you have any questions, concerns, or require technical support, please contact our customer service team. Refer to your purchase documentation for contact details.