1. Wprowadzenie
Dziękujemy za wybranie Weber Summit SB38 S Built-In Natural Gas Grill. This manual provides essential information for the safe installation, operation, maintenance, and troubleshooting of your new grill. Please read all instructions carefully before assembly and use to ensure optimal performance and safety. Keep this manual for future reference.
2. Ważne informacje dotyczące bezpieczeństwa
OSTRZEŻENIE: Wyłącznie do użytku na zewnątrz. Nieprawidłowa instalacja, regulacja, modyfikacja, serwisowanie lub konserwacja może spowodować obrażenia ciała lub uszkodzenie mienia. Przed instalacją lub serwisowaniem tego urządzenia należy dokładnie przeczytać instrukcję instalacji, obsługi i konserwacji.
2.1 Bezpieczeństwo gazowe
- Ensure all gas connections are tight and leak-free. Perform a leak test with a soap and water solution before first use and after any gas component replacement.
- Nigdy nie przechowuj ani nie używaj benzyny lub innych łatwopalnych oparów i cieczy w pobliżu tego lub innego urządzenia.
- Jeśli poczujesz zapach gazu:
- Wyłącz dopływ gazu do urządzenia.
- Zgasić otwarty ogień.
- Otwórz pokrywę.
- Jeżeli zapach nadal jest wyczuwalny, należy odsunąć się od urządzenia i natychmiast skontaktować się z dostawcą gazu lub strażą pożarną.
2.2 Installation & Clearance
- This grill must be installed by a qualified installer, service agency, or gas supplier.
- Maintain minimum clearances from combustible materials as specified in the installation guide.
- Ensure adequate ventilation around the grill for proper combustion and to prevent accumulation of unburned gas.
2.3 Bezpieczeństwo elektryczne
- The grill requires 17.58 watts of power. Ensure proper electrical grounding and connection if applicable for features like rotisserie or lighting.
- Do not operate the grill if the electrical cord is damaged.
3. Koniec produktuview
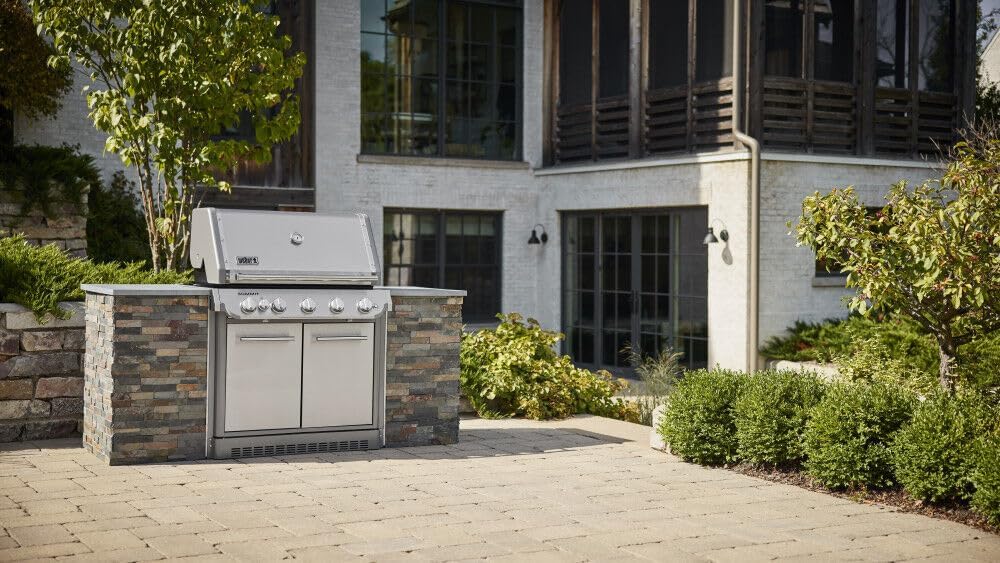
Ten Weber Summit SB38 S is a high-performance built-in natural gas grill designed for outdoor cooking. It features advanced components to enhance your grilling experience.
3.1 Główne cechy
- New Top-Down Infrared Broiler: Caramelizes steaks with intense heat.
- Heavy-Duty, Integrated Rotisserie: Accommodates multiple items for slow roasting.
- WEBER CRAFTED Cooking Grates and Frame Kit: Allows for versatile cooking with various custom-fit grillware (sold separately).
- Large, Stainless-Steel Smoker Box: Adds wood-smoked flavor to your food.
- Zestaw wykończeniowy: Provides a seamless, built-in appearance for outdoor kitchens.
- Osłona grilla: Included to protect the grill from outdoor elements.
3.2 Grill Components
The grill features a durable stainless steel construction, five main burners, and a warming rack. A thermometer is integrated into the lid for temperature monitoring.

4. Konfiguracja i instalacja
Assembly of certain components is required. Due to the nature of natural gas appliances, professional installation is strongly recommended.
4.1 Wymagania dotyczące witryny
- The grill must be installed in an outdoor area with adequate ventilation.
- Ensure the installation surface is level and capable of supporting the grill's weight.
- Refer to the detailed installation guide for specific cutout dimensions and clearance requirements for your outdoor kitchen setup.
4.2 Podłączenie gazu
- This grill is designed for natural gas only. Do not attempt to connect it to a propane (LP) gas supply.
- All gas connections must comply with local codes, or in the absence of local codes, with the National Fuel Gas Code, ANSI Z223.1/NFPA 54.
- A manual shut-off valve must be installed upstream of the grill's gas supply line.
4.3 Podłączenie elektryczne
- Connect the grill to a properly grounded electrical outlet as per local electrical codes.
- The electrical connection powers features such as the rotisserie motor and internal lighting.
5. Instrukcja obsługi
5.1 Lighting the Main Burners
- Otwórz pokrywę grilla.
- Upewnij się, że wszystkie pokrętła palnika są ustawione w pozycji „WYŁĄCZONE”.
- Włącz dopływ gazu do grilla.
- Push and turn one burner control knob to the 'START/HIGH' position. You should hear the igniter click.
- Verify the burner has lit by looking through the cooking grates. If it does not light within 5 seconds, turn the knob to 'OFF', wait 5 minutes, and repeat the process.
- Once one burner is lit, you can light adjacent burners by turning their knobs to 'HIGH'.
5.2 Using the Infrared Broiler
- The infrared broiler is located in the top of the grill lid.
- To activate, ensure the main burners are off and the lid is open.
- Follow specific lighting instructions for the infrared broiler, typically involving pushing and turning its dedicated control knob.
- Use for searing and caramelizing the top surface of food.
5.3 Rotisserie Operation
- Attach the rotisserie motor and spit rod according to the separate rotisserie instructions.
- Secure food onto the spit rod.
- Turn on the rotisserie burner (if applicable) and the rotisserie motor.
- Monitor cooking progress and internal food temperature.
5.4 Smoker Box Usage
- Fill the stainless steel smoker box with wood chips (pre-soaked if desired).
- Place the smoker box over a lit burner or in a designated area on the cooking grates.
- Close the lid to allow smoke to infuse food. Adjust burner settings to control smoke intensity.
5.5 WEBER CRAFTED System
- Ten WEBER CRAFTED cooking grates and frame kit allow for the use of specialized grillware (e.g., griddle, pizza oven, wok, sold separately).
- Remove the center section of the cooking grate and insert the desired WEBAkcesoria ER CRAFTED.
- Follow the instructions provided with each accessory for specific cooking techniques.
6. Konserwacja i pielęgnacja
Regular cleaning and maintenance will extend the life of your grill and ensure safe operation.
6.1 Cleaning the Cooking Grates
- After each use, while the grill is still warm, brush the cooking grates with a stiff wire brush.
- For deeper cleaning, remove grates and wash with warm, soapy water. Rinse thoroughly and dry.
6.2 Czyszczenie wnętrza
- Periodically remove cooking grates and flavorizer bars. Scrape off any accumulated grease and debris from the cookbox and grease tray.
- Clean the grease management system regularly to prevent flare-ups.
6.3 Czyszczenie powierzchni zewnętrznej
- Wipe stainless steel surfaces with a soft cloth and a stainless steel cleaner. Always wipe in the direction of the grain.
- Avoid abrasive cleaners or pads that can scratch the finish.
6.4 Pokrowiec na grilla
- Use the included grill cover to protect your grill from weather elements when not in use.
- Ensure the grill is cool before covering.
7. Rozwiązywanie Problemów
This section addresses common issues you might encounter. For problems not listed here, contact customer support or a qualified service technician.
7.1 Palnik nie zapala się
- Sprawdź dostawę gazu: Ensure the gas tank valve (if applicable) or main gas supply is open.
- Check Igniter: Listen for a clicking sound when turning the knob. If no click, check igniter electrode and wire connections.
- Clear Burner Ports: Clogged burner ports can prevent ignition. Clean with a wire brush.
7.2 Nierównomierne ogrzewanie
- Clean Burners: Ensure burner ports are clear of debris.
- Sprawdź ciśnienie gazu: Low gas pressure can cause uneven heating. Consult a gas professional.
- Warunki wietrzne: Strong winds can affect heat distribution. Consider a windbreak if safe and appropriate.
7.3 Excessive Flare-Ups
- Clean Grill: Accumulation of grease and food debris is a common cause. Clean the cookbox and grease management system.
- Trim Fat: Przed grillowaniem odetnij nadmiar tłuszczu z mięsa.
- Zmniejszenie ciepła: Lower burner settings if flare-ups occur frequently.
8. Specyfikacje
| Funkcja | Specyfikacja |
|---|---|
| Nazwa modelu | Summit® SB38 S Built-In Gas Grill (Natural Gas) |
| Numer modelu przedmiotu | 1500043 |
| UPC | 077924989599 |
| Wymiary produktu (Gł. x Szer. x Wys.) | 27" gł. x 38.9" szer. x 52.5" wys. |
| Typ paliwa | Gaz ziemny |
| Tworzywo | Stal nierdzewna |
| Rodzaj wykończenia | Szczotkowane |
| Liczba głównych palników | 5 |
| Powierzchnia do gotowania | 652.5 cali kwadratowych |
| Cotage | 17.58 watów |
| Funkcja specjalna | Stojak na ocieplenie |
| Zawarte komponenty | Thermometer, Grill Cover |
| Wymagany montaż | Tak |
9. Gwarancja i wsparcie
9.1 Gwarancja producenta
Ten produkt jest objęty a 2 lata gwarancji producentaProsimy zachować dowód zakupu na wypadek roszczeń gwarancyjnych. Gwarancja obejmuje wady materiałowe i wykonawcze powstałe w wyniku normalnego użytkowania.
9.2 Obsługa klienta
For technical assistance, parts, or warranty inquiries, please contact the manufacturer's customer service department. Refer to the product packaging or the manufacturer's official webAktualne dane kontaktowe znajdują się na stronie.