1. Wprowadzenie
Thank you for choosing the RIGOL DS1102Z-E Digital Oscilloscope. This manual provides essential information for the safe and efficient use of your device. Please read it thoroughly before operation and keep it for future reference.
The DS1102Z-E is a high-performance digital oscilloscope designed for various applications including research and development, education, maintenance, and industrial testing. It features a 100 MHz bandwidth, 1 GSa/s sample rate, and a 24 Mpts memory depth, enabling precise analysis of complex waveforms.
2. Koniec produktuview
The RIGOL DS1102Z-E is a versatile measurement instrument integrating a frequency counter and supporting protocol decoding for RS232/UART, I2C, and SPI. It also includes FFT analysis and automatic measurement functions to enhance testing efficiency.
Rycina 2.1: Przód view of the RIGOL DS1102Z-E Digital Oscilloscope.
2.1 Główne cechy
- 100 MHz Bandwidth, 1 GSa/s Sampstawka: Captures signals with high precision.
- 24 Mpts Memory Depth: Allows for extended signal capture and detailed waveform analysis.
- Multi-function Measurement Device: Includes frequency counter, protocol decoding (RS232/UART, I2C, SPI), FFT analysis, and automatic measurement functions.
- Waveform Recording and Playback: Records signal variations and replays them for fault identification.
- Wyświetlacz o wysokiej rozdzielczości: 7-inch TFT screen with 256-level grayscale, offering a phosphor-like display effect for clear waveform details.
- Remote Control & Secondary Development Support: Equipped with USB and LAN ports for PC remote control, compatible with SCPI commands, LabVIEW, Visual Basic, and Visual C++.
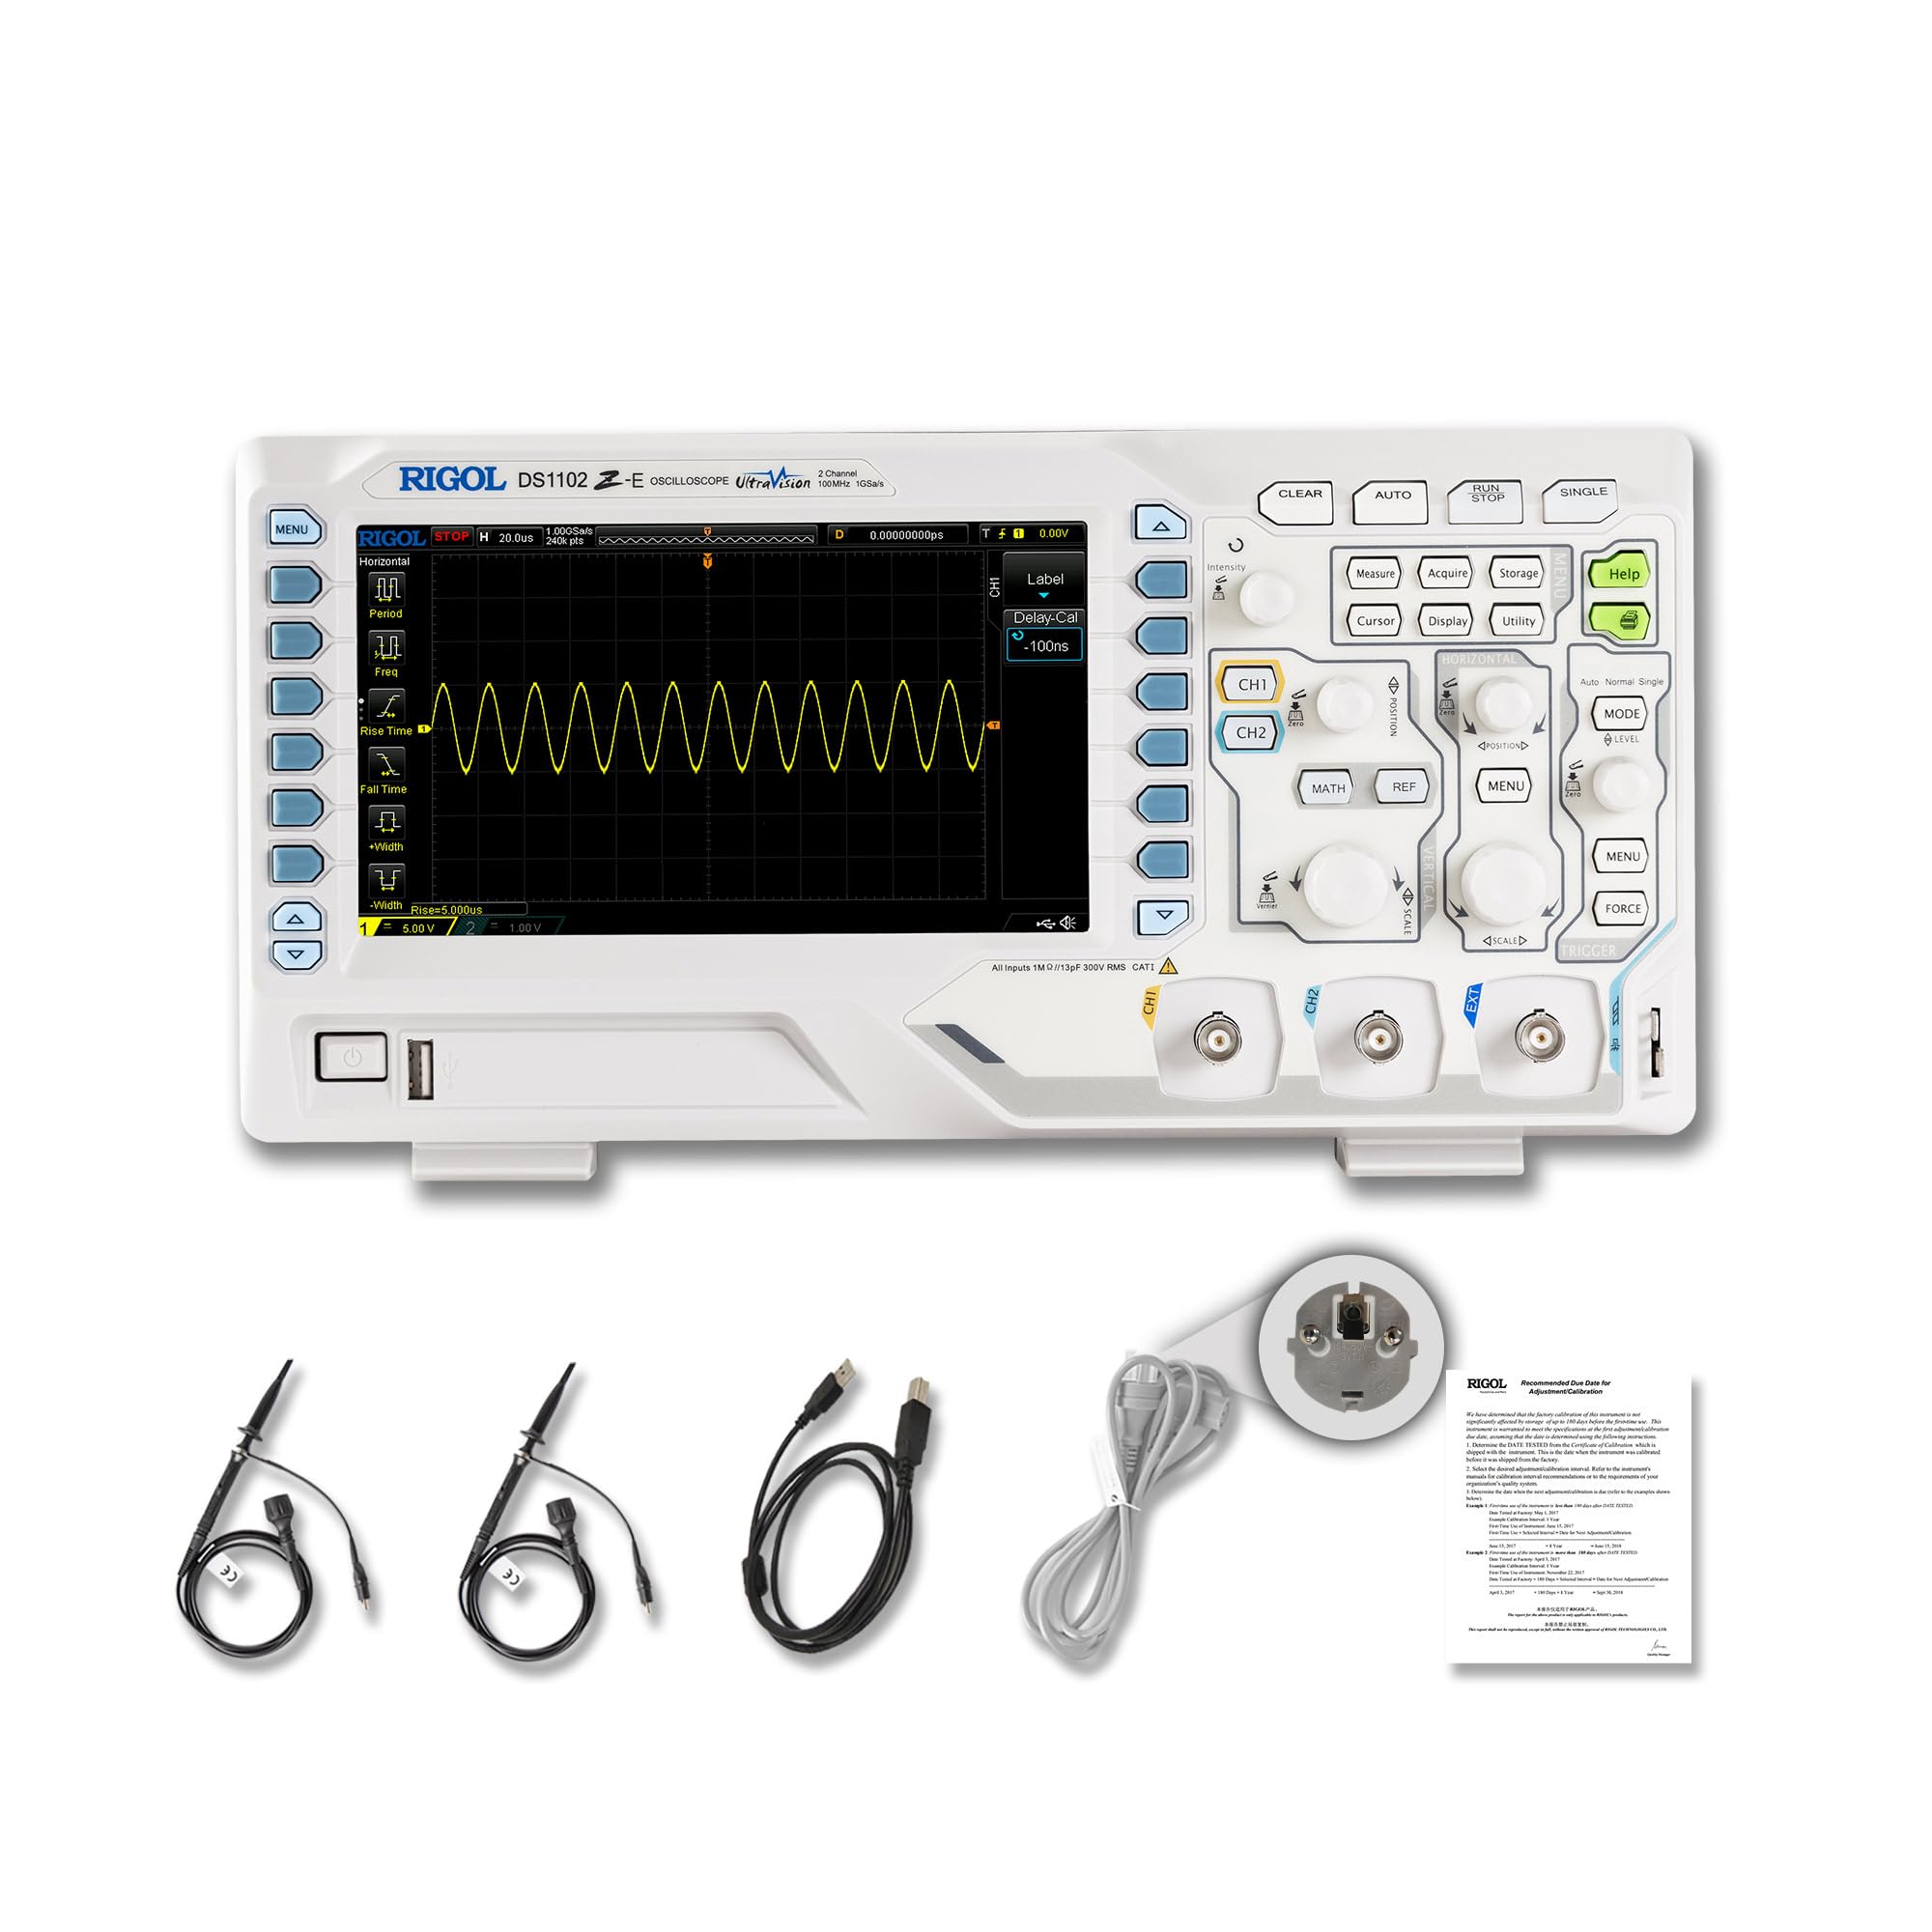
2.2 Zawartość pudełka

Figure 2.2: Contents included with the DS1102Z-E Oscilloscope.
- 1x Main Unit (DS1102Z-E Digital Oscilloscope)
- 2x Passive Probes (150MHz)
- 1x Power Cable (EU plug)
- 1x USB A-B Cable
- 1x Karta gwarancyjna
- 1x Certyfikat kalibracji
- 1x Declaration of Conformity
3. Konfiguracja
Follow these steps to set up your RIGOL DS1102Z-E oscilloscope:
- Rozpakowywanie: Ostrożnie wyjmij wszystkie elementy z opakowania. Sprawdź urządzenie pod kątem ewentualnych uszkodzeń.
- Podłączenie zasilania: Connect the provided power cable to the oscilloscope's power input and then to a suitable AC power outlet.
- Połączenie sondy: Connect the passive probes to the BNC input connectors (CH1, CH2) on the front panel. Ensure a secure connection.
- Grunt: Always ensure the oscilloscope is properly grounded through the power cable.
- USB/LAN Connection (Optional): If you plan to use remote control or secondary development, connect the USB cable to a PC or the LAN cable to your network.

Rysunek 3.1: Koniecview of the oscilloscope's physical dimensions and ports.
4. Instrukcja obsługi
This section covers the basic operation of your oscilloscope.
4.1 Włączanie/wyłączanie
- Włączanie: Press the power button located on the front panel. The device will perform a self-test and display the main interface.
- Wyłączone: Naciśnij i przytrzymaj przycisk zasilania, aż urządzenie się wyłączy.
4.2 Podstawowy wyświetlacz przebiegu
After powering on, connect a signal to one of the input channels (e.g., CH1). Adjust the vertical scale (Volts/Div) and horizontal scale (Time/Div) knobs to display the waveform clearly. Use the AUTOMATYCZNY button for automatic setup of the waveform display.

Rysunek 4.1: Example of a waveform displayed on the oscilloscope screen.
4.3 zaawansowane funkcje
- Funkcje pomiarowe: Naciśnij MIERZYĆ button to access automatic measurements like frequency, period, peak-to-peak voltage, itp.
- System wyzwalania: Use the trigger controls to stabilize repetitive waveforms. Adjust the trigger level and mode (Edge, Pulse, Video, Slope, etc.) as needed.
- Waveform Recording: The oscilloscope allows recording and replaying waveforms. Access this feature through the menu to capture transient events.
- Protocol Decoding: For serial bus analysis (RS232/UART, I2C, SPI), configure the decoding settings via the menu.
- Analiza FFT: Perform Fast Fourier Transform (FFT) to analyze the frequency components of your signal.

Figure 4.2: Complex waveform analysis with measurement data.

Figure 4.3: Multiple waveforms displayed simultaneously for comparison.
5. Konserwacja
Właściwa konserwacja gwarantuje długowieczność i dokładność oscyloskopu.
- Czyszczenie: Do czyszczenia zewnętrznej części oscyloskopu należy używać miękkiej, suchej ściereczki. W przypadku uporczywych zabrudzeń należy użyć delikatnegoamp Można używać ściereczki z łagodnym detergentem. Unikać środków czyszczących o działaniu ściernym i rozpuszczalników.
- Pielęgnacja ekranu: Clean the display screen with a soft, lint-free cloth. Do not use excessive force or harsh chemicals.
- Składowanie: When not in use, store the oscilloscope in a clean, dry environment, away from direct sunlight, extreme temperatures, and excessive dust.
- Pielęgnacja sondy: Handle probes carefully. Avoid bending or stressing the probe tips. Store them properly to prevent damage.
- Kalibrowanie: For optimal performance, periodic calibration by qualified personnel is recommended. Refer to the official RIGOL website for calibration services.
6. Rozwiązywanie Problemów
W tej sekcji znajdziesz rozwiązania typowych problemów, na jakie możesz natrafić.
| Problem | Możliwa przyczyna | Rozwiązanie |
|---|---|---|
| No power when turned on. | Power cable not connected, power outlet faulty, or power button issue. | Check power cable connection. Test the power outlet. Ensure the power button is fully pressed. |
| Nie wyświetla się żaden przebieg. | No signal input, probe not connected correctly, vertical/horizontal scale incorrect, or trigger not set. | Verify signal source. Check probe connections. Adjust Volts/Div and Time/Div. Press AUTOMATYCZNY or adjust trigger settings. |
| Kształt fali jest niestabilny. | Nieprawidłowe ustawienia wyzwalacza. | Adjust trigger level, mode, and source to stabilize the waveform. |
| Pilot nie działa. | USB/LAN cable issue, incorrect network settings, or software driver not installed. | Check cable connections. Verify network configuration. Install necessary drivers and software (e.g., UltraScope). |
If the problem persists, please contact RIGOL technical support.
7. Specyfikacje
Detailed technical specifications for the RIGOL DS1102Z-E Digital Oscilloscope.

Figure 7.1: Visual representation of key technical specifications.
| Funkcja | Specyfikacja |
|---|---|
| Marka | Rygol |
| Model | DS1102Z-E |
| Przepustowość łącza | 100MHz |
| Kanały | 2 Channels + EXT |
| Sampstawka | 1 GSa/s |
| Głębokość pamięci | 24 Mpkt |
| Częstotliwość przechwytywania przebiegów | 30,000 XNUMX połączeń na sekundę |
| Rozdzielczość pionowa | 8 bit |
| Minimalna czułość | 1 mV/działkę |
| Minimum Time Base | 2 ns/div |
| Wsparcie dekodowania | RS232/UART, I2C, SPI |
| Analiza FFT | Standard |
| Wyświetlacz | 7-calowy wyświetlacz TFT (800x480) |
| Łączność | Host USB, urządzenie USB, sieć LAN |
| Źródło zasilania | Zasilacz sieciowy |
| Kolor | Szaro-biały |
| Waga przedmiotu | 2.9 kilograma |
| Wymiary (dł. x szer. x wys.) | 31.31 x 16.08 x 12.24 centymetra |
| Zgodne standardy | CE, RoHS |
| Numer części producenta | DS1102Z-E |
| Kraj pochodzenia | Chiny |
8. Gwarancja i wsparcie
RIGOL is committed to providing high-quality products and excellent customer service.
- Gwarancja: The RIGOL DS1102Z-E Digital Oscilloscope comes with a 3-letnia gwarancja od daty zakupu. Niniejsza gwarancja obejmuje wady materiałowe i wykonawcze przy normalnym użytkowaniu.
- Wsparcie techniczne: RIGOL offers Wsparcie techniczne 24/7 to assist you with any questions or issues you may encounter. Please refer to the official RIGOL webStrona zawierająca informacje kontaktowe i zasoby pomocy.
- Zasoby internetowe: Visit the official RIGOL website for product documentation, software updates (e.g., UltraScope), and additional support materials.

Figure 8.1: RIGOL oscilloscopes support multiple languages for user convenience.


