Wstęp
This instruction manual provides essential information for the proper installation, operation, and maintenance of your Toshiba Washing Machine Bath Water Supply Filter, Model 42044562. This filter is designed to remove dirt and impurities from bath water before it enters your washing machine, contributing to cleaner laundry and prolonging the life of your appliance.
Produkt ponadview
The Toshiba Bath Water Supply Filter set includes two filters: one black and one green. These filters are crucial components for maintaining the quality of water used in your washing machine's bath water supply system.
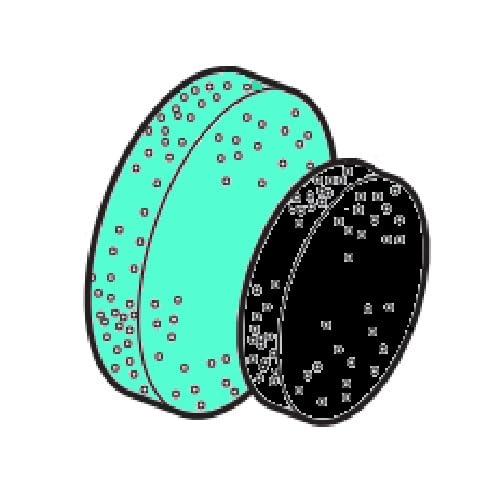
Image: The Toshiba Bath Water Supply Filter set, featuring one black and one green filter.
Kompatybilne modele
This filter is compatible with a wide range of Toshiba washing machine models. A partial list of compatible models includes:
- AW-10DP1, AW-10DP1BK, AW-10DP2, AW-10DP2BK, AW-10DP3, AW-10DP3BK
- AW-10DPE1, AW-10DPE2, AW-10DPE3, AW-10M7, AW-10SD2M, AW-10SD3M
- AW-10SD5, AW-10SD6, AW-10SD7, AW-10SD70J, AW-10SD8, AW-10SD9
- AW-10SD9BK, AW-10SDE5, AW-10SDE6, AW-10SDE7, AW-10SDE8
- AW-10SV2, AW-10SV2M, AW-10SV3M, AW-10SV5, AW-10SV6, AW-10SV7
- AW-10SV8, AW-10SV9, AW-10SVE4, AW-10SVE5, AW-10SVE6, AW-10VH1
- AW-10VP2, AW-10VP3, AW-11XD7, AW-12DP1, AW-12DP2, AW-12DP3
- AW-12VP2, AW-12VP3, AW-12XD7, AW-12XD8, AW-12XD9, AW-501VP
- AW-502V, AW-601GP, AW-601VP, AW-602GP, AW-602VP, AW-603GP
- AW-604GP, AW-607, AW-60DL, AW-60DM, AW-60GA, AW-60GC
- AW-60GE, AW-60GF, AW-60GK, AW-60GL, AW-60GM, AW-60SDC
- AW-60SDF, AW-61EGP, AW-61MAP, AW-6D2, AW-6D3M, AW-6D6
- AW-6DH2, AW-6G2, AW-6G3, AW-6G5, AW-6G6, AW-6G8, AW-6G9
- AW-6GM1, AW-701GP, AW-701HVP, AW-701MVP, AW-702GP, AW-702HVP
- AW-702MVP, AW-703GP, AW-704GP, AW-70DA, AW-70DAV7, AW-70DB
- AW-70DBE2, AW-70DC, AW-70DCE3, AW-70DE, AW-70DF, AW-70DG
- AW-70DJ, AW-70DJE7, AW-70DK, AW-70DKE8, AW-70DL, AW-70DLE9
- AW-70DM, AW-70DME1, AW-70GA, AW-70GC, AW-70GE, AW-70GF
- AW-70GK, AW-70GL, AW-70GM, AW-70J2, AW-70VA, AW-70VAV7
- AW-70VB, AW-70VBE2, AW-70VC, AW-70VE, AW-70VF, AW-70VG
- AW-70VJ, AW-70VJE7, AW-70VK, AW-70VKE8, AW-70VL, AW-70VLE9
- AW-70VM, AW-70VME1, AW-71EGVP, AW-75VCE3, AW-7D2, AW-7D3M
- AW-7D5, AW-7D6, AW-7D7, AW-7D8, AW-7D9, AW-7DE2, AW-7DE3MG
- AW-7DE4, AW-7DH2, AW-7G2, AW-7G3, AW-7G5, AW-7G6, AW-7G8
- AW-7G8BK, AW-7G9, AW-7G9BK, AW-7GM1, AW-7GM1BK, AW-7GME1
- AW-7V3M, AW-801HVP, AW-801MVP, AW-802HVP, AW-802MVP, AW-80DA
- AW-80DAV7, AW-80DB, AW-80DBE2, AW-80DC, AW-80DCE3, AW-80DE
- AW-80DF, AW-80DG, AW-80DJ, AW-80DJE7, AW-80DK, AW-80DKE8
- AW-80DL, AW-80DLE9, AW-80DM, AW-80DME1, AW-80SVL, AW-80SVM
- AW-80VA, AW-80VAV7, AW-80VB, AW-80VBE2, AW-80VC, AW-80VE
- AW-80VF, AW-80VG, AW-80VJ, AW-80VJE7, AW-80VK, AW-80VKE8
- AW-80VL, AW-80VLE9, AW-80VM, AW-80VME1, AW-81EGVP, AW-830JDM
- AW-8D2, AW-8D2M, AW-8D3M, AW-8D5, AW-8D6, AW-8D7, AW-8D8
- AW-8D9, AW-8D9BK, AW-8DE2, AW-8DE3MG, AW-8DE4, AW-8DH1
- AW-8DH1BK, AW-8DH2, AW-8DH2BK, AW-8V2, AW-8V2M, AW-8V3M
- AW-8V5, AW-8V6, AW-8V7, AW-8V8, AW-8V9, AW-8VE2MG, AW-8VE3MG
- AW-8VE6, AW-8VM2, AW-90GF, AW-90SDL, AW-90SDM, AW-90SVL
- AW-90SVM, AW-95JD, AW-9DH1, AW-9DH2, AW-9SD2M, AW-9SD3M
- AW-9SD5, AW-9SD6, AW-9SD7, AW-9SDE5, AW-9SDE6, AW-9SV2
- AW-9SV2M, AW-9SV3M, AW-9SV5, AW-9SV6, AW-9SV7, AW-9SV8
- AW-9SV9, AW-9SVE4, AW-9SVE5, AW-9V2M, AW-9V3M, AW-9V5
- AW-9V6, AW-9V7, AW-9VE2MG, AW-9VE3MG, AW-9VE6, AW-9VH1
- AW-A60UP, AW-A60XP, AW-A70UP, AW-A70XP, AW-A80DA, AW-A80VA
- AW-B60DP, AW-B60UP, AW-B60XP, AW-B6MP, AW-B70DP, AW-B70UP
- AW-B70VP, AW-B70XP, AW-B7KSP, AW-B80VP, AW-BC80VA, AW-BG80VA
- AW-BK10SD6, AW-BK10SD7, AW-BK10SD8, AW-BK10SV8, AW-BK70VM, AW-BK80VM
- AW-BK8D7, AW-BK8D8, AW-C60VP, AW-C60XP, AW-C61G, AW-C6VIP
- AW-C70VP, AW-C70XP, AW-C7DVP, AW-C7VIP, AW-C7VPV, AW-C85VP
- AW-C8VIP, AW-D60XP, AW-D702MVP, AW-D702V5, AW-D702VP, AW-D703V6
- AW-D703VP, AW-D703YVP, AW-D802MVP, AW-D802V5, AW-D802VP, AW-D803V6
- AW-D803VP, AW-D835, AW-D836, AW-D853XVP, AW-E45V, AW-E470D
- AW-E470V, AW-E480D, AW-E480V, AW-E50VP, AW-E60VP, AW-E60XP
- AW-E70HVP, AW-E70XP, AW-E7VPV, AW-E80HVP, AW-EG8HVP, AW-F50VP
- AW-F60GP, AW-F60VP, AW-F70GP, AW-F70HVP, AW-F7JGP, AW-F80HVP
- AW-FC60G, AW-FV60GP, AW-GH70VK, AW-GH70VL, AW-GH80VK, AW-GH80VL
- AW-GN70DC, AW-GN70DE, AW-GN70DF, AW-GN70DG, AW-GN70DJ, AW-GN80VE
- AW-GN80VF, AW-GN80VG, AW-GN80VJ, AW-GT70DA, AW-GT70DB, AW-GT70VA
- AW-H701, AW-J60VP, AW-J60XP, AW-J70VP, AW-JB6XP, AW-JB7XP
- AW-K60VP, AW-KS10SD6, AW-KS10SD7, AW-KS10SD8, AW-KS10SD9, AW-KS10SV6
- AW-KS10SV7, AW-KS70DJ, AW-KS70DK, AW-KS70DL, AW-KS70DM, AW-KS7D2
- AW-KS80VM, AW-KS8D3M, AW-KS8D5, AW-KS8D7, AW-KS8D8, AW-KS8D9
- AW-KS8V2, AW-KS8V3M, AW-S62GP, AW-S63GP, AW-S64GP, AW-T75DA
- AW-T75DB, AW-T75DC, AW-T75DE, AW-T75DF, AW-T75DG, AW-T75DJ
- AW-T75DKS, AW-T75DMS, AW-TS75D2M, AW-TS75D5, AW-TS75D6, AW-TS75D7
- AW-TS75D9, AW-TS85DH1, AW-V601GP, TW-117E4L, TW-117E4R, TW-117E5L
- TW-117E5R, TW-117V3L, TW-117V3R, TW-117V5L, TW-117V5R, TW-117V6L
- TW-117V6R, TW-117X3L, TW-117X3R, TW-117X5L, TW-117X5R, TW-117X6L
- TW-117X6R, TW-127V7L, TW-127V7R, TW-127X7L, TW-127X7R, TW-127X8BKL
- TW-127X8BKR, TW-127X8L, TW-127X8R, TW-127X9BKL, TW-127X9BKR, TW-127X9L
- TW-127X9R, TW-127XP1L, TW-127XP1R, TW-127XP2L, TW-127XP2R, TW-96A3L
- TW-96A3R, TW-Z96A2L, TW-Z96A2ML, TW-Z96A2MR, TW-Z96A2R, TW-Z96V2L
- TW-Z96V2ML, TW-Z96V2MR, TW-Z96V2R, TW-Z96VS2ML, TW-Z96VS2MR
- TW-Z96X2ML, TW-Z96X2MR
Please refer to your washing machine's manual or the product packaging for a complete and up-to-date list of compatible models.
Konfiguracja i instalacja
- Identify the Bath Water Supply Hose: Locate the hose on your washing machine designed for drawing water from a bath or external source.
- Przygotuj filtr: Ensure the filter is clean and free from any packaging materials.
- Podłącz filtr: Attach one end of the filter to the intake end of the bath water supply hose. Ensure a snug and secure connection to prevent leaks.
- Insert into Washing Machine: Insert the other end of the filter, along with the hose, into the designated bath water supply inlet on your washing machine. Confirm it is properly seated.
- Sprawdź, czy nie ma wycieków: Before operating, visually inspect all connections for any signs of water leakage.
Instrukcja obsługi
Once the bath water supply filter is correctly installed, you can utilize your washing machine's bath water intake function.
- Zapewnij prawidłową instalację: Verify that the filter is securely attached to the bath water supply hose and inserted into the washing machine's inlet.
- Place Hose in Bath Water: Position the end of the bath water supply hose (with the filter attached) into the bath water source.
- Select Bath Water Option: On your washing machine's control panel, select the appropriate setting or program that utilizes the bath water supply function.
- Start Washing Cycle: Begin the washing cycle as usual. The washing machine will draw water through the filter.
Konserwacja
Regular maintenance of your bath water supply filter ensures optimal performance and longevity of your washing machine.
- Regularna kontrola: Periodically inspect the filter for visible dirt, debris, or signs of wear and tear.
- Czyszczenie: If the filter appears dirty, remove it from the hose and rinse it thoroughly under clean running water. Gently scrub any stubborn debris if necessary.
- Wymiana: Replace the filter when it shows signs of degradation, such as tearing, excessive clogging that cannot be cleaned, or if you notice a decrease in the bath water pump's suction performance. The product includes two filters (one black, one green) for replacement.
- Składowanie: If not in use for an extended period, clean the filter, allow it to dry completely, and store it in a cool, dry place.
Rozwiązywanie problemów
If you encounter issues with your bath water supply system, consider the following troubleshooting steps related to the filter:
- Poor Water Suction: If the washing machine's bath water pump is not drawing water effectively, first check the filter. It may be clogged with debris or degraded. Clean or replace the filter as needed.
- Wyciek wody: Ensure the filter is securely connected to both the bath water supply hose and the washing machine inlet. Tighten connections if loose. Inspect the filter for any damage that might cause leaks.
- Unclean Water: If the water drawn from the bath still appears unclean, the filter might be compromised or severely clogged. Replace the filter.
Specyfikacje
| Producent | Toshiba |
| Numer modelu | 42044562 |
| Wymiary opakowania | Wymiary 12.5 x 8 x 1.2 cm |
| Waga paczki | 0.01 kilogramów |
| Wymagane baterie | NIE |
| Cechy produktu | Removes dirt and impurities from washing machine water. |
| Liczba elementów | 2 (one black, one green filter) |
Gwarancja i wsparcie
For information regarding product warranty, technical support, or replacement parts, please refer to the documentation included with your washing machine or visit the official Toshiba webstrona. Zachowaj dowód zakupu na potrzeby roszczeń gwarancyjnych.


