1. Wprowadzenie
This manual provides instructions for the proper use and maintenance of the SUNMI V2SE Smart Mobile Terminal. The V2SE is a versatile device designed for various business applications, featuring an integrated 58mm thermal printer, 1D/2D barcode recognition, NFC capabilities, and running on Android 12.0.
Główne cechy obejmują:
- Integrated 58mm thermal printer with 80mm/s print speed.
- 1D/2D Barcode recognition for efficient scanning.
- NFC for contactless transactions.
- Android 12.0 operating system with a Quad Core 2.0 GHz CPU.
- 2 GB RAM and 8 GB ROM for smooth operation.
- Connectivity: 4G/3G/2G, 2.4G/5G Wi-Fi, Bluetooth 2.1/3.0/4.2.
- Removable Lithium Ion battery.
2. Komponenty urządzenia
Familiarize yourself with the main components of your SUNMI V2SE terminal.
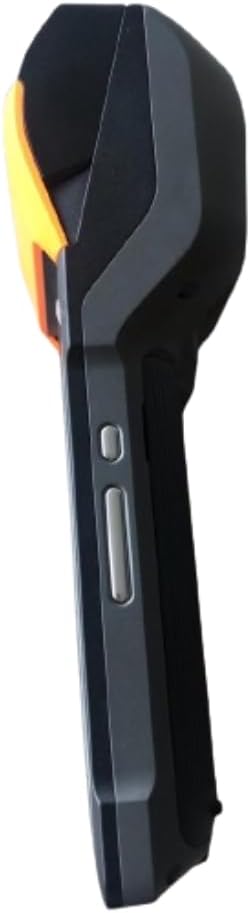
Rysunek 2.1: Przód i bok View. This image displays the device's screen, the integrated barcode scanner at the top, and the power and volume buttons located on the side.

Rysunek 2.2: Strona View. Na tym zdjęciu widać boczną częśćfile of the terminal, including the cover for the SIM card slot and additional buttons.

Rysunek 2.3: Z powrotem View. This image illustrates the rear of the device, featuring the thermal printer cover, the 0.3 MP camera, and the charging contact points.
Lista komponentów:
- Ekran wyświetlacza: Touch-sensitive LCD for user interaction.
- Skaner kodów kreskowych: Integrated 1D/2D scanner for data capture.
- Drukarka termiczna: For printing receipts and other documents.
- Przycisk zasilania: To turn the device on/off or wake/sleep.
- Przyciski głośności: Aby dostosować poziom dźwięku.
- Kamera: 0.3 MP front photo sensor.
- Gniazdo karty SIM: Supports 1 Nano SIM.
- Komora baterii: Houses the removable Lithium Ion battery.
- Charging Port/Contacts: Do ładowania urządzenia.
3. Konfiguracja początkowa
3.1. Instalacja baterii
- Sprawdź, czy urządzenie jest wyłączone.
- Znajdź pokrywę komory baterii z tyłu urządzenia (patrz rysunek 2.3).
- Zdejmij pokrywę przesuwając ją lub unosząc zgodnie z oznaczeniami.
- Insert the provided Lithium Ion battery, ensuring the contacts align correctly.
- Dokładnie załóż pokrywę komory baterii.
3.2. Instalacja karty SIM
- Ensure the device is powered off and the battery is installed.
- Locate the SIM card slot cover on the side of the device (refer to Figure 2.2).
- Otwórz pokrywę.
- Insert a Nano SIM card into the designated slot with the gold contacts facing down and the notched corner aligned.
- Close the SIM card slot cover firmly.
3.3. Thermal Paper Loading
- Locate the printer cover release latch, typically on the top or side of the printer compartment (refer to Figure 2.3).
- Otwórz pokrywę drukarki.
- Insert a 58mm thermal paper roll into the compartment, ensuring the paper feeds from the bottom and the leading edge extends out of the printer slot.
- Close the printer cover firmly until it clicks into place. Ensure there is no slack in the paper roll.
3.4. Pierwsze ładowanie i włączanie
- Connect the provided power adapter to the device's charging port.
- Plug the adapter into a power outlet. Allow the device to charge fully before first use.
- To power on, press and hold the Power button (refer to Figure 2.1) until the SUNMI logo appears on the screen.
4. Instrukcja obsługi
4.1. Włączanie/wyłączanie i tryb uśpienia
- Włączanie: Naciśnij i przytrzymaj przycisk zasilania, aż urządzenie zawibruje, a ekran się zaświeci.
- Wyłączone: Press and hold the Power button until a power menu appears. Select "Power Off" and confirm.
- Sen/Budzenie: Briefly press the Power button to put the device into sleep mode or wake it up.
4.2. Korzystanie z drukarki termicznej
The integrated 58mm thermal printer can be used to print receipts, tickets, and other documents.
- Sprawdź, czy papier termiczny jest prawidłowo załadowany (patrz rozdział 3.3).
- Open the application that requires printing (e.g., POS software).
- Initiate the print command within the application. The device will automatically print the content.
- Tear off the printed paper against the serrated edge.
4.3. Skanowanie kodów kreskowych
The V2SE supports 1D and 2D barcode recognition.
- Open an application that requires barcode input.
- Point the scanner window (located at the top of the device, refer to Figure 2.1) at the barcode.
- Press the dedicated scan button (if available) or trigger the scan function within the application.
- Upewnij się, że kod kreskowy znajduje się w polu widzenia skanera. view and well-lit for optimal performance.
4.4. Funkcjonalność NFC
The device supports Near Field Communication (NFC) for contactless operations.
- Ensure NFC is enabled in the device settings (Settings > Connected devices > NFC).
- Open an application that utilizes NFC (e.g., payment app, data transfer app).
- Hold the NFC-enabled card or device close to the NFC detection area on your terminal (typically near the top or back of the device).
- Follow the on-screen prompts to complete the transaction or data transfer.
4.5. Łączność sieciowa
- Wi-Fi: Go to Settings > Network & internet > Wi-Fi to connect to available wireless networks.
- Mobile Data (4G/3G/2G): Ensure a valid SIM card is installed and mobile data is enabled in Settings > Network & internet > Mobile network.
- Bluetooth: Przejdź do Ustawienia > Podłączone urządzenia > Bluetooth, aby sparować z innymi urządzeniami Bluetooth.
5. Konserwacja
5.1. Czyszczenie urządzenia
- Wyłącz urządzenie przed czyszczeniem.
- Użyj miękkiej, niestrzępiącej się ściereczki, lekko wyczyśćampprzetrzeć powierzchnię zewnętrzną wodą lub delikatnym, nieściernym środkiem czyszczącym.
- Do czyszczenia wyświetlacza należy używać specjalnego środka czyszczącego przeznaczonego do ekranów oraz ściereczki z mikrofibry.
- Do not use harsh chemicals, solvents, or abrasive materials. Avoid spraying liquids directly onto the device.
5.2. Pielęgnacja baterii
- Charge the battery regularly, avoiding complete discharge whenever possible.
- Nie narażaj akumulatora na działanie ekstremalnych temperatur.
- Jeżeli urządzenie nie będzie używane przez dłuższy czas, naładuj baterię do około 50% i przechowuj ją w chłodnym, suchym miejscu.
- Use only the original or approved charger and battery.
5.3. Printer Head Cleaning
Regular cleaning of the printer head can prevent print quality issues.
- Power off the device and open the printer cover.
- Delikatnie przetrzyj wacikiemampened with isopropyl alcohol to gently wipe the thermal print head.
- Allow the print head to dry completely before closing the cover and powering on the device.
6. Rozwiązywanie Problemów
| Problem | Możliwa przyczyna | Rozwiązanie |
|---|---|---|
| Urządzenie nie włącza się | Low battery; Faulty battery; Power button issue | Charge the device for at least 30 minutes. Ensure battery is correctly installed. Try a different charger. |
| Drukarka nie drukuje | No paper; Paper jammed; Printer head dirty; Application error | Check and load paper. Clear any paper jams. Clean the printer head (Section 5.3). Restart the application or device. |
| Skaner kodów kreskowych nie działa | Scanner window obstructed; Barcode damaged; Application error | Ensure scanner window is clean. Try scanning a different barcode. Restart the application or device. |
| Brak połączenia Wi-Fi | Wi-Fi off; Incorrect password; Out of range | Enable Wi-Fi in settings. Re-enter password. Move closer to the Wi-Fi router. |
| No mobile data | SIM card not installed; Mobile data off; No network coverage | Check SIM card installation. Enable mobile data in settings. Check for network coverage in your area. |
7. Specyfikacje
| Funkcja | Szczegół |
|---|---|
| Model | V2SE |
| System operacyjny | Android 12.0 |
| Procesor | Czterordzeniowy 2.0 GHz |
| BARAN | 2 GB |
| ROM | 8 GB |
| Wyświetlacz | LCD, 1920 x 1080 resolution, 16:9 Aspect Ratio |
| Drukarka | 58 mm thermal printer, 80 mm/s print speed |
| Rozpoznawanie kodów kreskowych | 1D / 2D Barcode recognition |
| Kamera | 0.3 MP Front Photo Sensor |
| Gniazdo karty SIM | 1 Nano SIM (Dual SIM support) |
| Łączność | 4G/3G/2G Cellular, Wi-Fi (2.4G/5G), Bluetooth 2.1/3.0/4.2, NFC |
| GPS | True, Supports GPS satellite navigation system |
| Bateria | 1 Lithium Ion battery (removable, included) |
| Wymiary | Wymiary 22 x 9 x 9 cm |
| Waga | 400 gramów |
| Producent | SUNMI |
8. Gwarancja i wsparcie
For warranty information and technical support, please refer to the documentation provided with your purchase or contact your vendor. Keep your proof of purchase for warranty claims.