CREWORKS 9" x 24"
CREWORKS Mini Metal Lathe 9" x 24" Instruction Manual
Model: 9" x 24" | Brand: CREWORKS
1. Wprowadzenie
Thank you for choosing the CREWORKS 9" x 24" Mini Metal Lathe. This manual provides essential information for the safe operation, maintenance, and troubleshooting of your new machine. Please read this manual thoroughly before operating the lathe to ensure proper use and to prevent injury or damage.
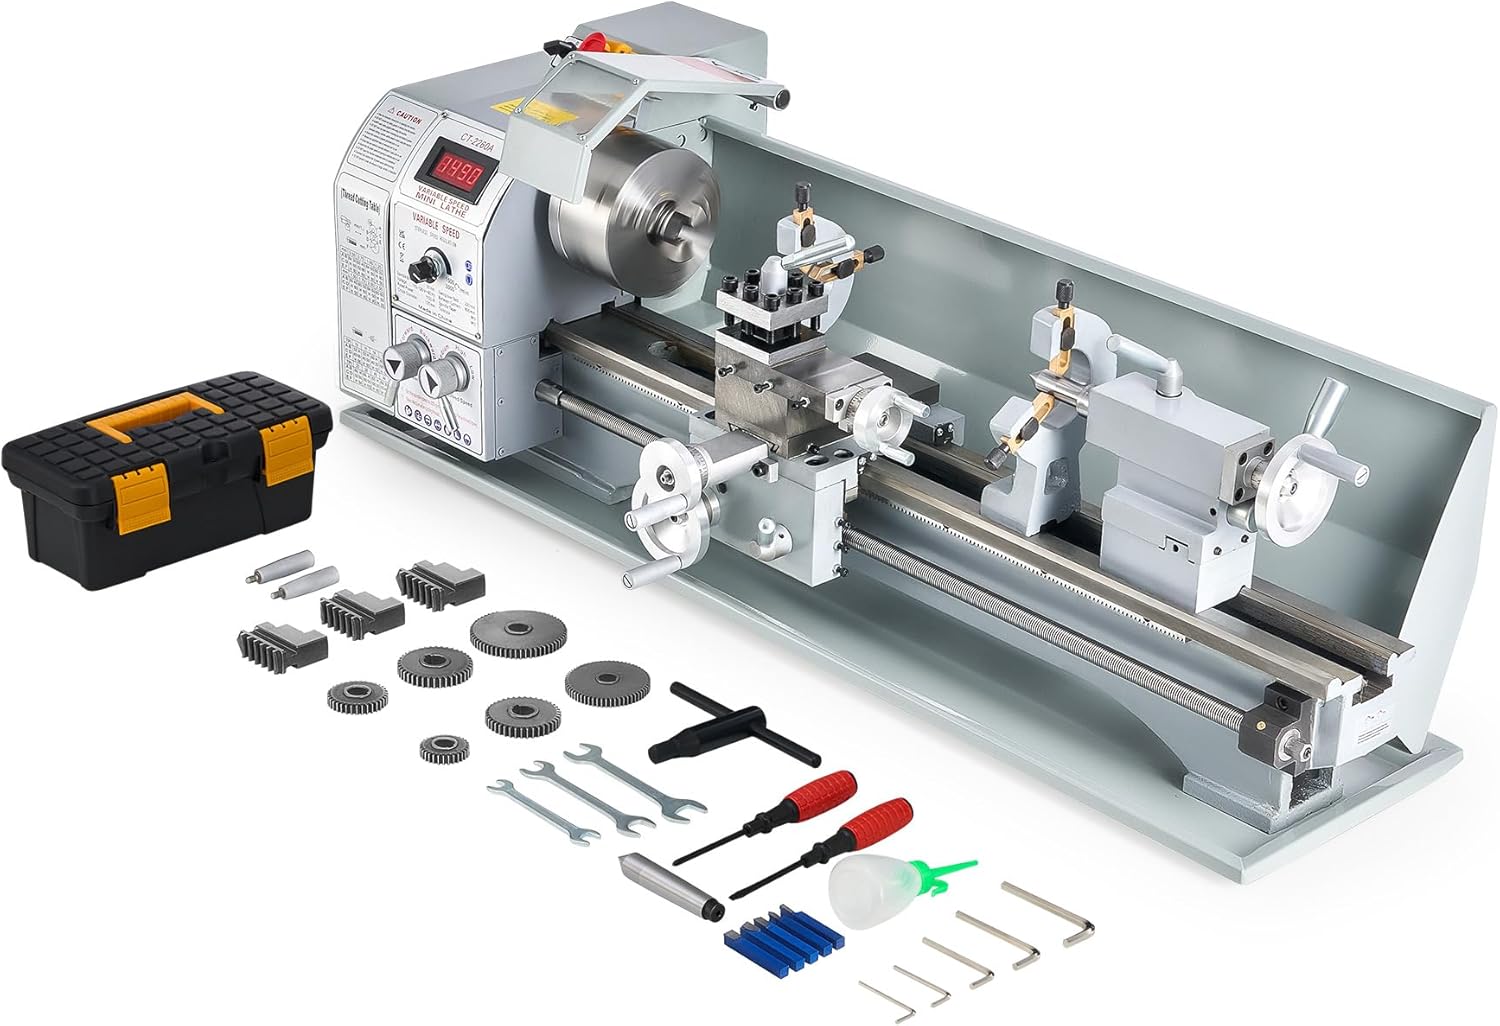
Figure 1.1: CREWORKS 9" x 24" Mini Metal Lathe with included accessories.
2. Instrukcje bezpieczeństwa
Always prioritize safety when operating machinery. Failure to follow these instructions may result in serious injury or death.
- Przeczytaj instrukcję: Przed rozpoczęciem użytkowania należy zapoznać się ze wszystkimi instrukcjami i ostrzeżeniami.
- Środki ochrony osobistej (PPE): Always wear safety glasses or a face shield. Use hearing protection. Do not wear loose clothing, gloves, ties, or jewelry that can get caught in moving parts. Tie back long hair.
- Obszar roboczy: Keep the work area clean, well-lit, and free from clutter. Ensure adequate space around the machine.
- Stan maszyny: Inspect the lathe for damage or loose parts before each use. Do not operate if damaged.
- Podłączenie zasilania: Ensure the machine is properly grounded. Disconnect power before making adjustments, changing tools, or performing maintenance.
- Bezpieczeństwo przedmiotu obrabianego: Zawsze upewnij się, że przedmiot obrabiany jest bezpiecznie zamocowany.ampw uchwycie lub tulei zaciskowej.
- Usuwanie wiórów: Never remove chips by hand while the machine is running. Use a brush or hook.
- Awaryjny postój: Zapoznaj się z lokalizacją i działaniem przycisku zatrzymania awaryjnego.
- Nadzór: Nigdy nie pozostawiaj pracującej maszyny bez nadzoru.

Rysunek 2.1: Koniecview of the lathe components, including the emergency stop button.
3. Komponenty i elementy sterujące
Understanding the various parts of your lathe is crucial for effective and safe operation.
3.1 Główne komponenty
- Główka: Houses the main spindle, motor, and gear train.
- Chuck: Holds the workpiece securely. The CREWORKS lathe features a 3-jaw chuck.
- Przewóz: Moves along the bed, carrying the cross slide and tool post.
- Przesuw poprzeczny: Moves perpendicular to the bed, allowing for facing operations.
- Odpoczynek złożony: Rotates and slides to allow for angled cuts and fine adjustments.
- Stanowisko narzędziowe: Holds the cutting tools.
- Konik: Podtrzymuje końce długich elementów obrabianych lub utrzymuje narzędzia wiertnicze/rozwiercające.
- Łóżko: The main frame of the lathe, providing precision guide rails for the carriage and tailstock.
- Śruba pociągowa: Used for automatic feeding and threading operations.
3.2 Sterowanie
- Zasilanie i zatrzymanie awaryjne: Main power switch and immediate shutdown button.
- Przełącznik przód/tył: Controls spindle rotation direction.
- Pokrętło regulacji prędkości: Varies the spindle speed.
- Cyfrowy wyświetlacz prędkości: Shows the current spindle RPM.
- Koło ręczne wózka: Manual movement of the carriage along the bed.
- Koło ręczne suwaka poprzecznego: Manual movement of the cross slide.
- Koło sterujące złożone: Manual movement of the compound rest.
- Pokrętło podawania ogona: Advances the tailstock quill.
- Dźwignia z połową nakrętki: Engages the lead screw for threading.
Figure 3.1: Detailed diagram showing the main components and controls of the lathe.
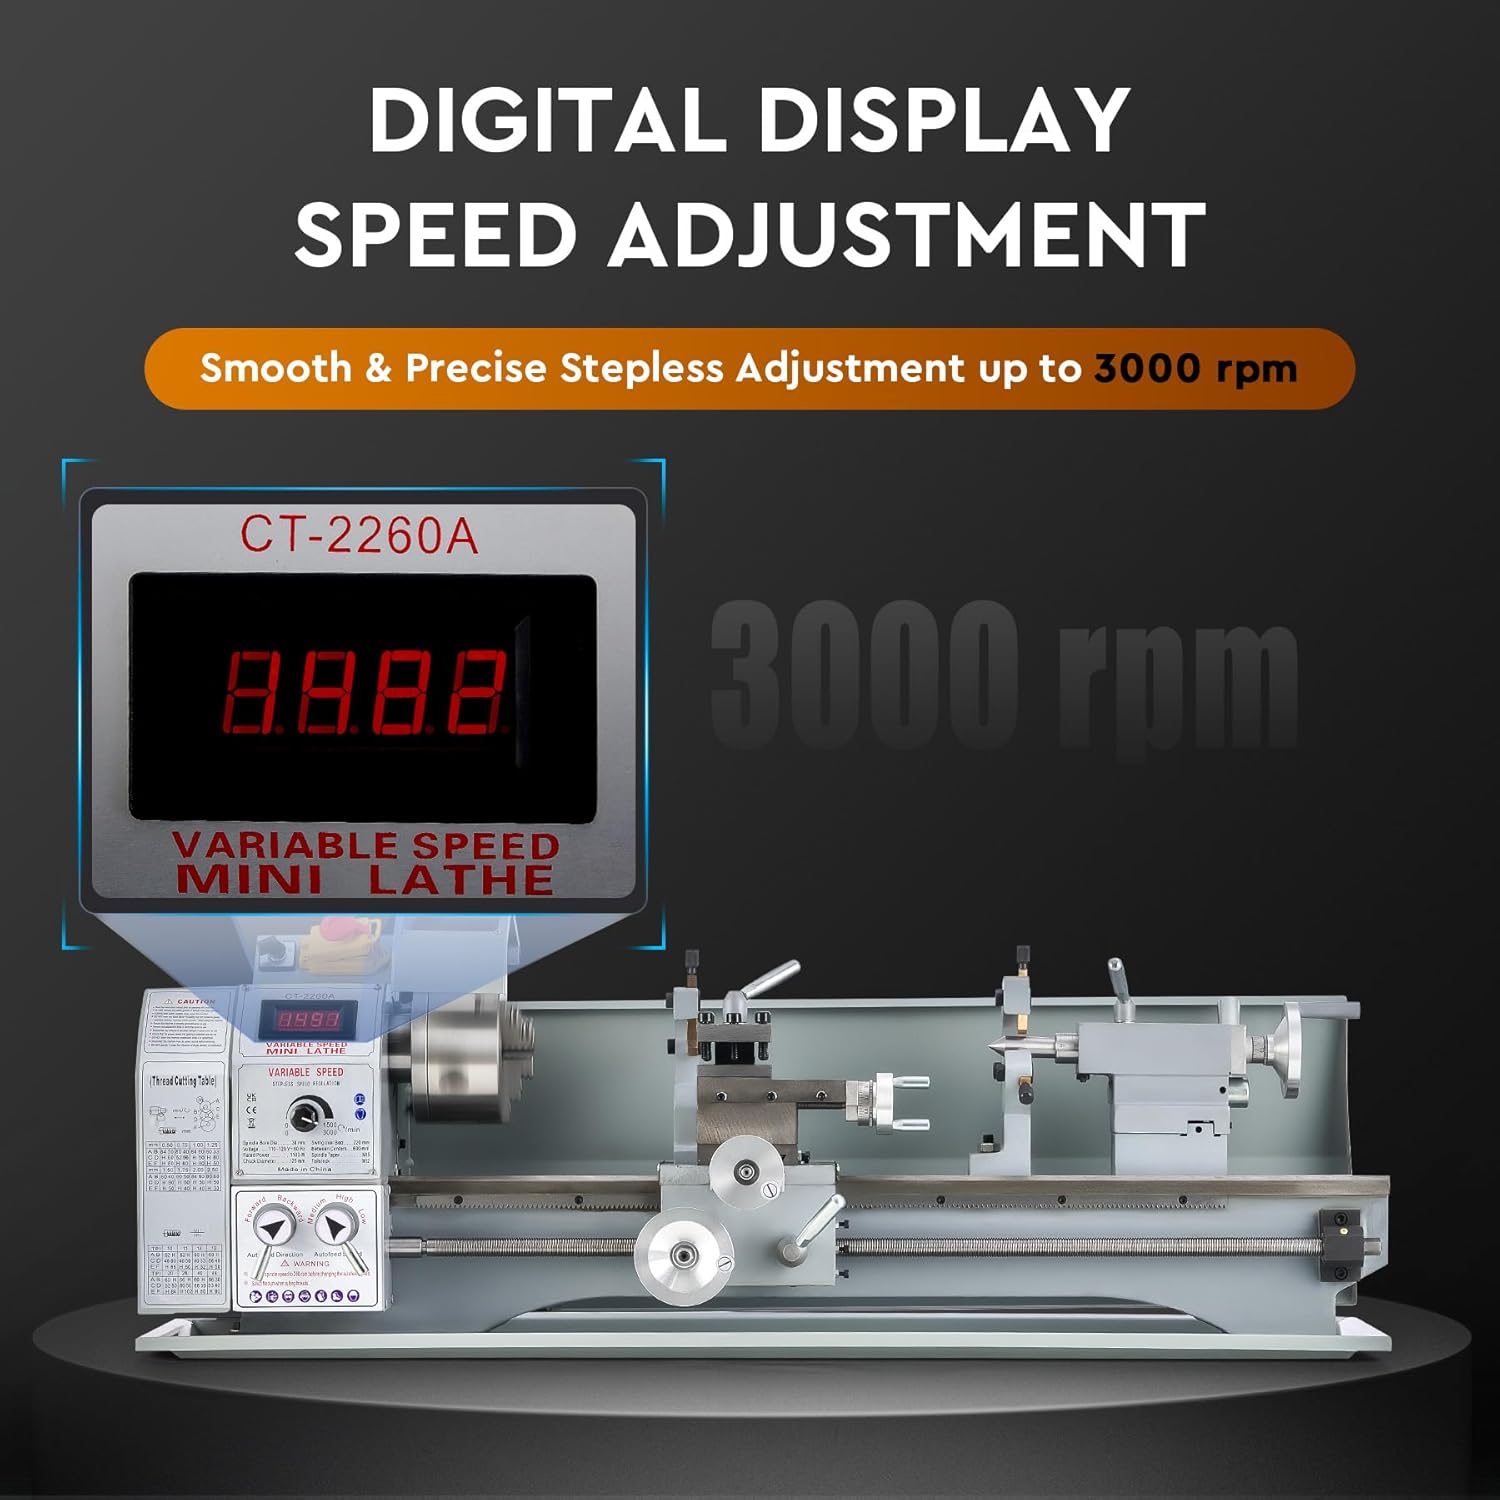
Figure 3.2: The digital display provides real-time spindle speed readings.
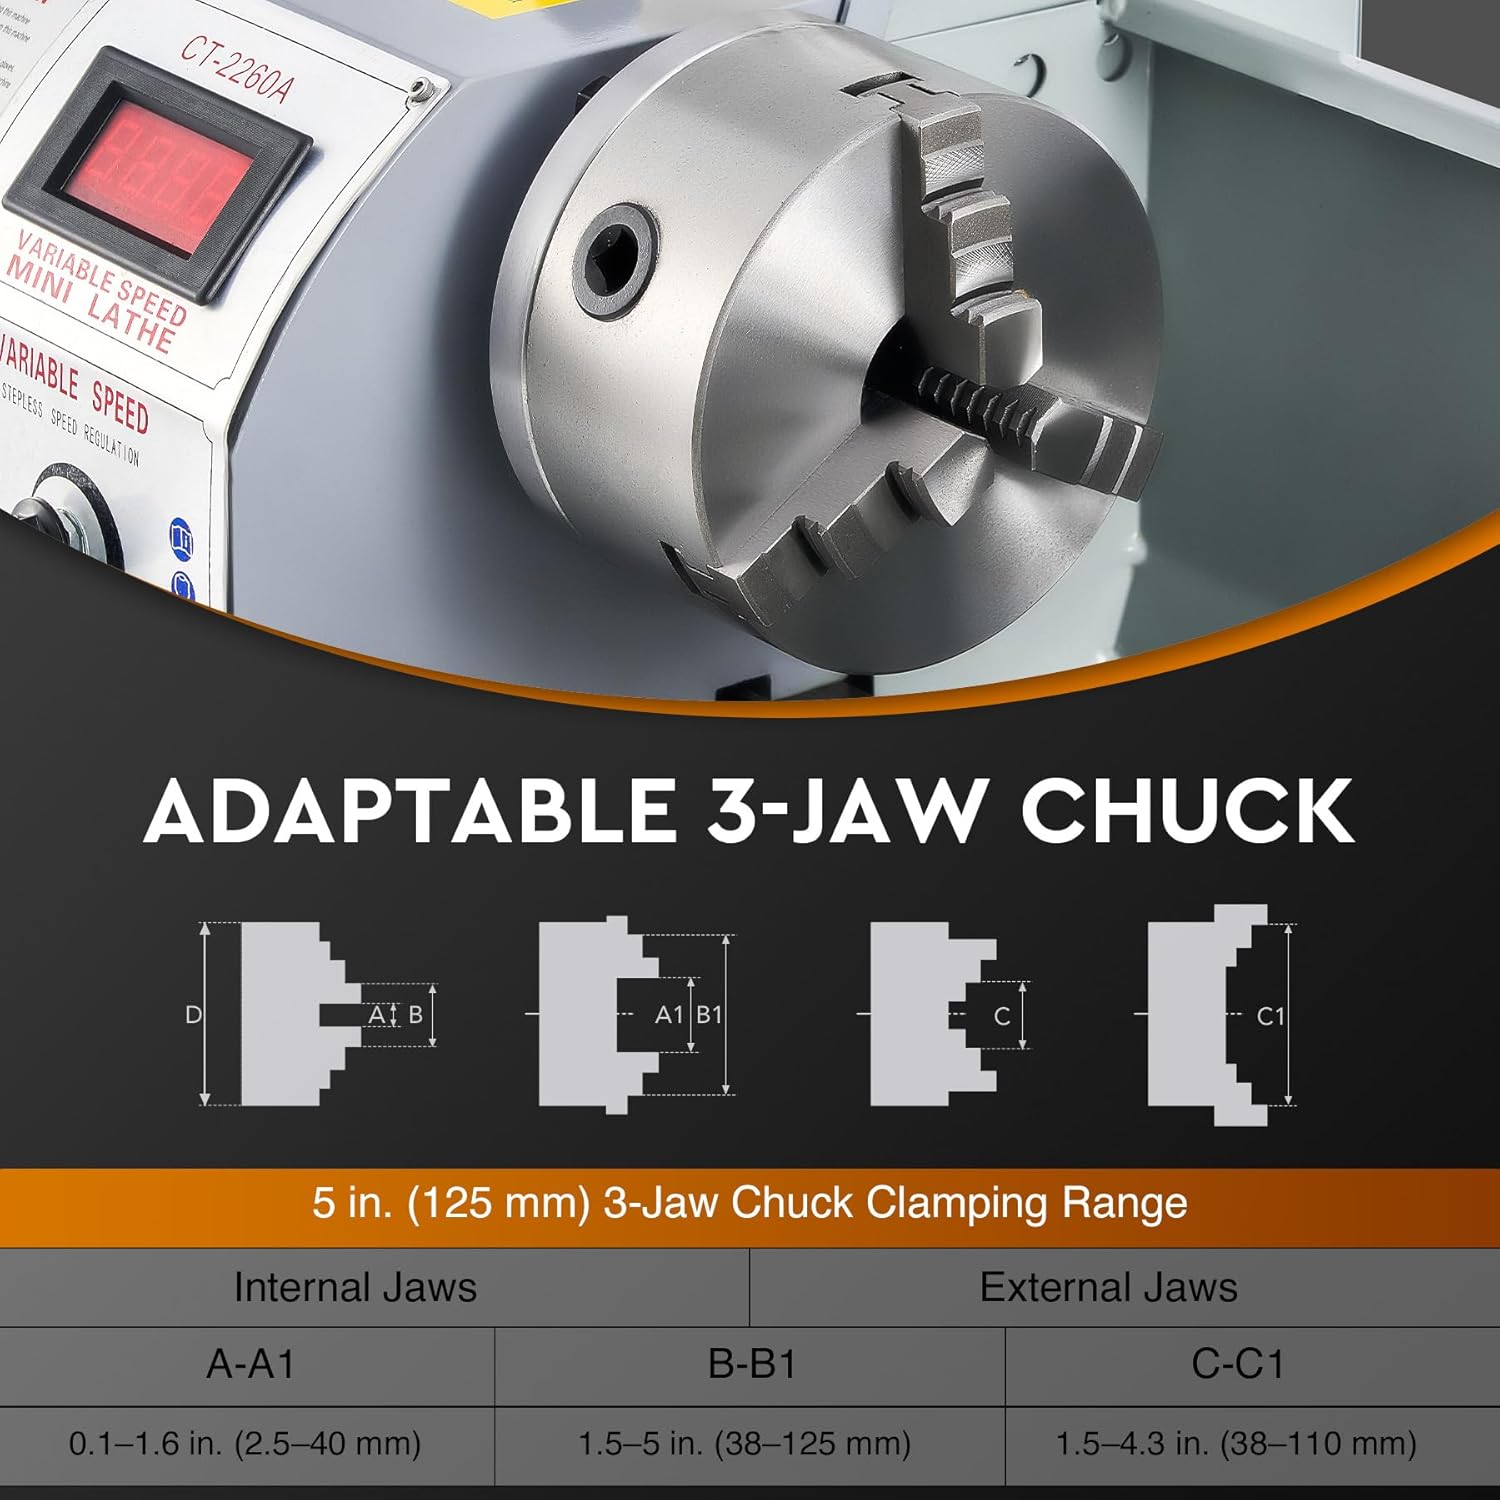
Figure 3.3: The 5-inch 3-jaw chuck is adaptable for various workpiece sizes.
4. Konfiguracja
4.1 Rozpakowywanie i umieszczanie
- Carefully remove the lathe and all accessories from the packaging. Retain packaging for future transport or storage.
- Clean off any protective grease or oil from the machine surfaces using a suitable degreaser.
- Place the lathe on a sturdy, level workbench capable of supporting its weight (approximately 159 lbs / 72 kg). Ensure the workbench is stable and does not wobble.
- Secure the lathe to the workbench using appropriate fasteners through the mounting holes in the base.
4.2 Kontrole wstępne
- Verify all moving parts move freely without excessive play or binding.
- Sprawdź, czy wszystkie elementy mocujące są dobrze dokręcone.
- Ensure the chuck guard is properly installed and functions correctly.
- Podłącz przewód zasilający do uziemionego gniazdka elektrycznego.
5. Działanie
5.1 Podstawowa obsługa
- Włączanie: Turn on the main power switch. The digital display should illuminate.
- Mocowanie przedmiotu obrabianego: Open the chuck jaws using the chuck key. Insert the workpiece, ensuring it is securely centered and clamped. Remove the chuck key before starting the machine.
- Instalacja narzędzia: Loosen the tool post locking screw. Insert the cutting tool, ensuring it is at the correct height relative to the workpiece center. Tighten the locking screw.
- Regulacja prędkości: Use the speed adjustment knob to set the desired spindle RPM. The digital display will show the current speed. The lathe supports speeds from 0 to 3000 rpm.
- Spindle Direction: Select forward or reverse rotation using the direction switch.
- Engage Feed: For manual operation, use the carriage, cross slide, and compound handwheels. For automatic feed or threading, engage the half-nut lever (refer to threading charts for gear setup).
- Cięcie: Slowly advance the cutting tool into the workpiece. Monitor the cut and adjust feed rate as needed.
- Wyłączone: After completing the operation, turn off the spindle, then the main power switch.
5.2 Zastosowania
This mini metal lathe is versatile and can perform various operations on materials such as wood, plastics, brass, and aluminum.
- Obrócenie: Zmniejszanie średnicy przedmiotu obrabianego.
- Okładzina: Creating a flat surface on the end of a workpiece.
- Wiercenie: Creating holes along the center axis using the tailstock.
- Wątki: Cutting external or internal threads.
- Cięcie: Parting off sections of material.

Figure 5.1: The lathe is suitable for a wide range of metalworking and other material applications.
6. Konserwacja
Regular maintenance ensures the longevity and precision of your CREWORKS Mini Metal Lathe.
6.1 Czyszczenie
- After each use, clean all chips and debris from the machine, especially from the bedways, lead screw, and chuck. Use a brush or shop vacuum.
- Wipe down all surfaces with a clean cloth.
6.2 Smarowanie
- Regularly apply a thin coat of machine oil to the bedways, lead screw, and other sliding surfaces to prevent rust and ensure smooth operation.
- Consult the lubrication points diagram (if available in a more detailed manual) for specific oiling requirements.
6.3 Adjustments and Inspections
- Periodically check the tension of the drive belts.
- Inspect the chuck jaws for wear or damage.
- Ensure the tailstock is aligned correctly.
- Check the condition of the metal gear set for any signs of wear or damage.
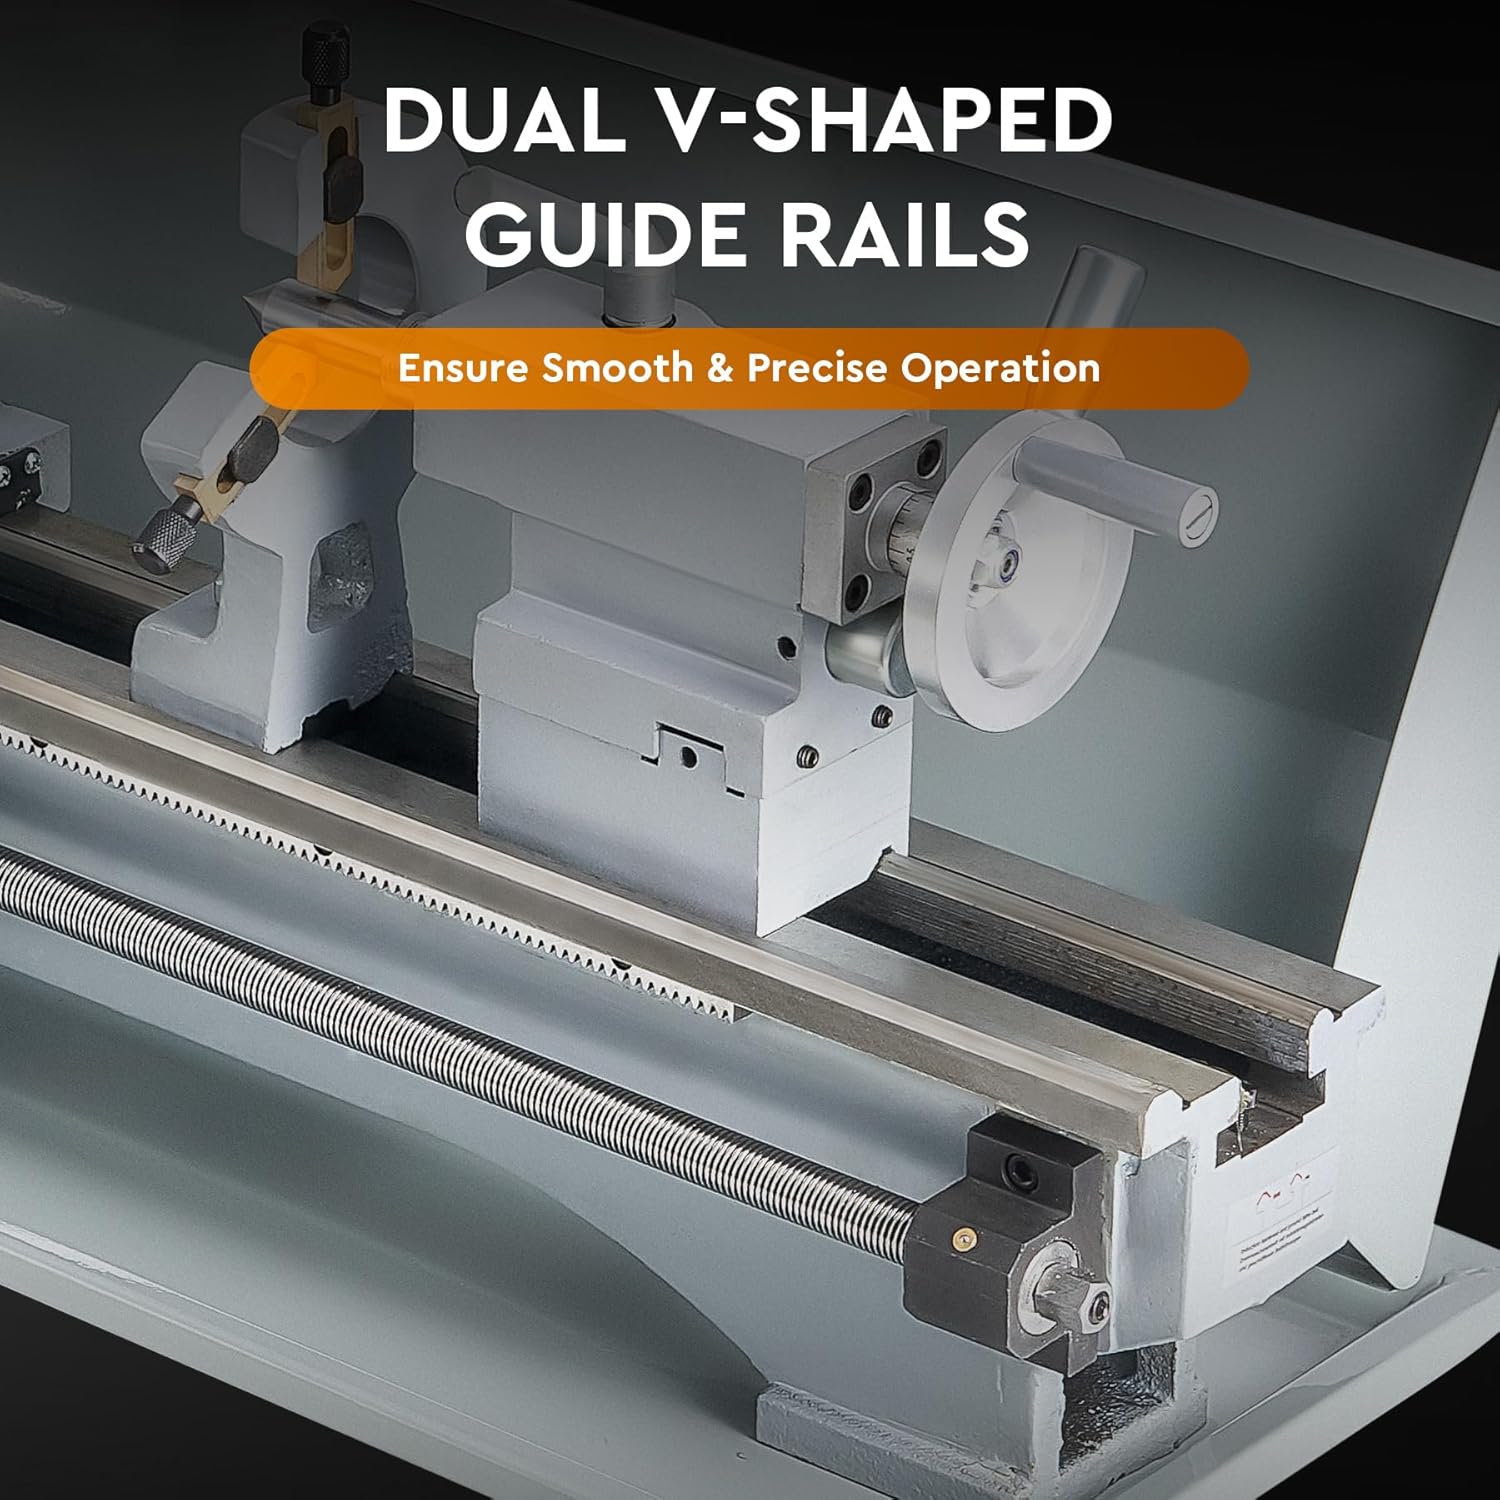
Figure 6.1: The dual V-shaped guide rails require regular cleaning and lubrication for smooth and precise operation.

Figure 6.2: The metal gear set ensures strong and efficient power transmission and should be inspected periodically.
7. Rozwiązywanie Problemów
W tej sekcji omówiono typowe problemy, które mogą wystąpić podczas użytkowania tokarki.
| Problem | Możliwa przyczyna | Rozwiązanie |
|---|---|---|
| Lathe does not power on. | No power supply; Emergency stop engaged; Loose wiring. | Check power cord and outlet; Disengage emergency stop; Inspect wiring (if qualified). |
| Wrzeciono się nie obraca. | Speed knob set to zero; Direction switch not engaged; Motor fault. | Increase speed; Select forward/reverse; Contact support if motor fault suspected. |
| Nadmierne wibracje lub hałas. | Unbalanced workpiece; Loose components; Worn bearings; Insufficient lubrication. | Ensure workpiece is balanced and secure; Tighten all fasteners; Lubricate moving parts; Contact support for bearing issues. |
| Słaba jakość wykończenia powierzchni przedmiotu obrabianego. | Dull cutting tool; Incorrect speed/feed rate; Workpiece not rigid; Lathe not level. | Sharpen/replace tool; Adjust speed/feed; Ensure workpiece is secure; Level the lathe. |
8. Specyfikacje
Technical specifications for the CREWORKS 9" x 24" Mini Metal Lathe.
| Funkcja | Specyfikacja |
|---|---|
| Model | 9" x 24" |
| Moc znamionowa | 1.5 KM (1100 W) |
| Huśtawka nad łóżkiem | 8.7 cali (220 mm) |
| Odległość między ośrodkami | 23.6 cali (600 mm) |
| Otwór wrzeciona | 1.5 cali (38 mm) |
| Średnica uchwytu | 5 cali (125 mm) |
| Maksymalna prędkość wrzeciona | 3000 obr./min |
| Stożek konika | MT#2 |
| Stożek wrzeciona | MT#5 |
| Zakres gwintów metrycznych | 0.3–3 mm |
| Zakres gwintów calowych | 8–44 zębów na cal |
| Wymiary produktu (dł. x szer. x wys.) | 39.57 x 13.78 x 16.93 cala |
| Masa netto | 158.7 funta (72 kg) |
| Tworzywo | Żeliwo, stal nierdzewna, ABS |

Figure 8.1: Visual representation of key specifications and dimensions.
9. Gwarancja i wsparcie
For warranty information or technical support, please refer to the contact details provided at the point of purchase or visit the official CREWORKS webstrona.
- Obsługa klienta: For assistance with product issues, setup, or operation, please contact CREWORKS customer service.
- Zwroty: Ten produkt zazwyczaj objęty jest 30-dniową łatwą polityką zwrotu. Sprawdź szczegóły zakupu, aby zapoznać się ze szczegółowymi warunkami.
Notatka: Any unauthorized modifications or repairs to the machine may void the warranty.
Powiązane dokumenty - 9" x 24"
 |
Podręcznik użytkownika: Minitorno Creworks de 9" x 24" (UM-MLM-0024-V4) Kompletny podręcznik używany do minitorno Creworks de 9" x 24" (UM-MLM-0024-V4). Zawiera informacje detallada sobre seguridad, especificaciones, instalación, operación, mantenimiento, solución de problemas y eliminación. |
 |
Instrukcja obsługi sprężarki powietrza wysokociśnieniowego Instrukcja obsługi sprężarki powietrza wysokociśnieniowego zawierająca szczegółowe informacje dotyczące bezpieczeństwa, dane techniczne, zawartość opakowania, schemat produktu, montaż, obsługę, konserwację, rozwiązywanie problemów i utylizację. |
 |
Podręcznik użytkownika Tente Pulitore i Ultrasuoni CREWORKS Podręcznik ten jest kompletny dla wszystkich użytkowników do ultrasuoni CREWORKS, które są określone, instrukcje dla użytkowników, rozwiązania i rozwiązania problemów. |
 |
Instrukcja obsługi myjki ultradźwiękowej CREWORKS – obsługa, bezpieczeństwo i specyfikacje Kompleksowa instrukcja obsługi myjki ultradźwiękowej CREWORKS, obejmująca instrukcje bezpieczeństwa, specyfikacje, procedury obsługi, konserwację i rozwiązywanie problemów dla modeli JX-009S, JX-010S, JX-020S i JX-031S. |
 |
Instrukcja obsługi plotera tnącego/plotera winylowego CREWORKS SK-720T/SK-870T Niniejsza instrukcja obsługi zawiera kompleksowe instrukcje dotyczące obsługi i konserwacji ploterów tnąco-ploterowych CREWORKS SK-720T i SK-870T. Zawiera ona podstawowe informacje dotyczące bezpieczeństwa, szczegółowe specyfikacje, identyfikację części, procedury instalacji, wskazówki dotyczące obsługi, wskazówki dotyczące konserwacji oraz rozwiązania problemów. |
 |
Podręcznik użytkownika Usuario Limpiador Ultrasónico CREWORKS Podręcznik użytkownika jest kompletny dla limpiadores ultrasónicos CREWORKS, que cubre operación, seguridad, especificaciones, lista paquetes, diagramas, panel de control, operación, mantenimiento y solución de problemas. |