Wstęp
This manual provides instructions for the setup, operation, maintenance, and troubleshooting of your Pisichen 17.3 inch Portable Monitor. This monitor features a 1600x900 HD resolution, 800:1 contrast ratio, 250 cd/m² brightness, 16:9 aspect ratio, and a 60Hz refresh rate, designed to provide an extended display for various devices.
The monitor includes multiple interfaces for broad compatibility and a built-in kickstand for convenience. It supports various display modes for enhanced productivity and entertainment.
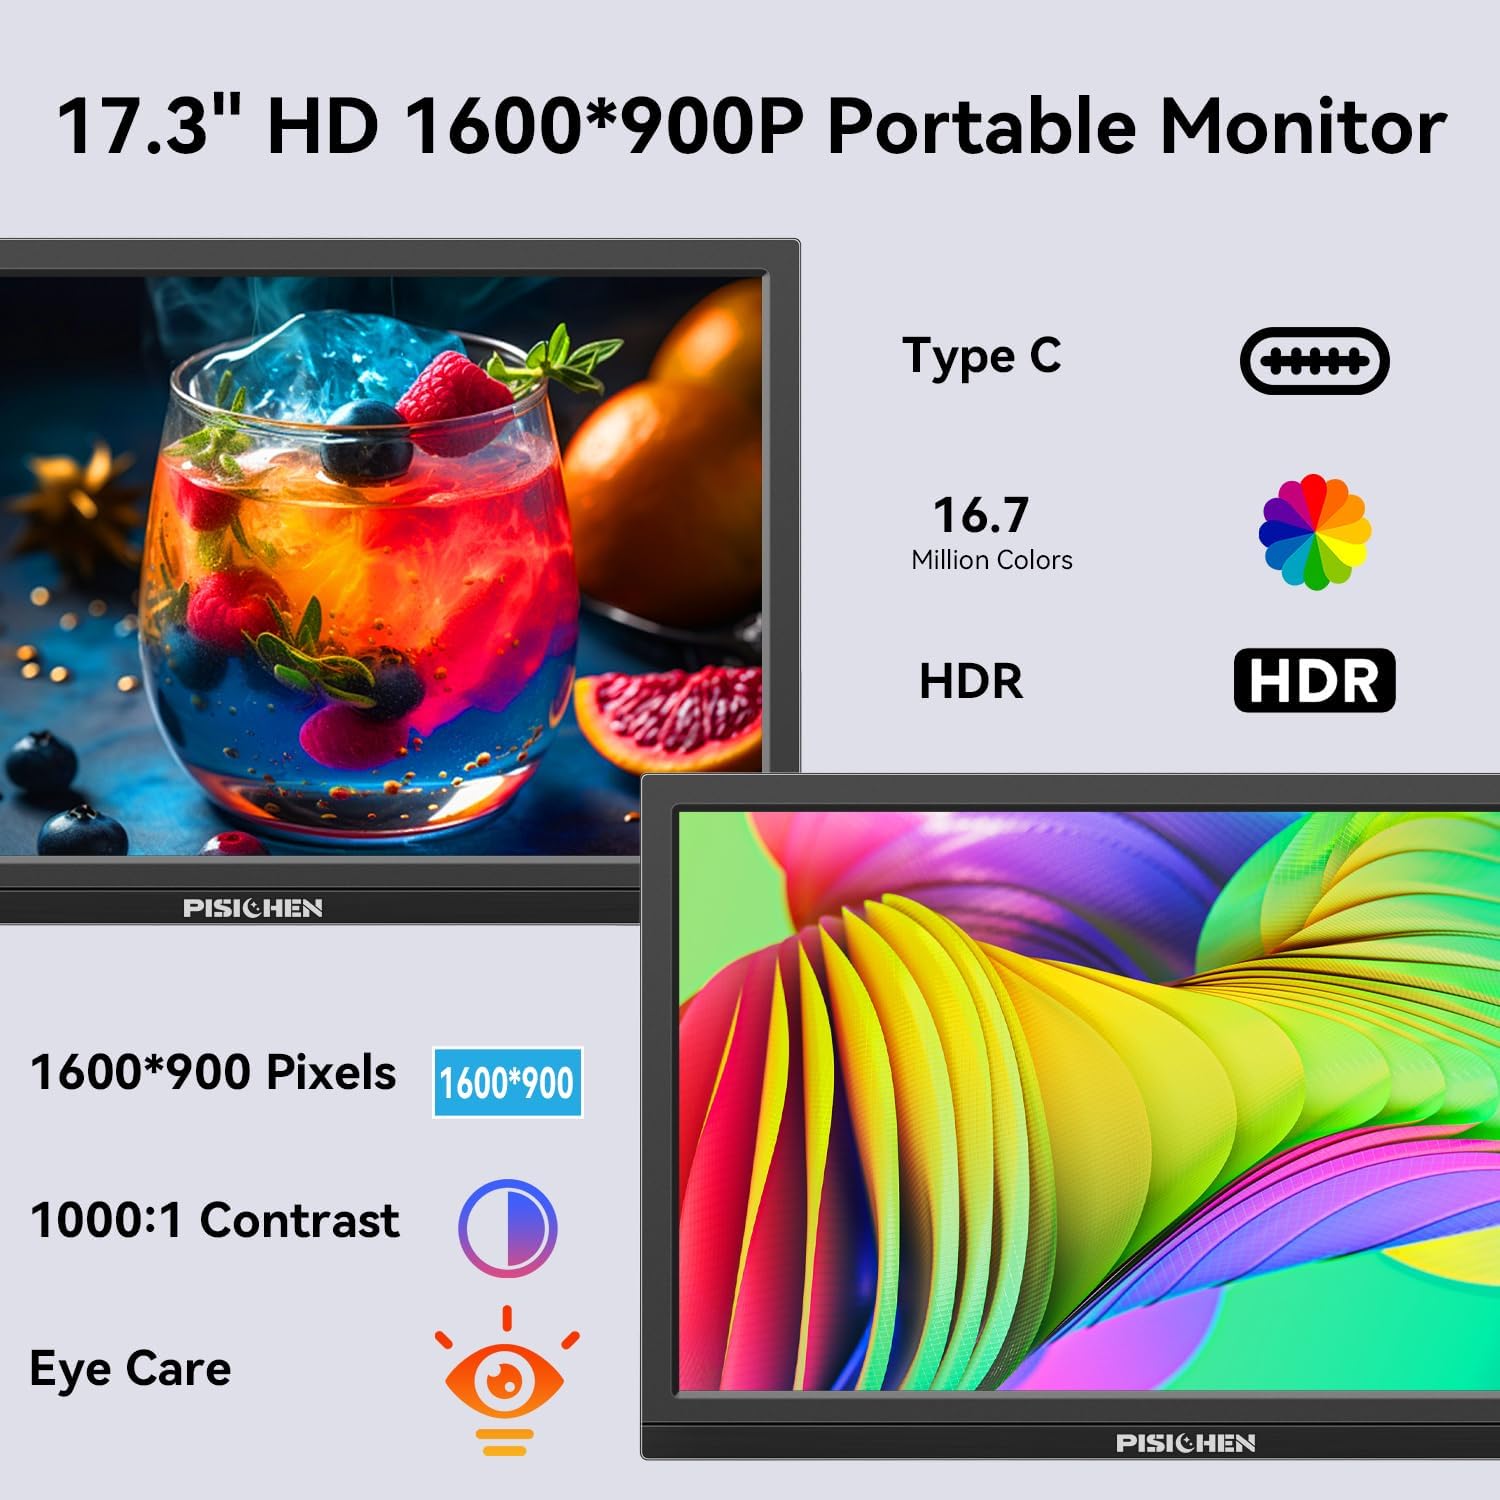
Image: The Pisichen 17.3 inch Portable Monitor highlighting its HD 1600x900 resolution, 1000:1 contrast, and eye care features.
Zawartość opakowania
Sprawdź, czy w opakowaniu znajdują się wszystkie elementy:
- 17.3-calowy przenośny monitor
- Zasilacz prądu stałego
- Kabel HDMI do HDMI
- Kabel USB-C do USB-C
- Instrukcja obsługi (ten dokument)

Image: The portable monitor and its accompanying accessories, including cables and power adapter.
Instrukcje konfiguracji
1. Podłączanie zasilania
Connect the provided DC Power Adapter to the DC Power Port on the monitor and then to a power outlet. Ensure the monitor receives sufficient power for stable operation.
2. Łączenie z urządzeniem
Monitor obsługuje dwie podstawowe metody połączenia:
- Połączenie USB-C: Use the provided USB-C to USB-C cable. Connect one end to the monitor's USB-C 3.1 port (for signal input) and the other end to a compatible USB-C 3.1 (or higher) port on your laptop, PC, or smartphone. This connection can transmit both video and power.
- Połączenie HDMI: Use the provided HDMI to HDMI cable. Connect one end to the monitor's HDMI port and the other end to the HDMI output of your device (laptop, PC, game console). When using HDMI, ensure the monitor is also connected to power via the DC power adapter.

Image: Visual guide for USB-C and HDMI connection methods, showing cable connections and power requirements.
3. Konfiguracja fizyczna
- Wbudowana podpórka: The monitor features an integrated, foldable kickstand. Gently unfold it from the back of the monitor to position the screen at a desired viewing angle on a flat surface.
- Montaż VESA: For alternative mounting options, the monitor is equipped with standard 75x75mm VESA holes on the back. This allows for mounting to compatible desktop stands or wall mounts (mounting hardware not included).
Instrukcja obsługi
1. Monitor Interfaces and Controls
Familiarize yourself with the ports and control buttons located on the side of the monitor:
- Port zasilania prądem stałym: Do podłączenia zasilacza.
- Port audio 3.5 mm: Do podłączenia zewnętrznych słuchawek lub głośników.
- Port USB C 3.1: For video signal input and power delivery from compatible devices.
- Port USB C 2.0: Primarily for charging phones or connecting OTG devices.
- Port HDMI: For video signal input from HDMI-enabled devices.
- Brightness/Up Button: Adjusts screen brightness or navigates up in the OSD menu.
- Przycisk Menu/OK: Opens the On-Screen Display (OSD) menu or confirms selections.
- Volume/Down Button: Adjusts audio volume or navigates down in the OSD menu.
- Port OTG: For connecting a keyboard or mouse.

Obraz: Szczegółowy view portów i przycisków sterujących monitora.
2. Tryby wyświetlania
The monitor supports various display modes when connected to a compatible device:
- Tryb duplikacji: Wyświetla zawartość głównego ekranu.
- Tryb rozszerzania: Extends your desktop, providing additional screen space.
- Tryb drugiego ekranu: Jako wyświetlacz wykorzystuje wyłącznie przenośny monitor.
These modes can typically be configured through your device's display settings (e.g., Windows Display Settings, macOS System Preferences).

Obraz: Byłyample of extending a smartphone's display to the portable monitor via USB-C.
3. Menu ekranowe (OSD)
Naciśnij Menu/OK button to access the OSD menu. Use the Jasność/góra I Ściszanie buttons to navigate through options and adjust settings such as brightness, contrast, color temperature, and input source. Press Menu/OK again to confirm selections or exit sub-menus.
4. HDR Mode
The monitor supports HDR (High Dynamic Range) technology for improved color and contrast. This mode can be enabled or disabled through the OSD menu, if supported by your connected device and content.

Image: Visual comparison of SDR and HDR display quality.
5. Low Blue Light Feature
The monitor includes a Low Blue Light feature designed to filter harmful blue light, reducing eye strain during prolonged use. This setting can be adjusted via the OSD menu.

Image: Illustration of the Low Blue Light feature for eye protection.
Konserwacja
1. Czyszczenie monitora
- Zawsze wyłączaj monitor i odłączaj go od zasilania przed czyszczeniem.
- Delikatnie użyj miękkiej, niestrzępiącej się szmatki dampCzyścić wodą lub nieściernym środkiem do czyszczenia ekranów.
- Nie rozpylaj środka czyszczącego bezpośrednio na ekran. Najpierw nanieś go na ściereczkę.
- Unikaj stosowania silnych środków chemicznych, alkoholu lub środków czyszczących na bazie amoniaku, ponieważ mogą one uszkodzić powierzchnię ekranu.
2. Przechowywanie
When not in use, store the monitor in a cool, dry place, away from direct sunlight and extreme temperatures. If transporting, use a protective sleeve or case to prevent scratches and damage.
Rozwiązywanie problemów
Jeśli masz problemy z monitorem, zapoznaj się z poniższymi typowymi problemami i ich rozwiązaniami:
- Brak sygnału / Czarny ekran:
- Ensure all cables (power and video) are securely connected to both the monitor and the source device.
- Sprawdź, czy urządzenie źródłowe jest włączone i wysyła sygnał.
- Check the input source setting on the monitor via the OSD menu to ensure it matches your connection (e.g., HDMI, USB-C).
- If using USB-C, confirm your device's USB-C port supports video output (DisplayPort Alternate Mode).
- Screen is Too Dim / Cannot Adjust Brightness:
- Access the OSD menu and navigate to the brightness settings. Ensure the brightness level is increased.
- Some devices may have their own display settings that override or limit monitor brightness. Check your connected device's display settings.
- Ensure the monitor is receiving adequate power. A weak power source can sometimes affect brightness.
- No Audio / Headphone Jack Not Working:
- Check the volume settings on both the monitor (via OSD menu) and your connected device.
- Ensure headphones or speakers are fully plugged into the 3.5mm audio port.
- Sprawdź, czy wyjście audio w urządzeniu źródłowym jest ustawione na monitor przenośny.
- Test with different headphones or speakers to rule out a faulty audio device.
- Image Distortion / Poor Picture Quality:
- Ensure the display resolution on your source device is set to the monitor's native resolution (1600x900).
- Check for damaged or loose video cables. Try a different cable if available.
- Adjust contrast and color settings in the OSD menu.
Specyfikacje
| Numer modelu | SLZJ173 |
| Rozmiar ekranu | 17.3 cali |
| Rezolucja | 1600x900 HD |
| Proporcje obrazu | 16:9 |
| Współczynnik kontrastu | 800:1 |
| Jasność | 250 cd/m² |
| Częstotliwość odświeżania | 60 Hz |
| Typ panelu | TN |
| Viewing kąt | 170° |
| Gama kolorów | 99% sRGB, 16.7 million colors (8-bit) |
| Łączność | 1x HDMI, 1x USB-C 3.1 (signal input), 1x USB-C 2.0 (phone charging/OTG), 1x 3.5mm Audio Jack, 1x DC Power Port |
| Wbudowane głośniki | Tak |
| Mocowanie VESA | 75x75mm |
| Wymiary produktu | 0.3 x 12 x 8 cale (w przybliżeniu) |
| Waga przedmiotu | 3.54 funta |
Gwarancja i wsparcie
For warranty information or technical support, please contact the manufacturer, Pisichen, or the retailer from whom you purchased the product. Please have your model number (SLZJ173) and purchase details ready when contacting support.