Keurig K-Duo, K-Slim
Keurig K-Duo & K-Slim Coffee Makers User Manual
Models: K-Duo, K-Slim
Marka: Keurig
Wstęp
This manual provides comprehensive instructions for the safe and efficient operation, maintenance, and troubleshooting of your Keurig K-Duo Single Serve K-Cup Pod & Carafe Coffee Maker and Keurig K-Slim Single Serve K-Cup Pod Coffee Maker. Please read all instructions carefully before using your coffee maker.
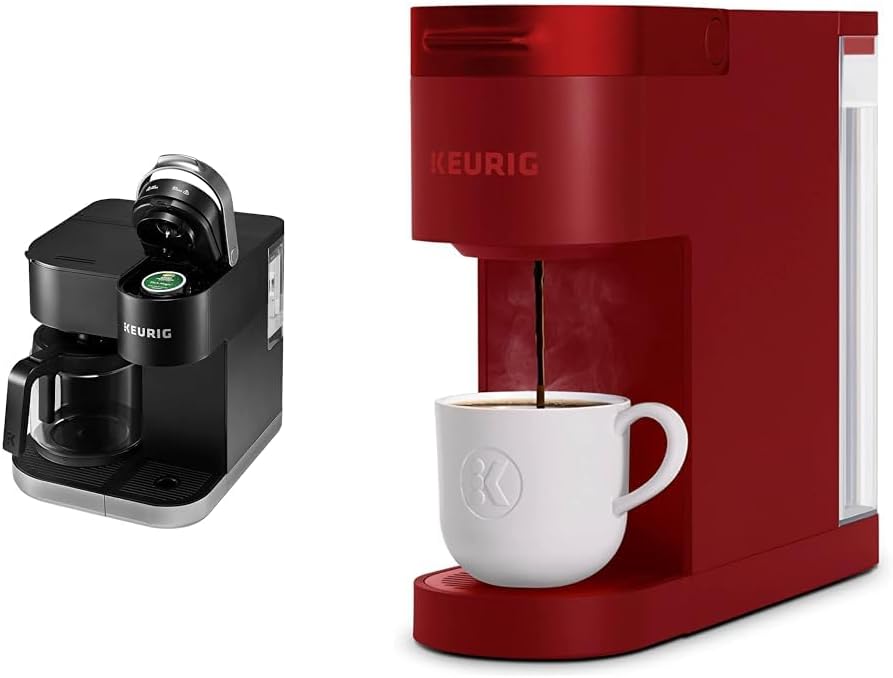
Image: The Keurig K-Duo coffee maker (black, left) with a glass carafe and a K-Cup pod brewing mechanism, alongside the Keurig K-Slim coffee maker (red, right) brewing into a white mug. This image illustrates both models covered in this manual.
Ważne informacje dotyczące bezpieczeństwa
Aby zminimalizować ryzyko pożaru, porażenia prądem lub obrażeń ciała, należy zawsze przestrzegać podstawowych zasad bezpieczeństwa podczas korzystania z urządzeń elektrycznych.
- Przeczytaj wszystkie instrukcje.
- Nie dotykaj gorących powierzchni. Używaj uchwytów lub gałek.
- Aby zapobiec pożarowi, porażeniu prądem elektrycznym i obrażeniom ciała, nie zanurzaj przewodu zasilającego, wtyczek ani ekspresu do kawy w wodzie ani innym płynie.
- Należy zachować ścisły nadzór, jeżeli z urządzenia korzystają dzieci lub w ich pobliżu.
- Odłącz od gniazdka, gdy nie jest używane i przed czyszczeniem. Pozostaw do ostygnięcia przed założeniem lub zdjęciem części oraz przed czyszczeniem urządzenia.
- Nie używaj żadnego urządzenia z uszkodzonym przewodem lub wtyczką lub po awarii urządzenia lub po jego uszkodzeniu w jakikolwiek sposób. Zwróć urządzenie do najbliższego autoryzowanego serwisu w celu sprawdzenia, naprawy lub regulacji.
- Użycie akcesoriów niezalecanych przez producenta urządzenia może spowodować pożar, porażenie prądem lub obrażenia ciała.
- Nie stosować na zewnątrz.
- Nie pozwól, aby przewód zwisał z krawędzi stołu lub blatu i dotykał gorących powierzchni.
- Nie umieszczać na gorącym palniku gazowym lub elektrycznym ani w jego pobliżu, a także w nagrzanym piekarniku.
- Zawsze najpierw podłącz wtyczkę do urządzenia, a następnie podłącz przewód do gniazdka ściennego. Aby odłączyć, ustaw dowolny element sterujący w pozycji „wyłączone”, a następnie wyjmij wtyczkę z gniazdka ściennego.
- Nie używaj urządzenia niezgodnie z jego przeznaczeniem.
Części i funkcje
Keurig K-Duo Coffee Maker

Obraz: Zbliżenie view of the Keurig K-Duo coffee maker, showing the top lid open to reveal the K-Cup pod holder. A green K-Cup pod is visible inside the holder. The glass carafe is in its position below the drip tray.
- Uchwyt na kapsułki K-Cup: For single-serve brewing.
- Ground Coffee Filter Basket: For carafe brewing with ground coffee.
- Zbiornik wodny: Shared for both single-serve and carafe brewing (60 oz capacity).
- Szklana karafka: 12-cup capacity for carafe brewing.
- Taca ociekowa: Removable for easy cleaning and to accommodate travel mugs.
- Panel sterowania: Buttons for brew size, strong brew, carafe brew, and power.

Image: The Keurig K-Duo coffee maker with its removable parts displayed around it. These include the glass carafe, the K-Cup pod holder, the ground coffee filter basket, and the removable drip tray. A silver travel mug is also shown next to the machine.
Keurig K-Slim Coffee Maker

Image: The red Keurig K-Slim coffee maker actively brewing coffee into a white mug. Steam is visible rising from the mug, indicating hot coffee. This image highlights the compact design of the K-Slim model.
- Uchwyt na kapsułki K-Cup: For single-serve brewing.
- Zbiornik wodny: Removable, 46 oz capacity.
- Taca ociekowa: Removable for easy cleaning and to accommodate travel mugs.
- Panel sterowania: Buttons for 8, 10, or 12 oz brew sizes.
Organizować coś
Before first use, remove all packaging materials and clean your coffee maker.
- Włączać do kontaktu: Podłącz ekspres do kawy do uziemionego gniazdka.
- Napełnij zbiornik na wodę: Remove the water reservoir lid and fill the reservoir with fresh water up to the MAX fill line. Replace the lid.
- Cleansing Brew (K-Duo):
- Umieść duży kubek na tacce ociekowej.
- Open and close the K-Cup pod holder without inserting a K-Cup pod.
- Select a 12 oz brew size. The brew button will flash. Press the brew button.
- Once the brew is complete, discard the hot water.
- For carafe cleansing brew, fill the carafe with water, place it on the heating plate, and select a carafe brew size. Discard water after brewing.
- Cleansing Brew (K-Slim):
- Umieść duży kubek na tacce ociekowej.
- Open and close the K-Cup pod holder without inserting a K-Cup pod.
- Press the 8 oz brew button. The brew button will flash. Press the brew button.
- Once the brew is complete, discard the hot water.
- Twój ekspres do kawy jest teraz gotowy do użycia.
Instrukcja obsługi
Brewing with K-Cup Pods (K-Duo & K-Slim)
- Upewnij się, że zbiornik na wodę jest napełniony świeżą wodą.
- Podnieś uchwyt, aby otworzyć uchwyt na kapsułki K-Cup.
- Włóż kapsułkę K-Cup do uchwytu.
- Lower the handle completely to close the holder.
- Umieść kubek na tacce ociekowej.
- Select your desired brew size (K-Duo: 6, 8, 10, or 12 oz; K-Slim: 8, 10, or 12 oz). The selected brew button will flash.
- Naciśnij migający przycisk parzenia, aby rozpocząć parzenie.
- The brew will complete in approximately one minute.

Image: The Keurig K-Duo coffee maker in black, actively brewing coffee into a light yellow mug. The carafe is positioned on the heating plate to the left. This demonstrates the single-serve brewing function of the K-Duo.
Brewing with Ground Coffee (K-Duo Only)
- Upewnij się, że zbiornik na wodę jest napełniony świeżą wodą.
- Remove the ground coffee filter basket from the brewer.
- Insert a paper filter (not included) or use the reusable gold tone mesh filter (sold separately) into the basket.
- Add your desired amount of ground coffee to the filter basket. Refer to the coffee packaging for recommended amounts.
- Place the filter basket back into the brewer.
- Postaw pusty szklany dzbanek na płycie grzewczej.
- Select your desired carafe brew size (6, 8, 10, or 12 cups). The selected brew button will flash.
- Naciśnij migający przycisk parzenia, aby rozpocząć parzenie.
- The Pause & Pour feature allows you to pause brewing for 20 seconds to pour a cup before the full carafe is complete.
Konserwacja i czyszczenie
Ogólne sprzątanie
- Zawsze odłączaj ekspres do kawy od zasilania przed czyszczeniem.
- Przetrzyj powierzchnię zewnętrzną środkiem adamp, soapy cloth. Rinse thoroughly.
- The drip tray and drip tray plate can be removed and washed with warm, soapy water.
- The K-Cup pod holder and funnel can be removed and washed by hand or placed on the top rack of a dishwasher.
- For K-Duo, the glass carafe and its lid are dishwasher safe (top rack only).
Odkamienianie ekspresu do kawy
Descaling removes mineral deposits that can build up in your coffee maker over time, affecting performance. Descale every 3-6 months, or more frequently if you have hard water.
- Przygotować: Turn off and unplug the coffee maker. Empty the water reservoir.
- Add Descaling Solution: Wlej całą butelkę środka odkamieniającego Keurig do zbiornika na wodę.
- First Rinse Brew: Place a large mug on the drip tray. Lift and lower the handle. Select the largest single-serve brew size and press the brew button. Discard the hot liquid. Repeat this process until the "ADD WATER" light illuminates.
- Moczyć: Let the coffee maker stand for at least 30 minutes.
- Second Rinse Brew: After 30 minutes, discard any remaining solution from the reservoir and rinse it thoroughly. Fill the reservoir with fresh water up to the MAX fill line.
- Fresh Water Rinses: Place a large mug on the drip tray. Lift and lower the handle. Select the largest single-serve brew size and press the brew button. Discard the hot liquid. Repeat this process at least 12 times, refilling the reservoir with fresh water as needed, until no descaling solution taste remains.
- For K-Duo, also perform a carafe cleansing brew with fresh water after descaling the single-serve side.
Rozwiązywanie problemów
| Problem | Możliwa przyczyna | Rozwiązanie |
|---|---|---|
| Ekspres do kawy nie parzy kawy. | No water in reservoir; K-Cup pod not properly seated; Air bubble in water line. | Fill reservoir; Ensure K-Cup pod is fully inserted and handle is lowered; Perform a cleansing brew without a K-Cup pod. |
| Słaba kawa. | K-Cup pod not suitable for selected brew size; Ground coffee amount too low (K-Duo); Coffee maker needs descaling. | Use a K-Cup pod designed for larger brews or select a smaller brew size; Increase ground coffee amount; Descale the coffee maker. |
| Fusy z kawy w filiżance. | K-Cup pod punctured incorrectly; Ground coffee overflow (K-Duo). | Ensure K-Cup pod is properly seated; Do not overfill ground coffee filter basket. Clean the exit needle. |
| "Add Water" light stays on after filling. | Water level sensor issue. | Ensure reservoir is fully seated. Try removing and re-inserting the reservoir. |
Specyfikacje
- Marka: Keurig
- Modele: K-Duo, K-Slim
- Color (K-Slim): Szkarłatna czerwień
- Color (K-Duo): Czarny
- Water Reservoir Capacity (K-Duo): 60 oz (shared)
- Water Reservoir Capacity (K-Slim): 46 uncji
- Brew Sizes (K-Duo): 6, 8, 10, 12 oz (single-serve); 6, 8, 10, 12 cups (carafe)
- Brew Sizes (K-Slim): 8, 10, 12 oz (single-serve)
- Cechy szczególne: Removable Tank, Multistream Technology (K-Slim), Pause & Pour (K-Duo), Programmable Carafe Auto Brew (K-Duo), Strong Brew (K-Duo)
- Typ filtra: Reusable (compatible, sold separately)
- Tryb działania: Całkowicie automatyczny
Gwarancja i wsparcie
For detailed warranty information and customer support, please refer to the warranty card included with your product or visit the official Keurig website. Do not attempt to service the coffee maker yourself. Any servicing other than cleaning and descaling should be performed by an authorized service representative.
Możesz również odwiedzić Sklep Keurig na Amazon Więcej informacji i akcesoriów.