1. Koniec produktuview
The Armor All Advanced Garage Parking Aid with LED Light is designed to assist in safely and accurately parking your vehicle within your garage. It utilizes a color-changing LED light system and audible alerts to indicate your vehicle's distance from a set stopping point.

Image: The Armor All Advanced Garage Parking Aid, showing the LED light unit and the sensor unit, packaged for retail.
Główne cechy:
- Wskaźnik świetlny LED: Features green, yellow, and red lights to visually communicate proximity.
- Alerty dźwiękowe: Provides audio signals that increase in frequency as the vehicle approaches the stop distance.
- Adjustable Stop Distance: Allows customization of the stopping point from 1.5 ft to 5 ft.
- Elastyczne opcje zasilania: Operates via a 5 ft AC adapter or a 9V battery backup (battery not included).
- Extended Sensor Cable: Includes a 5.6 ft sensor cable for flexible placement.
2. Co znajduje się w pudełku
- Armor All Advanced Garage Parking Aid LED Light Unit
- Ultrasonic Sensor Unit
- Zasilacz sieciowy
- Instrukcja obsługi
3. Konfiguracja i instalacja
3.1. Wybór lokalizacji
Select a location on your garage wall where the LED light unit is clearly visible from your driver's seat and the sensor unit can detect the front bumper of your vehicle without obstruction.

Obraz: View from inside a car showing the parking aid mounted on the garage wall, indicating optimal visibility.
3.2. Mounting the Sensor and LED Unit
- Position the Vehicle: Park your vehicle in the desired final parking position within your garage.
- Mark Sensor Location: Identify the spot on the wall where your vehicle's front bumper aligns. The sensor should be mounted at the height of your vehicle's bumper.
- Zamontuj czujnik: Use the provided adhesive or screws (not included) to securely attach the ultrasonic sensor unit to the marked spot on the wall. Ensure the sensor faces directly towards where the vehicle's bumper will be.
- Mount LED Light: Attach the LED light unit to the wall at a height easily visible from your driver's seat. The 5.6 ft cable connects the LED light to the sensor unit, allowing for flexible placement.

Image: A visual representation of the garage parking sensor components and their recommended installation positions.
3.3. Włączanie urządzenia
- Zasilanie prądem zmiennym: Plug the included AC adapter into a standard electrical outlet and connect it to the parking aid unit.
- Zapas baterii: Do zasilania awaryjnego podczastages, insert a 9V battery (not included) into the designated battery compartment.
3.4. Setting the Stop Distance
The stop distance can be adjusted from 1.5 ft to 5 ft. Refer to the detailed instructions in the included manual for precise calibration steps. Generally, you will park your car in the desired final position, then press a 'Set' button on the unit to calibrate the distance.

Image: The LED light unit with labels for LED Signals and Built-in Speaker, highlighting the adjustable stop distance feature.
3.5. Video Guide for Installation (Similar Product)
Video: This video demonstrates the installation process for a similar garage parking assist device. While not the exact Armor All model, it provides a helpful visual guide for general setup principles.
4. Instrukcja obsługi
Once installed and calibrated, the Armor All Advanced Garage Parking Aid provides real-time feedback as you park your vehicle.
4.1. Parking Procedure
- Approach your garage slowly.
- As your vehicle enters the detection zone, the LED light will illuminate green, indicating it is safe to proceed.
- As you get closer to the set stop distance, the light will change to yellow, and the audible alerts will begin to beep slowly, signaling caution.
- When you reach the precise stopping point, the light will turn red, and the audible alerts will beep rapidly, indicating you should stop immediately.
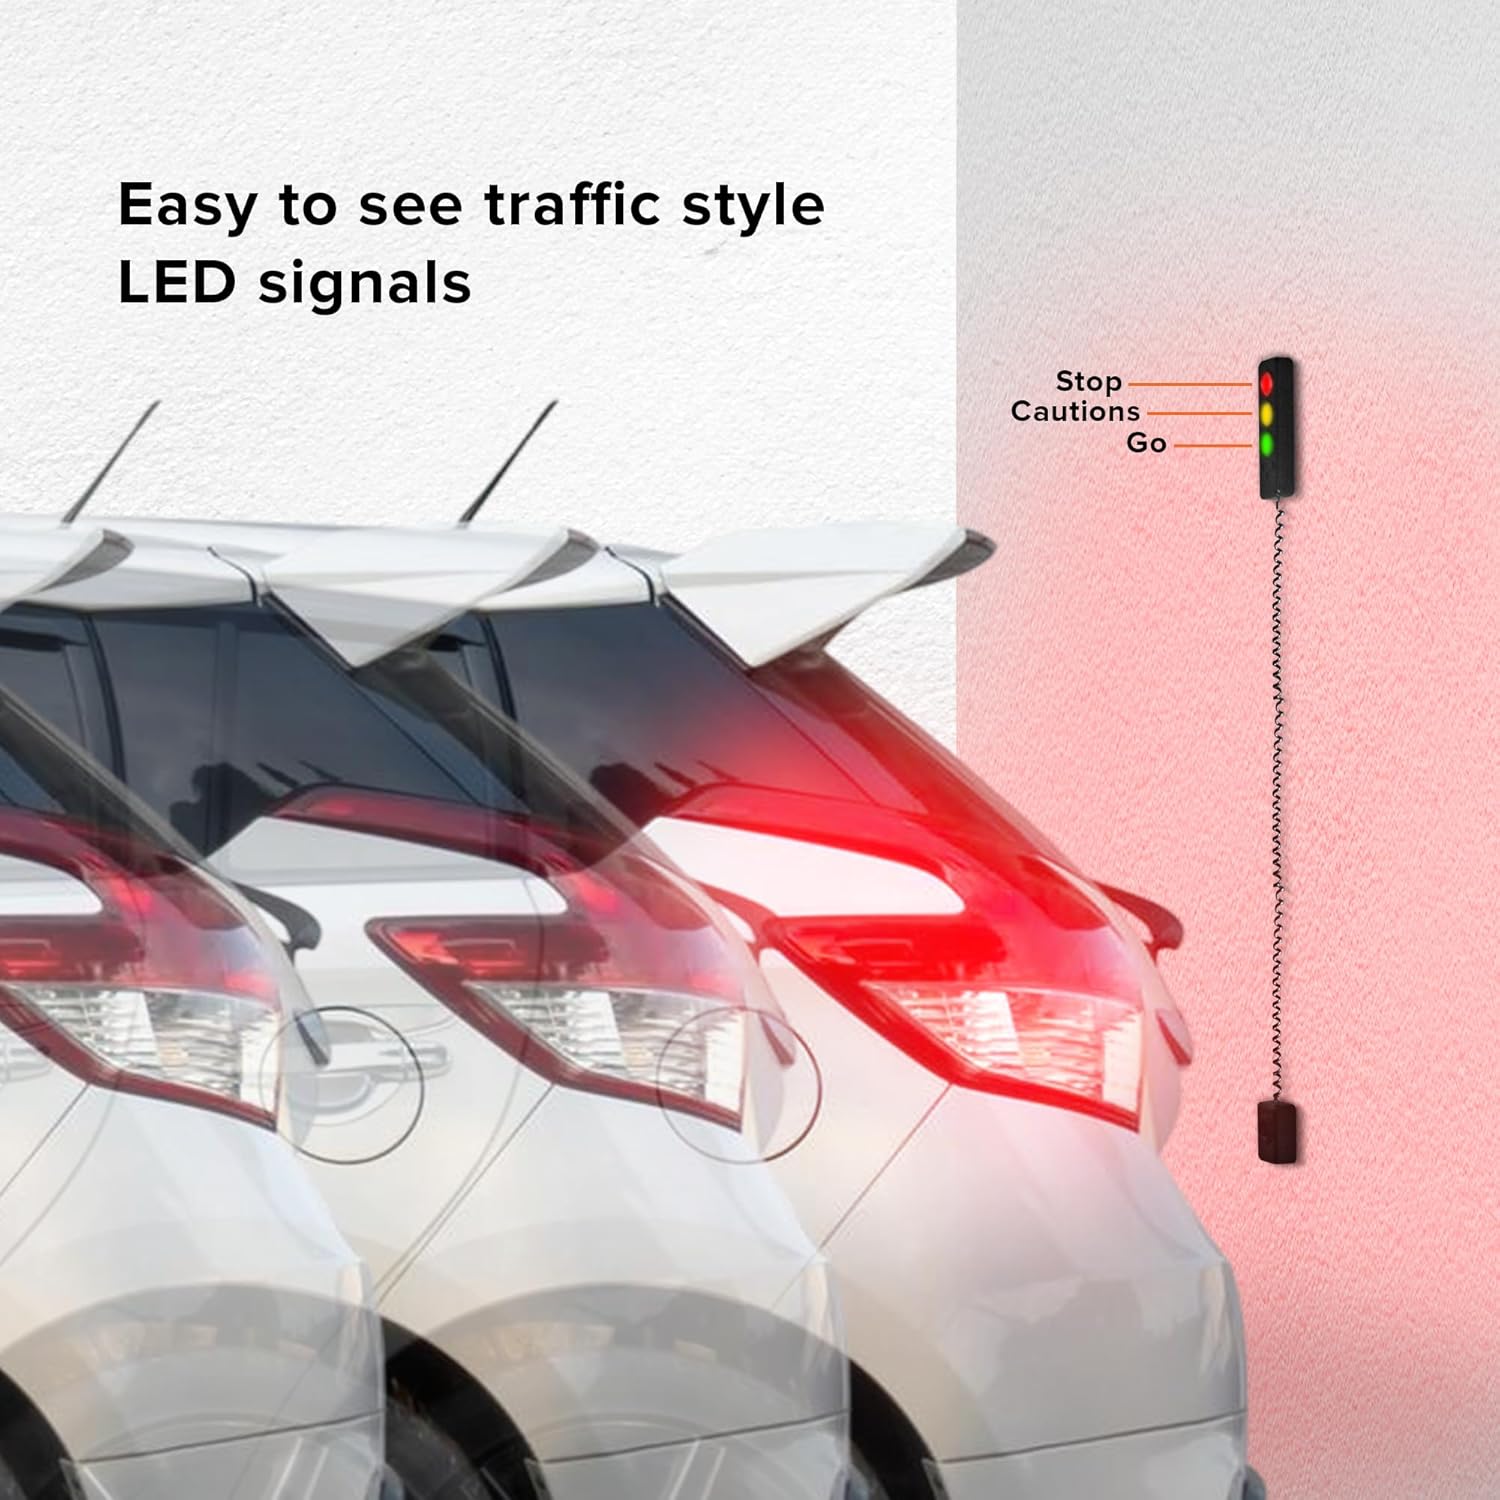
Image: A visual guide to the traffic-style LED signals (Go, Caution, Stop) as a car parks in a garage.

Image: An illustration demonstrating the programmable ultrasonic range-finder technology and audible sound alerts.
4.2. Video Guide for Usage (Similar Product)
Video: This video demonstrates how to use a similar garage parking assist device. While not the exact Armor All model, it illustrates the operational concept of light and sound indicators for parking.
5. Konserwacja
- Czyszczenie: Periodically wipe the LED light unit and sensor with a soft, dry cloth to remove dust and debris. Do not use abrasive cleaners or solvents.
- Wymiana baterii: If using the 9V battery backup, replace the battery when the device's performance degrades or if the battery indicator (if present) signals low power.
- Kontrola kabla: Regularly check the sensor cable for any signs of wear or damage.
6. Rozwiązywanie Problemów
- Urządzenie nie włącza się: Ensure the AC adapter is securely plugged into both the unit and a working electrical outlet. If using battery backup, check if the 9V battery is correctly inserted and has sufficient charge.
- Inaccurate Distance Detection: Re-calibrate the stop distance by following the instructions in the manual. Ensure the sensor is clean and free from obstructions. Verify the sensor is mounted at the correct height relative to your vehicle's bumper.
- Lights Not Changing / No Audible Alert: Check power supply. Ensure the sensor is not obstructed. Re-calibrate the device.
- Fałszywe alarmy: Ensure the sensor is not picking up movement from outside the garage or from objects within the garage that are not your vehicle. Adjust sensor sensitivity if possible (refer to manual).
7. Specyfikacje
| Funkcja | Specyfikacja |
|---|---|
| Marka | Zbroja Wszystko |
| Numer modelu | AAC4-1000-BLK |
| Waga przedmiotu | 10.8 uncji |
| Wymiary produktu | 3.5 x 2.6 x 8.31 cala |
| Adjustable Stop Distance | od 1.5 stóp do 5 stóp |
| Długość kabla czujnika | 5.6 stóp |
| AC Adapter Power Cable Length | 5 stóp |
| Zapasowa bateria | 9V (not included) |
8. Gwarancja i wsparcie
For warranty information or technical support, please refer to the contact details provided in the product packaging or visit the official Armor All webZachowaj dowód zakupu na wypadek roszczeń gwarancyjnych.