1. Informacje dotyczące bezpieczeństwa
Please read all instructions and warnings carefully before using this product. Failure to follow these safety guidelines may result in fire, electric shock, property damage, or injury.
- Nie należy świecić latarką bezpośrednio w oczy. Silny strumień światła może spowodować tymczasowe upośledzenie wzroku lub trwałe uszkodzenie oczu.
- Trzymaj latarkę poza zasięgiem dzieci.
- Do not disassemble the flashlight head as this may damage the reflector or LED.
- Latarka może generować dużo ciepła podczas długotrwałego użytkowania z dużą mocą. Zachowaj ostrożność, aby uniknąć oparzeń.
- Use only recommended AA batteries. Do not mix old and new batteries, or different types of batteries.
- Jeśli latarka nie będzie używana przez dłuższy czas, wyjmij baterie, aby zapobiec wyciekowi.
2. Zawartość opakowania
Sprawdź, czy w przesyłce znajdują się wszystkie elementy wymienione poniżej:
- ThruNite Archer 2A V3 LED Flashlight x 1
- Pocket Clip x 1
- Spare O-rings x 2
- Smycz x 1
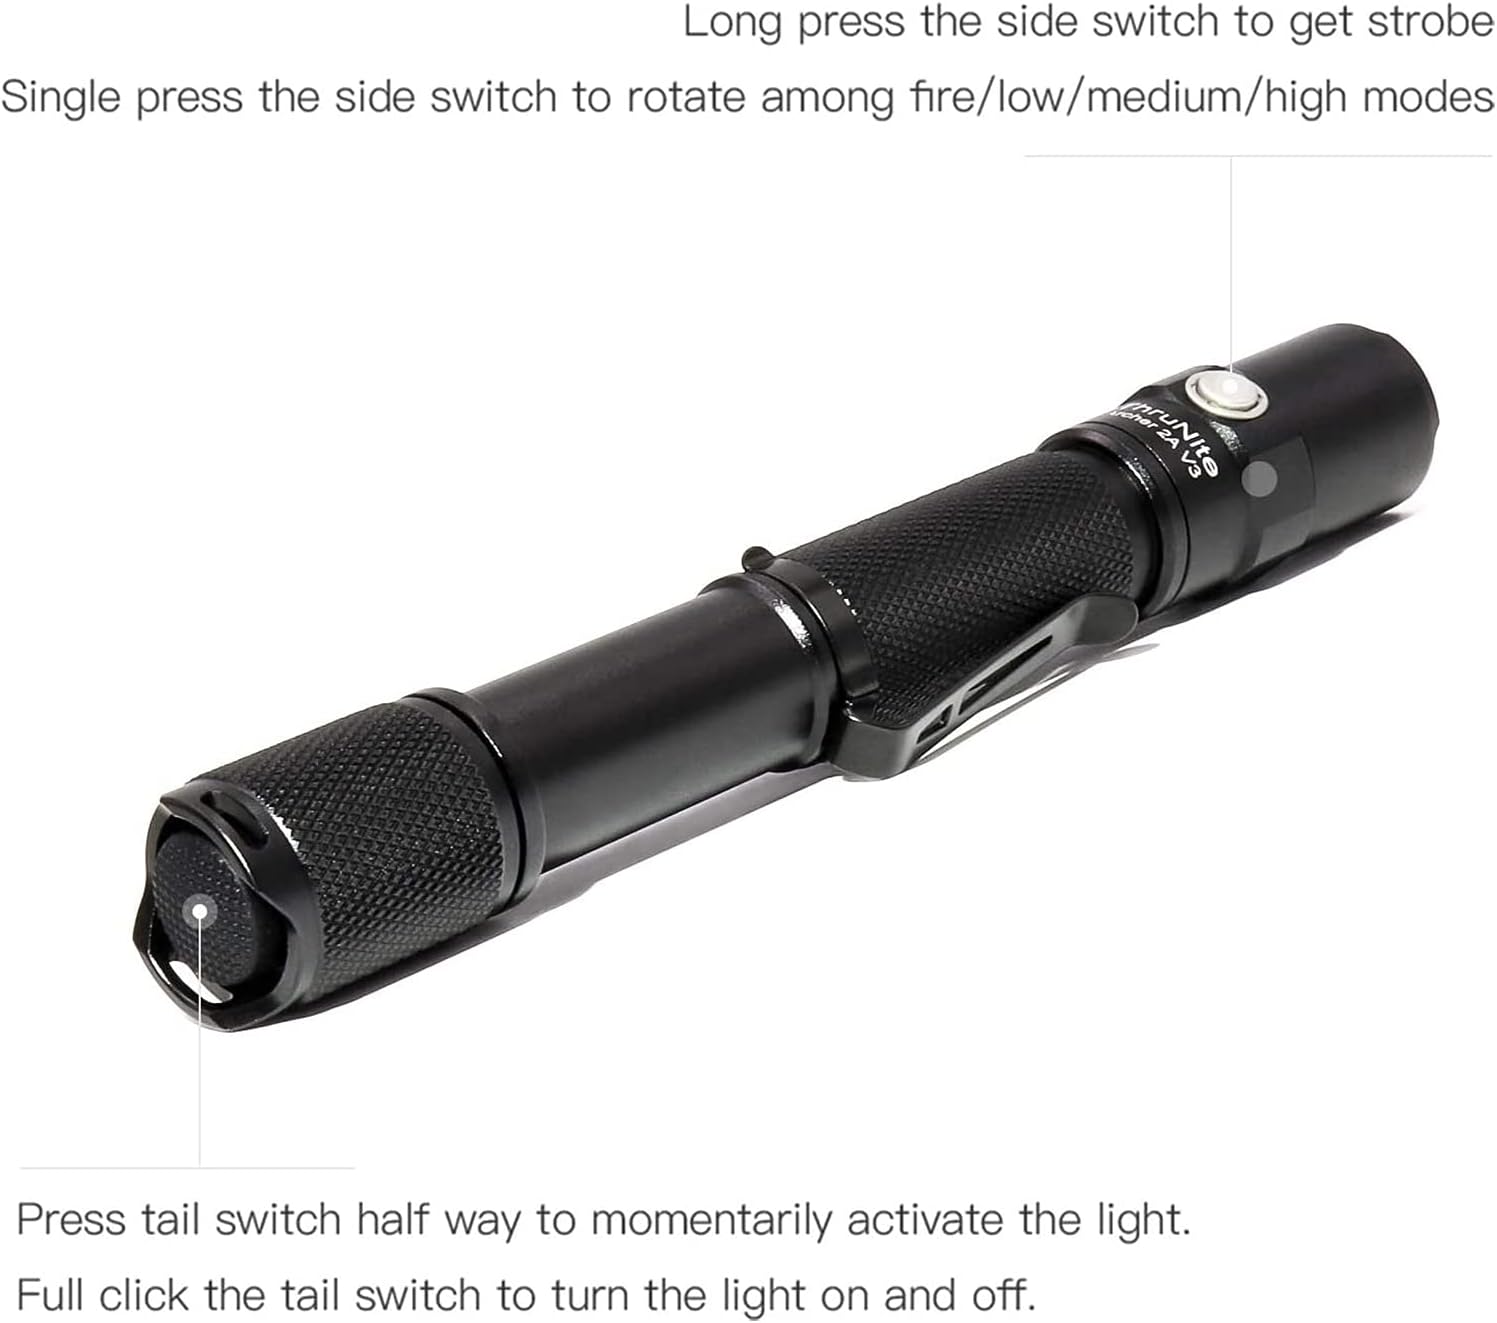
Image: All components included in the ThruNite Archer 2A V3 package, neatly laid out. This includes the flashlight body, a removable pocket clip, two spare O-rings for sealing, and a lanyard for secure carrying.
3. Konfiguracja
3.1 Instalacja baterii
The ThruNite Archer 2A V3 operates on two AA batteries (not included). Ensure correct polarity during installation.
- Odkręć tylną nakrętkę latarki, obracając ją w kierunku przeciwnym do ruchu wskazówek zegara.
- Insert two AA batteries into the battery compartment with the positive (+) end facing towards the flashlight head.
- Zakręć z powrotem nakrętkę zgodnie z ruchem wskazówek zegara, aż będzie dobrze dokręcona.
3.2 Mocowanie klipsa kieszonkowego
The removable pocket clip can be attached to the flashlight body for convenient carrying.
- Slide the pocket clip onto the flashlight body, positioning it as desired.
- Ensure the clip is firmly seated in the groove to prevent accidental detachment.

Obraz: szczegółowy view of the ThruNite Archer 2A V3 flashlight, highlighting the textured grip and the securely attached removable pocket clip. This clip allows for easy attachment to clothing or gear.
4. Instrukcja obsługi
The Archer 2A V3 features both a tail switch and a side switch for versatile operation.
4.1 Basic Operation (Tail Switch)
- Momentary Activation: Press the tail switch halfway to momentarily activate the light. Release to turn off.
- Stałe włączanie/wyłączanie: Fully click the tail switch to turn the light on or off.
4.2 Przełączanie trybu (przełącznik boczny)
When the flashlight is on (via tail switch):
- Tryby cyklu: Single press the side switch to cycle through the general modes: Low → Medium → High.
- Tryb stroboskopowy: Long press the side switch to activate Strobe mode. Single press again to return to the previously used general mode.

Image: An illustrative diagram demonstrating the operational controls of the ThruNite Archer 2A V3. It shows how to use the tail switch for momentary and constant on/off functions, and the side switch for cycling through brightness modes (Low, Medium, High) and activating the Strobe function with a long press.

Image: A person is shown walking on a dark, unpaved path, illuminated by the powerful beam of the ThruNite Archer 2A V3 flashlight. The flashlight provides ample light to navigate the surroundings, demonstrating its effectiveness in low-light conditions.
5. Konserwacja
Właściwa konserwacja gwarantuje długowieczność i optymalną wydajność latarki.
- Czyszczenie: Clean the body of the flashlight with a soft, damp ściereczka. Nie należy używać środków czyszczących o właściwościach ściernych ani rozpuszczalników.
- Gwinty i pierścienie uszczelniające: Okresowo smaruj gwinty i pierścienie uszczelniające smarem silikonowym, aby zachować wodoodporność i płynne działanie. Wymień zużyte pierścienie uszczelniające na dołączone części zamienne.
- Pielęgnacja baterii: Remove batteries if the flashlight is not used for extended periods to prevent corrosion. Store batteries in a cool, dry place.
- Pielęgnacja soczewek: Keep the lens clean. If it gets dirty, gently wipe it with a lens cleaning cloth.
6. Rozwiązywanie Problemów
If you encounter issues with your ThruNite Archer 2A V3, try the following steps:
- Latarka się nie włącza:
- Sprawdź, czy baterie są włożone prawidłowo, biegunem dodatnim (+) skierowanym w stronę głowy.
- Ensure the batteries are not depleted. Replace with fresh AA batteries.
- Confirm the tail cap is fully tightened. A loose tail cap can prevent electrical contact.
- Wyczyść styki i gwinty akumulatora czystą szmatką.
- Światło jest słabe lub migocze:
- Baterie mogą być rozładowane. Wymień je.
- Ensure the tail cap and head are securely tightened.
- Wyczyść styki i gwinty akumulatora.
- Wnikanie wody:
- Check if O-rings are properly seated and not damaged. Replace if necessary.
- Ensure all parts are tightly screwed together.
Jeśli powyższe kroki nie rozwiążą problemu, skontaktuj się z obsługą klienta.
7. Specyfikacje
Detailed specifications for the ThruNite Archer 2A V3 LED Flashlight:
| Funkcja | Szczegół |
|---|---|
| Źródło światła | XP-L V6 LED |
| Maksymalna wydajność | 500 lumenów |
| Odległość wiązki | 108 metrów (354 stóp) |
| Źródło zasilania | 2 baterie AA (brak w zestawie) |
| Tworzywo | Aerospace Grade Aluminum with Type III Hard-Anodized Finish |
| Funkcja specjalna | Lightweight, Removable Clip |
| Wymiary | Length: 155mm (6.1 inches), Diameter: 22mm (0.87 inches) |
| Waga przedmiotu | Około 500 gramów (1.1 funta) |
| Tryby | Low, Medium, High, Strobe |

Image: The ThruNite Archer 2A V3 flashlight displayed with its key dimensions: a length of 155mm and a diameter of 22mm, illustrating its compact and portable design.
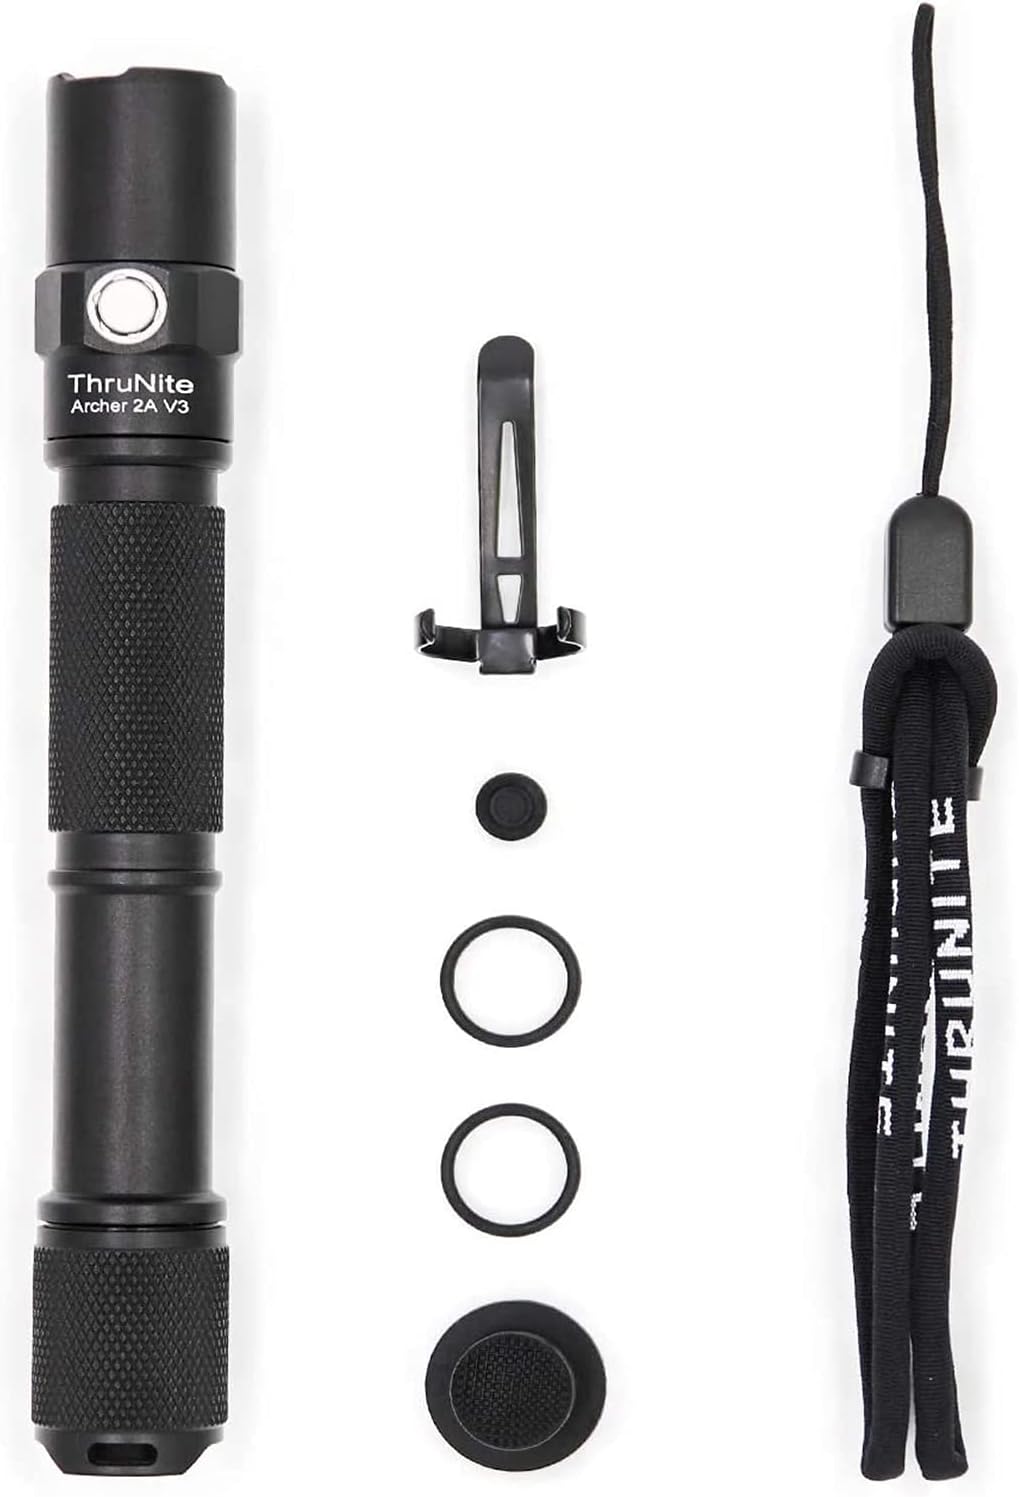
Image: A hand holding the ThruNite Archer 2A V3 flashlight, providing a clear perspective on its ergonomic design and compact size. The image also reiterates its dimensions, 6.1 inches (155mm) in length and 0.87 inches (22mm) in diameter, and highlights its lightweight nature at 48g (without batteries).
8. Gwarancja i wsparcie
ThruNite is committed to providing quality products and excellent customer service.
8.1 Informacje o gwarancji
Specific warranty details may vary. Please refer to the product packaging or the official ThruNite webna tej stronie znajdziesz najbardziej aktualną politykę gwarancyjną.
8.2 Obsługa klienta
If you have any questions, require assistance with setup, operation, or troubleshooting, or need to inquire about warranty service, please contact our customer service team. Contact information can typically be found on the product packaging or the official ThruNite webstrona.