1. Wprowadzenie
This manual provides detailed instructions for the installation, operation, and maintenance of your NULKOMMA YL80C Electric Bicycle LCD Display Meter. Please read this guide thoroughly before use to ensure proper functionality and safety.
2. Koniec produktuview
2.1. składniki
- 1 x YL80C LCD Display Meter
2.2. Główne cechy
- YL80C (5-PIN) KDS protocol compatibility.
- Constructed from premium ABS material for sturdiness and wear resistance, ensuring a long service life.
- Waterproof design allows for convenient and practical use in rainy conditions without fear of damage.
- Clear LCD screen for easy readability of riding parameters.
2.3. Zdjęcia produktów
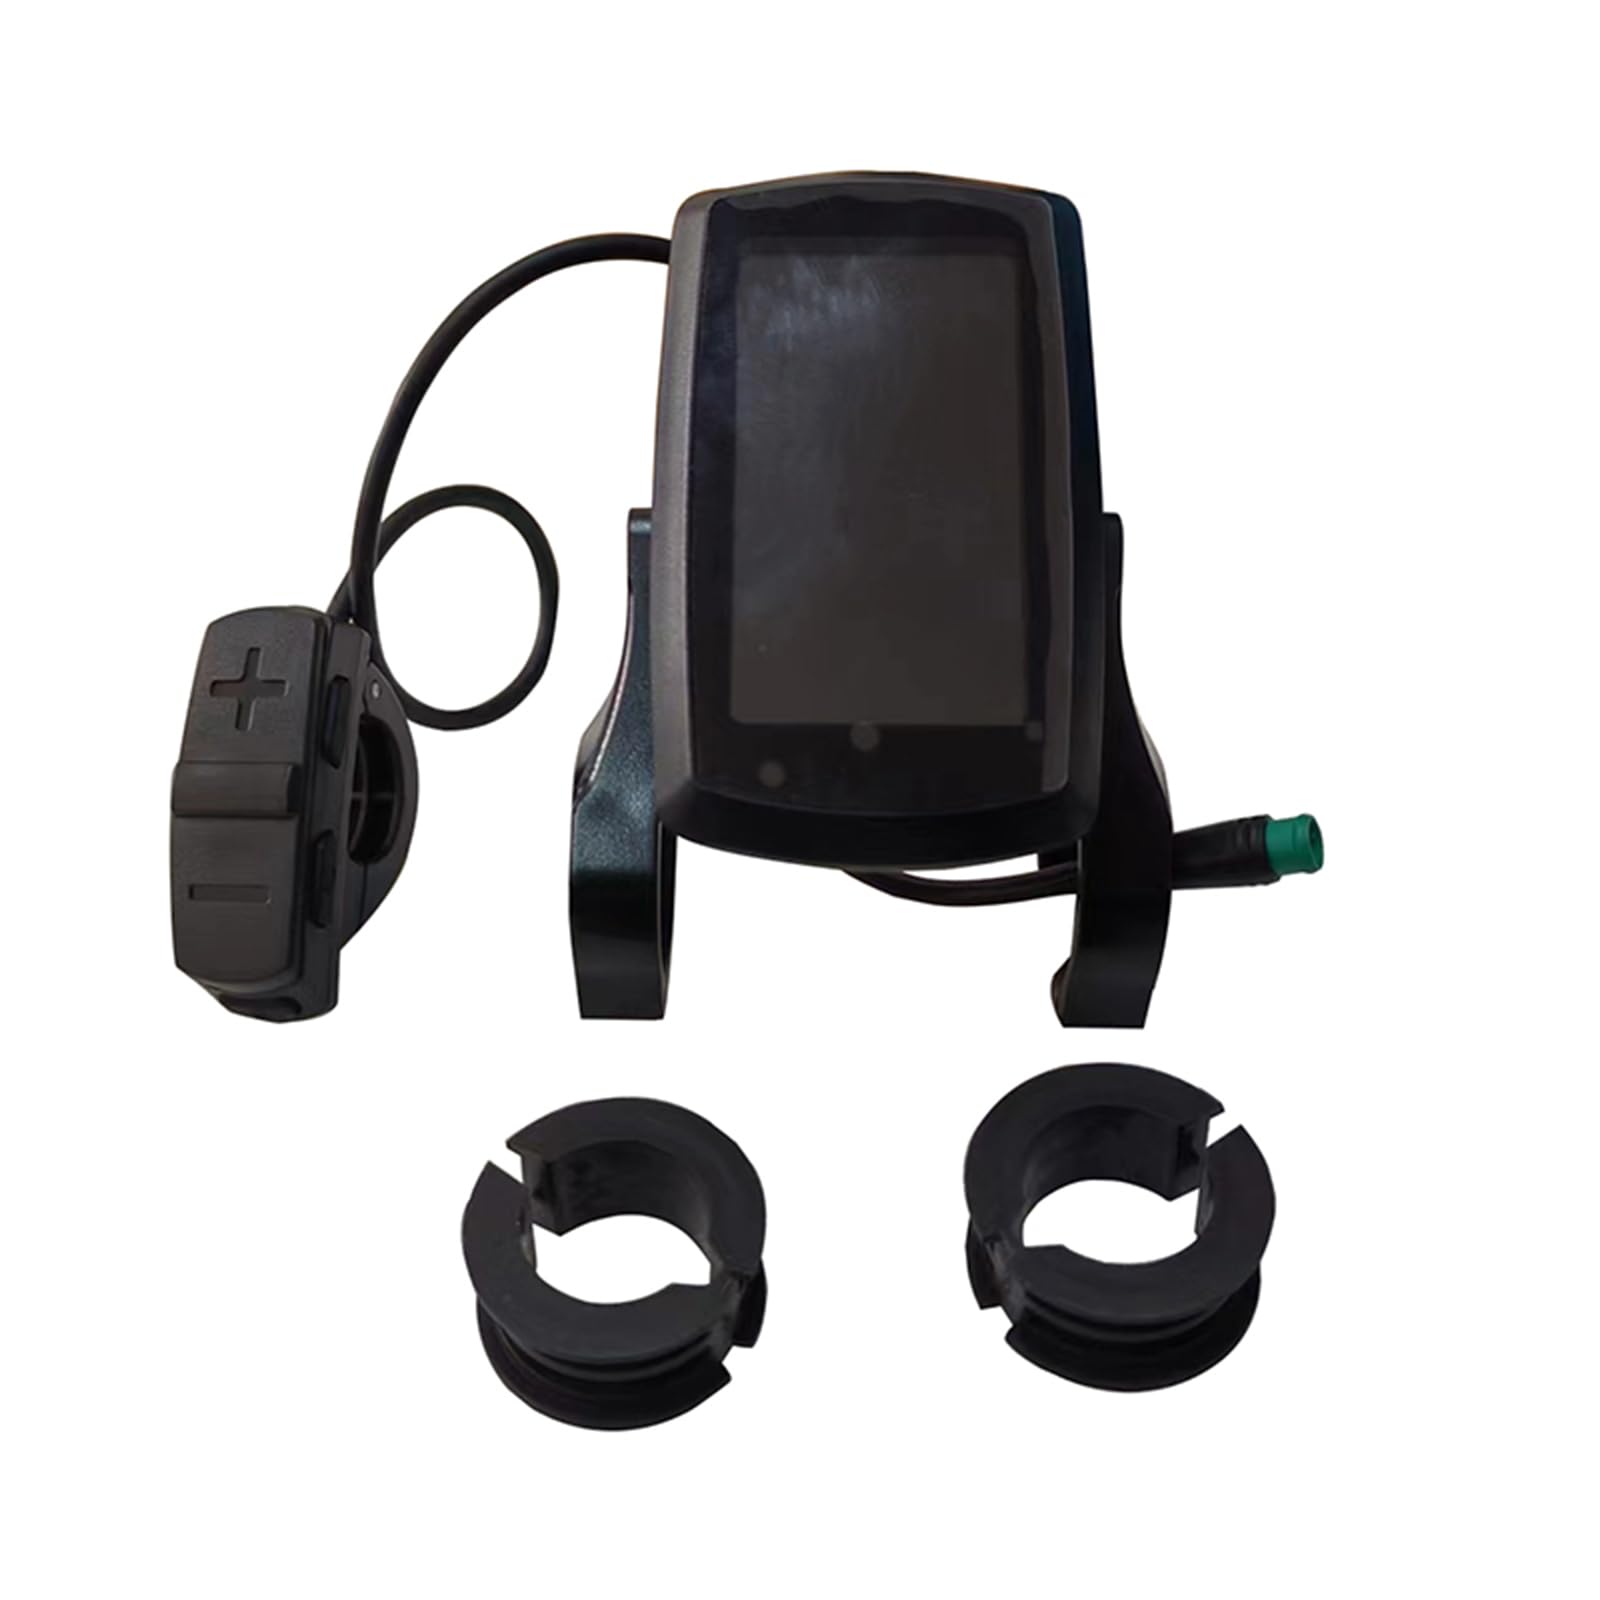
Figure 1: NULKOMMA YL80C LCD Display Meter with control buttons and 5-pin connector.
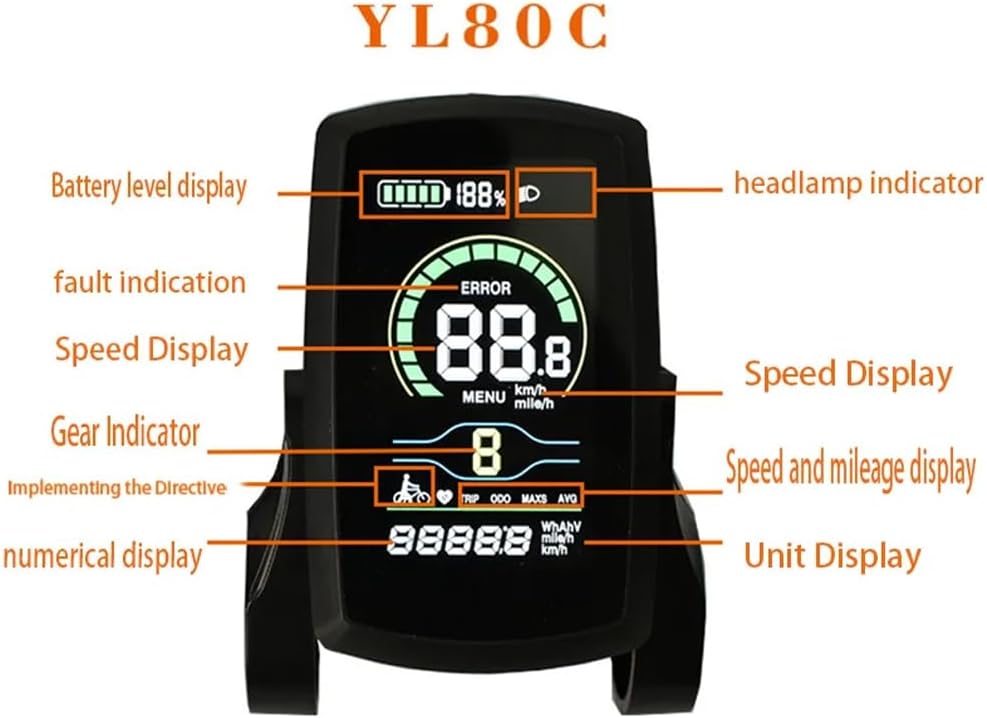
Rysunek 2: Szczegółowy view of the YL80C display interface with labeled indicators.
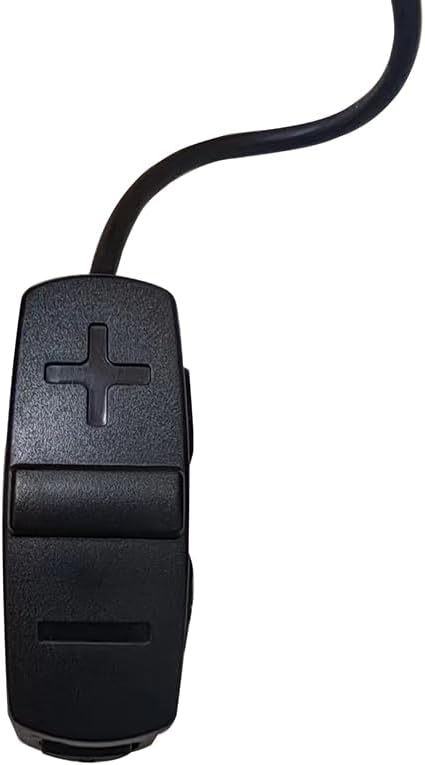
Figure 3: Dimensions of the YL80C display and control unit for reference.
3. Konfiguracja i instalacja
3.1. Instrukcje instalacji
Follow these steps to install the YL80C LCD Display Meter on your electric bicycle:
- Fix the LCD display part and its control buttons onto the handlebar of your electric vehicle.
- Adjust the display to an appropriate viewing angle for optimal visibility during your ride.
- Ensure the vehicle's power is off. Connect the display's 5-pin connector to the corresponding connector on the controller.
- Turn on the power. The electric vehicle and the display should now be in normal operating state.

Figure 4: YL80C Display securely mounted on an e-bike handlebar.

Figure 5: The 5-pin male waterproof connector for connecting the display to the controller.
3.2. Film instalacyjny
Video 1: General installation guide for an Electric Bike LCD Display Meter with a 5-pin connector. This video provides a visual aid for the installation process.
4. Instrukcja obsługi
4.1. Funkcje podstawowe
Włączanie/wyłączanie zasilania
Press and hold the Power button (usually marked with a power symbol) to turn the display on or off.
Increase/Decrease Pedal Assist Level (PAS)
Press the Plus (+) or Minus (-) button to adjust the pedal assist level. Higher levels provide more motor assistance and speed.
Tryb wspomagania chodzenia
Press and hold the Minus (-) button to activate walk assist mode, which provides low-speed assistance for pushing the bike.
Podświetlenie wyświetlacza
Press and hold the Plus (+) button to activate or deactivate the display backlight for improved visibility in different lighting conditions.
Switch between Odometer and Trip Meter
Press the Power button briefly to toggle between the Odometer (TOTAL distance) and Trip Meter (TRIP distance) displays.
Zresetuj dystans podróży
Press and hold both the Power and Minus (-) buttons simultaneously to reset the current trip distance to zero.
4.2. Ustawienia zaawansowane
The following advanced settings allow for customization of your display. While the video below demonstrates settings for a BAFANG C961 display, many of the functions are similar and can serve as a general guide for the YL80C.
Wejdź do menu ustawień
Press and hold both the Plus (+) and Minus (-) buttons simultaneously to enter the advanced setting menu.
Switch Speed Unit (Metric/Imperial)
Within the setting menu, use the Plus (+) or Minus (-) button to switch the speed unit between kilometers per hour (Km/h) and miles per hour (Mile/h).
Maximum Pedal Assist Speed Setting
In the setting menu, use the Plus (+) or Minus (-) button to adjust the maximum speed at which pedal assist will be provided.
Ustawienie jasności podświetlenia
Access this setting in the menu to adjust the display's backlight brightness. Typically, there are 0-8 levels of brightness available.
Ustawienie zegara
Within the setting menu, use the Plus (+) and Minus (-) buttons to adjust the current minute and hour for the display's clock.
Ustawienie automatycznego wyłączania
In the setting menu, you can adjust the time duration after which the display will automatically turn off due to inactivity.
Pedal Assist Level (PAS) Setting
This setting allows you to fine-tune the amount of assistance provided at each pedal assist level, typically adjustable between a range like 3 and 9.
Ustawienie średnicy koła
It is crucial to set the correct wheel diameter in the display's settings to ensure accurate speed and distance readings. Use the Plus (+) or Minus (-) button to adjust this value.
4.3. Advanced Settings Video Guide
Video 2: This video demonstrates advanced settings for a BAFANG C961 display. While not identical to the YL80C, it provides a helpful visual reference for navigating and adjusting common e-bike display settings.
5. Specyfikacje
| Funkcja | Specyfikacja |
|---|---|
| Numer modelu | YL80C |
| Marka | NULKOMMA |
| Tomtage | 36V 48V (compatible) |
| Interfejs | Waterproof 5-pin male |
| Tworzywo | ABS |
| Waga produktu | Approximately 135 grams / 4.76 ounces |
| Applicable Handlebar Diameter | 22.2mm, 25.4mm, 28.6mm, 31.8mm (0.87in, 1in, 1.13in, 1.25in) |
| Rozmiar ekranu | 4.1 cali |
| Typ wyświetlacza | LCD |
| Typ czujnika | Czujnik prędkości, czujnik kadencji |
| Technologia łączności | Wtyczka |
| Międzynarodowa Ocena Ochrony | IP65 |
6. Konserwacja
6.1. Czyszczenie
Przetrzyj ekran wyświetlacza i obudowę miękką szmatką.amp cloth. Avoid using abrasive cleaners, solvents, or harsh chemicals, as these can damage the display surface or internal components.
6.2. Wodoodporność
The YL80C display is rated IP65 for water and dust resistance, meaning it is protected against low-pressure water jets from any direction. However, it is not designed for prolonged submersion. Ensure all connectors are securely fastened to maintain its waterproof integrity, especially after installation or adjustments.
6.3. Przechowywanie
When not in use for extended periods, store the display in a cool, dry place away from direct sunlight and extreme temperatures. Disconnecting it from the e-bike battery is recommended to prevent any potential drain.
7. Rozwiązywanie Problemów
7.1. Wyświetlacz się nie włącza
- Check all cable connections, especially the 5-pin connector to the controller, to ensure they are secure and fully inserted.
- Verify that your e-bike battery is charged and properly connected to the system.
- Ensure the power button is pressed and held for a sufficient duration (typically 2-3 seconds).
7.2. Incorrect Speed/Distance Readings
- Confirm that the wheel diameter setting in the display's advanced settings is accurately configured for your bicycle's wheel size.
- Inspect the speed sensor for proper alignment and ensure it is not obstructed or damaged.
7.3. Buttons Unresponsive
- Try restarting the display by turning the e-bike power off and then back on.
- Ensure no debris or foreign objects are obstructing the buttons, preventing them from being pressed correctly.
8. Gwarancja i wsparcie
8.1. Informacje o gwarancji
This product comes with a 100% warranty. If you encounter any problems or have questions about our products, please feel free to contact us directly for assistance. We are committed to replying to your inquiries within 12-24 hours and will do our best to help you solve the problem as soon as possible.
8.2. Skontaktuj się z pomocą techniczną
For further assistance or inquiries, please refer to your purchase platform for seller contact information or reach out to NULKOMMA customer service through the provided channels.