Wstęp
Thank you for choosing the Aokeo Boom Microphone Stand with Tablet Holder, Model AK-210. This versatile stand is designed to provide stable support for your microphone and tablet, suitable for a wide range of applications including live performances, recording, presentations, and more. This manual will guide you through the assembly, operation, and care of your new stand.
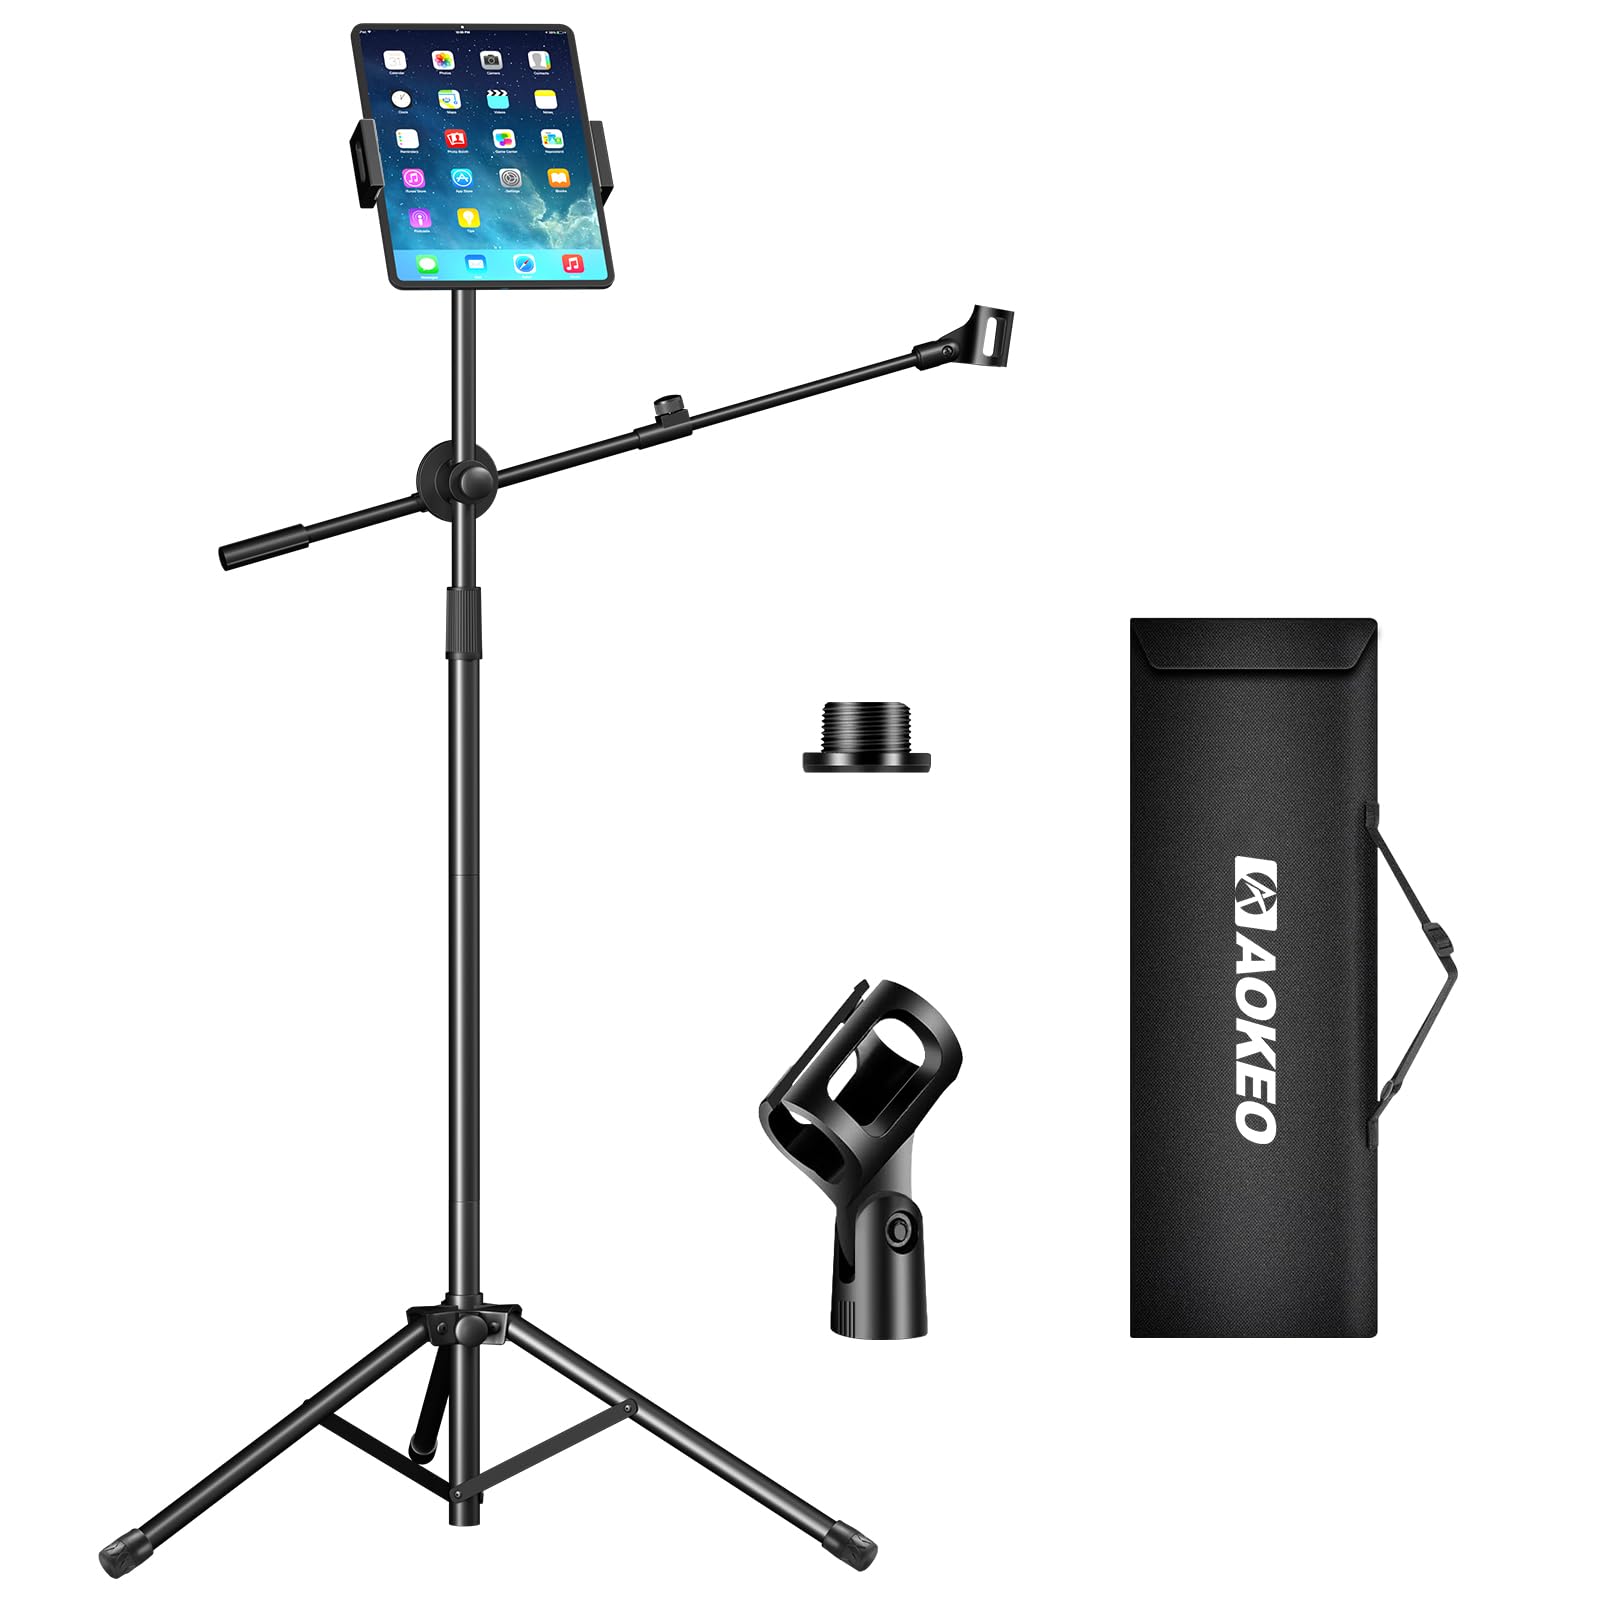
The Aokeo Boom Microphone Stand with Tablet Holder, Model AK-210, fully assembled.
Zawartość opakowania
Sprawdź zawartość opakowania, aby upewnić się, że znajdują się w nim wszystkie części:
- A: Portable Storage Bag
- B: Tripod Base
- C: Lower Extension Pole
- D: Upper Extension Pole
- E: Microphone Clip
- F: Ball Head Adapter for Tablet Clip
- G: Tablet/Phone Clip
- H: Boom Arm Assembly
- I: Cable Management Strap

All components included in the Aokeo AK-210 package.
Instrukcje konfiguracji
Follow these steps to assemble your Aokeo microphone stand:
- Step 1: Set up the Tripod Base
Take out part B (Tripod Base). Loosen the knob and spread the tripod legs as wide as possible to ensure maximum stability. Tighten the knob to secure the legs. - Step 2: Assemble the Main Pole
Connect part C (Lower Extension Pole) to part B (Tripod Base) by screwing it in. Then, connect part D (Upper Extension Pole) to part C. - Step 3: Attach the Boom Arm
Attach part H (Boom Arm Assembly) to the main pole (part D). Ensure it is securely tightened. - Step 4: Install the Microphone Clip
Screw part E (Microphone Clip) onto the end of the boom arm. The clip is compatible with most handheld microphones and microphones with a 3/8-inch interface. - Step 5: Attach the Tablet/Phone Clip
Screw part F (Ball Head Adapter) onto the top of the upper extension pole (part D). Then, attach part G (Tablet/Phone Clip) to the ball head adapter. Adjust the angle and tighten the knob to secure.

Unfolding and securing the tripod base for stability.

Connecting the extension poles to form the main stand.
Attaching the boom arm to the main stand pole.

Installing the microphone clip on the boom arm.

Attaching the tablet/phone clip to the stand.
Film demonstracyjny konfiguracji
This video demonstrates the assembly process and key features of the Aokeo AK-210 microphone stand, including setting up the base, attaching components, and adjusting the microphone and tablet holders.
Instrukcja obsługi
The Aokeo microphone stand offers flexible adjustments for optimal positioning.
Regulacja wysokości
The main pole features a telescopic rod that allows you to adjust the stand's height from 42 inches (1070mm) to 68.5 inches (1740mm). Loosen the knob on the main pole, extend or retract the pole to your desired height, and then tighten the knob to secure it.

Adjusting the stand height for sitting or standing use.
Boom Arm Adjustment
The boom arm can be adjusted in length and rotated 360 degrees. Loosen the central knob to extend or retract the arm, and to rotate it to the desired angle. Tighten the knob to lock it in place. This allows for precise microphone positioning without needing to move the entire stand.

Flexible adjustment of the boom arm for optimal microphone placement.
Tablet/Phone Clip Adjustment
The tablet/phone clip is mounted on a ball head adapter, allowing for 360-degree rotation and tilt adjustments. Loosen the knob on the ball head to adjust the viewing angle of your device, then tighten to secure. The clip is compatible with most smartphones and tablets ranging from 5.5 to 12.9 inches.

Adjusting the flexible iPad/phone clip for various angles.
Scenariusze użytkowania
This stand is ideal for various settings:
- Band Singing/Recording/Dubbing: Use for vocal performances or studio recording sessions.
- Presentations/Meetings: Perfect for speakers, allowing hands-free operation and easy access to notes on a tablet.
- Outdoor Performances/Live Broadcasts: Portable design makes it suitable for street performances or outdoor events.
- Karaoke/Podcasts: Enhance your home entertainment or podcasting setup.

The Aokeo AK-210 stand in various usage scenarios.
Konserwacja
To ensure the longevity and optimal performance of your Aokeo microphone stand, follow these maintenance guidelines:
- Czyszczenie: Wipe down the stand with a soft, dry cloth after each use to remove dust and fingerprints. For stubborn dirt, use a slightly damp ściereczką, a następnie dokładnie wysuszyć. Unikać środków czyszczących o działaniu ściernym i rozpuszczalników.
- Smarowanie: Periodically check the adjustable joints and threads. If they become stiff, apply a small amount of silicone-based lubricant to ensure smooth operation.
- Składowanie: When not in use, disassemble the stand and store it in the provided portable storage bag (Part A) to protect it from dust and damage. Store in a cool, dry place.
- Kontrola: Regularly inspect all screws, knobs, and connections to ensure they are tight. Re-tighten any loose parts to maintain stability.

The portable storage bag allows for easy transport and protection of the stand.
Rozwiązywanie problemów
If you encounter any issues with your Aokeo microphone stand, refer to the following common problems and solutions:
- Stojak jest niestabilny:
- Ensure the tripod legs are fully extended and the central knob on the base is securely tightened.
- Verify that all extension poles are fully inserted and tightened.
- Check if the boom arm is balanced. If a heavy microphone is used, ensure the boom arm is positioned to maintain the center of gravity over the tripod base.
- Adjustments are stiff or difficult:
- Loosen the relevant knobs completely before attempting to adjust height or boom arm position.
- Apply a small amount of silicone lubricant to the moving parts or threads if they are still stiff.
- Tablet/phone clip does not hold device securely:
- Ensure your device is within the supported size range (5.5-12.9 inches).
- Make sure the spring-loaded mechanism of the clip is fully engaged with your device.
- Tighten the knob on the ball head adapter to prevent tilting or rotation.
If you experience issues not covered here, please contact Aokeo customer support for assistance.
Specyfikacje
| Funkcja | Specyfikacja |
|---|---|
| Marka | aokeo |
| Numer modelu | AK-210 |
| Kolor | Czarny |
| Tworzywo | Metal |
| Waga przedmiotu | 1.5 kilogramów |
| Typ bazowy | Statyw |
| Maksymalna zalecana waga | 10 kilogramów |
| Overall Height (with EV) | 68 cali (ok. 1740 mm) |
| Rozmiar śruby montażowej | 5/8 cala |
| Rodzaj wykończenia | Malowane proszkowo |
| Zawarte komponenty | Klips mikrofonowy |
Gwarancja i wsparcie
For warranty information and customer support, please refer to the documentation included with your purchase or visit the official Aokeo website. If you have any questions or require assistance with your product, do not hesitate to contact our support team.
Aokeo Customer Service:
- Please refer to the contact information provided on the product packaging or the official Aokeo brand store on Amazon.