Wstęp
This manual provides comprehensive instructions for the safe and efficient use of your DOOGEE N50PRO smartphone. Please read this manual thoroughly before operating your device and retain it for future reference. The DOOGEE N50PRO is an Android 13 smartphone equipped with an Octa-Core processor, a 6.52-inch HD+ display, a 50MP main camera, a 4200mAh battery, and supports 4G Dual SIM, Face ID, and Fingerprint ID.
Zawartość opakowania
Sprawdź, czy w opakowaniu produktu znajdują się wszystkie poniższe elementy:
- DOOGEE N50PRO Smartphone
- Pudełko opakowaniowe
- Ładowarka (9V / 2A)
- Kabel USB typu C.
- Kod PIN karty SIM
- Pre-applied TP Protective Film
- Instrukcja obsługi (ten dokument)
Organizować coś
1. Instalacja karty SIM i karty TF
The DOOGEE N50PRO supports dual Nano SIM cards or one Nano SIM card and one TF (MicroSD) card for expandable storage up to 1TB. Ensure the device is powered off before inserting or removing cards.
- Znajdź tackę na kartę SIM znajdującą się z boku telefonu.
- Włóż wtyczkę karty SIM do małego otworu obok tacki, aby ją wysunąć.
- Ostrożnie wyciągnij tackę.
- Umieść kartę(y) nano SIM i/lub kartę TF w wyznaczonych gniazdach na tacce. Upewnij się, że złote styki są skierowane w dół.
- Delikatnie wsuń tackę z powrotem do telefonu, aż zatrzaśnie się na swoim miejscu.
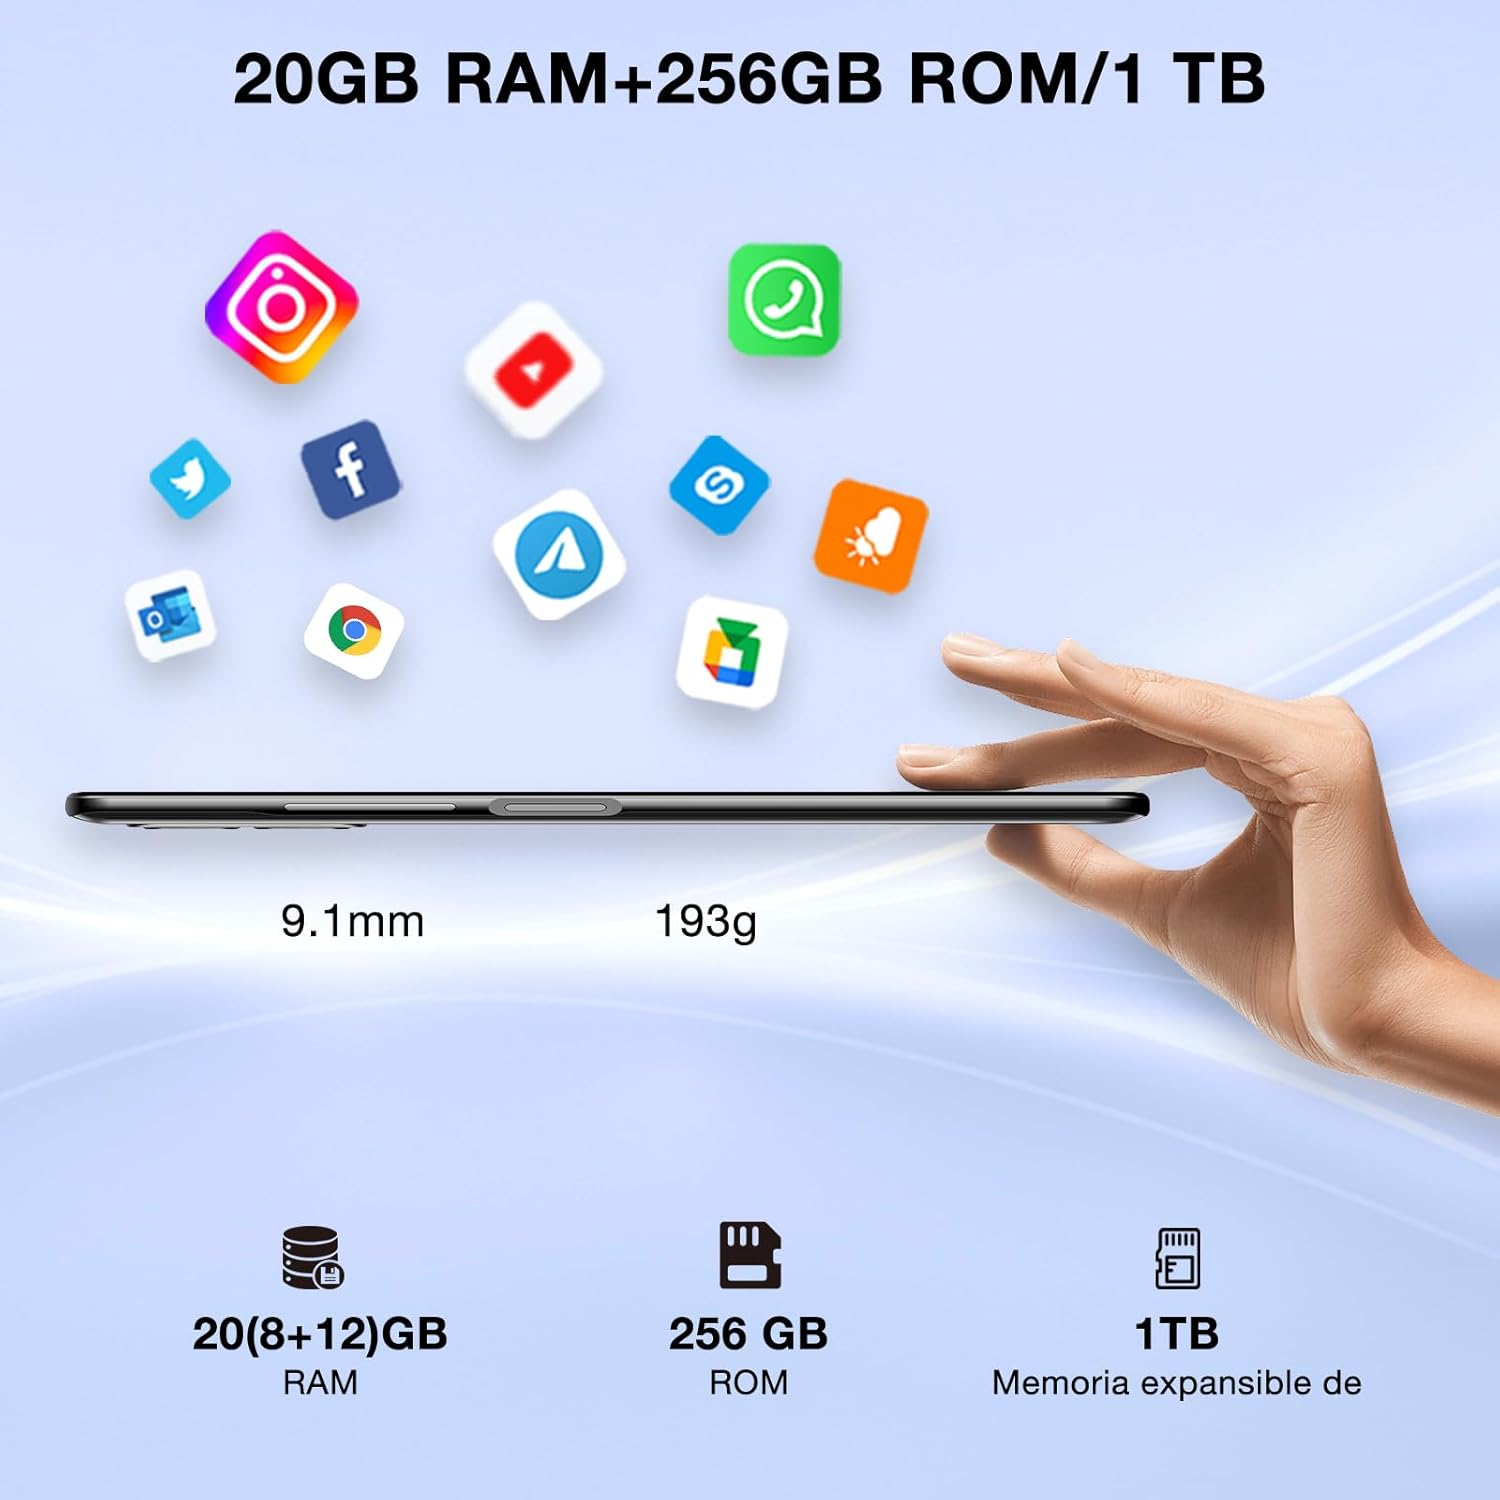
Image: DOOGEE N50PRO smartphone showing its slim profile (9.1mm), weight (193g), and memory configuration (20GB RAM, 256GB ROM, 1TB expandable memory).
2. Pierwsze włączenie zasilania
Naciśnij i przytrzymaj przycisk zasilania z boku urządzenia, aż pojawi się logo DOOGEE. Postępuj zgodnie z instrukcjami wyświetlanymi na ekranie, aby dokończyć konfigurację początkową, w tym wybrać język, nawiązać połączenie Wi-Fi i skonfigurować konto Google.
3. Ładowanie akumulatora
Before first use, it is recommended to fully charge the device. Connect the USB Type-C cable to the phone's charging port and the other end to the provided 9V/2A charger. Plug the charger into a power outlet. The charging indicator will appear on the screen.

Image: DOOGEE N50PRO connected to a charger, illustrating its 4200mAh battery capacity and 18W fast charging capability. The image also highlights OTG reverse charging.
Instrukcja obsługi
1. Basic Navigation and Android 13 Features
Your DOOGEE N50PRO runs on Android 13, offering an intuitive user experience. Swipe down from the top of the screen to access the notification panel and quick settings. Customize your control center and direct access operations for efficient use of various functions.

Image: Visual representation of the DOOGEE N50PRO's internal components, highlighting the Spreadtrum T606 Octa-Core processor with 1.6GHz high frequency and 12nm advanced technology, running on Android 13.
2. Security Features: Face ID and Fingerprint ID
Enhance your device's security and convenience with advanced biometric authentication:
- Identyfikator twarzy: Register your face to unlock the phone by simply looking at the front camera.
- Identyfikacja odcisku palca: Register your fingerprint(s) to unlock the phone or authorize purchases with a touch. The fingerprint sensor is typically located on the side or back of the device.

Image: A user demonstrating Face ID unlock and a close-up of the Fingerprint ID sensor on the DOOGEE N50PRO, showcasing its multi-function security features.
3. Korzystanie z aparatu
The DOOGEE N50PRO features a triple camera system:
- Główny aparat 50 MP: Zdjęcia w wysokiej rozdzielczości.
- Przedni aparat 8 MP: Do selfie i rozmów wideo.
- Aparat makro 2 MP: Do szczegółowych ujęć z bliska.
Access the Camera app from your home screen or app drawer. Explore various modes such as Panorama, Portrait, and Night mode to capture different scenes effectively.

Image: Diagram illustrating the DOOGEE N50PRO's dual AI camera setup, featuring a 50MP main camera, an 8MP front camera, and a 2MP macro camera. Sample photos taken with the 50MP main and 8MP front cameras are also shown.
4. Łączność
- Wi-Fi: Supports 2.4G/5G Wi-Fi for fast and stable internet connection. Go to Settings > Network & internet > Wi-Fi to connect to available networks.
- Bluetooth 5.0: For connecting wireless accessories like headphones or speakers. Go to Settings > Connected devices > Bluetooth.
- OTG (w podróży): Allows the phone to act as a host to connect USB devices like flash drives or external keyboards. It also supports reverse charging for other devices.
- Nawigacja: Integrated GPS, GLONASS, BeiDou, and Galileo for accurate location services.
- Radio FM: Use the built-in FM radio feature (requires headphones to act as an antenna).
- Gniazdo słuchawkowe 3.5 mm: Do przewodowych akcesoriów audio.
5. Kontrola rodzicielska
The device includes parental control features, allowing you to monitor and manage screen time and application usage for children. Access these settings through the device's system settings to balance usage effectively.
Konserwacja
1. Pielęgnacja baterii
- Unikaj wystawiania akumulatora na działanie ekstremalnych temperatur (wysokich lub niskich).
- Do not fully discharge the battery frequently. Charge it before it drops below 20%.
- Aby uniknąć uszkodzeń, należy używać wyłącznie dołączonej ładowarki i kabla.
2. Czyszczenie
Do czyszczenia ekranu i obudowy telefonu używaj miękkiej, niepozostawiającej włókien ściereczki. Unikaj stosowania silnych środków chemicznych i materiałów ściernych. W przypadku uporczywych plam delikatnie przetrzyj powierzchnię.ampPrzetrzyj ściereczkę wodą lub płynem do czyszczenia ekranów przeznaczonym do urządzeń elektronicznych.
3. Aktualizacje oprogramowania
Regularnie sprawdzaj dostępność aktualizacji oprogramowania i instaluj je, aby mieć pewność, że Twoje urządzenie ma najnowsze funkcje, poprawki zabezpieczeń i udoskonalenia wydajności. Przejdź do Ustawienia > System > Aktualizacja systemu.
Rozwiązywanie problemów
- Urządzenie się nie włącza: Upewnij się, że bateria jest naładowana. Podłącz ładowarkę i odczekaj kilka minut przed ponownym włączeniem.
- Ekran nie reaguje: Spróbuj ponownie uruchomić urządzenie, przytrzymując przycisk zasilania przez około 10–15 sekund.
- Problemy z siecią: Check if your SIM card is properly inserted. Try toggling Airplane Mode on and off. If issues persist, contact your mobile service provider.
- Aplikacje ulegają awarii: Clear the cache of the problematic app (Settings > Apps > [App Name] > Storage & cache > Clear cache). If the issue continues, consider reinstalling the app.
- Niska wydajność: Zamknij nieużywane aplikacje, wyczyść pamięć podręczną lub rozważ przywrócenie ustawień fabrycznych jako ostateczność (najpierw wykonaj kopię zapasową danych).
Specyfikacje
| Funkcja | Specyfikacja |
|---|---|
| Nazwa modelu | DOOGEE N50PRO |
| System operacyjny | Android 13.0 |
| Edytor | Octa-Core (Spreadtrum T606) |
| BARAN | 20 GB (Extended Memory) |
| Pamięć wewnętrzna (ROM) | 256 GB |
| Możliwość rozbudowy pamięci masowej | Do 1 TB (karta TF) |
| Rozmiar wyświetlacza | 6.52 cali |
| Rozdzielczość wyświetlacza | HD+ (720x1600) |
| Główna kamera | 50 MP |
| Przednia kamera | 8 MP |
| Aparat makro | 2 MP |
| Pojemność baterii | 4200 mAh |
| Ładowanie | Szybkie ładowanie typu C 18 W |
| Technologia komórkowa | 4G |
| Typ karty SIM | Nano SIM (obsługa dwóch kart SIM) |
| Łączność | Wi-Fi (2.4G/5G), Bluetooth 5.0, OTG, FM Radio |
| Nawigacja | GPS, GLONASS, BeiDou, Galileo |
| Funkcje bezpieczeństwa | Face ID, Fingerprint ID |
| Wymiary | Wymiary: 165.8 x 76.2 x 9.1 mm |
| Waga | 187 gramów |
| Gniazdo słuchawkowe | 3.5 mm |
| Czas rozmowy | Do 16 godzin |

Image: The DOOGEE N50PRO's 6.52-inch Waterdrop HD+ display, showing its 720x1600 resolution, 20:9 aspect ratio, and 86% screen-to-body ratio.
Gwarancja i wsparcie
1. Informacje o gwarancji
Your DOOGEE N50PRO smartphone comes with a dwuletnia oficjalna gwarancja from the date of purchase. Please retain your proof of purchase for warranty claims. This warranty covers manufacturing defects and malfunctions under normal use conditions.
2. Obsługa klienta
For technical assistance, warranty claims, or further inquiries, please contact DOOGEE customer support through their official website or the contact information provided with your purchase. Ensure you have your device model number and proof of purchase ready when contacting support.