
ATOMSTACK OMTA24PRO
Instrukcja obsługi grawerki laserowej i plotera tnącego ATOMSTACK A24 Pro
Model: OMTA24PRO
1. Wprowadzenie
This manual provides essential information for the safe and efficient operation of your ATOMSTACK A24 Pro Laser Engraver and Cutter. Please read this manual thoroughly before operating the machine and keep it for future reference.
The ATOMSTACK A24 Pro is a high-power 20W laser engraving and cutting machine, featuring a 0.06 x 0.06 mm ultra-fine laser focus area. It is designed for precise engraving and efficient cutting of various materials, including wood, acrylic, and certain metals, with cutting capabilities comparable to a 300W CO₂ laser engraving machine.
2. Środki ostrożności
Operating a laser machine requires strict adherence to safety guidelines to prevent injury and damage. Always prioritize safety.
- Ochrona oczu: The laser module includes a protective cover to shield the user's eyes. However, it is highly recommended to wear additional certified laser safety goggles during operation.
- Wentylacja: Należy zapewnić odpowiednią wentylację w miejscu pracy, aby rozproszyć opary i dym powstające podczas grawerowania i cięcia.
- Bezpieczeństwo materiałów: Only engrave or cut materials specified as safe for laser processing. Avoid materials that produce toxic fumes or are highly flammable.
- Zagrożenie pożarem: Trzymaj gaśnicę w pobliżu. Nigdy nie zostawiaj maszyny bez nadzoru podczas pracy.
- Dzieci i zwierzęta: Keep children and pets away from the machine during operation. The laser protective cover helps prevent accidental contact with the laser point.
- Zasilanie: Use only the provided power adapter. Ensure the power supply meets the machine's requirements (AC 100-240 V, 50/60 Hz, Output: 24 V, 5 A).
- Awaryjny postój: Zapoznaj się z lokalizacją i funkcją przycisku zatrzymania awaryjnego.
3. Składniki produktu
The ATOMSTACK A24 Pro comes with the following components:
- 1 x ATOMSTACK A24 Pro Laser Engraving Machine Frame
- 1 x moduł laserowy
- 1 x Cable Chain
- 1 x śruba mocująca
- 1 x zestaw narzędzi
- 1 x Fixed Focus Film
- 3 x Acrylic Plates
- 3 x Wood Chips
- Opaski kablowe 10 x
- 1 x Desiccant
- 1 x Szczotka
- 1 x Dust-free Cloth
- 1 x zasilacz
- 1 x Instrukcja obsługi (ten dokument)
- 1 x kabel do transmisji danych (USB)

Obraz: Ponadview of the accessories and components included with the ATOMSTACK A24 Pro.
4. Przewodnik konfiguracji
The ATOMSTACK A24 Pro features a unibody aluminum alloy casting, requiring no complex installation. It is designed for immediate use.
- Rozpakowywanie: Ostrożnie wyjmij wszystkie elementy z opakowania. Sprawdź, czy nie doszło do uszkodzeń podczas transportu.
- Umieszczenie: Place the machine on a stable, level, and heat-resistant surface in a well-ventilated area. Ensure sufficient space around the machine for operation and material handling.
- Podłączenie zasilania: Connect the provided power adapter to the machine's power input and then to a suitable electrical outlet.
- Połączenie USB: Connect the machine to your computer using the supplied USB data cable.
- Instalacja oprogramowania: Install the recommended operating software (LaserGRBL or LightBurn) on your computer. The machine supports Win XP/Win 7/Win 8/XP/Win 10 systems. Refer to the software's documentation for installation and setup.
- Fixed Focus Adjustment: The laser module features a fixed-focus design, eliminating the need for manual focus adjustment. For initial setup or specific material thickness, use the provided fixed focus film to ensure optimal laser performance.

Image: The ATOMSTACK A24 Pro laser engraver, ready for operation.
5. Instrukcja obsługi
This section outlines the general steps for operating your ATOMSTACK A24 Pro.
- Przygotuj swój projekt: Create or import your design using your chosen software (LaserGRBL, LightBurn). Supported file formats include NC, BMP, JPG, PNG, DXF.
- Umieszczenie materiału: Place the material to be engraved or cut onto the working area of the machine. Ensure it is flat and securely positioned.
- Pozycjonowanie: Utilize the cross-positioning system for precise and horizontal engraving. This system aids in visual edge finding and object alignment.
- Ustawienia oprogramowania: Adjust laser power, speed, and passes in your software based on the material type and desired effect. The A24 Pro offers high precision (0.02 mm) and high-speed operation (up to 36000 mm/min).
- Rozpocznij operację: Once all settings are confirmed and safety precautions are in place, initiate the engraving or cutting process from your software.
- Monitorowanie: Continuously monitor the machine during operation. Be prepared to use the emergency stop if any issues arise.
- Ukończenie: After the process is complete, allow the material to cool if necessary before handling. Disconnect the machine from power when not in use.

Image: Cross positioning system for accurate material placement.

Image: High-speed engraving capability of the ATOMSTACK A24 Pro.
5.1. Możliwości grawerowania i cięcia
The ATOMSTACK A24 Pro is equipped with a 24W optical power laser module, utilizing second-generation fiber compression packaging technology for an ultra-fine laser spot of 0.06 x 0.06 mm. This allows for powerful cutting and fine engraving.
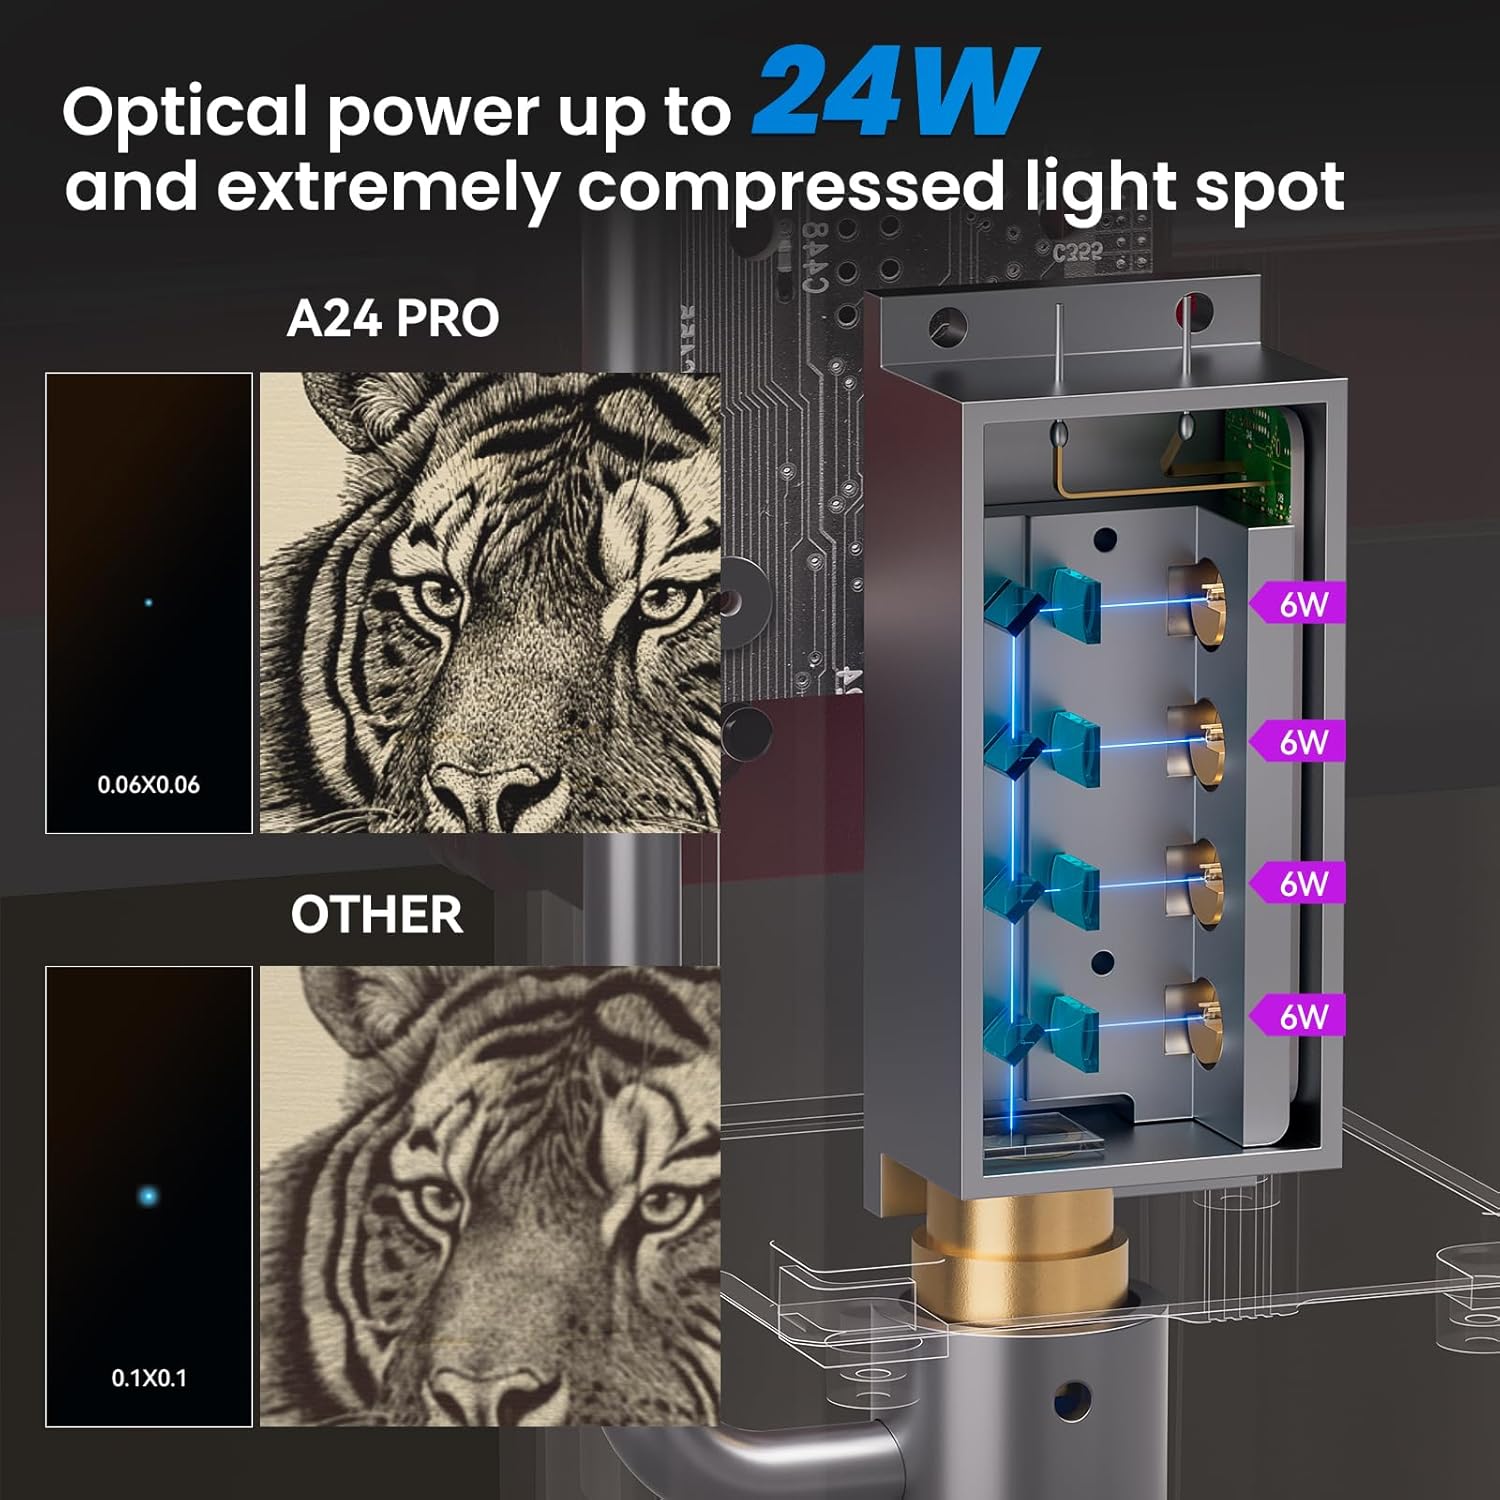
Image: Comparison of laser spot size, highlighting the A24 Pro's precision.

Image: Demonstration of the A24 Pro's high precision engraving.
Materiały grawerowalne:
- Wood, Bamboo, Cardboard, Plastic, Leather, PCB, Aluminum Oxide, Non-reflective Electroplated and Painted Metal, 304 Mirror Stainless Steel, Glass, Ceramic, Cotton Cloth, Slate.
Materiały do cięcia:
- Cardboard, Non-woven Fabrics, Wood Boards, Plywood (up to 20mm), Acrylic (transparent acrylic needs to be painted black, up to 30mm black acrylic), Some Thin Plastic Boards, Sponges, Aluminum and Stainless Steel (up to 0.05mm thick), and other metal sheets.

Obraz: Byłyamples of maximum cutting thickness for various materials.

Image: Illustration of the long beam waist laser for enhanced deep cutting.

Image: Close-up of the Second Generation Packaged Blue Laser module.
6. Konserwacja
Regular maintenance ensures the longevity and optimal performance of your ATOMSTACK A24 Pro.
- Czyszczenie obiektywu: The laser module features a dual-layer wind cover design to prevent the lens from being blocked or soiled. However, periodic inspection and gentle cleaning of the laser lens with the provided dust-free cloth are recommended to maintain laser efficiency.
- Usuwanie kurzu: Regularly clean dust and debris from the machine's frame and moving parts using the provided brush or compressed air. Accumulation of dust can affect performance and lead to wear.
- Smarowanie szyn: Periodically check the X-axis guide rail for smooth movement. If necessary, apply a small amount of appropriate lubricant to ensure frictionless operation.
- Aktualizacje oprogramowania układowego: Check the official ATOMSTACK website for any available firmware updates for the 32-bit motherboard to ensure you have the latest features and performance enhancements.
7. Rozwiązywanie Problemów
W tej sekcji omówiono często spotykane problemy i możliwe rozwiązania.
| Problem | Możliwa przyczyna | Rozwiązanie |
|---|---|---|
| Maszyna nie włącza się. | Loose power connection, faulty power adapter, power outlet issue. | Check all power connections. Try a different power outlet. Ensure the power adapter is functioning correctly. |
| Laser nie działa lub jego moc jest słaba. | Dirty laser lens, incorrect focus, low power setting in software, laser module issue. | Clean the laser lens. Verify focus using the fixed focus film. Increase laser power in software. Contact support if the issue persists. |
| Engraving/cutting results are inconsistent or inaccurate. | Material not flat/secure, incorrect speed/power settings, loose belts/components, software error. | Ensure material is flat and secured. Adjust speed and power settings. Check for any loose mechanical parts. Restart software and machine. |
| Software not connecting to the machine. | Problem z kablem USB, sterownik nie został zainstalowany, wybrano niewłaściwy port COM, konflikt oprogramowania. | Try a different USB port or cable. Ensure USB drivers are installed. Select the correct COM port in software. Close other applications. |
8. Specyfikacje techniczne
| Funkcja | Specyfikacja |
|---|---|
| Model produktu | ATOMSTACK A24 Pro |
| Engraving Dimensions | 370x310mm |
| Moc maszyny | 120 W |
| Laser Optical Output Power | 24 W |
| Długość fali lasera | 455 ± 5 mXNUMX |
| Precyzja grawerowania | 0.02 mm |
| Metoda ogniskowania | Fixed focus laser, no focus adjustment needed |
| Osłona ochronna przed laserem | Yes, integrated cover to protect eyes |
| Oprogramowanie operacyjne | LaserGRBL, LightBurn |
| Obsługiwane systemy operacyjne | Win XP/Win 7/Win 8/XP/Win 10 |
| Utrzymany File Formaty | NC, BMP, JPG, PNG, DXF |
| Metoda przesyłania danych | Połączenie USB |
| Zasilacz | International Standard Input: AC 100-240 V, 50/60 Hz; Output: 24 V, 5 A |
| Certyfikaty | CE, FCC, RoHS, FDA, PSE |
| Wymiary produktu (dł. x szer. x wys.) | Wymiary 64 x 35 x 13 cm |
| Waga produktu | 8.12 kilogramów |
9. Informacje o gwarancji
ATOMSTACK products are manufactured to high-quality standards. For information regarding warranty coverage and terms, please refer to the warranty card included with your product or visit the official ATOMSTACK website. Typically, products are eligible for a refund or replacement within 30 days of purchase, subject to the seller's return policy.
10. Obsługa klienta
If you encounter any issues or have questions not covered in this manual, please contact ATOMSTACK customer support. Refer to the contact information provided on the product packaging or the official ATOMSTACK webwitryna z najnowszymi kanałami wsparcia.
When contacting support, please have your product model (ATOMSTACK A24 Pro) and serial number (if applicable) ready.
Ask a question about this manual
Ask about setup, troubleshooting, compatibility, parts, safety, or missing instructions. Manuals+ will review the question and use this page’s manual context to help answer it.