ZIPRO 5941659
Instrukcja obsługi roweru treningowego magnetycznego dla dorosłych ZIPRO
Model: 5941659
Wstęp
Thank you for choosing the ZIPRO Adult Magnetic Fitness Bike. This manual provides essential information for the safe assembly, operation, and maintenance of your new fitness equipment. Please read this manual thoroughly before first use and keep it for future reference.

Figure 1: ZIPRO Adult Magnetic Fitness Bike
Informacje dotyczące bezpieczeństwa
Twoje bezpieczeństwo jest najważniejsze. Przestrzegaj poniższych wytycznych:
- Przed rozpoczęciem jakiegokolwiek programu ćwiczeń skonsultuj się z lekarzem.
- Przed każdym użyciem należy upewnić się, że wszystkie części są solidnie zamocowane.
- Podczas pracy dzieci i zwierzęta domowe należy trzymać z dala od urządzenia.
- Ustaw rower na płaskiej i stabilnej powierzchni.
- Nie należy przekraczać maksymalnej wagi użytkownika wynoszącej 110 kg (242 funtów).
- Natychmiast przerwij ćwiczenia, jeśli poczujesz osłabienie, zawroty głowy lub ból.
- Należy nosić odpowiedni strój i obuwie sportowe.
Zawartość opakowania
Przed montażem należy sprawdzić, czy wszystkie elementy są obecne:
- Rama główna (1)
- Handlebar Assembly with Console (1)
- Seat Post and Saddle (1)
- Pedały (lewy i prawy)
- Front and Rear Stabilizers (2)
- Zestaw elementów montażowych (śruby, podkładki, nakrętki, narzędzia)
- Uchwyt na butelkę wody (1)
- Instrukcja obsługi (ten dokument)
Instrukcja montażu
Aby uzyskać prawidłowy montaż, wykonaj następujące kroki:
- Zamontuj stabilizatory: Przymocuj przednie i tylne stabilizatory do ramy głównej za pomocą dołączonych śrub i nakrętek. Upewnij się, że są mocno dokręcone, aby zapewnić stabilność.
- Zainstaluj pedały: Identify the Left (L) and Right (R) pedals. The left pedal screws counter-clockwise, and the right pedal screws clockwise. Thread them carefully into the crank arms and tighten securely.

Figure 2: Securely attach pedals.
- Montaż sztycy i siodełka: Insert the seat post into the main frame. Adjust the height to your preference and secure it with the locking knob. Attach the saddle to the seat post.

Figure 3: Adjusting seat height for comfort.
- Zamontuj zespół kierownicy: Connect the handlebar assembly to the main frame. Ensure all cables are properly routed and not pinched. Secure with the designated bolts.
- Montaż uchwytu na butelkę z wodą: Attach the water bottle holder to the designated location on the main frame.
Organizować coś
Before your first workout, ensure the bike is set up correctly for your body:
- Wysokość siedziska: Adjust the seat height so that your leg is almost fully extended at the bottom of the pedal stroke, with a slight bend in the knee.
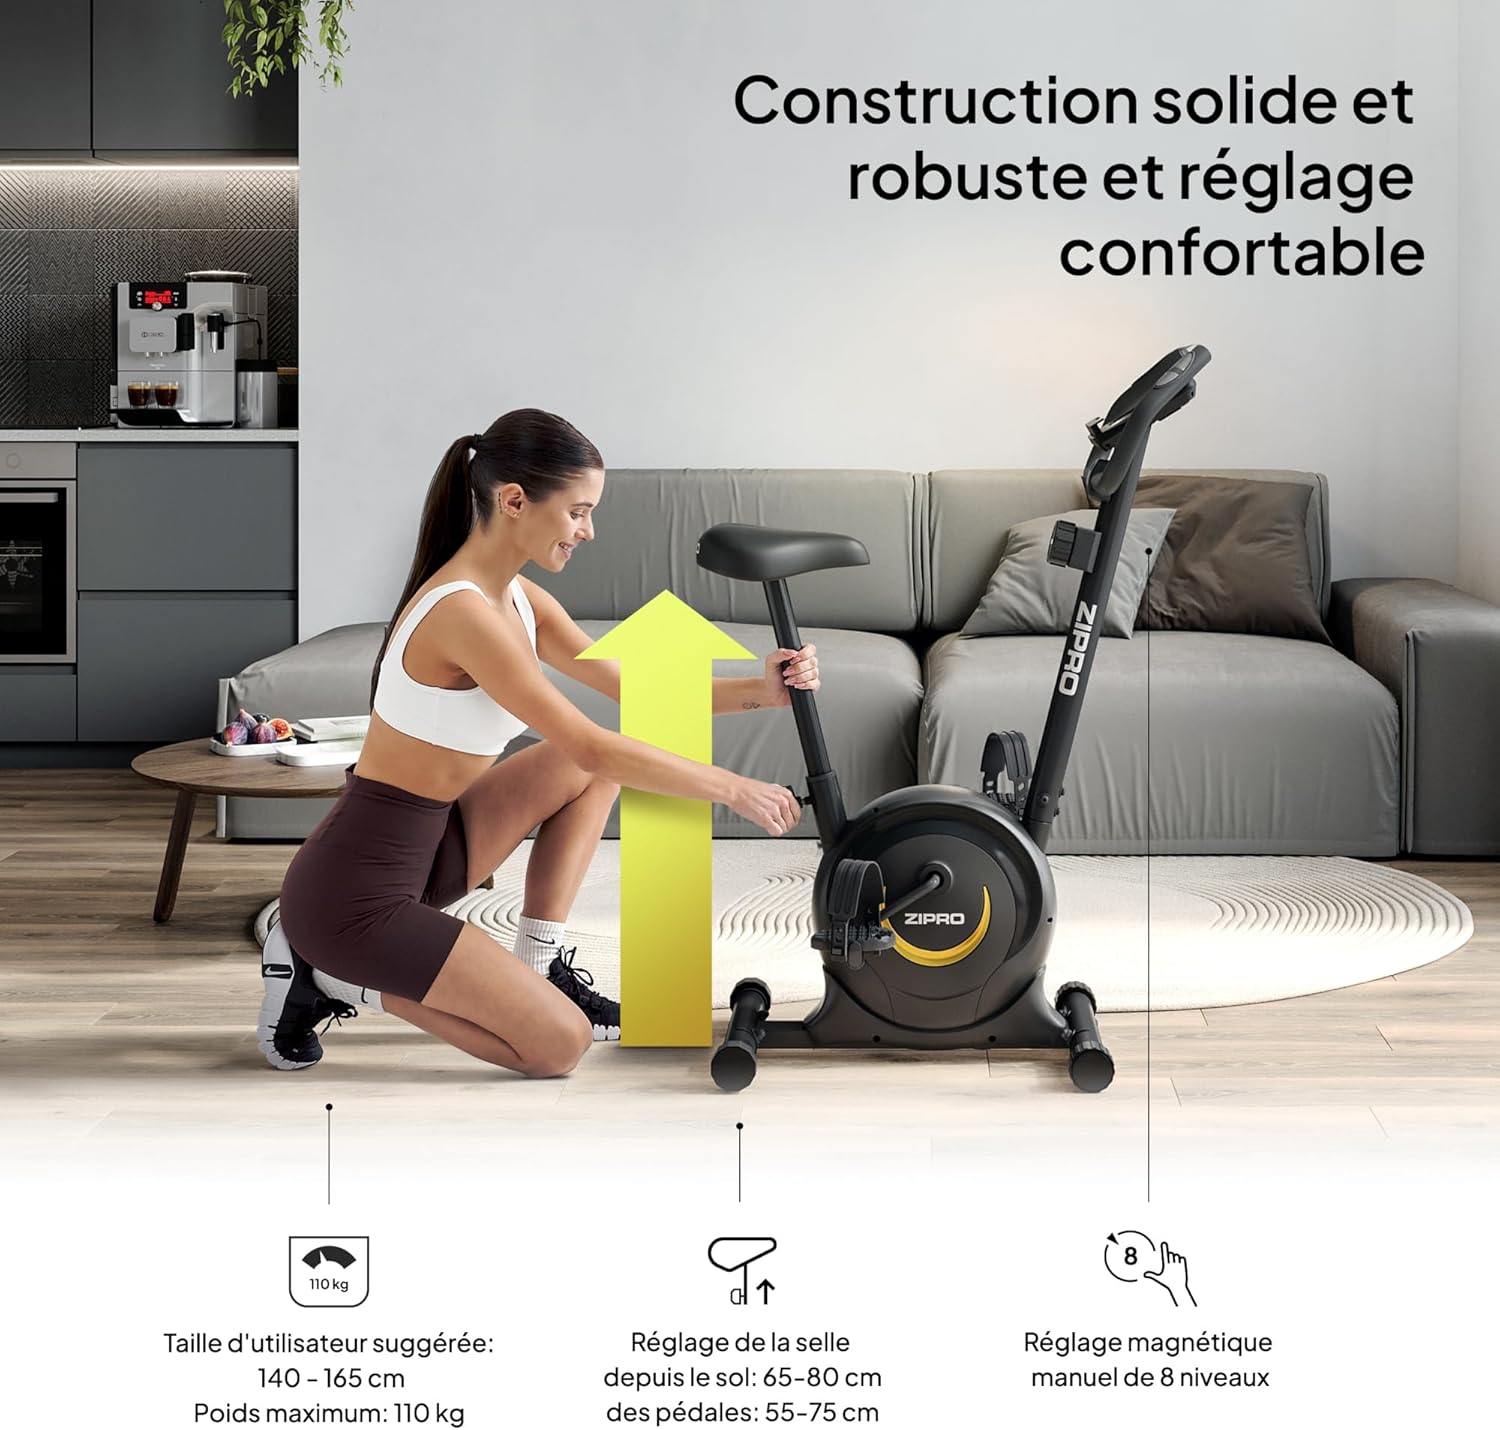
Figure 4: Proper seat height ensures comfort and efficiency.
- Pozycja kierownicy: The handlebars can be adjusted for height to provide a comfortable riding posture. Ensure you can reach them without straining.
- Poziom oporu: The magnetic resistance system offers 8 levels. Start with a lower level (1-2) and gradually increase as your fitness improves. The resistance knob is located below the console.

Figure 5: Adjusting the 8-level magnetic resistance.
Instrukcja obsługi
Your fitness bike features an intuitive console to track your workout data:
Funkcje konsoli:

Figure 6: Console display showing Time, Speed, Calories, Pulse, and Distance.
- Przycisk TRYB: Press to cycle through display functions: Time, Speed, Distance, Calories, Pulse, and Odometer (ODO). Hold to reset values.
- Przycisk SET: Służy do ustawiania wartości docelowych dla czasu, dystansu lub kalorii.
- Przycisk reset: Naciśnij, aby wyczyścić bieżące dane treningu.
- Funkcja SCAN: Automatycznie przełącza wszystkie funkcje wyświetlacza co kilka sekund.
- Czujniki tętna: Grip the metal plates on the handlebars to measure your heart rate. Your pulse will be displayed on the console.
Rozpoczynanie treningu:
- Sit on the saddle and place your feet securely in the pedal straps.
- Adjust the resistance to your desired level using the tension control knob.
- Begin pedaling. The console will automatically activate and start tracking your workout.
- Użyj przycisku MODE, aby view different metrics or the SCAN function for automatic cycling.
- To measure pulse, firmly grip the pulse sensors on the handlebars.

Figure 7: Integrated mobile device holder for convenience.
Konserwacja
Regular maintenance ensures the longevity and safe operation of your fitness bike:
- Czyszczenie: Wytrzyj rower reklamąamp Po każdym użyciu przetrzyj ściereczką pot i kurz. Nie używaj środków czyszczących o działaniu ściernym.
- Inspekcje: Okresowo sprawdzaj dokręcenie wszystkich śrub, nakrętek i części ruchomych. Dokręć wszystkie luźne elementy.
- Smarowanie: The magnetic resistance system is generally maintenance-free. However, if you notice any squeaking from moving parts, apply a small amount of silicone-based lubricant.
- Składowanie: Przechowuj rower w suchym, chłodnym miejscu, z dala od bezpośredniego światła słonecznego i ekstremalnych temperatur. Zintegrowane kółka transportowe umożliwiają łatwe przemieszczanie.

Rysunek 8: Koła transportowe ułatwiające przemieszczanie i przechowywanie.
Rozwiązywanie problemów
| Problem | Możliwa przyczyna | Rozwiązanie |
|---|---|---|
| Konsola nie wyświetla danych. | Baterie są rozładowane lub nieprawidłowo zainstalowane. Luźne połączenie. | Replace batteries (2x AAA). Check all cable connections to the console. |
| Pisk lub zgrzytanie. | Loose bolts. Parts need lubrication. | Tighten all visible bolts. Apply silicone lubricant to moving joints if necessary. |
| Opór się nie zmienia. | Kabel oporowy odłączony lub uszkodzony. | Check the connection of the resistance cable to the knob and the main unit. Contact support if damaged. |
| Unstable during use. | Bike not on a level surface. Stabilizer caps not adjusted. | Ensure the bike is on a flat surface. Adjust the leveling caps on the stabilizers until stable. |
Specyfikacje
| Funkcja | Szczegół |
|---|---|
| Marka | ZIPRO |
| Nazwa modelu | zipro (Model Number: 5941659) |
| Mechanizm oporu | Magnetyczny |
| Liczba poziomów oporu | 8 |
| Maksymalna zalecana waga | 110 kg (242 funta) |
| Wymiary produktu (Gł. x Szer. x Wys.) | 35.04" x 17.32" x 43.31" (89cm D x 44cm W x 110cm H) |
| Waga przedmiotu | 16.5 kg (36.3 funta) |
| Tworzywo | Stal węglowa |
| Źródło zasilania | Zasilany bateryjnie (do konsoli) |
| Zalecane zastosowanie | Wnętrz |
| Cechy specjalne | Distance Travelled Monitor |
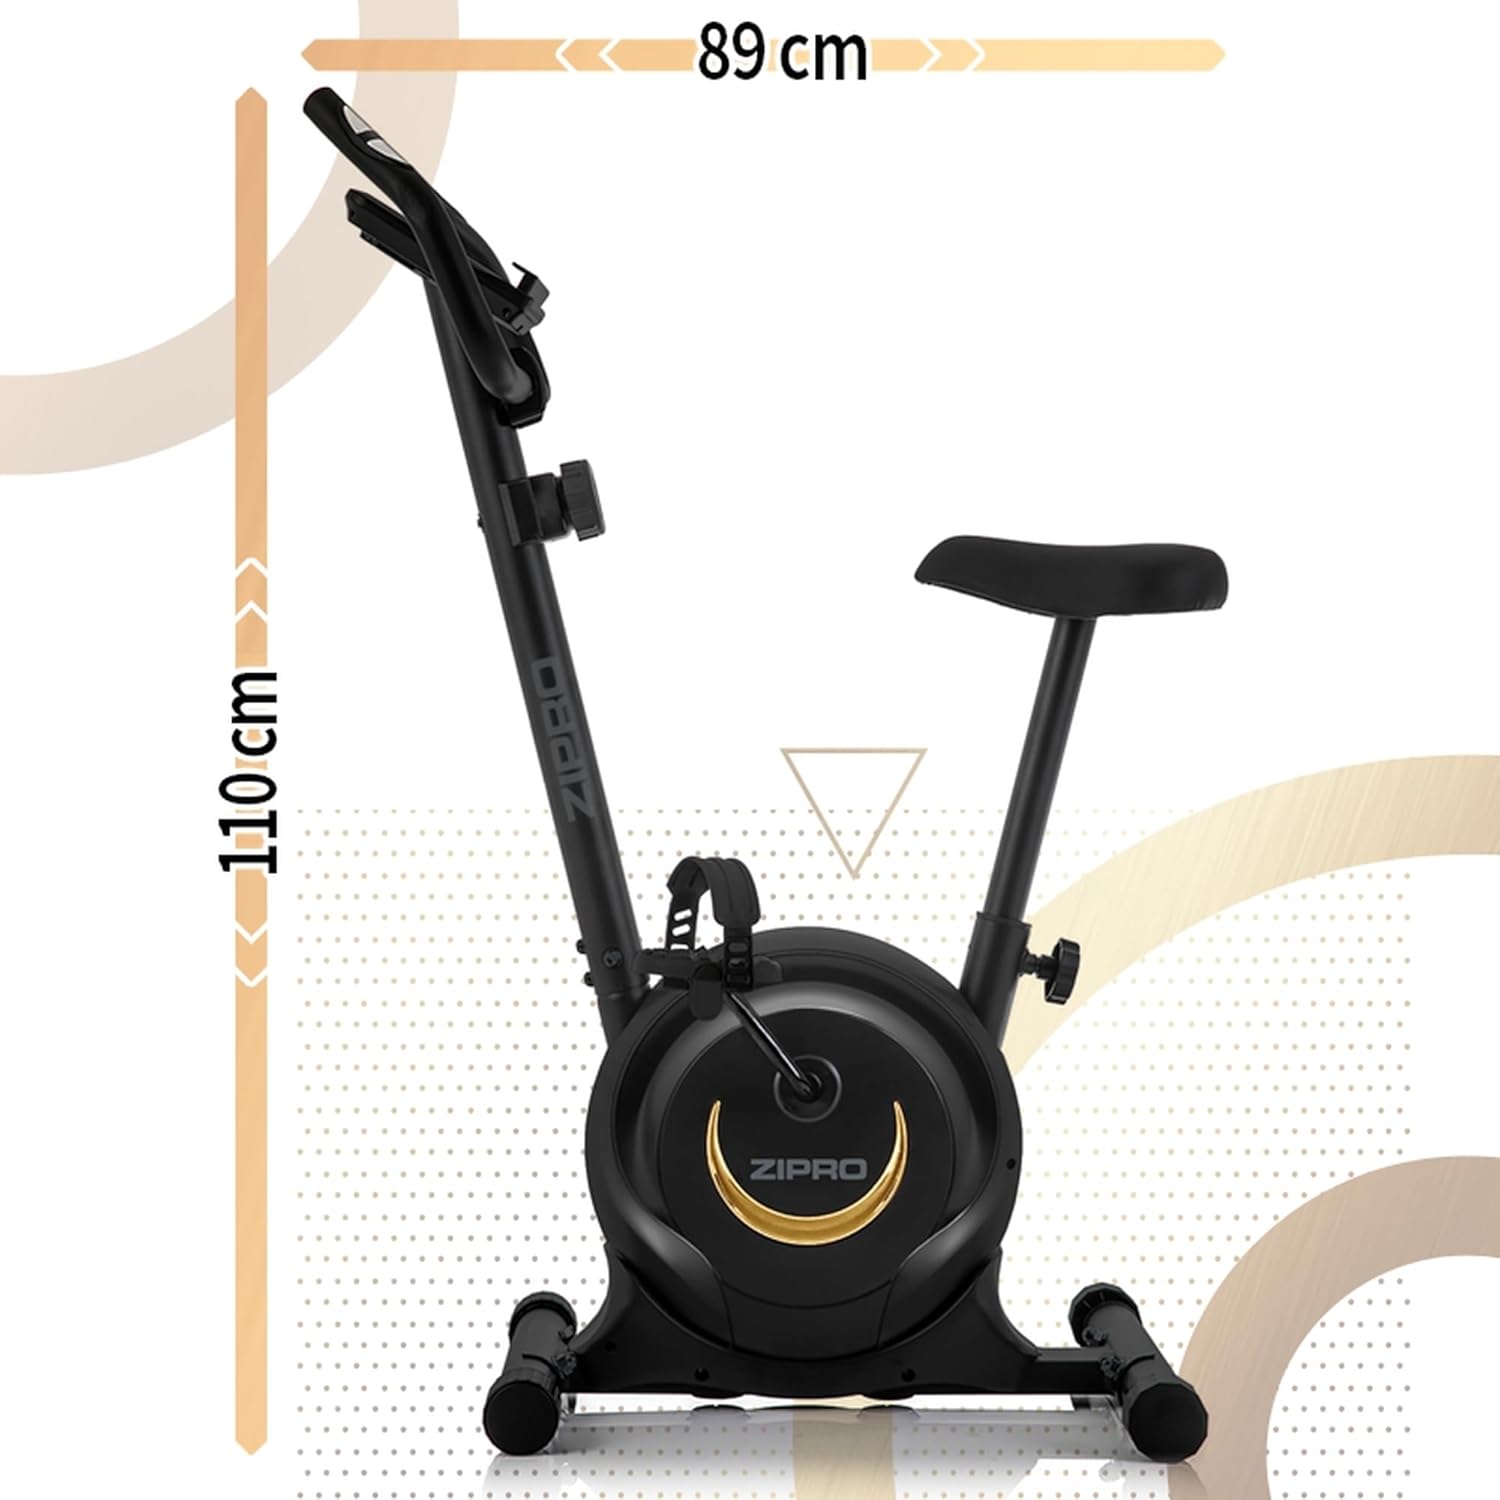
Rysunek 9: Wymiary produktu na potrzeby planowania przestrzeni.
Gwarancja i wsparcie
For warranty information, technical support, or to order replacement parts, please refer to the warranty card included with your product or visit the official ZIPRO webZachowaj paragon jako dowód zakupu.
Ask a question about this manual
Ask about setup, troubleshooting, compatibility, parts, safety, or missing instructions. Manuals+ will review the question and use this page’s manual context to help answer it.