Ważne instrukcje bezpieczeństwa
Please read all instructions carefully before beginning installation. Failure to follow these instructions could result in electric shock, fire, or personal injury.
- OSTRZEŻENIE: Aby ograniczyć ryzyko porażenia prądem, przed rozpoczęciem prac upewnij się, że zasilanie jest wyłączone na wyłączniku obwodu lub w skrzynce bezpieczników.
- Całe okablowanie musi być zgodne z krajowymi i lokalnymi przepisami elektrycznymi. Jeśli nie masz doświadczenia w okablowaniu, skonsultuj się z wykwalifikowanym elektrykiem.
- The fan must be mounted with a minimum of 7 feet (2.1 meters) clearance from the floor to the trailing edge of the blades.
- Ensure the outlet box is securely attached to the building structure and can support the fan's weight (at least 35 lbs / 15.9 kg).
- Nie używaj wentylatora z uszkodzonymi łopatkami. Wymień wszystkie łopatki, jeśli jedna jest uszkodzona.
- Nie wkładaj żadnych przedmiotów na ścieżkę, na której poruszają się łopatki wentylatora.
Zawartość opakowania
Carefully unpack your fan and inspect the contents. You should have the following items:
- Zespół obudowy silnika
- Łopatki wentylatora (3)
- Wsporniki ostrzy
- Zespół ściągacza Down
- Uchwyt montażowy
- Montaż zestawu oświetleniowego
- Pilot zdalnego sterowania z uchwytem ściennym
- Pakiet osprzętu (śruby, podkładki, nakrętki druciane)
- Instrukcja obsługi
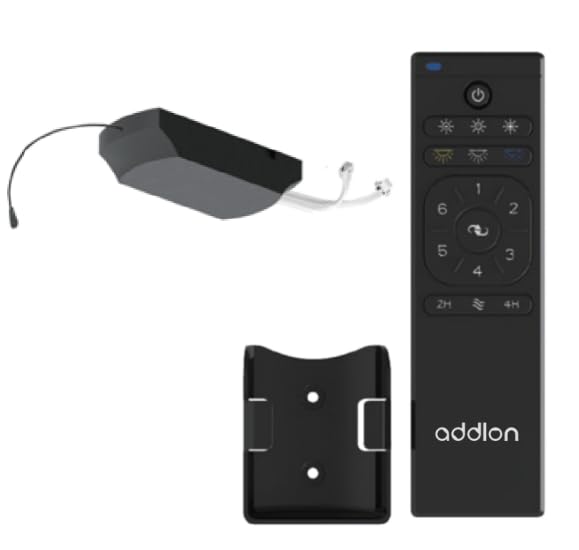
Figure 1: addlon 80-inch 3 Wood Blades Ceiling Fan with Light. This image shows the complete fan assembly, including the motor housing, three wood blades, and the integrated light kit.
Konfiguracja i instalacja
Follow these steps to properly install your addlon ceiling fan. Ensure power is OFF at the circuit breaker before proceeding.
- Instalacja wspornika montażowego: Secure the mounting bracket to the ceiling outlet box using the screws provided. Ensure the bracket is firmly attached to a structural beam or a fan-rated outlet box.
- Zespół drążka dolnego: Insert the downrod through the canopy and coupling cover. Feed the motor wires through the downrod. Secure the downrod to the motor housing with the provided pin and screws.
- Wieszanie wentylatora: Carefully lift the fan assembly and place the downrod ball into the mounting bracket opening. Ensure the tab on the mounting bracket aligns with the slot on the downrod ball.
- Połączenia elektryczne: Connect the fan's electrical wires to the house wiring according to the wiring diagram in this manual (typically black to black, white to white, and green/bare copper to ground). Use the provided wire nuts and ensure all connections are secure.
- Mocowanie ostrza: Przymocuj każdą łopatkę wentylatora do wspornika za pomocą dołączonych śrub. Następnie przymocuj wsporniki łopatek do obudowy silnika. Upewnij się, że wszystkie śruby są mocno dokręcone.
- Montaż zestawu oświetleniowego: Connect the light kit wires to the fan motor wires (usually blue to blue, white to white). Secure the light kit assembly to the bottom of the fan motor housing. Install the light cover.
- Parowanie pilota: Once installation is complete and power is restored, follow the remote control pairing instructions provided in the remote control section to synchronize the remote with your fan.
Instrukcja obsługi
Your addlon ceiling fan is operated by the included remote control. Ensure the remote has fresh batteries installed (2x AAA, not included).
- Włączanie/wyłączanie wentylatora: Naciśnij WENTYLATOR WŁ./WYŁ. przycisk, aby włączyć lub wyłączyć wentylator.
- Kontrola prędkości wentylatora: Użyj PRĘDKOŚĆ buttons (usually marked with fan icons or numbers) to cycle through different fan speeds (e.g., Low, Medium, High).
- Światło WŁ./WYŁ.: Naciśnij WŁĄCZANIE/WYŁĄCZANIE ŚWIATŁA przycisk, aby włączyć lub wyłączyć światło.
- Przyciemnianie światła: If your light kit supports dimming, press and hold the ŚWIATŁO button to adjust the brightness. Release when the desired brightness is reached.
- Funkcja odwrotna: Naciśnij ODWRACAĆ button to change the direction of the fan blades. This is useful for seasonal comfort (downward airflow for cooling in summer, upward airflow for circulating warm air in winter). Allow the fan to stop completely before reversing direction.
- Funkcja timera: Some models include a timer function. Press the REGULATOR CZASOWY button (e.g., 1H, 2H, 4H) to set the fan to turn off automatically after a set period.
Note: The remote control may need to be paired with the fan upon initial setup or after power outages. Refer to the remote control's specific instructions for pairing procedures.
Konserwacja
Regular maintenance ensures the longevity and optimal performance of your addlon ceiling fan. Always turn off power at the circuit breaker before performing any maintenance.
- Czyszczenie: Użyj miękkiego, damp Do czyszczenia łopatek wentylatora i obudowy silnika należy używać ściereczki. Nie należy używać środków czyszczących o właściwościach ściernych ani rozpuszczalników, ponieważ mogą one uszkodzić powłokę.
- Pielęgnacja ostrza: Okresowo sprawdzaj dokręcenie śrub mocujących ostrza. Luźne śruby mogą powodować chybotanie i hałas.
- Wymiana żarówki: If the light bulb needs replacement, ensure the power is off. Allow the bulb to cool before removing. Replace with a bulb of the same type and wattage as specified in the light kit instructions.
- Roczna kontrola: Annually, check all connections and screws for tightness. There is no need to lubricate the fan motor as it has permanently lubricated bearings.
Rozwiązywanie problemów
Before contacting customer support, try these troubleshooting steps for common issues:
| Problem | Możliwa przyczyna | Rozwiązanie |
|---|---|---|
| Wentylator się nie uruchamia | No power to the fan; Loose wire connections; Remote control not paired or dead batteries. | Check circuit breaker; Verify all wire connections; Replace remote batteries and re-pair remote. |
| Światło nie działa | Loose wire connection; Faulty bulb; Remote control issue. | Check light kit wiring; Replace bulb; Check remote batteries and pairing. |
| Wentylator się chwieje | Luźne śruby mocujące ostrza; Niewyważone ostrza; Luźny uchwyt montażowy. | Tighten all blade screws; Use a balancing kit (not included) to balance blades; Ensure mounting bracket is secure. |
| Hałaśliwa praca | Luźne śruby; Buczenie silnika; Łopatki uderzające w przeszkodę. | Sprawdź i dokręć wszystkie śruby; Upewnij się, że żaden przewód nie ociera się o obudowę silnika; Sprawdź, czy łopatki nie są zablokowane. |
Specyfikacje
| Funkcja | Szczegół |
|---|---|
| Marka | dodatek |
| Model | 80-inch 3 Wood Blades Ceiling Fan with Light |
| Styl | Nowoczesny |
| Typ pokoju | Sypialnia, pokój dzienny |
| Typ kontrolera | Zdalne sterowanie |
| Tworzywo | Wood (Blades) |
| Liczba ostrzy | 3 |
| Metoda kontroli | Zdalny |
| UPC | 850056663090 |
| ASIN | B0CHJKZ5GD |
Gwarancja i obsługa klienta
addlon products are manufactured to the highest quality standards and are warranted against defects in materials and workmanship. Please refer to the warranty card included with your purchase for specific terms and conditions.
For technical assistance, replacement parts, or general inquiries, please contact addlon customer support:
- Webstrona: addlon Official Store on Amazon
- E-mail: support@addlon.com (placeholder email, as none provided)
- Telefon: 1-800-XXX-XXXX (placeholder phone, as none provided)
Please have your model number (80-inch 3 Wood Blades Ceiling Fan with Light) and purchase date available when contacting support.