
1. Wprowadzenie
This manual provides detailed instructions for the installation, operation, and maintenance of your OLONETO 100A Solar Charge Controller. This device is designed to manage power flow from your solar panel to your battery bank and DC loads, ensuring efficient charging and protection for your battery system. It supports 12V, 24V, 36V, and 48V battery systems with automatic voltage identyfikacja.
Note: This controller utilizes a combination of MPPT and PWM charging technologies. It is not a 100% true MPPT controller.
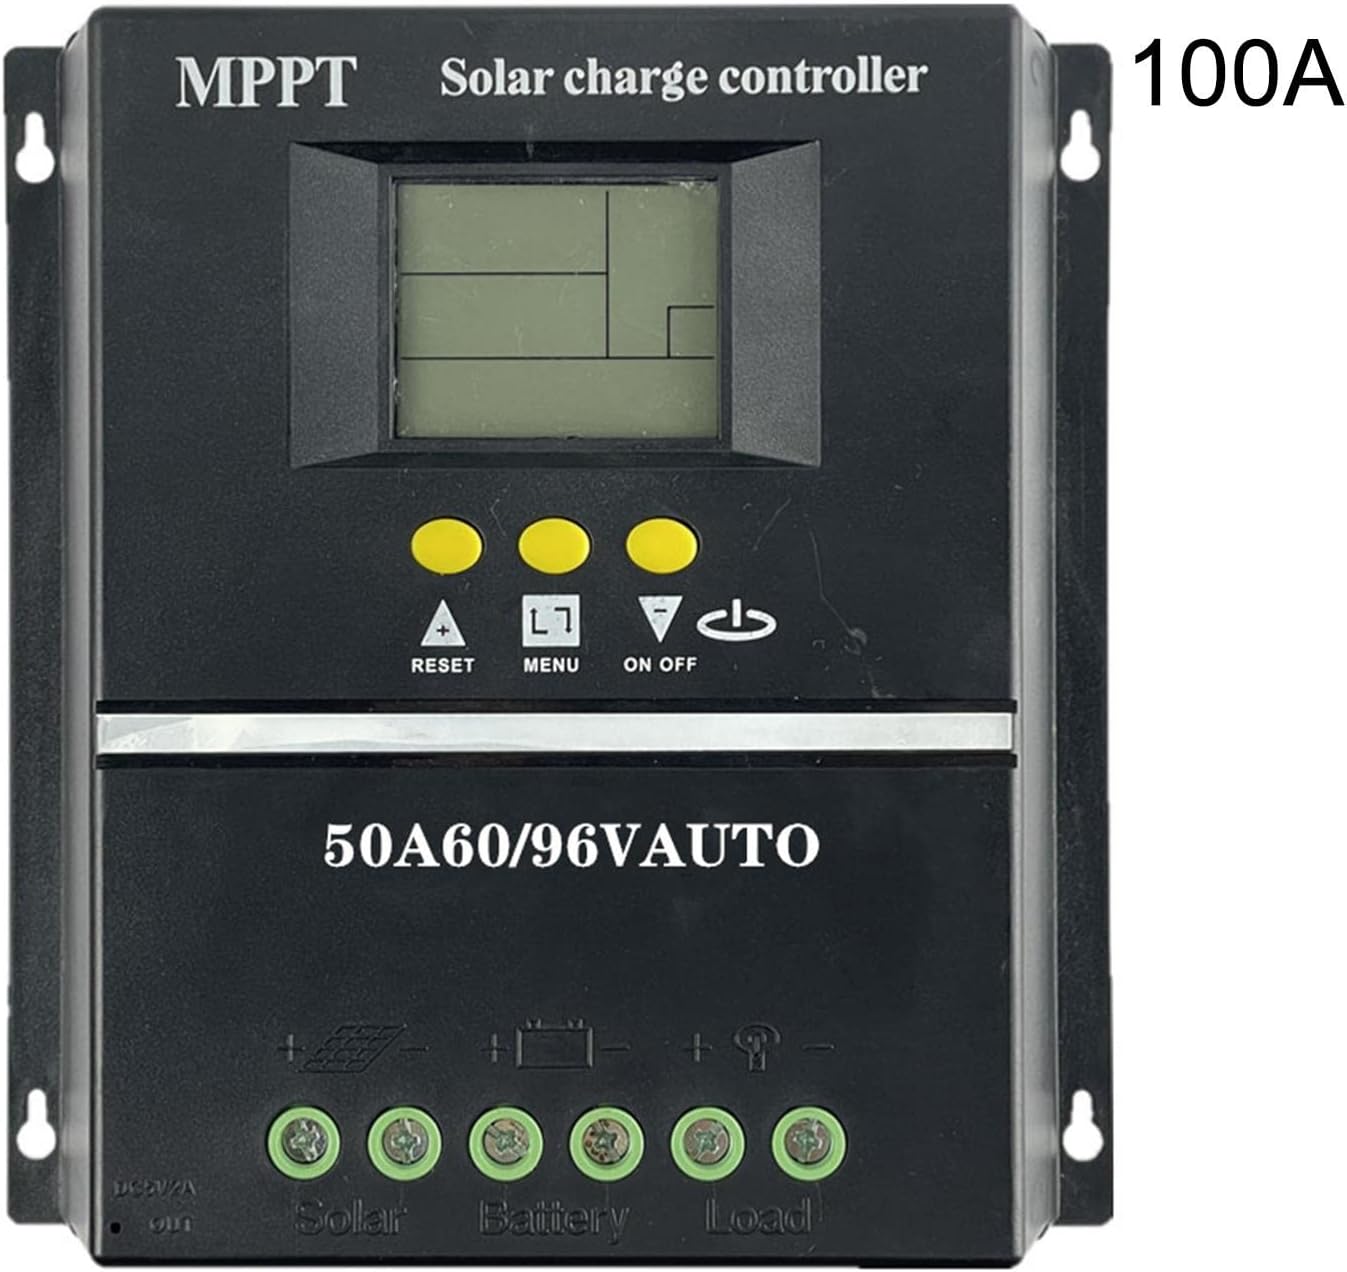
Rycina 1: Przód view of the OLONETO 100A Solar Charge Controller, showing the LCD display, control buttons, and connection terminals. The "100A" rating is visible on the top right.
2. Instrukcje bezpieczeństwa
- Ensure all connections are tight and correct to prevent damage to the controller or other components.
- Zawsze podłączaj akumulator do kontrolera Pierwszy, and then connect the solar panel. Disconnect in the reverse order: solar panel first, then battery. Failure to follow this sequence may damage the controller.
- Upewnij się, że pojemność bateriitage is sufficient for the controller to recognize the system voltage (e.g., >10V for 12V battery, >20V for 24V battery, >30V for 36V battery, >40V for 48V battery).
- Zainstaluj kontroler w dobrze wentylowanym pomieszczeniu, z dala od bezpośredniego światła słonecznego, wysokich temperatur i wilgoci.
- Nie próbuj samodzielnie naprawiać ani modyfikować kontrolera. W celu uzyskania pomocy skontaktuj się z wykwalifikowanym personelem.
3. Funkcje produktu
The OLONETO Solar Charge Controller offers several key features for efficient solar power management:
- Automatyczna objętośćtage Identyfikacja: Automatically detects 12V, 24V, 36V, or 48V battery systems.
- Wyświetlacz LCD: Provides real-time information on battery status, charging parameters, and load status.
- Dwa wyjścia USB: Convenient 5V output for charging mobile phones and other USB devices.
- Regulowane parametry: Allows users to customize charging and discharge settings.
- Smart Charge Management: Optimizes battery charging to prolong battery life.
- Ochrona środowiska: Designed with green environmental protection principles.
- Automatic Focusing MPPT Tracking: High charging efficiency with non-stop detection during charging and bidirectional focusing tracking.

Figure 2: Diagram illustrating key features of the solar charge controller, including LCD display for battery power supply voltage, smart charge capabilities, 5V USB output, adjustable parameters, and green environmental protection.

Figure 3: Image highlighting the automatic focusing MPPT tracking feature, which ensures high charging efficiency and continuous detection during the charging process.
4. Konfiguracja i instalacja
4.1 Kolejność okablowania
- Podłącz akumulator: Connect the battery to the controller's battery terminals. Ensure correct polarity (+ to + and - to -). The controller will automatically detect the battery voltage.
- Podłącz panel słoneczny: Connect the solar panel to the controller's solar panel terminals. Ensure correct polarity.
- Podłącz obciążenie DC (opcjonalnie): Podłącz obciążenia DC do zacisków obciążenia kontrolera. Upewnij się, że polaryzacja jest prawidłowa.
Important: Always follow this connection order: Battery → Solar Panel → Load. To disconnect, follow the reverse order: Load → Solar Panel → Battery.
4.2 Recommended Solar Panel Voltage
- Dla 12 V battery systems: Use a solar panel with approximately 18 V wyjście.
- Dla 24 V battery systems: Use a solar panel with approximately 30-37 V wyjście.
- Dla 36 V battery systems: Use a solar panel with approximately 45-55 V wyjście.
- Dla 48 V battery systems: Use a solar panel with approximately 60-72 V wyjście.
4.3 Schematy połączeń

Figure 4: Basic wiring diagram showing connections for the solar panel, battery, and DC loads to the controller. Ensure positive (+) and negative (-) terminals are correctly matched.

Figure 5: Detailed wiring diagram illustrating connections for the solar panel, battery, DC load, and the integrated USB output for charging external devices.
5. Instrukcja obsługi
5.1 Pierwsze uruchomienie i wyświetlanie
Once the battery is connected, the controller's LCD display will power on, showing current system parameters. The controller automatically identifies the battery voltage (12 V, 24 V, 36 V lub 48 V).
5.2 Funkcje przycisków
- ▲ (Up/Reset): Used to increase values during setting, or as a reset function.
- MENU: Used to navigate through display screens and enter/exit setting modes.
- ▼ (Down/On/Off): Used to decrease values during setting, or to toggle the DC load on/off.
5.3 Objętość ładowaniatage Ustawienia
To adjust charging parameters:
- After connecting the battery, ensure the clock is set and saved (see 5.4 Clock Setting).
- Naciśnij i przytrzymaj „▲" button for 3-5 seconds. The screen will display "L**V" (floating charging voltagmi).
- Użyj "▼" button to adjust the floating charging voltage.
- Briefly press "▲" again. The screen will display "H**V" (boost charging voltagmi).
- Użyj "▼" button to adjust the boost charging voltage.
- Briefly press "▲" again. The screen will display "F**V" (low-voltage odcięcie voltage for DC load).
- Użyj "▼" button to adjust the low-voltage odcięcie voltage.
- After making all desired adjustments, press and hold the "▲" button for 3-5 seconds to save the settings and exit.
5.4 Ustawienie zegara
To set the internal clock:
- Upewnij się, że bateria jest podłączona.
- Naciśnij „▲" Lub "▼" buttons to navigate to the clock setting interface.
- Użyj "▲" I "▼" buttons to adjust the time.
- Briefly press the "MENU" button (represented as "□" in some descriptions) to save the clock setting.
5.5 Load Protection Voltage Odniesienie
The following are typical battery charging voltages for different system voltages:
- Podczas korzystania z 12 V battery, the battery charging voltage is typically 13.7 V.
- Podczas korzystania z 24 V battery, the battery charging voltage is typically 27.4 V.
- Podczas korzystania z 36 V battery, the battery charging voltage is typically 41.1 V.
- Podczas korzystania z 48 V battery, the battery charging voltage is typically 54.8 V.
6. Konserwacja
- Regularna kontrola: Okresowo sprawdzaj wszystkie połączenia przewodów pod kątem szczelności i korozji.
- Czystość: Utrzymuj kontroler w czystości, bez kurzu i zanieczyszczeń. Do czyszczenia używaj suchej ściereczki.
- Wentylacja: Aby zapobiec przegrzaniu, należy zadbać o dobrą wentylację miejsca instalacji.
- Stan baterii: Monitoruj stan i pojemność bateriitage regularly to ensure optimal system performance.
7. Rozwiązywanie Problemów
| Problem | Możliwa przyczyna | Rozwiązanie |
|---|---|---|
| Wyświetlacz kontrolera jest wyłączony. | Brak podłączonego akumulatora lub niski poziom naładowania akumulatoratage za niskie. | Connect battery or ensure battery voltage is above minimum threshold (e.g., >10V for 12V system). |
| No charging from solar panel. | Solar panel not connected, incorrect polarity, or insufficient sunlight. | Sprawdź połączenia i polaryzację paneli słonecznych. Zapewnij odpowiednie nasłonecznienie. |
| Tomtage identification error. | Pojemność bateriitage was too low when connected initially. | Upewnij się, że akumulator voltage is above the minimum threshold before connecting to the controller. Disconnect and reconnect the battery. |
| DC load not working. | Load is off, incorrect wiring, or battery voltage is below low-voltagodcięcie. | Check load connection and polarity. Press the "▼" button to toggle load. Check battery voltage and adjust low-voltage cut-off if necessary. |
8. Specyfikacje
| Parametr | Wartość |
|---|---|
| Model | 100A |
| Marka | OLONETO |
| Objętość systemutage | Automatyczne 12V/24V/36V/48V |
| Technologia ładowania | MPPT/PWM Hybrid |
| Wyjście USB | Dual USB, 5V |
| Waga przedmiotu | 200 gram |
| Wymiary (w przybliżeniu) | 190 mm (7.48 cala) x 180 mm (7.08 cala) |

Figure 6: Physical dimensions of the solar charge controller, showing approximate measurements of 190mm (7.48 inches) in width and 180mm (7.08 inches) in height.
9. Gwarancja i wsparcie
Aby uzyskać informacje o gwarancji i pomocy technicznej, zapoznaj się z dokumentacją dołączoną do zakupu lub skontaktuj się ze sprzedawcą. Zachowaj dowód zakupu na wypadek roszczeń gwarancyjnych.