
1. Wprowadzenie
The SINGER® HD0400S Heavy Duty Overlock Serger Sewing Machine is designed for durable performance and professional finishes. This machine offers speed, strength, and precision for various sewing projects, from finishing seams to creating decorative edges. It features a heavy metal frame, 2/3/4 thread capability, and a high stitching speed of up to 1,300 stitches per minute.
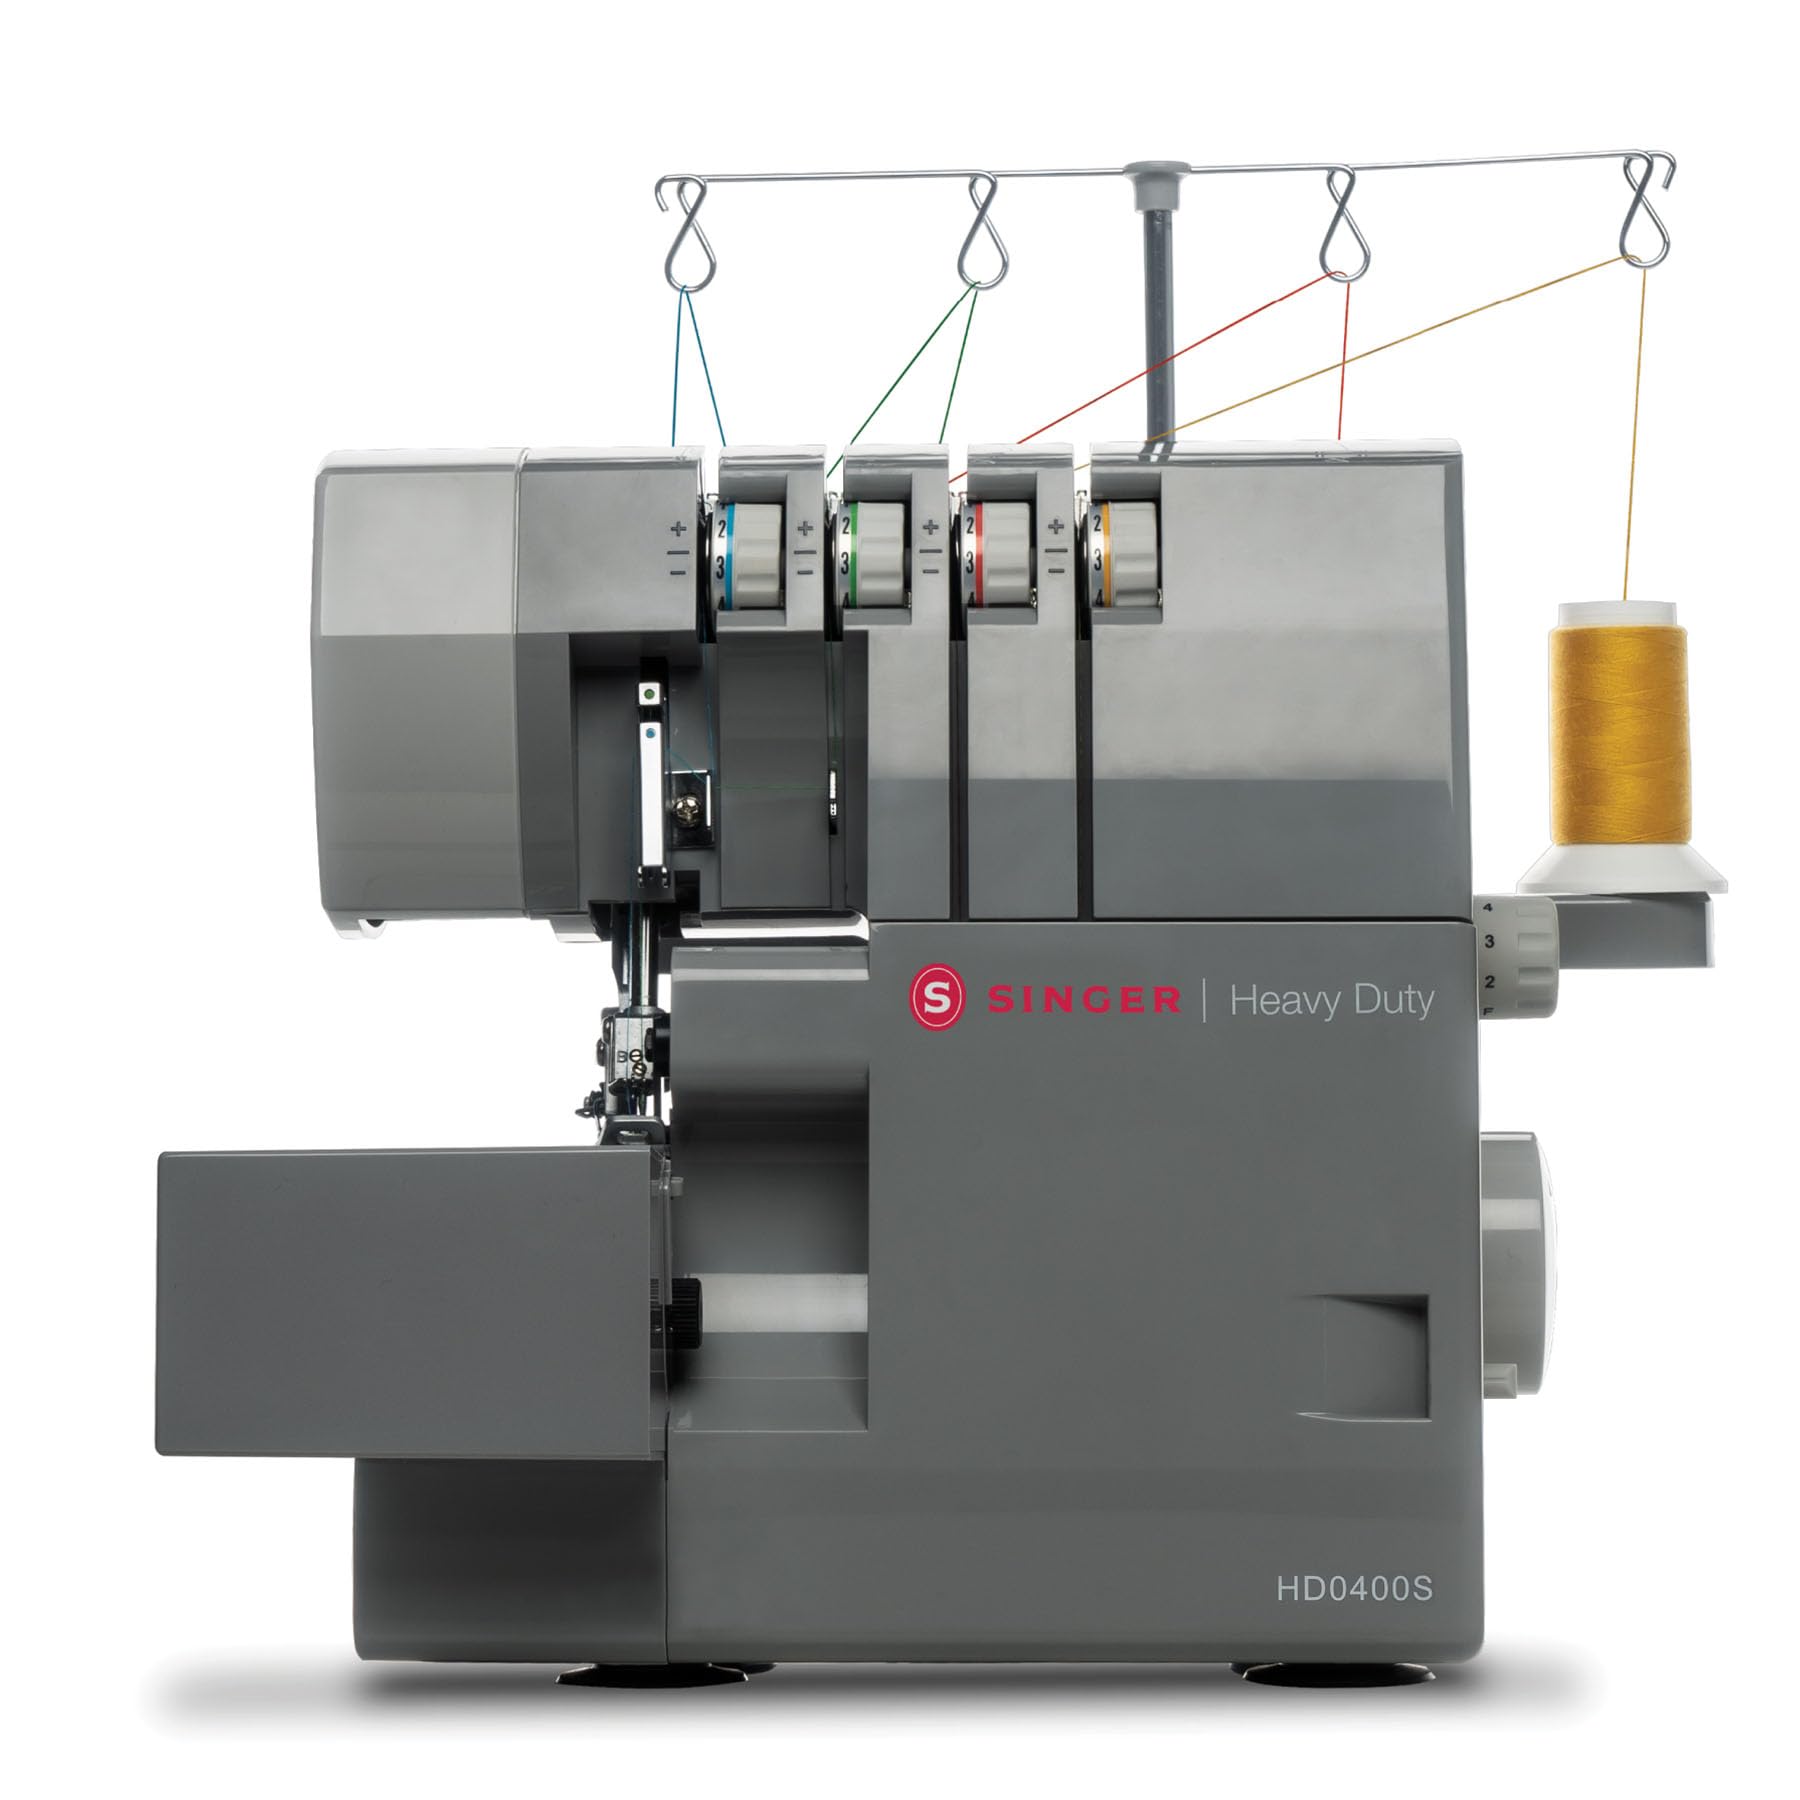
Rysunek 1: The SINGER HD0400S Heavy Duty Overlock Serger Sewing Machine, showcasing jego solidna konstrukcja.
This manual provides instructions for setting up, operating, and maintaining your SINGER HD0400S serger to ensure optimal performance and longevity.
2. Ważne instrukcje bezpieczeństwa
Before using the SINGER HD0400S serger, please read all instructions. Keep this manual for future reference.
- Zawsze odłączaj urządzenie od gniazdka elektrycznego natychmiast po użyciu, przed czyszczeniem, zdjęciem obudowy lub wykonywaniem jakichkolwiek czynności serwisowych.
- Nie należy pozwalać dzieciom obsługiwać urządzenia bez nadzoru.
- Używaj tego urządzenia wyłącznie zgodnie z jego przeznaczeniem opisanym w niniejszej instrukcji.
- Nigdy nie używaj urządzenia, jeśli przewód lub wtyczka są uszkodzone, jeśli urządzenie nie działa prawidłowo lub jeśli zostało upuszczone lub uszkodzone.
- Keep fingers away from all moving parts. Special care is required around the serger needles and cutting knife.
- Zawsze używaj właściwej płytki igłowej. Niewłaściwa płytka może spowodować złamanie igły.
- Nie ciągnij ani nie popychaj materiału podczas szycia. Może to spowodować odchylenie igły i jej złamanie.
- Turn the serger off when making any adjustments in the needle area, such as threading the needle, changing the needle, or changing the presser foot.
3. Machine Components and Included Accessories
3.1 Koniec maszynyview
Familiarize yourself with the main parts of your SINGER HD0400S serger.

Rysunek 2: Nadview of the SINGER HD0400S serger with key components labeled, including tension indicators, stitch length display, and differential feed adjustment.
- Right Needle Thread Tension Selector (Green): Adjusts tension for the right needle thread.
- Left Needle Thread Tension Display (Blue): Displays tension for the left needle thread.
- Upper Looper Thread Tension Indicator (Orange): Indicates tension for the upper looper thread.
- Lower Looper Thread Tension Indicator (Yellow): Indicates tension for the lower looper thread.
- Stitch Length Display: Shows the current stitch length setting.
- Differential Feed Adjustment Lever/Button: Controls the differential feed ratio.
- Cloth Plate: The working surface where fabric is placed.
3.2 Dołączone akcesoria
The following accessories are included with your SINGER HD0400S serger:
- 4 Thread Spool Holders
- Stopa uniwersalna
- Pędzel do kłaczków
- Igły
- Scrap Bag
- Śrubokręt
- Spare Lower Knife
- Rozszerzacz
- Komora magazynowa
- Pinceta
4. Konfiguracja
4.1 Rozpakowywanie i umieszczanie
- Carefully remove the serger from its packaging.
- Umieść maszynę na stabilnej, płaskiej powierzchni.
- Ensure there is adequate space around the machine for fabric handling and accessory storage.
- Podłącz przewód zasilający do urządzenia, a następnie do odpowiedniego gniazdka elektrycznego.
4.2 Nawlekanie maszyny
The SINGER HD0400S features a color-coded threading system and on-machine diagrams to simplify the threading process.

Rysunek 3: The color-coded threading paths on the SINGER HD0400S serger, designed for ease of use.
- Podnieś stopkę dociskową i obróć koło zamachowe w swoim kierunku, aby podnieść igły do najwyższej pozycji.
- Follow the color-coded guides on the machine for each thread (blue for left needle, green for right needle, orange for upper looper, yellow for lower looper).
- Use the included tweezers to assist with guiding threads through small openings.
- Ensure all threads are correctly seated in their tension discs and guides.
Refer to the detailed threading diagrams printed on the machine for precise instructions.
5. Instrukcja obsługi
5.1 Basic Operation and Stitch Options
The HD0400S offers 2, 3, or 4 thread stitch options for various professional finishes.

Rysunek 4: Key operational features of the SINGER HD0400S, including high-speed stitching, the larger cutting knife, and versatile thread capacity.
- Stitching Speed: The machine operates at up to 1,300 stitches per minute, allowing for efficient completion of projects.
- Obsługa 2/3/4 wątków: Select the appropriate number of threads for your desired stitch type (e.g., 4-thread overlock for strong seams, 3-thread for general finishing, 2-thread for delicate rolled hems).
- Regulacja długości ściegu: Use the stitch length dial to set the desired stitch length for your fabric and project.
5.2 Differential Feed Control
The differential feed system controls the movement ratio between the front and back sections of the feed teeth. This feature is crucial for managing various fabric types.

Rysunek 5: A hand adjusting the differential feed dial, which helps prevent fabric stretching or puckering.
- Preventing Puckering: For lightweight or stretchy fabrics, adjust the differential feed to a higher ratio (e.g., above 1.0) to prevent puckering.
- Preventing Stretching: For knit fabrics or bias-cut materials, adjust to a lower ratio (e.g., below 1.0) to prevent stretching.
- Even Stitching: For most woven fabrics, a 1:1 ratio (1.0) is suitable for even stitching.
5.3 Built-in Rolled Hem
The HD0400S features a built-in rolled hem plate, allowing for quick conversion to rolled hem stitching without changing the stitch plate.
- Locate the lever for the rolled hem conversion.
- Flip the lever to engage the rolled hem setting.
- Adjust tension settings as recommended for rolled hems (refer to the full user manual for specific tension guidelines).
5.4 Free Arm Design
The free arm design facilitates sewing tubular items such as cuffs, sleeves, and small openings.
- Remove the accessory storage compartment to expose the free arm.
- Slide the tubular fabric item onto the free arm.
- Proceed with stitching, ensuring the fabric moves smoothly around the free arm.
5.5 Dual LED Lighting
Two integrated LED lights illuminate the work area, reducing shadows and improving visibility, especially when working with dark fabrics or in low-light conditions.

Rysunek 6: A user operating the SINGER HD0400S, demonstrating the illuminated work area provided by the dual LED lights.
6. Konserwacja
Regular maintenance ensures the smooth operation and longevity of your serger.
6.1 Czyszczenie
- Wyłączone: Zawsze wyłączaj urządzenie i odłączaj je od zasilania przed czyszczeniem.
- Usuń kłaczki: Use the included lint brush to remove lint and thread scraps from the feed dogs, looper area, and under the needle plate.
- Scrap Bag: Regularly empty the scrap bag to prevent accumulation of fabric trimmings.
- Czyszczenie zewnętrzne: Przetrzyj powierzchnie zewnętrzne miękką, suchą ściereczką. Nie używaj silnych środków chemicznych ani ściernych środków czyszczących.
6.2 Replacing the Lower Knife
The serger includes a spare lower knife. Replace the knife when it becomes dull to ensure clean fabric cuts.
- Bezpieczeństwo przede wszystkim: Upewnij się, że urządzenie jest odłączone.
- Access Knife: Open the front cover to access the lower knife.
- Remove Old Knife: Use the screwdriver to loosen the screw holding the lower knife in place and carefully remove it.
- Install New Knife: Insert the spare lower knife, ensuring it is correctly positioned, and tighten the screw securely.
- Test: Close the cover and perform a test stitch on scrap fabric to verify proper cutting.
7. Rozwiązywanie Problemów
This section addresses common issues you might encounter. For more detailed troubleshooting, refer to the complete user manual.
| Problem | Możliwa przyczyna | Rozwiązanie |
|---|---|---|
| Pominięte ściegi | Niewłaściwa igła, wygięta igła, nieprawidłowe nawlekanie, nieprawidłowe naprężenie. | Replace needle with correct type/size, re-thread machine carefully, adjust tension settings. |
| Zerwanie nici | High tension, poor quality thread, burrs on thread path, incorrect threading. | Reduce tension, use quality thread, check thread path for obstructions, re-thread. |
| Marszczenie/rozciąganie się tkaniny | Incorrect differential feed setting. | Adjust differential feed ratio according to fabric type (see Section 5.2). |
| Maszyna nie uruchamia się | Przewód zasilający nie jest podłączony, wyłącznik zasilania jest wyłączony, funkcje bezpieczeństwa są włączone. | Check power connections, ensure switch is on, verify all covers are closed. |
8. Specyfikacje
| Funkcja | Szczegół |
|---|---|
| Marka | PIOSENKARZ |
| Numer modelu | HD0400S |
| Kolor | Szary |
| Tworzywo | Metal (Heavy Duty Frame) |
| Wymiary produktu (Gł. x Szer. x Wys.) | 14" gł. x 11" szer. x 11.5" wys. |
| Źródło zasilania | Elektryczny |
| Opcje ściegu | Gwint 2/3/4 |
| Szwów na minutę (SPM) | Do 1300 |
| Nóż tnący | 60% Larger than standard models |
| Podawanie różnicowe | Nastawny |
| Zawijany brzeg | Wbudowana płyta |
| Typ ramienia | Wolne ramię |
| Oświetlenie | Podwójne światła LED |
| Ruchliwość | Wbudowany uchwyt do przenoszenia |
| GTIN (UPC) | 037431887269 |
9. Gwarancja i wsparcie
For detailed warranty information, please refer to the official SINGER warranty documentation included with your purchase.
For comprehensive instructions, advanced techniques, and further troubleshooting, please download the complete User Manual (PDF) from the official SINGER website or via the link provided during purchase.
Pobierz instrukcję obsługi (PDF)
For customer support, visit the official SINGER webstronie lub skontaktuj się z działem obsługi klienta.