
1. Wprowadzenie
This manual provides detailed instructions for the installation, operation, and maintenance of your EVGATSAUTO K2MRH3A Digital Programmable Thermostat. This device is designed for water heating systems, offering intelligent temperature control and energy-saving features. Please read this manual thoroughly before installation and use to ensure proper function and safety.
2. Zawartość opakowania
Po rozpakowaniu sprawdź, czy wszystkie wymienione poniżej przedmioty znajdują się na miejscu i są w dobrym stanie:
- 1 x Temperature Controller (Digital Thermostat)
- 1 x Instrukcja obsługi (ten dokument)
- 2 x śruby montażowe

Figure 1: EVGATSAUTO K2MRH3A Digital Thermostat and included mounting screws.
3. Funkcje produktu
- Inteligentna kontrola temperatury: Allows precise temperature management for water heating systems.
- Oszczędność energii: Features low consumption touch buttons and intelligent programming to optimize energy use.
- Wiele trybów sterowania: Supports intelligent timing, direct touch control, and programmable time control.
- Trwała konstrukcja: Made from flame-retardant PC material with an IP20 rating for safety and longevity.
- Przejrzysty wyświetlacz LCD: Features a dark black LCD screen for easy readability of current and set temperatures, time, and operating modes.
- Szerokie zastosowanie: Suitable for various environments including homes, offices, hospitals, and commercial spaces.
4. Specyfikacje techniczne
| Parametr | Wartość |
|---|---|
| Typ przedmiotu | Cyfrowy termostat |
| Stopień ochrony IP | IP20 |
| Materiał skorupy | PC trudnopalny |
| Czujnik temperatury | NTC |
| Dokładność temperatury | ±1℃ |
| Typ wyświetlacza | LCD |
| Środowisko pracy | -5 ~ 50℃ |
| Pobór mocy | <1 W |
| Zakres ustawień temperatury | 5 ~ 60℃ |
| Zakres wyświetlania | 0 do 50℃ |
| Wejście Voltage | Prąd zmienny 90-240 V |
| Maksymalne obciążenie | 3A |
| Maksymalna moc | 3500 W |
| Tryb sterowania | Intelligent timing; Touch control; Programming time control |
| Kolor | Czarny |
5. Informacje dotyczące bezpieczeństwa
Aby zapobiec uszkodzeniu urządzenia lub obrażeniom ciała, należy przestrzegać następujących środków ostrożności:
- Instalację powinien wykonać wyłącznie wykwalifikowany elektryk, zgodnie z lokalnymi przepisami elektrycznymi.
- Ensure the power supply is disconnected before installation, maintenance, or removal of the thermostat.
- Nie wystawiaj urządzenia na działanie wody ani nadmiernej wilgoci.
- Do not attempt to disassemble or repair the thermostat yourself. Contact qualified service personnel.
- Trzymaj urządzenie z dala od materiałów łatwopalnych i bezpośrednich źródeł ciepła.
6. Konfiguracja i instalacja
This section outlines the general steps for installing your digital thermostat. For detailed wiring diagrams and specific installation requirements, consult a professional electrician.
6.1 Montaż termostatu
- Wybierz lokacje: Select an indoor wall location, away from direct sunlight, drafts, or heat sources that could affect temperature readings.
- Odłącz zasilanie: Wyłącz główne zasilanie systemu grzewczego za pomocą wyłącznika automatycznego.
- Przygotuj okablowanie: Follow the wiring diagram provided by your electrician or heating system manufacturer. Connect the AC 90-240V input and heating load wires to the appropriate terminals on the thermostat.
- Mocowanie do ściany: Mount the thermostat base to the wall using the provided screws. Ensure it is level and securely fastened.
- Podłącz jednostkę wyświetlającą: Carefully attach the display unit to the mounted base, ensuring all connections are secure.
- Przywróć zasilanie: Once installation is complete and verified, restore power to the heating system.

Rysunek 2: Strona view termostatu, ilustrującego jego kompaktową konstrukcję przeznaczoną do montażu na ścianie.

Rycina 3: Przód view of the thermostat, showing the LCD display with current time and temperature settings.
7. Instrukcja obsługi
The EVGATSAUTO K2MRH3A thermostat offers intuitive touch controls and programmable settings.
7.1 Wyświetl ponadview
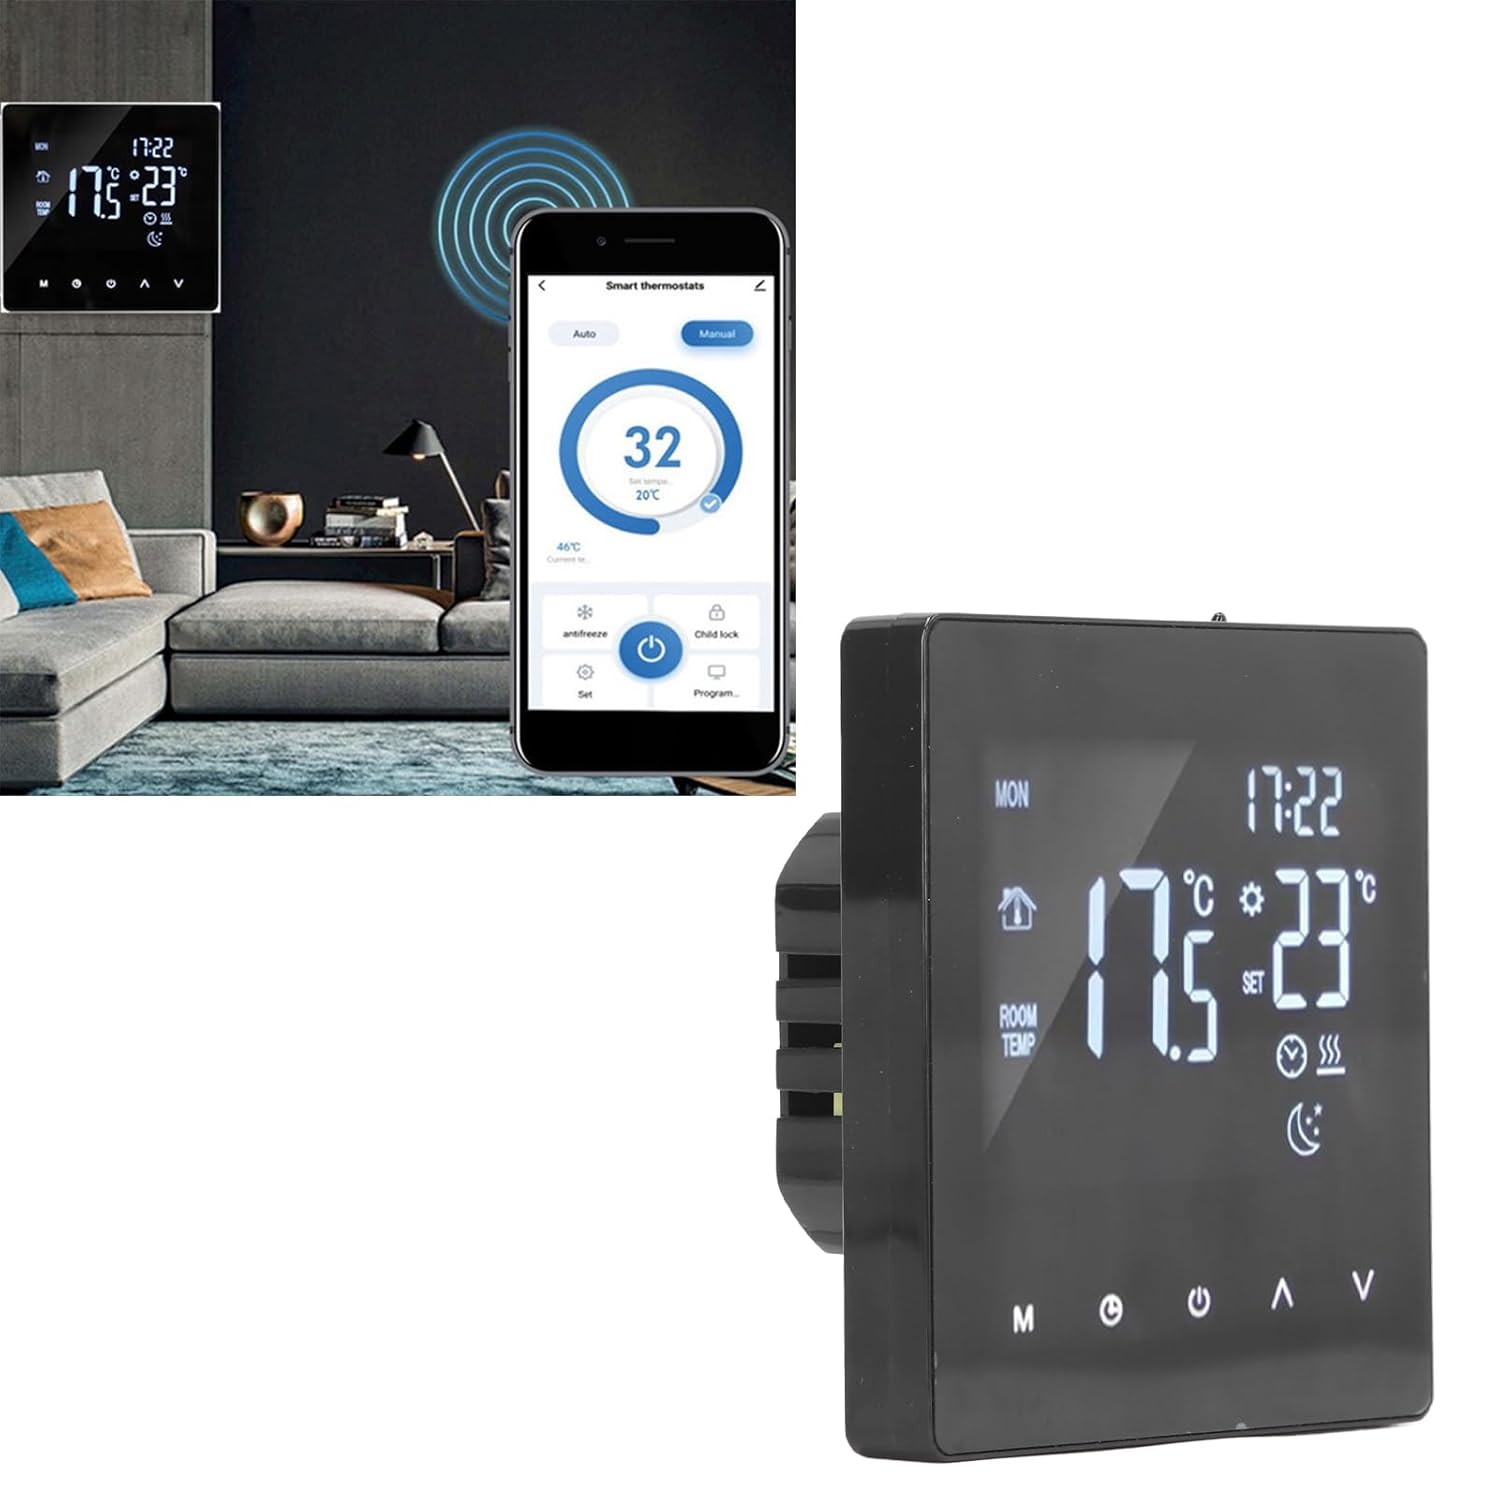
Figure 4: Close-up of the thermostat display, highlighting icons for mode, time, room temperature, set temperature, and heating status.
7.2 Podstawowa obsługa
- Włączanie/wyłączanie: Naciśnij Moc button (usually represented by a circle with a vertical line) to turn the thermostat on or off.
- Dostosuj temperaturę: Użyj W górę (▲) I W dół (▼) arrows to increase or decrease the desired set temperature.
- Wybór trybu: Naciśnij Tryb (M) button to cycle through available operating modes (e.g., Manual, Auto, Program).
- Ustawienia zegara/czasu: Naciśnij Zegar button (often represented by a clock icon) to access time settings. Use the Up/Down arrows to adjust hours and minutes.
7.3 Harmonogram programowania
The thermostat allows you to set a weekly heating schedule to optimize comfort and energy efficiency. Refer to the specific programming instructions in the full user manual for detailed steps on setting daily schedules, temperature points, and periods.

Rysunek 5: Profesjonalizm bocznyfile of the thermostat, highlighting its slim design when mounted.
7.4 Advanced Features (If Applicable)
- Blokada dziecięca: Some models may feature a child lock function to prevent unauthorized changes to settings. Consult the full manual for activation.
- Tryb przeciwzamrożeniowy: This mode maintains a minimum temperature to prevent pipes from freezing.
- Integracja inteligentnego domu: While this specific model is a standalone unit, some EVGATSAUTO thermostats may offer compatibility with smart home systems for remote control via an app.

Figure 6: The thermostat displayed alongside a smartphone showing a potential smart control application interface. Note: App control functionality may vary by model and region. Please refer to product specifications for confirmation.
8. Konserwacja
The EVGATSAUTO K2MRH3A thermostat requires minimal maintenance to ensure optimal performance.
- Czyszczenie: Delikatnie przetrzyj wyświetlacz iasinCzyścić miękką, suchą ściereczką. Nie używać środków czyszczących o działaniu ściernym, rozpuszczalników ani nie spryskiwać urządzenia bezpośrednio.
- Unikaj przeszkód: Ensure that the thermostat's vents (if any) are not blocked by furniture or curtains, as this can affect temperature readings.
- Regularne kontrole: Okresowo sprawdzaj połączenia przewodów pod kątem oznak zużycia lub luzów. (Wykonuj tę czynność wyłącznie po uzyskaniu odpowiednich kwalifikacji i przy odłączonym zasilaniu).
9. Rozwiązywanie Problemów
Jeśli masz problemy z termostatem, zapoznaj się z poniższymi typowymi problemami i rozwiązaniami:
| Problem | Możliwa przyczyna | Rozwiązanie |
|---|---|---|
| Wyświetlacz termostatu jest pusty. | Brak zasilania. | Check circuit breaker and wiring connections. Ensure power is restored. |
| System ogrzewania nie odpowiada. | Incorrect settings; Wiring issue; System fault. | Verify thermostat mode (e.g., not in 'Off' mode). Check set temperature. Inspect wiring (if qualified). Consult heating system manual. |
| Niedokładny odczyt temperatury. | Na lokalizację termostatu mogą mieć wpływ przeciągi i źródła ciepła. | Upewnij się, że termostat nie jest wystawiony na bezpośrednie działanie promieni słonecznych, przeciągów ani urządzeń emitujących ciepło. |
| Nie można zmienić ustawień. | Włączona blokada dziecięca. | Refer to the full manual for instructions on deactivating the child lock feature. |
Jeśli po wypróbowaniu tych rozwiązań problem nadal występuje, skontaktuj się z działem obsługi klienta lub wykwalifikowanym technikiem.
10. Gwarancja i obsługa klienta
EVGATSAUTO products are manufactured to high-quality standards. For specific warranty details, please refer to the warranty card included with your purchase or visit the official EVGATSAUTO website. For technical assistance, troubleshooting, or service inquiries, please contact EVGATSAUTO customer support through the contact information provided on our webwitryny lub dokumentacji zakupu.
Producent: EVGATSAUTO
Data pierwszej dostępności: 10 sierpnia 2023 r.