
Wstęp
This manual provides instructions for the installation, operation, and maintenance of your REVODATA TSEYE 5MP PIR POE IP Camera (Model IPIR-POE). Please read this manual thoroughly before using the product to ensure correct usage and optimal performance.
The IPIR-POE camera features 5-megapixel resolution, Power over Ethernet (PoE) capability, 940nm invisible infrared LEDs for night vision, and passive infrared (PIR) motion detection.
Zawartość opakowania
Sprawdź, czy wszystkie wymienione poniżej elementy znajdują się w Twojej paczce. Jeśli brakuje któregokolwiek z nich lub jest on uszkodzony, skontaktuj się z obsługą klienta.

Image: Contents of the REVODATA TSEYE IPIR-POE camera package. Includes the camera unit, product packaging box, a set of mounting screws, and the user manual.
- REVODATA TSEYE IPIR-POE Camera
- Zestaw śrub montażowych
- Instrukcja obsługi
Note: This product does not include a power adapter. It is designed for Power over Ethernet (PoE) or requires a separate 12V DC power supply.
Specyfikacje
| Marka | REWODATA |
| Model | IPIR-POE |
| Rezolucja | 5 MP (2880x1660p) |
| Obiektyw | Soczewka otworkowa 3.7 mm |
| Diody LED podczerwieni | Diody LED IR 940 nm niewidzialne |
| Źródło zasilania | 48V Power over Ethernet (PoE) or 12V DC (adapter not included) |
| Maximum IR Range | 15 metrów |
| Wykrywanie ruchu | PIR (pasywna podczerwień) |
| Łączność | Ethernet (No Wi-Fi) |
| Waga | 10.56 uncji |

Obraz: Szczegółowy view of the camera's physical features and connections, including its dimensions (4.72 in height, 2.76 in width), 940nm LEDs, 3.7mm Pinhole Lens, mounting bracket, camera cable, auxiliary power supply input, and RJ45 network cable connection.
Organizować coś
1. Physical Installation and Connection
The IPIR-POE camera supports Power over Ethernet (PoE), simplifying installation by delivering both power and data through a single Ethernet cable. Alternatively, it can be powered by a 12V DC adapter (not included).
- Montowanie: Secure the camera to your desired location using the provided mounting screws. Ensure the camera has a clear field of view.
- Połączenie PoE: Connect one end of an Ethernet cable to the camera's RJ45 port and the other end to a PoE-enabled NVR (Network Video Recorder) or a PoE switch.
- Połączenie bez PoE (opcjonalnie): If not using PoE, connect a 12V DC power adapter (not included) to the camera's power input and an Ethernet cable to a standard network switch or router.
- NVR/Monitor Connection: Connect your PoE NVR to a monitor for local viewing, or ensure your NVR/router is connected to your network for remote access.
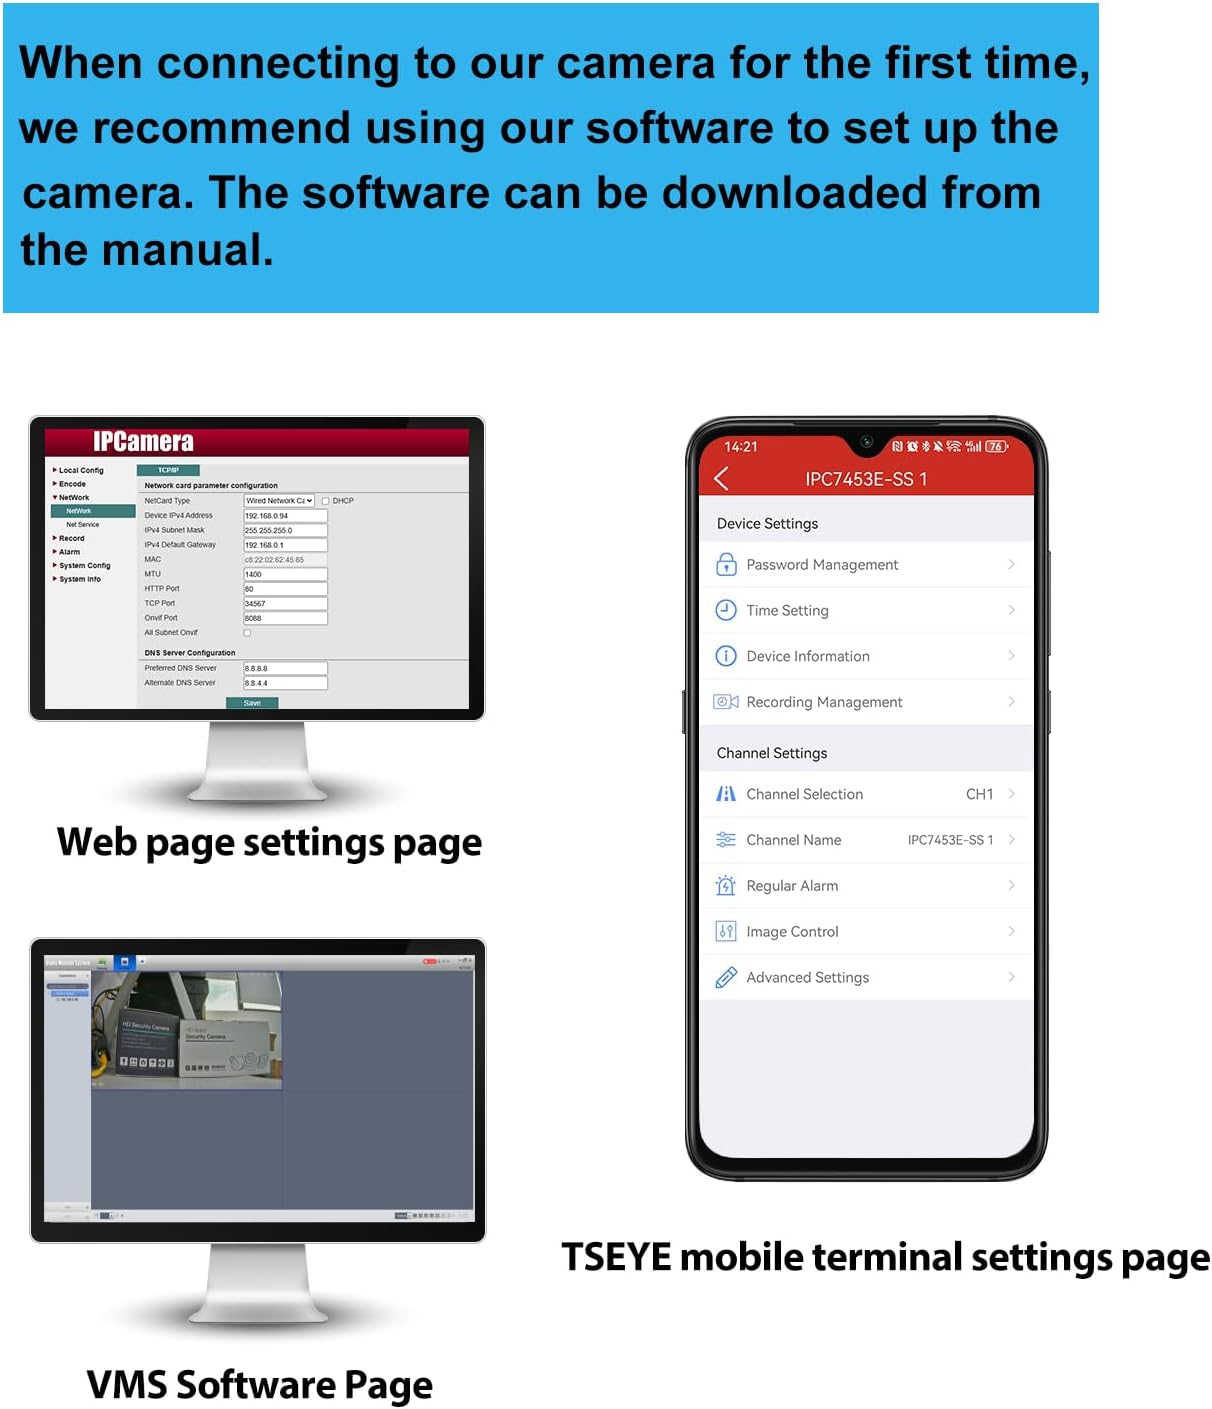
Image: Connection diagram for the PoE IP Camera. The camera connects to a PoE NVR via a network cable (power + network). The NVR connects to a monitor and a router. An optional DC 12V/2A power adapter is shown for non-PoE setups.
2. Konfiguracja oprogramowania
For initial setup and configuration, REVODATA recommends using the "TSEYE" smartphone application or the VMS software for Windows. The manual included in the camera package contains detailed instructions for software usage.

Obraz: Ponadview of software interfaces. This includes the camera's web page settings for network configuration, the VMS software interface for Windows, and the TSEYE mobile application interface for smartphone settings.
TSEYE Smartphone Application
The "TSEYE" app is available for download on your smartphone's app store. It allows for remote viewing, configuration, and motion detection notifications.

Image: TSEYE App View. Shows the app's listing in an app store and its main interface with live video feed and control options.
VMS Software (Windows)
For Windows users, the VMS (Video Management Software) provides advanced monitoring and management capabilities. This software is not compatible with MAC OS or Linux.

Image: VMS View. A screenshot of the Video Management Software interface on a computer monitor, showing a live camera feed.
Działanie
1. Detekcja ruchu
The camera features smart PIR motion detection. When movement is detected within the camera's field of view, an alarm notification will be sent to your smartphone via the TSEYE app.
- Konfiguracja: Motion detection settings, including sensitivity and detection zones, can be configured through the TSEYE app or VMS software.
- Powiadomienia: Ensure app notifications are enabled on your smartphone to receive timely alerts.

Image: Motion Detection feature. A smartphone displays a notification from the TSEYE app indicating a device alarm due to detected movement. An illustration shows the camera detecting a person in a room.
2. Invisible IR Night Vision
Equipped with 940nm invisible infrared LEDs, the camera provides clear night vision without emitting a visible red glow, enhancing discretion and security. The camera automatically switches between day and night modes based on ambient light conditions.
- Tryb dzienny: Full-color video recording in well-lit conditions.
- Tryb nocny: Black and white video recording in low-light or dark conditions, utilizing invisible IR illumination up to 15 meters.

Image: Day and Night Vision comparison. The top image shows a room in full color during the day. The bottom image shows the same room in clear black and white during the night, demonstrating the invisible IR night vision capability.
3 Zdalny dostęp i monitorowanie
Access your camera feed and settings remotely using the TSEYE smartphone application or the VMS software on your computer. Ensure your camera is properly connected to a network with internet access.
- Na żywo View: Monitor your premises in real-time from anywhere.
- Odtwarzanie nagranego dźwięku: Review nagrano footage stored on your NVR or local storage.
- Ustawienia: Adjust camera parameters, motion detection, and notification preferences remotely.
Konserwacja
- Czyszczenie: Regularnie czyść obiektyw aparatu miękką, suchą ściereczką, aby zapewnić wysoką jakość obrazu. Unikaj środków czyszczących o właściwościach ściernych.
- Aktualizacje oprogramowania układowego: Sprawdź producenta webodwiedź witrynę lub aplikację, aby sprawdzić dostępne aktualizacje oprogramowania sprzętowego i zapewnić optymalną wydajność i bezpieczeństwo.
- Kontrola kabla: Periodically inspect all cables for wear or damage, especially if installed outdoors.
- Warunki środowiskowe: Ensure the camera operates within its specified temperature and humidity ranges.
Rozwiązywanie problemów
Brak obrazu/wideo
- Sprawdź moc: Ensure the camera is receiving power. If using PoE, verify the PoE switch/NVR is functioning. If using a 12V DC adapter, ensure it's properly connected and working.
- Sprawdź kabel sieciowy: Verify the Ethernet cable is securely connected at both ends and is not damaged.
- Łączność sieciowa: Confirm that your NVR/router has network access and the camera is properly configured on the network.
- Oprogramowanie: Ensure the TSEYE app or VMS software is correctly installed and configured to connect to the camera.
Słaba jakość obrazu
- Wyczyść obiektyw: Wyczyść obiektyw aparatu, aby usunąć kurz i smugi.
- Oświetlenie: Ensure adequate lighting during the day. For night vision, confirm IR LEDs are functioning (though invisible, you might see a faint glow from certain angles or with another camera).
- Ustawienia rozdzielczości: Check the camera's resolution settings in the software to ensure it's set to 5MP (2880x1660P).
Wykrywanie ruchu nie działa
- Włącz funkcję: Verify that motion detection is enabled in the camera's settings via the TSEYE app or VMS software.
- Wrażliwość: Adjust motion detection sensitivity. Too low, and it might miss events; too high, and it might trigger false alarms.
- Strefa detekcji: Ensure the area you want to monitor is within the configured detection zone.
- Powiadomienia aplikacji: Check your smartphone's notification settings to ensure the TSEYE app is permitted to send alerts.
Cannot Connect to TSEYE App/VMS
- Połączenie internetowe: Ensure your smartphone/computer and the camera are connected to the internet.
- Adres IP kamery: Verify the camera's IP address and port settings are correct in the software.
- Zapora sieciowa: Check if your network firewall is blocking communication with the camera.
- Ustawienia routera: For remote access, ensure port forwarding (if required by your network setup) is correctly configured on your router.
Gwarancja i wsparcie
For warranty information, please refer to the documentation provided with your purchase or contact your retailer. REVODATA provides technical support for its products.
If you encounter issues not covered in this manual, or require further assistance, please contact REVODATA customer support through their official webstronę internetową lub dane kontaktowe znajdujące się na opakowaniu produktu.
Zasoby internetowe:
- Odwiedź REVODATA Store on Amazon Aby uzyskać informacje o produkcie i jego aktualizacjach.