
1. Wprowadzenie
Welcome to the world of aerial photography and flight with your new ATTOP W10 Drone. This drone is designed for both adults and kids, offering a user-friendly experience with advanced features. It comes equipped with a 1080P HD camera for FPV live video, one-key operations, 360° flips, and multiple control methods including APP, remote, voice, gesture, and gravity control. This manual provides detailed instructions to help you set up, operate, and maintain your drone safely and effectively.

Figure 1.1: ATTOP W10 Drone with included accessories.
2. Zawartość opakowania
Please check the package contents carefully upon unboxing. If any items are missing or damaged, please contact customer support.
- ATTOP W10 Drone (x1)
- Pilot zdalnego sterowania (x1)
- Akumulator drona (x1)
- Kabel USB do ładowania (x1)
- Zapasowe śmigła (x4)
- Osłony śmigieł (x4)
- Śrubokręt (x1)
- Phone Holder (x1)
- Instrukcja obsługi (x1)

Rysunek 2.1: Szczegółowy view wszystkich elementów zawartych w pakiecie.
3. Montaż i przygotowanie
Follow these steps to assemble your drone before its first flight.
3.1 Montaż osłony śmigła
Attach the propeller guards to the drone's arms. These guards help protect the propellers from damage during collisions and enhance safety.
3.2 Montaż podwozia
Securely attach the landing gear to the bottom of the drone. This provides stability during take-off and landing.
3.3 Phone Holder Installation
Slide the phone holder onto the remote control until it clicks into place. This allows you to mount your smartphone for FPV viewi sterowanie aplikacją.
Wideo 3.1: Produkt w całościview and assembly guide for the ATTOP W10 Drone. This video demonstrates the installation of propeller guards, landing gear, and the phone holder, along with basic flight features.
4. Ładowanie i instalacja akumulatora
4.1 Ładowanie akumulatora drona
Connect the drone battery to the USB charging cable. Plug the USB cable into a 5V/1A USB adapter (not included) or a computer USB port. The indicator light on the USB cable will show the charging status. Charging typically takes approximately 60-90 minutes for a full charge.
4.2 Montaż akumulatora drona
Insert the fully charged battery into the battery compartment on the drone's underside. Ensure it is securely latched.
4.3 Instalowanie baterii w pilocie zdalnego sterowania
Open the battery compartment on the back of the remote control. Insert 3 x AAA batteries (not included), ensuring correct polarity. Close the compartment securely.

Figure 4.1: The drone offers extended flight time and features a low battery alert on the remote control.
5. Zdalne sterowanieview
Zapoznaj się z funkcjami pilota:
- Lewy drążek (przepustnica/odchylenie): Kontroluje wysokość (w górę/w dół) i obrót (w lewo/w prawo).
- Prawy drążek (pochylenie/przechylenie): Kontroluje ruch do przodu/do tyłu oraz w lewo/w prawo.
- Przycisk startu/lądowania jednym klawiszem: Inicjuje automatyczny start lub lądowanie.
- Przycisk przełącznika prędkości: Toggles between different speed modes (low, medium, high).
- Przycisk obrotu 360°: Aktywuje funkcję obrotu o 360 stopni.
- Przycisk trybu bezgłowego: Engages headless mode for simplified control.
- Przycisk zdjęcia/wideo: Robienie zdjęć lub rozpoczynanie/zatrzymywanie nagrywania wideo.
- Przycisk powrotu jednym klawiszem: Commands the drone to return to its take-off point.
6. Drone Overview
The ATTOP W10 drone features a compact and durable design. Key components include:
- Śmigła: Cztery główne śmigła zapewniające siłę nośną i ciąg.
- Silniki: Włącz śmigła.
- Kamera: Integrated 1080P HD camera for photo and video capture.
- Światła LED: Wskazuje status i orientację drona.
- Komora baterii: Located on the underside for the drone battery.
- Osłony śmigieł: Removable guards for added protection.
7. Instalacja i połączenie aplikacji
To unlock the full potential of your ATTOP W10 drone, download and connect to the official ATTOP GO app.
7.1 Download the ATTOP GO App
Scan the QR code provided in the quick start guide or search for "ATTOP GO" in your device's App Store (iOS) or Google Play Store (Android).
7.2 Connect to Drone's Wi-Fi
- Power on the drone. The drone's Wi-Fi signal will become active.
- On your smartphone, go to Wi-Fi settings and connect to the network named "W10-1080P-XXXXX" (the XXXXX will be unique to your drone).
- Once connected, open the ATTOP GO app.
- Select the drone model "W10" within the app and tap "Go to Connect" to enter the control interface.

Figure 7.1: The ATTOP GO app provides smart control options for your drone.
Video 7.2: Official APP Operation Guide for the ATTOP W10 Drone, detailing app download, Wi-Fi connection, and interface display.
8. Podstawowe operacje lotnicze
Before flying, ensure the drone and remote control are fully charged and properly synced.
8.1 Power On and Syncing
- Umieść drona na płaskiej, poziomej powierzchni.
- Włącz drona, a następnie włącz pilota.
- Push the left throttle stick all the way up, then all the way down. The remote will beep, indicating successful syncing.
8.2 Kalibracja
After syncing, perform a calibration for stable flight. Push both control sticks to the bottom-left or bottom-right corners simultaneously until the drone's lights flash and then become solid, indicating successful calibration.
8.3 Unlocking Motors
To unlock the motors, push both control sticks to the bottom-left and bottom-right corners simultaneously (opposite of calibration) until the propellers begin to spin slowly.
8.4 Start i lądowanie jednym klawiszem
Press the One-Key Take-off/Landing button on the remote control or in the app. The drone will automatically ascend to a stable hovering height or descend and land gently.
8.5 Utrzymywanie wysokości
The drone features an altitude hold function, allowing it to maintain a stable height automatically, making it easier to control.
8.6 Toss-to-Launch
For quick launches, simply toss the drone horizontally into the air. Its intelligent sensors will detect the motion, unlock the blades, and initiate flight.

Figure 8.1: User-friendly features like One Key Take-off & Landing, Toss-to-Launch, and Altitude Hold simplify drone operation.


Figure 8.2: Visual representation of One Key Take-off/Landing, Toss to Launch, and Altitude Hold functions.
9. Zaawansowane funkcje lotu
The ATTOP W10 drone offers several advanced features for an enhanced flying experience.
9.1 Tryb bezgłowy
In Headless Mode, the drone's orientation is irrelevant. It will fly according to the direction of the remote control, making it easier for beginners to navigate without worrying about the drone's front or back.
9.2 Obrót 360°
Press the 360° Flip button and then push the right control stick in any direction to perform an exciting aerial flip.
9.3 Lot trajektoryjny
Using the ATTOP GO app, draw a desired flight path on your smartphone screen. The drone will then automatically follow this trajectory.
9.4 Kontrola grawitacji
Activate Gravity Control in the app to control the drone's movement by tilting your smartphone. This provides an immersive and intuitive flying experience.
9.5 Sterowanie głosowe
The app supports voice commands for basic flight operations, such as "Take off," "Land," "Forward," etc.
9.6 Sterowanie gestami
Perform specific hand gestures in front of the drone's camera to trigger actions like taking a photo or starting video recording.

Figure 9.1: Explore dynamic maneuvers with 360° Free Flips and pre-planned Trajectory Flight.

Figure 9.2: Advanced flight modes including Headless Mode, 360° Free Flips, and Trajectory Flight.

Figure 9.3: Control your drone intuitively with Smart App Control, featuring Gravity Control and Voice Control.
10. Camera and FPV Operation
The ATTOP W10 drone is equipped with a 1080P HD camera for capturing stunning aerial footage.
10.1 Robienie zdjęć i nagrywanie filmów
Press the dedicated Photo/Video button on the remote control or tap the corresponding icon in the ATTOP GO app to capture images or start/stop video recording. All media will be saved directly to your connected smartphone.
10.2 First Person View (FPV)
The ATTOP GO app provides a real-time FPV feed from the drone's camera to your smartphone, allowing you to experience the flight from the drone's perspective.
10.3 1-Click Share
Easily share your captured photos and videos directly to social media platforms through the 1-Click Share function in the app.

Figure 10.1: Capture high-definition 1080P photos and videos to document your flights.

Figure 10.2: Share your aerial adventures instantly with the 1-Click Share feature.

Figure 10.3: Enjoy real-time FPV and share HD pictures and videos with ease.
11. Wytyczne bezpieczeństwa
To ensure a safe and enjoyable flight experience, please adhere to the following safety guidelines:
- Kontrola przed lotem: Always inspect the drone, propellers, and battery before each flight. Ensure propeller guards are securely attached.
- Środowisko: Fly in open, clear areas away from people, animals, buildings, and obstacles. Avoid flying in strong winds or adverse weather conditions.
- Linia wzroku: Podczas lotu utrzymuj drona w zasięgu wzroku.
- Bezpieczeństwo baterii: Use only the provided charging cable and battery. Do not overcharge or puncture batteries. Discontinue use if batteries are damaged or swollen.
- Bezpieczeństwo śmigła: Keep hands, face, and loose clothing away from rotating propellers. The propeller guards are designed to prevent accidental cuts.
- Zalecany wiek: This drone is suitable for ages 8-12 and adults. Adult supervision is recommended for younger users.
- FAA Regulations: This drone does not require an FAA license for recreational use. However, always be aware of local drone regulations and no-fly zones.
- Alert niskiego poziomu baterii: The remote will make a noise when the drone's battery is low, allowing you to recall the drone in time to prevent a crash.
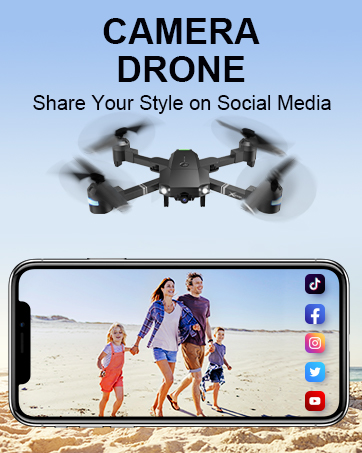
Figure 11.1: Propeller guards enhance safety by preventing accidental contact with rotating blades.
12. Konserwacja
Proper maintenance will extend the lifespan of your ATTOP W10 drone.
- Czyszczenie: Do czyszczenia drona i pilota używaj miękkiej, suchej ściereczki. Unikaj stosowania silnych środków chemicznych i rozpuszczalników.
- Wymiana śmigła: If propellers are damaged, replace them with the provided spare propellers. Ensure correct orientation (A and B propellers).
- Pielęgnacja baterii: Przechowuj baterie w chłodnym, suchym miejscu. Nie przechowuj w pełni naładowanych ani całkowicie rozładowanych baterii przez dłuższy czas. W przypadku długotrwałego przechowywania naładuj je do około 50%.
- Składowanie: When not in use, store the drone and its accessories in a safe place, away from direct sunlight and extreme temperatures.
13. Rozwiązywanie Problemów
Jeśli masz problemy z dronem, zapoznaj się z poniższymi typowymi problemami i ich rozwiązaniami:
| Problem | Możliwa przyczyna | Rozwiązanie |
|---|---|---|
| Dron nie reaguje na pilota. | Not synced; low battery; out of range. | Re-sync drone and remote; charge batteries; ensure within control range (up to 328ft). |
| Dron dryfuje w czasie lotu. | Not calibrated; uneven surface at take-off; wind interference. | Perform calibration on a flat surface; avoid windy conditions. |
| Słaba jakość kamery/brak obrazu FPV. | Weak Wi-Fi signal; app not connected; camera lens dirty. | Ensure strong Wi-Fi connection; reconnect app; clean camera lens. |
| Śmigła się nie kręcą. | Motors not unlocked; damaged propellers; motor issue. | Unlock motors; replace damaged propellers; contact support if motor issue. |
| Krótki czas lotu. | Akumulator nie jest w pełni naładowany; akumulator jest stary; latanie jest agresywne. | Fully charge battery; consider replacing old batteries; fly more gently. |
14. Specyfikacje produktu
- Marka: NA SZCZYCIE
- Nazwa modelu: W10
- Wymiary: 11.5" dł. x 11.5" szer. x 2.7" wys.
- Waga przedmiotu: 1.34 funta
- Rozdzielczość przechwytywania wideo: 1080p
- Rozdzielczość wyjścia wideo: 1920x1080 pikseli
- Technologia łączności: Wi-Fi
- Technologia zdalnego sterowania: Bluetooth
- Typ sterowania: Remote Control, App Control (Voice, Gesture, Gravity)
- Poziom umiejętności: Początkujący
- Bateria: 1 bateria litowo-polimerowa (w zestawie)
- Cechy szczególne: Extended Flight Time, 360 Degree Flip, CPSIA Qualification Certified, First Person View (FPV), Altitude Hold, Toss-to-Launch, Headless Mode, Trajectory Fly, 3-Gear Speeds, One-Key Take-off/Landing/Return.

Figure 14.1: The drone offers a longer effective signal distance for extended flight range.
15. Gwarancja i wsparcie
ATTOP is committed to providing high-quality products and customer satisfaction. For any product-related inquiries, technical support, or warranty claims, please contact our customer service team.
Szczegółową instrukcję użytkownika w formacie PDF można znaleźć w oficjalnym dokumencie: ATTOP W10 User Manual (PDF)
Contact Information: Please refer to the contact details provided on the product packaging or the official ATTOP webwitryna zawierająca najbardziej aktualne informacje dotyczące pomocy technicznej.