1. Wprowadzenie
Thank you for choosing the AUSEK UltraHD 4K Action Camera. This manual provides essential information for setting up, operating, and maintaining your camera. Please read it thoroughly before use to ensure optimal performance and longevity of your device.

Image: The AUSEK UltraHD 4K Action Camera, shown with its transparent waterproof housing and a separate view of the camera itself, highlighting its compact design and 4K Ultra HD and Wi-Fi capabilities.
2. Główne cechy
- 4K 60FPS Video & 24MP Photos: Capture high-resolution videos and still images.
- EIS Stabilization: Advanced Electronic Image Stabilization for smooth footage.
- Obiektyw szerokokątny 170°: Szerokie pole view for immersive captures.
- Wodoodporność 30M: Durable waterproof case for underwater use up to 30 meters.
- Łączność Wi-Fi: Connect to your smartphone or tablet for remote control and sharing.
- Bezprzewodowy pilot zdalnego sterowania 2.4G: Wygodna kontrola z odległości.
- Wszechstronne tryby fotografowania: Includes time-lapse, slow-motion, and burst photo modes.

Image: An illustration highlighting the key features of the AUSEK 4K Action Camera, including its 2-inch HD screen, 4K HD display, 30m diving depth, 1050mAh battery, remote controller, multi-language support, 170-degree wide angle, and built-in Wi-Fi.
3. Identyfikacja komponentów i części produktu
3.1. Co znajduje się w pudełku
W skład standardowego pakietu wchodzą następujące elementy:
- AUSEK 4K Action Camera
- Wodoodporna obudowa
- Bezprzewodowy pilot zdalnego sterowania 2.4G
- Stojak na rowery
- Multi-functional Mount Clip
- Uchwyty do hełmu
- Bandaże
- Kabel USB
- Ładowarka sieciowa
- Lens Cloth
- Quick Reference Guide (User Manual)

Image: A comprehensive display of all accessories included with the AUSEK 4K Action Camera, such as various mounts, straps, cables, and the waterproof case, alongside the camera itself and the user manual.
3.2. Camera Parts Identification
Zapoznaj się z przyciskami i portami aparatu:

Image: A detailed diagram of the AUSEK 4K Action Camera, labeling its various components including the Power/Mode Button, Shutter/Select Button, Status Indicator Light, Microphone, Lens, Charging Status Light, Micro SD Slot, Micro USB Port, and Micro HD OUT Port.
- Przycisk zasilania/trybu: Press to power on/off or switch between modes.
- Shutter / Select Button: Press to start/stop recording or take a photo. Also used to confirm selections in menus.
- Kontrolka stanu: Indicates camera status (e.g., recording, charging).
- Mikrofon: Wbudowany mikrofon do nagrywania dźwięku.
- Obiektyw: The camera's optical lens.
- Kontrolka stanu ładowania: Wskazuje stan ładowania.
- Gniazdo Micro SD: Tutaj włóż kartę Micro SD.
- Port micro USB: Do ładowania i przesyłania danych.
- Micro HD OUT Port: Do podłączenia do zewnętrznego wyświetlacza.
4. Konfiguracja
4.1. Ładowanie akumulatora
- Connect the camera to the AC charger using the provided USB cable.
- The Charging Status Light will indicate charging progress.
- Once fully charged, the light will change or turn off.
4.2. Wkładanie karty Micro SD
A Micro SD card (not included) is required to store photos and videos. Use a Class 10 or higher Micro SD card, up to 64GB capacity.
- Locate the Micro SD Slot on the side of the camera.
- Włóż kartę Micro SD złotymi stykami skierowanymi w stronę tylnej części aparatu, aż do zatrzaśnięcia.
- Aby wyjąć kartę, delikatnie wciśnij ją, aż wysunie się.
4.3. Korzystanie z obudowy wodoodpornej
The waterproof case allows the camera to be used underwater up to 30 meters and protects it from dust, dirt, and scratches.
- Przed umieszczeniem aparatu w obudowie wodoszczelnej należy upewnić się, że jest suchy.
- Close the case securely, ensuring the latch is fully engaged and the rubber seal is clean and free of debris.
- Przed pierwszym użyciem pod wodą należy wykonać test szczelności przy pustej obudowie.
4.4. Mocowanie uchwytów i akcesoriów
Various mounts are included to attach your camera to helmets, bicycles, and other surfaces.
- Refer to the specific mount's instructions for proper attachment.
- Ensure all connections are secure before engaging in activities.
5. Instrukcja obsługi
5.1. Włączanie/wyłączanie zasilania
- Włączanie: Press and hold the Power / Mode Button for a few seconds.
- Aby wyłączyć: Press and hold the Power / Mode Button for a few seconds until the screen turns off.
5.2. Przełączanie trybów
Press the Power / Mode Button repeatedly to cycle through the different modes:
- Tryb nagrywania wideo: Indicated by a video camera icon.
- Tryb zdjęć: Indicated by a camera icon.
- Tryb odtwarzania: Indicated by a play icon, for reviewprzechwycone media.
- Tryb ustawień: Indicated by a gear icon, for adjusting camera settings.
5.3. Nagrywanie wideo
- Przełącz na tryb nagrywania wideo.
- Press the Shutter / Select Button to start recording. A red dot or recording indicator will appear on the screen.
- Press the Shutter / Select Button again to stop recording.
5.4. Robienie zdjęć
- Przełącz na tryb zdjęć.
- Skomponuj kadr.
- Press the Shutter / Select Button to take a photo.
5.5. Elektroniczna stabilizacja obrazu (EIS)
The camera features EIS technology to reduce blur and stabilize footage, especially during fast-action activities.

Image: A side-by-side comparison demonstrating the effect of Electronic Image Stabilization (EIS) on the AUSEK 4K Action Camera. The left side shows a clear, stable image with EIS ON, while the right side shows a blurred image with EIS OFF, both depicting a person riding a mountain bike.
EIS can be enabled or disabled in the camera's settings menu. For best results in high-vibration environments, ensure EIS is turned on.
5.6. Łączność Wi-Fi i korzystanie z aplikacji
Connect your camera to a smartphone or tablet via Wi-Fi for remote control, live previewi łatwe udostępnianie.
- Download the compatible app (check user manual for app name) from your device's app store.
- Włącz Wi-Fi w menu ustawień aparatu. Wyświetlona zostanie nazwa i hasło Wi-Fi aparatu.
- Na smartfonie/tablecie przejdź do ustawień Wi-Fi i połącz się z siecią Wi-Fi aparatu.
- Otwórz aplikację, aby sterować kamerą, view żyćtage i pobierz files.

Image: An illustration showing the AUSEK 4K Action Camera's Wi-Fi sharing capability, allowing users to instantly review and share videos and photos on social media via a mobile phone. Examples of shared content include underwater footage, skateboarding, and skydiving.
5.7. Korzystanie z pilota bezprzewodowego
The included 2.4G wireless remote control allows you to operate the camera from a distance of up to 10 meters.

Image: A depiction of the AUSEK 4K Action Camera being controlled by its 2.4GHz wireless wrist remote control, illustrating the convenience of starting photo taking or video recording even when the camera is mounted in hard-to-reach places.
- Czerwony przycisk: Do robienia zdjęć.
- Gray Button: For starting/stopping video recording.
Ensure the remote control battery is charged and it is paired with the camera (refer to the quick reference guide for pairing instructions if needed).
5.8. Uniwersalne tryby fotografowania
Explore various creative shooting options:
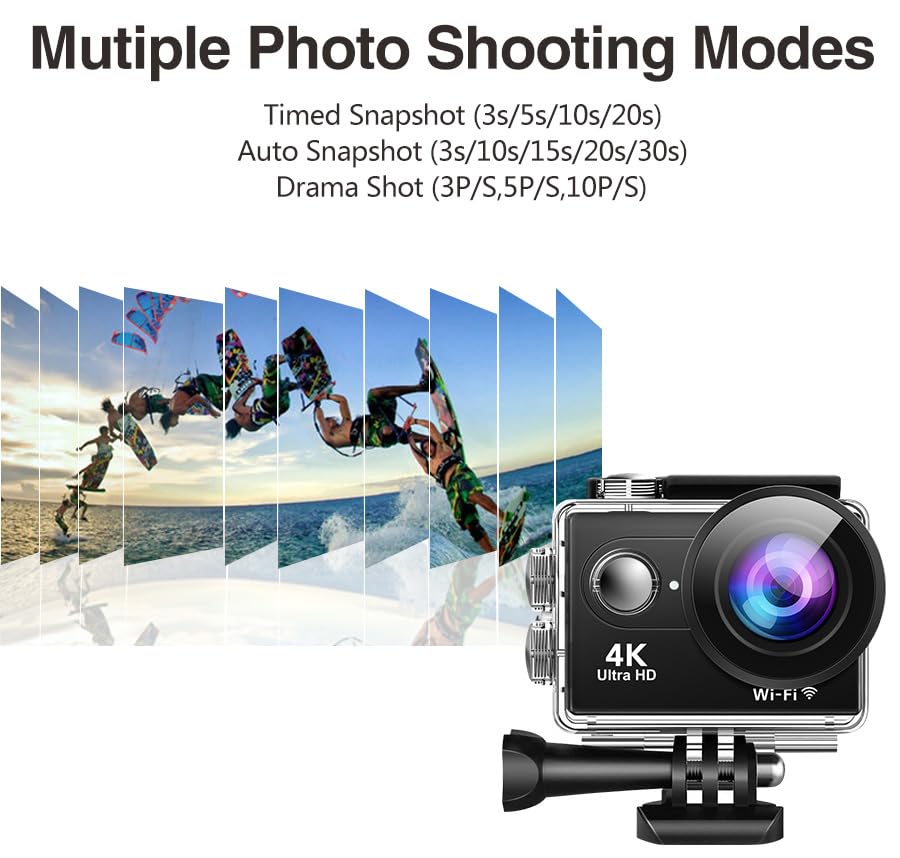
Obraz: Ilustracja pokazującaasing the multiple photo shooting modes available on the AUSEK 4K Action Camera, including Timed Snapshot (3s/5s/10s/20s), Auto Snapshot (3s/10s/15s/20s/30s), and Drama Shot (3P/S, 5P/S, 10P/S), with a visual representation of burst photography.
- Film poklatkowy: Przechwytuje klatki w określonych odstępach czasu, aby utworzyć przyspieszony film.
- Slow-Motion Recording: Records at a higher frame rate for smooth slow-motion playback.
- Zdjęcia seryjne: Wykonuje wiele zdjęć jedno po drugim.
- Nagrywanie w pętli: Nadpisuje najstarsze footage when the memory card is full, ideal for dashcam use.
These modes can be selected and configured within the camera's settings menu.
6. Konserwacja
6.1. Czyszczenie aparatu i obudowy
- Use the provided lens cloth or a soft, lint-free cloth to clean the camera lens and screen.
- For the waterproof case, rinse with fresh water after saltwater use and allow it to air dry. Ensure the rubber seal is clean and free of sand or debris.
- Nie używaj żrących chemikaliów ani ściernych środków czyszczących.
6.2. Przechowywanie
- Przechowuj kamerę w chłodnym, suchym miejscu, z dala od bezpośredniego światła słonecznego i ekstremalnych temperatur.
- Remove the battery if storing for extended periods to prevent damage.
7. Rozwiązywanie Problemów
| Problem | Możliwa przyczyna | Rozwiązanie |
|---|---|---|
| Kamera się nie włącza. | Niski poziom naładowania baterii; Bateria nie została prawidłowo włożona. | Charge the battery; Reinsert battery correctly. |
| Nie można nagrywać filmów/robić zdjęć. | No Micro SD card; SD card full; SD card error. | Insert SD card; Delete files or use a new card; Format SD card (backup data first). |
| Fujtage is blurry/shaky. | EIS is off; Lens is dirty; Insufficient lighting. | Enable EIS in settings; Clean the lens; Ensure adequate lighting. |
| Problemy z połączeniem Wi-Fi. | Incorrect password; Too far from camera; App not updated. | Re-enter password; Move closer to camera; Update app. |
| Audio is muffled in waterproof case. | Waterproof case inherently reduces audio clarity. | This is normal. For clear audio, use the camera without the waterproof case in dry environments. |
8. Specyfikacje
| Funkcja | Szczegół |
|---|---|
| Model | Rider Moto Vlogging Camera |
| Rozdzielczość wideo | 4K/60FPS, 2.7K/30FPS, 1080P/120FPS, 720P/120FPS |
| Rozdzielczość zdjęcia | 24 MP |
| Kąt obiektywu | Szeroki kąt 170° |
| Stabilizacja obrazu | EIS (elektroniczna stabilizacja obrazu) |
| Wodoodporna głębokość | Do 30 m (z obudową wodoodporną) |
| Ekran wyświetlacza | 2.0 cali |
| Składowanie | Micro SD (up to 64GB, Class 10 or higher recommended) |
| Łączność | Wi-Fi, Micro USB, Micro HD OUT |
| Zdalne sterowanie | Bezprzewodowy pilot 2.4G |
| Obsługiwane formaty audio | AAC |
| Format przechwytywania wideo | MP4, AVI |
| Technologia czujnika fotograficznego | CMOS |
9. Gwarancja i wsparcie
9.1. Informacje o gwarancji
This product comes with a 1-year warranty from the date of purchase. Please retain your purchase receipt as proof of warranty. The warranty covers manufacturing defects but does not cover damage caused by misuse, accidents, unauthorized repairs, or normal wear and tear.
9.2. Obsługa klienta
For any questions, technical assistance, or warranty claims, please contact AUSEK customer support:
- Telefon obsługi klienta: 08048977694
- Producent: AUSHA EXPORTS P LTD- 140, Sector 27, Gurugram-122009
You can also visit the official AUSEK webStrona z odpowiedziami na często zadawane pytania i dodatkowymi zasobami.