Tilta Full Camera Cage for Sony FX3/FX30 V2 Instruction Manual
Model: TA-T16-FCC-B
Produkt ponadview
The Tilta Full Camera Cage for Sony FX3/FX30 V2 provides protective armor and enhanced mounting options for your Sony FX3 or FX30 camera. Designed to minimize wear and tear, this cage offers a robust framework while maintaining access to essential camera functions.
Key features include multiple mounting points for accessories, a convenient cable clamp, a modular design supporting various configurations, and an Arca-Swiss standard bottom plate for quick release.
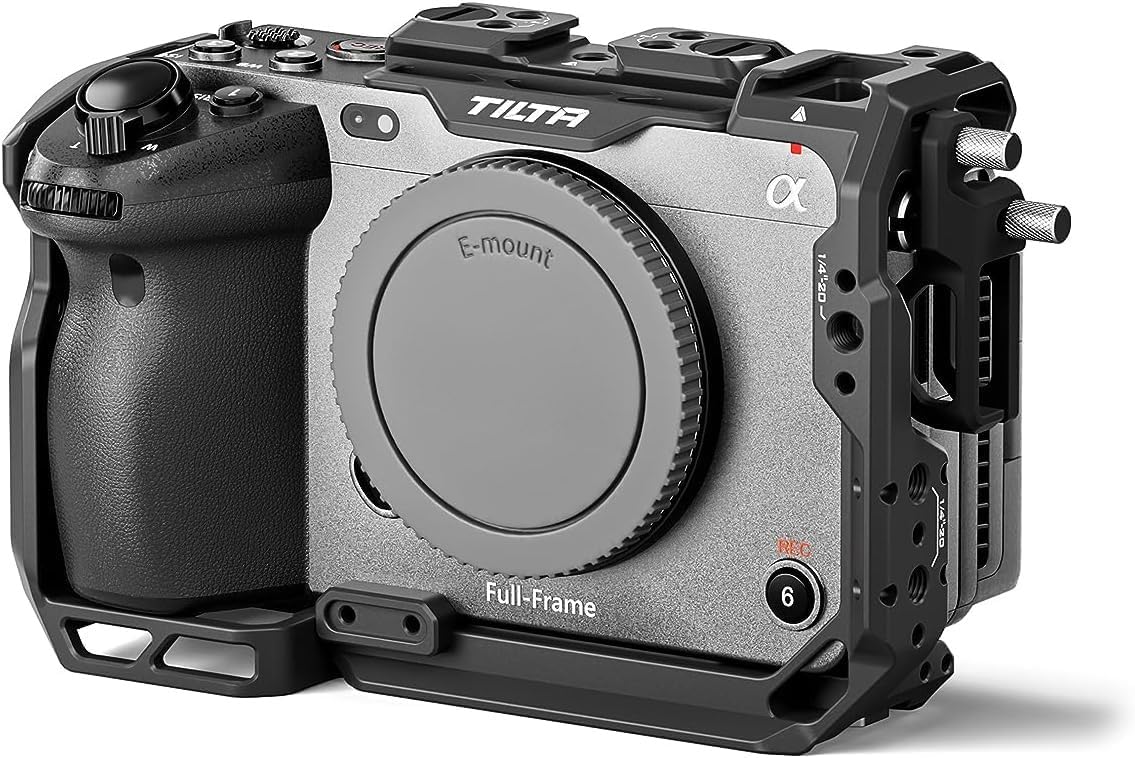
Image: The Tilta Full Camera Cage securely mounted on a Sony FX3 camera, showcasing its protective design and integrated mounting points.
Główne cechy:
Protective Armor: Designed specifically for Sony FX3 & FX30 to minimize wear and tear.
Montaż akcesoriów: Features a top plate NATO rail, cold shoe receivers, 1/4"-20 and 3/8"-16 threads with locating pins.
Kabel Clamp: Secures cables in place with a convenient thumb screw design.
Konstrukcja modułowa: Supports various configurations, including compatibility with the XLR top handle.
Gotowość Arca-Swiss: Integrated DJI Arca-Swiss standard bottom plate for quick mounting.
Video: Official product video demonstrating the Tilta Camera Cage compatible with Sony FX3/FX30 V2, highlighting its features and design.
Co jest zawarte
The Tilta Full Camera Cage kit includes all necessary components for immediate use and assembly with your Sony FX3 or FX30 camera.
1x Full Camera Cage Compatible with Sony FX3/FX30 V2
1x HDMI Cable Clamp Attachment Compatible with Sony FX3/FX30 V2
1x klucz imbusowy (32123.00001.00.00)
1x 2.5mm Allen Key (32123.00052.00.00)
Przewodnik po konfiguracji
Follow these steps to properly install your Tilta Full Camera Cage onto your Sony FX3 or FX30 camera.
1. Attaching the Camera to the Cage:
Upewnij się, że kamera jest wyłączona.
Align the camera with the base plate of the cage. The cage is designed for a custom fit, ensuring full access to ports and controls.
Secure the camera to the cage using the integrated 1/4"-20 screw on the bottom. Tighten firmly but do not overtighten.
Utilize the thumb screw design for easy and secure attachment.
Zdjęcie: Tył view of the Sony FX3 camera mounted within the Tilta Full Camera Cage, demonstrating the secure fit and accessibility to the camera's screen and controls.
2. Installing the HDMI Cable Clamp:
Locate the HDMI port on your camera.
Attach the HDMI cable clamp to the designated mounting point on the cage, typically near the HDMI port.
Route your HDMI cable through the clamp and tighten the thumb screw to secure the cable, preventing accidental disconnections or damage.
Image: The Tilta camera cage with an HDMI cable clamp attached, illustrating how cables are secured to prevent accidental disconnection.
3. Attaching Optional Accessories:
The cage provides various mounting points for additional accessories:
Top Plate NATO Rail: For quick attachment and release of top handles or other NATO-compatible accessories.
Cold Shoe Receivers: Ideal for mounting microphones, small LED lights, or wireless receivers.
1/4"-20 and 3/8"-16 Threads: Use these threaded holes with locating pins for secure attachment of articulating arms, monitor mounts, or other rigging components.
Image: The Tilta Full Camera Cage shown with an attached XLR top handle, demonstrating the modular design and accessory compatibility.
Operating the Camera Cage
The Tilta Full Camera Cage is designed to enhance your camera's functionality and protection during operation.
1. Maintaining Access to Camera Controls:
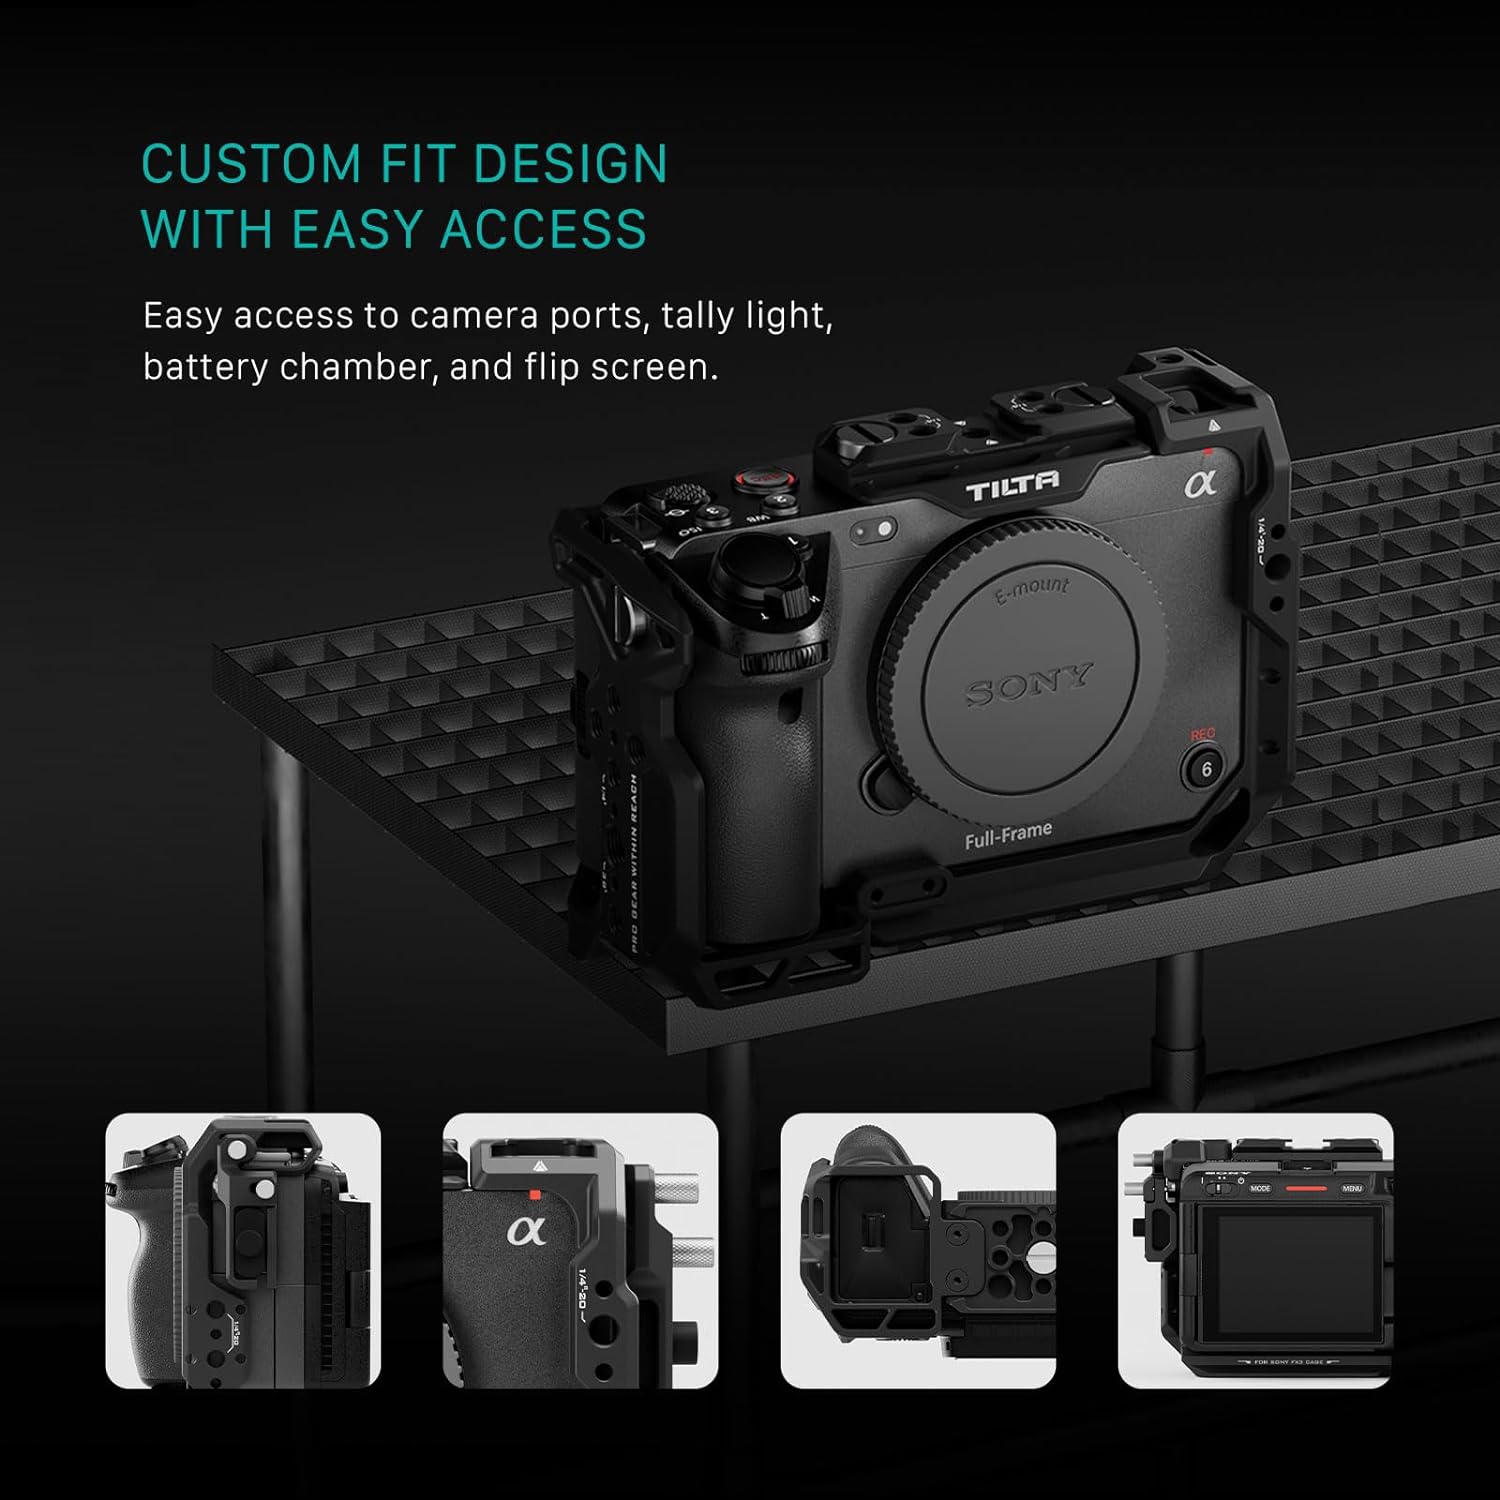
The custom-fit design ensures that all camera buttons, dials, battery compartments, and the flip screen remain fully accessible. This allows for uninterrupted operation and quick adjustments without removing the cage.
Image: The Tilta camera cage highlighting easy access to camera ports, tally light, battery chamber, and the flip screen.
2. Using the Arca-Swiss Quick Release:
The integrated DJI Arca-Swiss standard bottom plate allows for rapid transitions between handheld, tripod, and gimbal setups. Simply slide the camera and cage assembly onto any Arca-Swiss compatible baseplate for quick installation.
Image: The Tilta camera cage featuring an Arca-Swiss compatible bottom plate for quick installation onto baseplates and gimbals.
Wideo: Oficjalny film prezentujący produktasing the Tilta Camera Cage for FX3/FX30, demonstrating its features and how it integrates with the camera.
Konserwacja
To ensure the longevity and optimal performance of your Tilta Full Camera Cage, follow these simple maintenance guidelines:
Czyszczenie: Regularnie przecieraj klatkę miękką, suchą ściereczką, aby usunąć kurz i odciski palców. W przypadku uporczywych zabrudzeń użyj lekko zwilżonej ściereczki.amp Wytrzyj szmatką i dokładnie osusz. Unikaj silnych środków chemicznych i materiałów ściernych.
Kontrola śrub: Periodically check all screws and mounting points for tightness. Re-tighten any loose screws using the provided Allen keys to ensure the camera remains securely mounted.
Składowanie: When not in use, store the camera cage in a clean, dry environment, preferably in a padded bag or case to prevent scratches and impacts.
Unikaj nadmiernego dokręcania: While securing components, avoid excessive force when tightening screws to prevent stripping threads or damaging the cage/camera.
Specyfikacje
Marka
Tilta
Nazwa modelu
TA-T16-FCC-B
Kompatybilne urządzenia
Sony FX3, FX30
Kolor
Czarny
Wymiary produktu (Gł. x Szer. x Wys.)
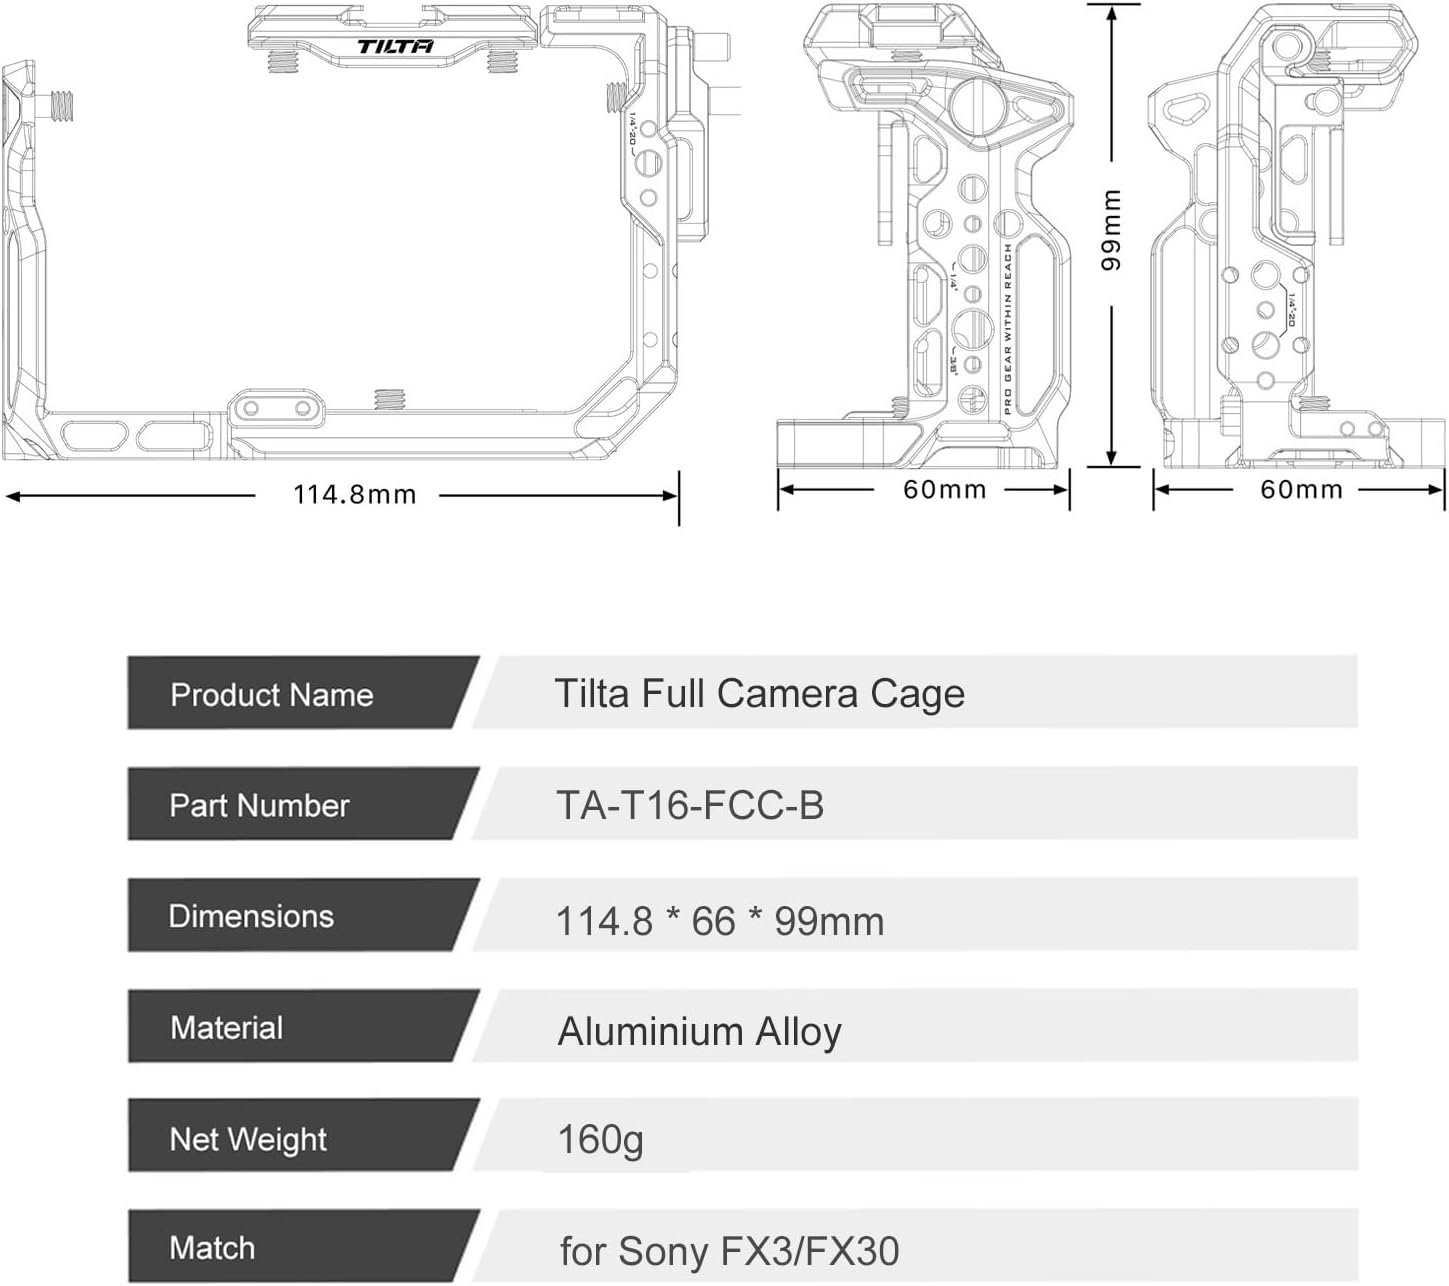
3.5" gł. x 9" szer. x 6" wys.
Waga przedmiotu
259 gram
UPC
810076276519
Tworzywo
Stop aluminium
Masa netto
160g
Image: Detailed specifications and dimensions of the Tilta Full Camera Cage, including material and weight.
Gwarancja i wsparcie
Informacje o gwarancji:
The Tilta Full Camera Cage comes with a 2-letnia gwarancja mechaniczna i 1-Year Electronic Warranty. Gwarancja obejmuje wady materiałowe i wykonawcze powstałe w normalnych warunkach użytkowania.
For specific terms and conditions, please refer to the official Tilta warranty policy or contact customer support.
Obsługa klienta:
For any questions, technical assistance, or warranty claims, please contact Tilta customer support through their official webwitrynę lub sprzedawcę, u którego zakupiono produkt.
Możesz również odwiedzić Sklep Tilta na Amazonie Aby uzyskać więcej informacji o produkcie i zasobach pomocy.
Powiązane dokumenty - TA-T16-FCC-B
System klatek kamerowych Tilta do Sony a7 IV: instalacja i funkcje Kompleksowy przewodnik po systemie klatek kamerowych Tilta do aparatu Sony A7 IV, szczegółowo opisujący instalację, funkcje i kompatybilność akcesoriów. Zawiera wszystkie elementy i instrukcje montażu.
Tilta Full Camera Cage for Sony A1 II/A9 III User Manual User guide and assembly instructions for the Tilta Full Camera Cage designed for Sony A1 II and A9 III cameras, detailing packing list, overview, assembly steps, and specifications. Includes instructions for switching between full and half cage configurations, cable clamp installation, and Arca-Swiss plate attachment.
Klatka kamerowa Tilta dla RED KOMODO-X: koniecview i funkcje Kompleksowy przewodnik szczegółowo opisujący system klatek kamerowych Tilta dla RED KOMODO-X, zawierający ponadview jego podzespołów oraz szczegółowy podział jego cech funkcjonalnych i punktów mocowania.
Instrukcja obsługi klatki Tilta Full Camera Cage do aparatu Nikon ZR Szczegółowa instrukcja obsługi klatki Tilta Full Camera Cage przeznaczonej do aparatu Nikon ZR, obejmująca wyłączenie odpowiedzialności, listę rzeczy do spakowania, informacje o klatceview, instrukcje montażu i instalację opcjonalnych akcesoriów.
Ask a question about this manual
Ask about setup, troubleshooting, compatibility, parts, safety, or missing instructions. Manuals+ will review the question and use this page’s manual context to help answer it.