1. Wprowadzenie
This manual provides detailed instructions for the setup, operation, maintenance, and troubleshooting of your Xprinter XP-233B Thermal Barcode Printer. The XP-233B is designed for efficient thermal printing of barcodes and labels, utilizing heat-sensitive paper without the need for ink or ribbons.
2. Instrukcje bezpieczeństwa
- Upewnij się, że drukarka jest podłączona do źródła zasilania o odpowiedniej mocy.tage zgodnie ze specyfikacją zasilacza.
- Nie wystawiaj drukarki na działanie wody ani nadmiernej wilgotności.
- Unikaj umieszczania drukarki w bezpośrednim świetle słonecznym lub w pobliżu źródeł ciepła.
- Keep the printer away from dust and debris to prevent damage to internal components.
- Nie próbuj samodzielnie demontować ani naprawiać drukarki. Skontaktuj się z wykwalifikowanym personelem serwisowym w celu uzyskania pomocy.
- Use only recommended thermal label rolls to ensure optimal print quality and printer longevity.
3. Zawartość opakowania
Sprawdź, czy w opakowaniu znajdują się wszystkie elementy:
- Xprinter XP-233B Thermal Barcode Printer
- Zasilacz
- Kabel USB
- Szybki przewodnik (jeśli dołączony)
- Driver CD (if included, drivers can also be downloaded online)
4. Koniec produktuview
Familiarize yourself with the main components of the XP-233B printer.

Rysunek 4.1: Przód view of the Xprinter XP-233B, showing the power switch, control panel, and label output slot.

Rysunek 4.2: Tył view of the Xprinter XP-233B, highlighting the USB, Ethernet, and power input ports.
Funkcje panelu sterowania:
- Przycisk PODAJNIK: Press to feed a blank label. Hold to perform a self-test print.
- Przycisk PAUZY: Wstrzymuje lub wznawia drukowanie.
- Przycisk ANULUJ: Anuluje bieżące zadanie drukowania.
- Wskaźniki LED: Display printer status (e.g., Power, Error, Paper Out). Refer to troubleshooting for specific light patterns.
5. Konfiguracja
5.1 Podłączanie drukarki
- Connect the power adapter to the printer's power input port and then plug it into a wall outlet.
- Connect the USB cable from the printer to your computer. For Ethernet connectivity, connect an Ethernet cable from the printer to your network router or switch.
- Włącz drukarkę za pomocą przełącznika zasilania znajdującego się z boku urządzenia.
5.2 Ładowanie etykiet
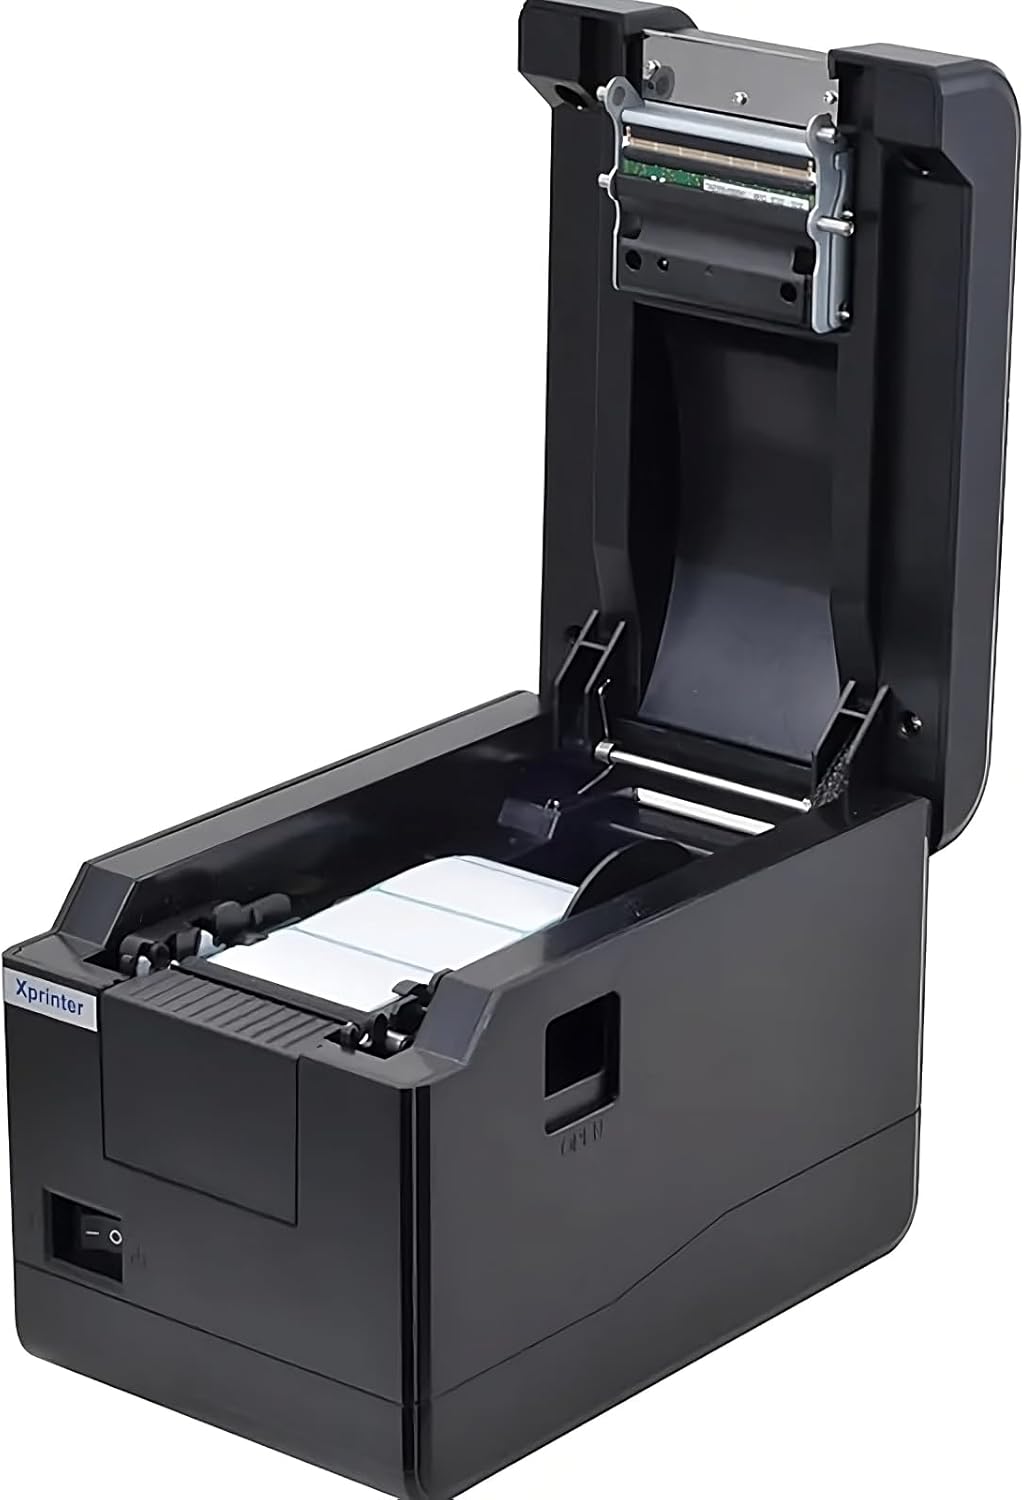
Rysunek 5.1: Z góry na dół view of the Xprinter XP-233B with the cover open, illustrating the label loading area.
- Press the 'OPEN' button on the side of the printer to open the top cover.
- Place the thermal label roll into the label compartment, ensuring the labels feed from the bottom of the roll and the printable side faces upwards.
- Adjust the movable label guides to fit the width of your label roll snugly, without pinching the labels.
- Pull a few labels past the print head and out through the front slot.
- Zamknij górną pokrywę, aż zatrzaśnie się na swoim miejscu.
- The printer will automatically calibrate and feed a few labels to detect the label gap.
5.3 Instalacja sterownika
Install the printer drivers on your computer. Drivers can typically be found on the included CD or downloaded from the official Xprinter webwitrynę. Postępuj zgodnie z instrukcjami wyświetlanymi na ekranie, aby przeprowadzić instalację.
6. Obsługa drukarki
6.1 Podstawowe drukowanie
Once the printer is set up and drivers are installed, you can print labels from your application (e.g., label design software, shipping software). Ensure the correct printer model (Xprinter XP-233B) is selected in your application's print settings.
6.2 Wydruk autotestu
To perform a self-test print:
- Ensure the printer is powered on and labels are loaded.
- Naciśnij i przytrzymaj KARMIĆ button for approximately 3-5 seconds until the printer starts printing.
- The self-test print will display printer information and a test pattern, confirming basic functionality.
7. Konserwacja
7.1 Czyszczenie głowicy drukującej
Regular cleaning of the print head ensures optimal print quality and extends the printer's lifespan. Clean the print head when print quality degrades or after every few rolls of labels.
- Wyłącz drukarkę i odłącz przewód zasilający.
- Otwórz górną pokrywę.
- Delikatnie przetrzyj powierzchnię głowicy drukującej wacikiem bawełnianym.ampened with isopropyl alcohol (70% or higher).
- Allow the print head to dry completely (approximately 2-3 minutes) before closing the cover and turning on the printer.
7.2 Czyszczenie powierzchni zewnętrznej
Przetrzyj zewnętrzną część drukarki miękką, miękką szmatką.amp płótno. Nie używaj ostrych środków chemicznych ani ściernych środków czyszczących.
8. Rozwiązywanie Problemów
| Problem | Możliwa przyczyna | Rozwiązanie |
|---|---|---|
| Drukarka się nie włącza | Power cord loose; power outlet faulty; power adapter damaged. | Check power connections; try a different outlet; replace power adapter if necessary. |
| No labels feeding | Labels incorrectly loaded; paper out; label guides too tight. | Reload labels correctly; replace label roll; adjust label guides. |
| Słaba jakość wydruku (wyblakły, linie) | Print head dirty; low-quality labels; print head damaged. | Clean print head (refer to Section 7.1); use recommended thermal labels; contact support if print head is damaged. |
| Printer not responding to print commands | Incorrect driver installed; USB/Ethernet cable loose; printer paused. | Reinstall drivers; check cable connections; press PAUZA przycisk, aby wznowić. |
| Labels skipping or misaligning | Incorrect label sensor calibration; label guides not set correctly. | Perform a self-test print to recalibrate; adjust label guides. |
9. Specyfikacje
| Funkcja | Specyfikacja |
|---|---|
| Nazwa modelu | Xprinter - Thermal barcode printer |
| Numer modelu przedmiotu | XP-233B |
| Technologia drukarek | Termiczny |
| Technologia łączności | Ethernet, USB |
| Wyjście drukarki | Monochromia |
| Media drukowane | Etykiety |
| Maksymalna pojemność arkuszy | 100 (typical for roll capacity, actual sheet capacity depends on label size) |
| Wymiary produktu (Gł. x Szer. x Wys.) | Wymiary 26.8 x 18 x 17.2 cm |
| Waga przedmiotu | 1.2 kilogramów |
| Kolor | Czarny |
10. Informacje o gwarancji
Xprinter products typically come with a limited manufacturer's warranty. Please refer to the warranty card included with your product or visit the official Xprinter website for specific warranty terms and conditions, including coverage duration and service procedures. Keep your purchase receipt as proof of purchase for warranty claims.
11. Obsługa klienta
For technical assistance, driver downloads, or further inquiries regarding your Xprinter XP-233B, please visit the official Xprinter support website or contact their customer service department. Contact information can usually be found on the Xprinter webstronie internetowej lub w dokumentacji dostarczonej wraz z drukarką.