1. Wprowadzenie
Dziękujemy za zakupasing the TIMEMORE Coffee Scale Basic 2.0. This high-precision digital scale is designed to enhance your coffee brewing experience, offering accurate measurements and convenient features for both espresso and drip coffee methods. This manual provides detailed instructions for setup, operation, and maintenance to ensure optimal performance and longevity of your device.

Image: TIMEMORE Coffee Scale Basic 2.0 in a coffee brewing setup.
2. Funkcje produktu
- Ulepszona konstrukcja: The Basic 2.0 model features a flow rate display function, building upon the Basic Plus. Its minimalist design ensures intuitive operation.
- Pomiary o wysokiej precyzji: Capable of measuring from 0.5g to 2000g with a minimum unit of 0.1g, ensuring accurate measurement of coffee beans and water.
- Integrated Timer & Flow Rate Function: Includes a timer to precisely control extraction time. The added flow rate display allows for simultaneous monitoring of time, weight, and flow rate, enhancing your brewing consistency.
- Durability & Easy Maintenance: Constructed with a sturdy weighing platform and a silicone pad, making it resistant to dirt and easy to clean, promoting a hygienic brewing environment.
- Funkcja automatycznego wyłączania: Equipped with a built-in 1600mAh rechargeable lithium battery. The scale automatically turns off after 3 minutes when the timer is off, and after 15 minutes when the timer is active, conserving battery life.
3. Konfiguracja
3.1 Rozpakowanie i wstępna inspekcja
Carefully remove all components from the packaging. Verify that all items are present and undamaged. The package should include the TIMEMORE Coffee Scale Basic 2.0, a silicone pad, and a USB-C charging cable.
3.2 Ładowanie urządzenia
Before first use, fully charge the scale. Connect the provided USB-C cable to the charging port on the side of the scale and plug the other end into a compatible USB power adapter (not included). The battery indicator on the display will show charging status. A full charge provides approximately 24 hours of standby time.

Image: The scale connected to a USB-C charger, displaying battery status.
3.3 Attaching the Silicone Pad
Place the included silicone pad onto the weighing platform. This pad provides heat insulation, prevents slipping, and protects the scale from scratches and spills.

Image: Attaching the silicone pad to the scale's weighing surface.
4. Instrukcja obsługi
4.1 Włączanie/wyłączanie zasilania
Press the power button (usually marked with a circle and a vertical line) located on the right side of the scale to turn it on. Press and hold the same button to turn it off.
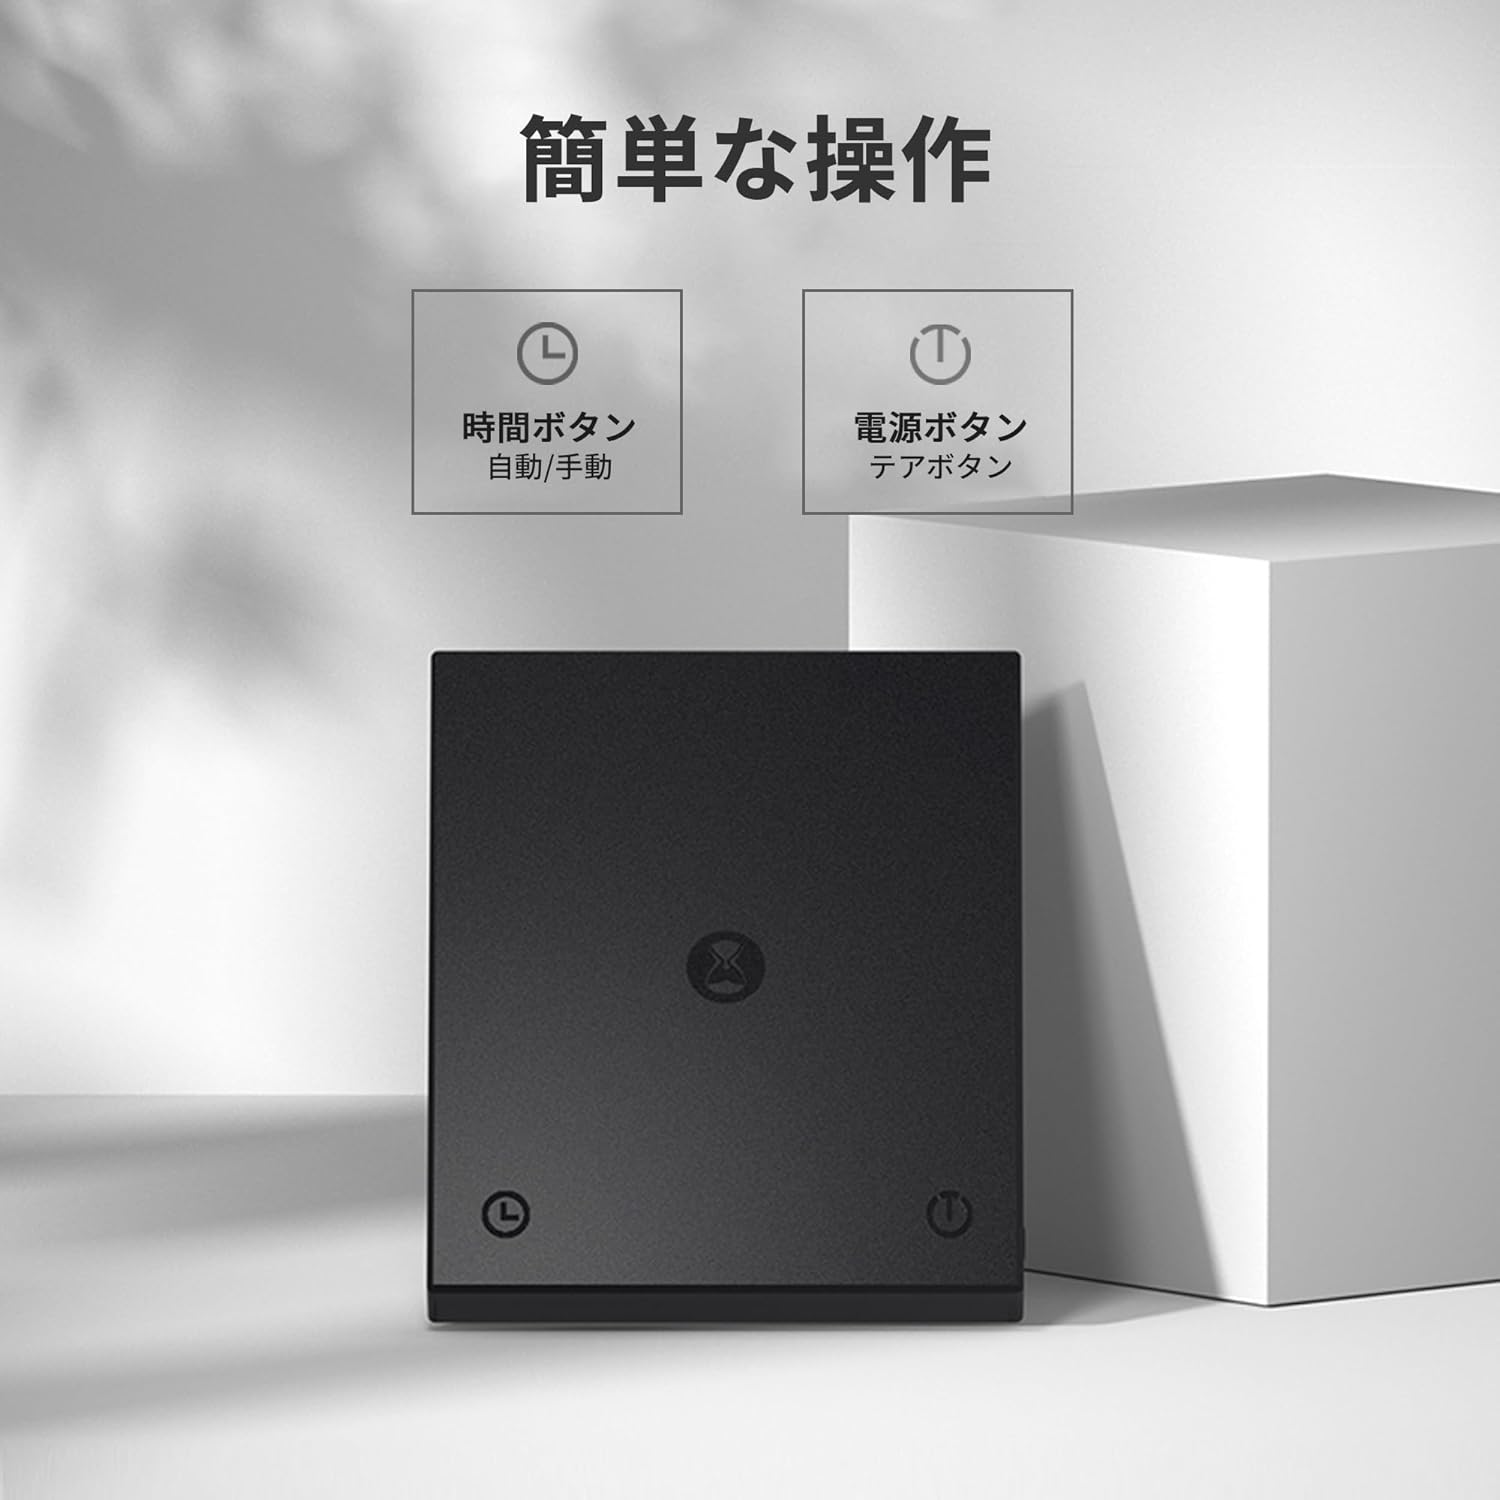
Image: The power button and timer button on the scale.
4.2 Funkcja tary
To reset the weight to zero (tare), place your container or dripper on the scale, then briefly press the power button. The display will show '0.0g'.
4.3 Działanie timera
The timer button is located on the left side of the scale (usually marked with a clock icon). Press it once to start the timer. Press it again to pause/stop. Double-tap to reset the timer to zero.
4.4 Flow Rate Display
The Basic 2.0 model includes a flow rate display. When brewing, the scale will show the current pouring speed in grams per second (g/s) alongside the weight and timer. This feature helps maintain consistent pouring for optimal extraction.

Image: Close-up of the scale's display showing time, weight, and flow rate during brewing.
4.5 Tryb automatyczny
The scale features an automatic mode for simplified brewing. To activate, double-tap the power button. When you start pouring water, the timer will automatically begin. This mode is ideal for consistent drip brewing.
4.6 Auto-Off Functionality
To conserve battery, the scale will automatically turn off under specific conditions:
- If the timer is OFF, the scale will power off after 3 minutes of inactivity.
- If the timer is ON, the scale will power off after 15 minutes of inactivity.
4.7 Ogólne wskazówki dotyczące użytkowania
- Always place the scale on a flat, stable surface for accurate readings.
- Avoid placing the scale near strong electromagnetic fields or vibrating surfaces.
- Nie przeciążaj wagi ponad jej maksymalny zakres 2000 g.
Video: An introductory video demonstrating the basic operation of a coffee scale, including tare, adding coffee, and pouring water for brewing.
5. Konserwacja
5.1 Czyszczenie
The scale's surface is flat and designed for easy cleaning. Wipe the scale with a soft, damp cloth. For stubborn stains, a mild detergent can be used. Ensure the scale is completely dry before storage or next use. Do not immerse the scale in water or use abrasive cleaners.
5.2 Pielęgnacja baterii
To prolong the life of the built-in lithium battery, avoid completely draining it frequently. Recharge the scale when the battery indicator is low. If storing the scale for an extended period, charge it to about 50% capacity and store in a cool, dry place.
6. Rozwiązywanie Problemów
- Waga się nie włącza: Upewnij się, że bateria jest naładowana. Podłącz kabel USB-C i spróbuj ponownie.
- Niedokładne odczyty: Place the scale on a flat, stable surface. Ensure no objects are touching the scale other than the item being weighed. Recalibrate if necessary (refer to manufacturer's website for specific calibration instructions if not in manual).
- Wyświetl błędy: Try turning the scale off and on again. If the error persists, contact customer support.
- Auto-off too quickly/slowly: Verify the timer function's status. The auto-off time varies depending on whether the timer is active or not.
7. Specyfikacje
| Funkcja | Specyfikacja |
|---|---|
| Marka | WIĘCEJ CZASU |
| Model | Basic 2.0 (TM056) |
| Kolor | Basic 2.0 (Black) |
| Zakres pomiaru | 0.5g do 2000g |
| Dokładność czytelności | 0.1g |
| Typ wyświetlacza | Cyfrowy, LCD |
| Bateria | Akumulator litowy o pojemności 1600 mAh |
| Auto-Off (Timer Off) | 3 minut |
| Auto-Off (Timer On) | 15 minut |
| Cechy | High-precision measurement, Timer function, Flow rate function, Automatic off function, Rechargeable |
| Współczynnik kształtu | Mały |

Image: Dimensions of the TIMEMORE Coffee Scale Basic 2.0.
8. Gwarancja i wsparcie
For warranty information, please refer to the product packaging or the official TIMEMORE website. If you encounter any issues or require technical assistance, please contact TIMEMORE customer support through their official channels or the retailer from whom you purchased the product.
Więcej informacji i wsparcia znajdziesz na stronie TIMEMORE Store on Amazon.