1. Wprowadzenie
Thank you for choosing the MOUNT PRO Single Monitor Mount. This premium aluminum heavy-duty monitor arm is designed to enhance your workspace ergonomics and free up valuable desk space. It supports ultrawide computer screens from 22 to 43 inches, with a weight capacity of 6.6 lbs to 33 lbs, and is compatible with VESA patterns of 75x75mm and 100x100mm. This manual provides detailed instructions for safe installation, operation, and maintenance of your monitor mount.
2. Informacje dotyczące bezpieczeństwa
Please read all instructions carefully before assembly and use. Failure to follow these instructions may result in property damage, serious injury, or death.
- Nośność: Do not exceed the maximum weight capacity of 33 lbs (15 kg). Ensure your monitor's weight is within this limit.
- Rozmiar monitora: Uchwyt ten nadaje się do monitorów o przekątnej od 22 do 43 cali.
- Zgodność z VESA: Ensure your monitor has VESA mounting holes (75x75mm or 100x100mm).
- Grubość biurka: dla clamp mounting, your desk must be between 0.4'' and 1.97'' thick. For grommet mounting, your desk must be between 0.4'' and 2.16'' thick.
- Materiał biurka: Do not install on tempered glass table tops or desks made of fragile materials. Ensure your desk is sturdy enough to support the combined weight of the mount and monitor.
- Montaż: Assemble the product according to the instructions. Do not modify the structure of the mount.
- Ruchome części: Podczas regulacji trzymaj dłonie i palce z dala od ruchomych części, aby zapobiec przytrzaśnięciu.
- Sprężyna gazowa: The gas spring is under high pressure. Do not disassemble or puncture it. Adjust tension carefully.
3. Zawartość opakowania
Please verify that all components are present and undamaged before proceeding with installation. If any parts are missing or damaged, please contact customer support.
- Zespół ramienia monitora
- Zdejmowana płyta VESA
- Biurko Clamp Opierać
- Podstawa mocująca przelotkę
- Sprzęt montażowy (różne śruby, podkładki, dystanse)
- Hex Keys / Allen Wrenches
- Klipsy do zarządzania kablami
- Instrukcja obsługi
4. Specyfikacje
| Funkcja | Specyfikacja |
|---|---|
| Typ montażu | Tabletop Mount (Clamp lub przelotka) |
| Typ ruchu | Rotate, Tilt, Swivel |
| Marka | MONTAŻ PRO |
| Tworzywo | Aluminium |
| Kolor | Czarny |
| Kompatybilne urządzenia | Monitor |
| Maksymalny kąt pochylenia | 45 stopni |
| Maximum Supported Screen Size | 43 cali |
| Minimum Supported Screen Size | 22 cali |
| Nośność | od 3 kg do 15 kg (od 6.6 funta do 33 funta) |
| Zgodność ze standardem VESA | 75x75mm, 100x100mm |
| Grubość biurka (Clamp) | 0.4'' - 1.97'' (10 mm - 50 mm) |
| Grubość biurka (przelotka) | 0.4'' - 2.16'' (10 mm - 55 mm) |
| Gwarancja | 2 lata |
5. Konfiguracja i instalacja
Follow these steps to correctly install your MOUNT PRO Single Monitor Mount.
5.1 Kontrole przed instalacją
Before beginning, ensure your monitor and desk meet the compatibility requirements.

Monitor VESA Compatibility: Verify your monitor has 75x75mm or 100x100mm VESA mounting holes. Remove any existing monitor stand or cover if necessary.

Kompatybilność z biurkiem: Ensure your desk thickness is within the specified range for either clamp or grommet installation. Avoid installing on tempered glass or fragile surfaces.
5.2 Wybierz opcję montażu
The MOUNT PRO Single Monitor Mount offers two installation methods: C-clamp or Grommet mounting.

Dwie opcje montażu: Select either the C-clamp for desk edges or the grommet mount for desks with existing holes. Ensure your desk meets the thickness requirements for your chosen method.
C-Clamp Instalacja:
- Dołącz C-klamp podstawę do krawędzi biurka.
- Dokręć clamp securely using the provided knob until the mount is stable.
Instalacja przelotki:
- Jeżeli biurko ma otwór na przelotkę, przełóż podstawę z przelotką przez otwór.
- Zabezpiecz podstawę od spodu biurka za pomocą dołączonej płytki i nakrętki.
5.3 Podłączanie monitora
The quick-release VESA plate simplifies monitor attachment.

Detachable VESA Plate: Attach the VESA plate to the back of your monitor using the appropriate screws. Then, slide the monitor (with the attached VESA plate) onto the arm head until it locks securely.
5.4 Przewodnik wideo po instalacji
For a visual guide on the installation process, please watch the official MOUNT PRO video:
Official MOUNT PRO Installation Guide: This video demonstrates the assembly and installation of the MOUNT PRO Premium Heavy Duty Single Monitor Desk Mount, including attaching the monitor and securing the base.
6. Obsługa i regulacje
The MOUNT PRO monitor arm offers full motion capabilities for optimal viewkomfort.
6.1 Regulacja napięcia sprężyny gazowej
Adjust the gas spring tension to match your monitor's weight for smooth height adjustments.

Regulacja sprężyny gazowej: Use the provided hex key to turn clockwise ('-') to reduce tension for lighter monitors (monitor raises up) or counter-clockwise ('+') to increase tension for heavier monitors (monitor drops down). Hold the arm horizontally during adjustment.
6.2 Regulacja wysokości
Dynamically adjust the monitor height to your eye level for improved posture.

Dynamic Height Adjustment: Once the gas spring tension is correctly set, you can effortlessly move your monitor up or down to achieve your desired ergonomic height.
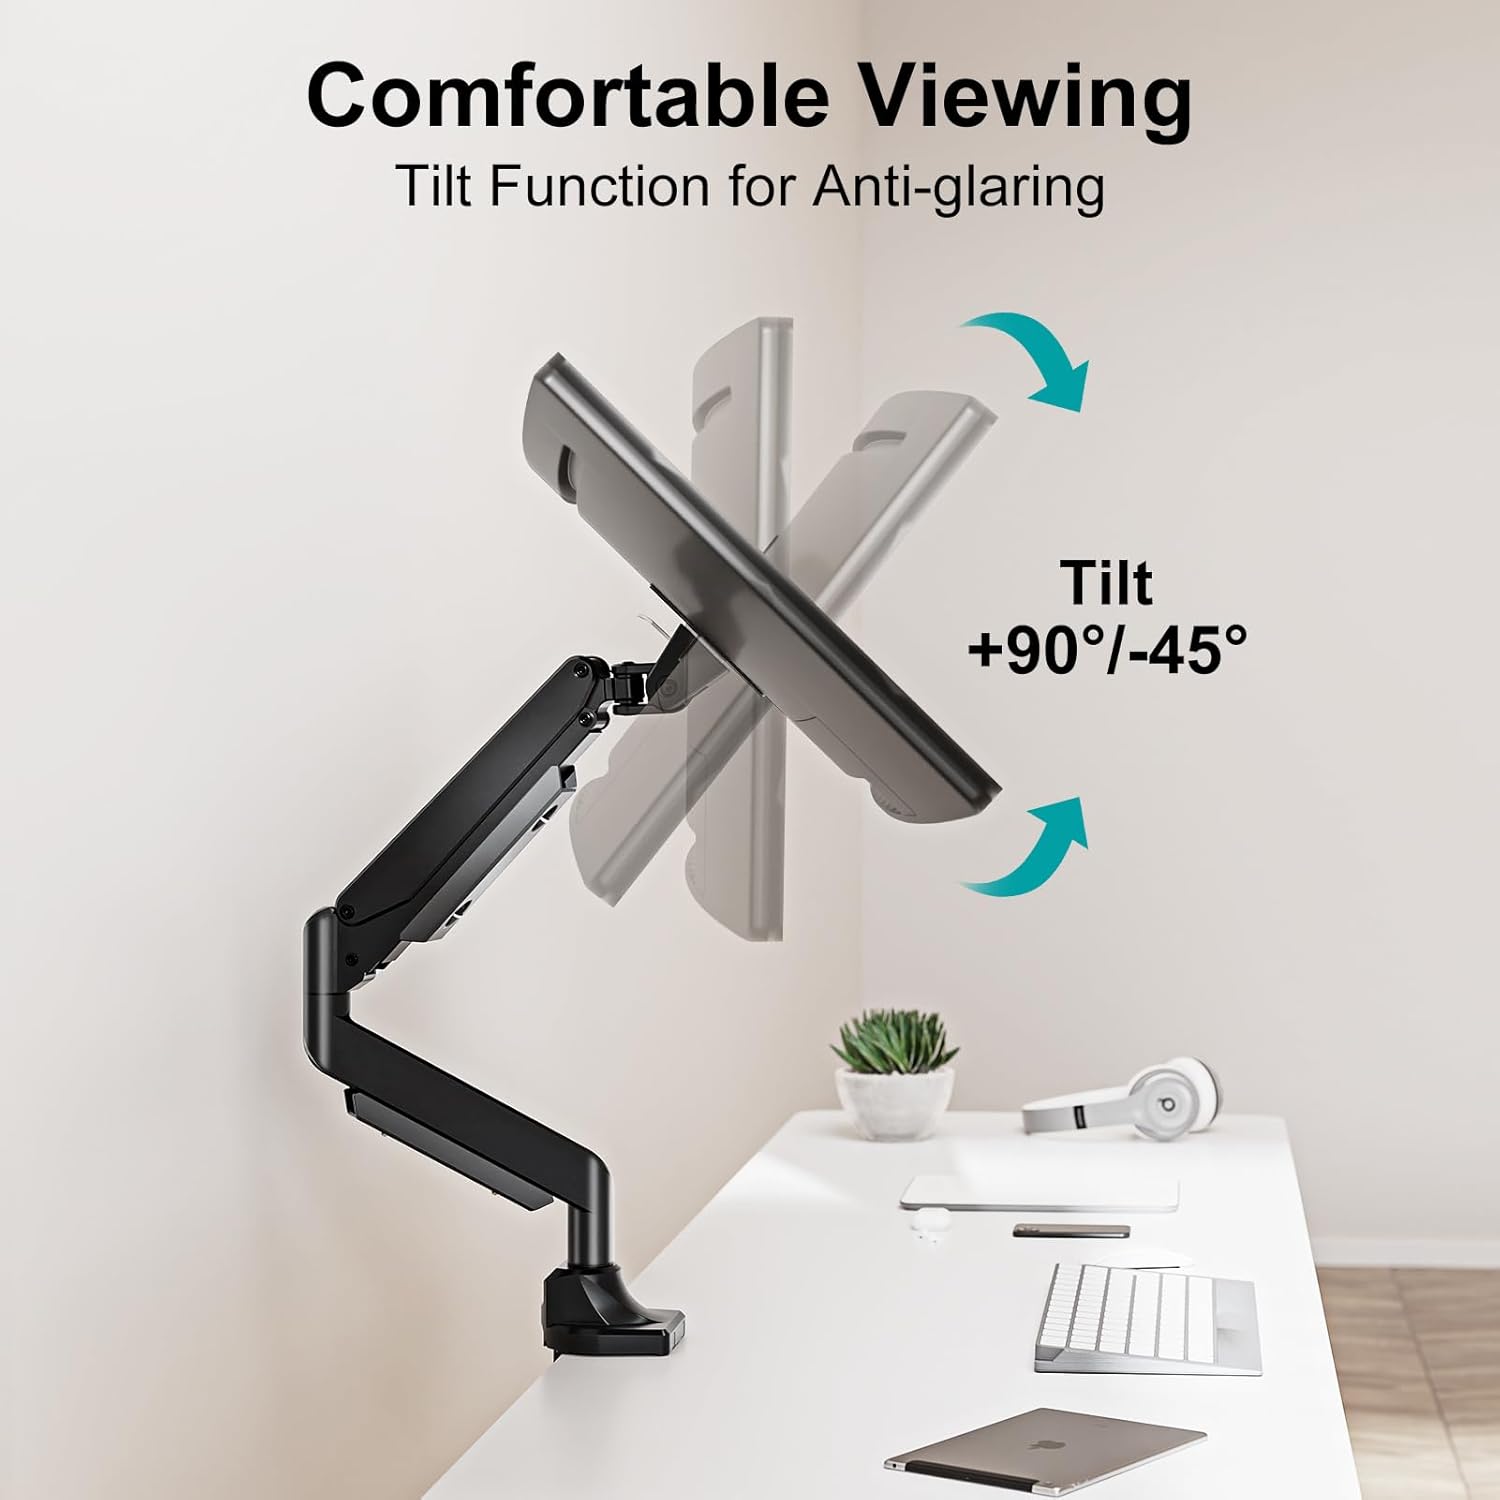
6.3 Regulacja nachylenia
Adjust the tilt angle to minimize glare and find your comfortable viewkąt.
Funkcja pochylenia: The monitor can be tilted from +90° to -45°. Loosen the tilting bolt (turn to '-' direction), adjust to your desired angle, and then retighten the bolt (turn to '+' direction).
6.4 Regulacja obrotu
Swivel your monitor to share your screen or view z różnych pozycji.

Obracać: The monitor arm allows for a ±90° swivel, providing flexibility to adjust your screen's horizontal position.
6.5 Regulacja obrotu
Obróć monitor o 360°, aby przełączać się między orientacją poziomą i pionową.
Obrót o 360°: Freely rotate your monitor 360 degrees to switch between horizontal (landscape) and vertical (portrait) screen orientations as needed for your tasks.
6.6 Zarządzanie kablami
Wykorzystaj zintegrowany system zarządzania kablami, aby utrzymać porządek w miejscu pracy.
- Route your monitor cables through the designated clips or channels on the arm.
- This helps to organize wires and maintain a clean, clutter-free desk.
7. Konserwacja
Regularna konserwacja zapewnia długowieczność i bezpieczne działanie uchwytu monitora.
- Czyszczenie: Przetrzyj uchwyt miękką ściereczką.amp szmatką. Unikaj środków czyszczących o działaniu ściernym i rozpuszczalników, które mogą uszkodzić wykończenie.
- Kontrole okresowe: Okresowo sprawdzaj wszystkie śruby i połączenia, aby upewnić się, że są dobrze dokręcone i zabezpieczone. W razie potrzeby dokręć je ponownie.
- Sprężyna gazowa: Do not attempt to service the gas spring mechanism yourself. If you experience issues, contact customer support.
8. Rozwiązywanie Problemów
Jeśli napotkasz jakiekolwiek problemy, zapoznaj się z poniższymi typowymi problemami i rozwiązaniami:
8.1 Monitor Sinks or Rises Too Easily
- Wydanie: The monitor does not stay in the desired height or moves too freely.
- Rozwiązanie: Adjust the gas spring tension. If the monitor sinks, increase tension (turn '+' direction). If it rises too easily, decrease tension (turn '-' direction). Refer to Section 6.1.
8.2 Monitor Tilts Forward or Backward
- Wydanie: The monitor's tilt angle cannot be maintained.
- Rozwiązanie: Tighten the tilting bolt on the VESA plate connection. Refer to Section 6.3.
8.3 Mount Feels Unstable or Wobbly
- Wydanie: The entire monitor arm or monitor feels unstable.
- Rozwiązanie: Upewnij się, że biurko jestamp or grommet base is securely tightened to the desk. Check all connection points on the arm and VESA plate for tightness. Verify your desk is stable and not damaged.
8.4 Cables are Disorganized
- Wydanie: Cables are hanging loosely or creating clutter.
- Rozwiązanie: Utilize the integrated cable management clips and channels on the monitor arm to route and secure your cables. Refer to Section 6.6.
9. Gwarancja i wsparcie
9.1 Informacje o gwarancji
This MOUNT PRO Single Monitor Mount comes with a 2-letnia gwarancja from the date of purchase. This warranty covers manufacturing defects and material flaws under normal use. It does not cover damage caused by improper installation, misuse, accidents, or unauthorized modifications.
For returns or replacements, please refer to the retailer's return policy, which typically allows for refunds or replacements within 30 days of purchase.
9.2 Obsługa klienta
If you have any questions, require assistance with installation, or need to report a defect, please contact MOUNT PRO customer support through the retailer's platform or the official MOUNT PRO webStrona. Kontaktując się z pomocą techniczną, przygotuj model produktu i informacje o zakupie.