
1. Wprowadzenie
This manual provides detailed instructions for the installation, operation, and maintenance of your Turing TP-MMD4MV2 Smart Series TwilightVision 4MP IR Zoom Dome IP Camera. This advanced surveillance camera features a 2.7-13.5mm motorized varifocal lens, Smart IR illumination up to 40m (131ft), and TwilightVision technology for optimal image clarity in low-light conditions. It supports up to a 256GB MicroSD card for edge storage and is designed for outdoor use with IP67 weather resistance and IK10 vandal resistance. Please read this manual thoroughly before using the product to ensure proper setup and functionality.
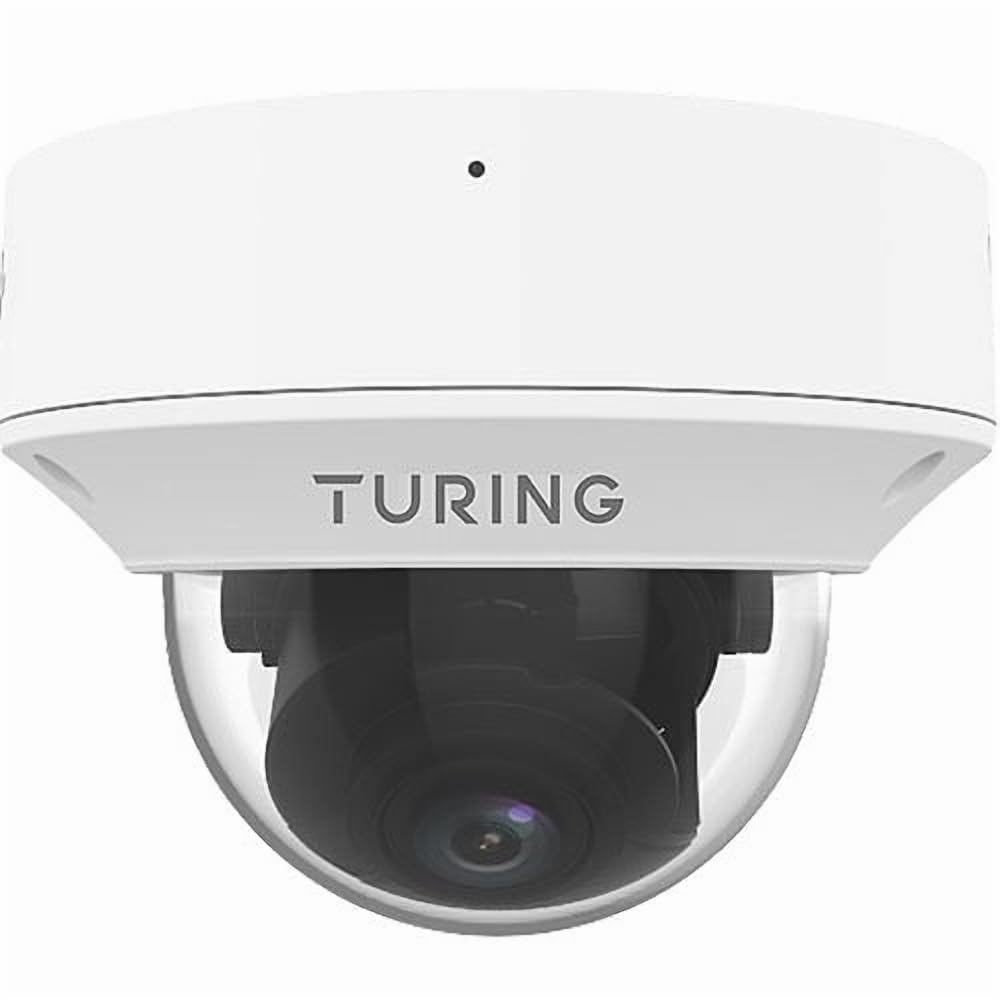
Figure 1: Turing TP-MMD4MV2 Smart Series TwilightVision 4MP IR Zoom Dome IP Camera. This image shows the white dome camera with its protective casing.
2. Informacje dotyczące bezpieczeństwa
Aby zapobiec obrażeniom ciała lub uszkodzeniu produktu, należy przestrzegać następujących środków ostrożności:
- Bezpieczeństwo elektryczne: Ensure power supply meets the camera's requirements (DC 12V+/-25% or PoE IEEE 802.3af). Do not overload power outlets.
- Instalacja: Installation should be performed by qualified personnel. Mount the camera securely to prevent it from falling.
- Środowisko: Nie wystawiaj aparatu na działanie ekstremalnych temperatur, wilgoci ani czynników korozyjnych poza określonymi warunkami pracy.
- Czyszczenie: Use a soft, dry cloth for cleaning. Do not use strong detergents or abrasive materials.
- Demontaż: Nie próbuj demontować ani modyfikować aparatu. Spowoduje to unieważnienie gwarancji i może spowodować uszkodzenia.
3. Zawartość opakowania
Sprawdź, czy w przesyłce znajdują się wszystkie elementy:
- Turing TP-MMD4MV2 IP Dome Camera
- Zestaw śrub montażowych (śruby, kotwy ścienne)
- Wodoodporne złącze do kabla Ethernet
- Szablon wiertła
- Szybki przewodnik / Podręcznik użytkownika (ten dokument)
Note: A MicroSD card and DC 12V power adapter are not included and must be purchased separately if not using Power over Ethernet (PoE).
4. Koniec produktuview
The TP-MMD4MV2 camera is designed for robust outdoor surveillance, offering high-resolution imaging and intelligent features.
4.1 Główne cechy
- Rozdzielczość 4 megapikseli: Captures video at 2688x1520 pixels at 30/25fps.
- Obiektyw progresywny z napędem silnikowym: 2.7-13.5mm lens with auto-focus for flexible viewkąty.
- TwilightVision Technology: Enhances image clarity in extremely low-light conditions (down to 0.002 Lux).
- Inteligentna podczerwień: Infrared illumination up to 40 meters (131 feet) for clear night vision.
- People and Vehicle Search: Advanced analytics when used with Turing SMART series NVRs and Turing Vision Cloud.
- Wbudowany mikrofon: Do monitorowania dźwięku.
- Pamięć brzegowa: Supports up to 256GB MicroSD card (not included).
- Trwała konstrukcja: IP67 weather-rated and IK10 vandal-resistant.
- Opcje zasilania: Supports Power over Ethernet (PoE) and DC 12V.
4.2 Komponenty kamery
The camera consists of the main dome unit, a mounting base, and various ports. While a specific diagram is not provided, typical components include:
- Pokrywa kopuły: Protective, vandal-resistant casing.
- Moduł kamery: Contains the lens, image sensor, and IR LEDs.
- Port Ethernet (RJ45): For network connection and PoE.
- Wejście zasilania prądem stałym: Do opcjonalnego zasilania prądem stałym 12 V.
- Przycisk resetowania: Aby przywrócić ustawienia fabryczne.
- Gniazdo kart microSD: Located internally, accessible by removing the dome cover.
Figure 2: Illustrative diagram of camera components (image not available). This diagram would typically show the external parts of the dome camera, including the lens, IR LEDs, and the location of the cable connections and reset button.
5. Konfiguracja i instalacja
Aby poprawnie zainstalować kamerę, wykonaj poniższe czynności.
5.1 Montaż kamery
- Wybierz lokalizację: Wybierz odpowiednie miejsce na zewnątrz do montażu na ścianie, zapewniając czyste pole widzenia. view and within range of your network cable. The camera is IP67 and IK10 rated for outdoor use.
- Przygotuj powierzchnię: Use the provided drill template to mark the screw holes on the mounting surface. Drill pilot holes as indicated.
- Zabezpiecz bazę: Attach the camera's mounting base to the surface using the supplied screws and wall anchors.
- Zarządzanie kablami: Route the Ethernet cable through the mounting base or side cable entry point. Use the waterproof connector for outdoor installations to protect the RJ45 connection.
Figure 3: Illustrative diagram of camera mounting (image not available). This diagram would show the steps for securing the camera base to a wall or ceiling, including drilling and cable routing.
5.2 Włączanie kamery
Kamerę można zasilać na dwa sposoby:
- Zasilanie przez Ethernet (PoE): Connect an Ethernet cable from a PoE-enabled switch or NVR to the camera's RJ45 port. This provides both power and data.
- Zasilacz prądu stałego 12 V: If PoE is not available, connect a 12V DC power adapter (not included) to the camera's DC power input. Then, connect an Ethernet cable for data transmission.
5.3 Połączenie sieciowe
Connect the camera to your network via an Ethernet cable. The camera supports Ethernet connectivity. While 'Wireless Communication Technology: Wi-Fi' is listed in some specifications, the primary and most robust connection method for this model is wired Ethernet, especially for PoE. For initial setup, a wired connection is recommended.
5.4 Instalacja karty MicroSD
To install a MicroSD card for local storage (up to 256GB):
- Wyłączone: Disconnect power from the camera before proceeding.
- Zdejmij osłonę kopułki: Carefully twist and remove the outer dome cover to access the internal components.
- Włóż kartę MicroSD: Locate the MicroSD card slot and gently insert the card until it clicks into place.
- Replace Dome Cover: Reattach the dome cover, ensuring it is securely sealed to maintain weather resistance.
Figure 4: Illustrative diagram of MicroSD card slot location (image not available). This diagram would show the internal view of the camera with the dome cover removed, highlighting the MicroSD card slot.
6. Obsługa aparatu
Once installed and powered, the camera can be accessed and configured.
6.1 Początkowy dostęp i konfiguracja
The camera is designed to integrate with Turing SMART NVRs (TR-MR(P) models) and the Turing Vision Cloud for full functionality, including People and Vehicle Search. Refer to your NVR's manual or Turing Vision Cloud documentation for specific integration steps.
- Odkrywanie sieci: Use Turing's network discovery tool to find the camera's IP address on your network.
- Web Interfejs: Uzyskaj dostęp do kamery web interfejs przez a web browser using its IP address. Log in with default credentials (refer to the Quick Start Guide for defaults).
- Zmień hasło: Ze względów bezpieczeństwa należy natychmiast zmienić domyślne hasło po pierwszym zalogowaniu.
- Ustawienia sieciowe: Configure IP address, subnet mask, and gateway if necessary.
6.2 Adjusting the Motorized Lens
The 2.7-13.5mm motorized varifocal lens allows you to remotely adjust the zoom and focus:
- Uzyskaj dostęp do obrazu na żywo z kamery view through the NVR interface or web przeglądarka.
- Locate the zoom and focus controls.
- Adjust the zoom to achieve the desired field of view. The camera will automatically adjust focus (AF).
6.3 Smart IR and TwilightVision
The camera automatically switches between day and night modes. Smart IR adjusts the intensity of the infrared LEDs to prevent overexposure of close-up objects, ensuring balanced illumination up to 40m (131ft). TwilightVision technology provides enhanced color images in extremely low-light conditions before switching to IR mode.
6.4 Rejestrowanie i przechowywanie
- Nagrywanie NVR: Configure recording schedules and motion detection settings on your Turing SMART NVR.
- Nagrywanie na karcie MicroSD: If a MicroSD card is installed, configure event-triggered or continuous recording via the camera's web interfejs.
- Kodowanie wideo: The camera supports Ultra 265, H.265, H.264, and MJPEG video encoding formats.
6.5 Monitorowanie dźwięku
The built-in microphone captures audio. Ensure audio recording is enabled in the camera's settings if desired. Audio compression uses G.711.
7. Konserwacja
Regularna konserwacja zapewnia optymalną wydajność i długowieczność aparatu.
- Czyszczenie: Periodically clean the dome cover with a soft, damp Ściereczką usuń kurz, brud lub plamy wody, które mogą wpłynąć na jakość obrazu. Nie używaj silnych środków chemicznych.
- Aktualizacje oprogramowania układowego: Sprawdź Turinga website for the latest firmware updates. Regularly updating firmware can improve performance, add features, and enhance security. Follow the provided instructions carefully during updates.
- Kontrola kabla: Periodically inspect all cables and connections for wear, damage, or corrosion, especially for outdoor installations.
- Kontrole środowiskowe: Ensure the camera's environment remains within its operating temperature and humidity ranges.
8. Rozwiązywanie Problemów
Aby zapoznać się z typowymi problemami i ich rozwiązaniami, zapoznaj się z poniższą tabelą.
| Problem | Możliwa przyczyna | Rozwiązanie |
|---|---|---|
| Brak zasilania kamery | Incorrect power supply; PoE not active; loose connection | Verify 12V DC power or PoE source. Check all cable connections. |
| Brak źródła wideo | Network issue; incorrect IP address; camera not configured | Check network cable. Ensure camera is powered. Verify IP address and network settings. Restart camera. |
| Niska jakość obrazu | Dirty lens/dome; improper focus; low light conditions | Clean the dome cover. Adjust focus via the motorized lens controls. Ensure sufficient lighting or proper IR operation. |
| Nie można uzyskać dostępu do kamery przez sieć | IP address conflict; firewall blocking; incorrect network settings | Use network discovery tool. Check network configuration. Temporarily disable firewall for testing. Reset camera to factory defaults if necessary. |
| Karta MicroSD nie nagrywa | Card full; card not formatted; recording schedule not set | Check card status in settings. Format card if needed. Configure recording schedule. Ensure card is properly inserted. |
9. Specyfikacje
Detailed technical specifications for the Turing TP-MMD4MV2 camera:
| Funkcja | Specyfikacja |
|---|---|
| Numer modelu | TP-MMD4MV2 |
| Czujnik obrazu | 1/3-inch, 4.0 megapixel, progressive scan, CMOS |
| Maksymalna rozdzielczość | 4MP (2688x1520) at 30/25fps |
| Obiektyw | 2.7-13.5mm motorized varifocal, AF automatic focusing |
| Kąt View | H: 98.26 - 31.35 degrees; V: 54.76 - 18.55 degrees; D: 127.74 - 36.99 degrees |
| Minimalne oświetlenie | Kolor: 0.002 luksa (F1.2, włączona AGC); 0 luksów z włączoną podczerwienią |
| Zasięg IR | Inteligentny IR do 40 m (131 stóp) |
| Kompresja wideo | Ultra 265, H.265, H.264, MJPEG |
| Kompresja dźwięku | G.711 |
| Cyfrowa redukcja szumów | 2D and 3D DNR |
| Magazyn Edge | Karta microSD do 256 GB (brak w zestawie) |
| Zasilacz | DC 12V+/-25%, PoE (IEEE 802.3af) |
| Pobór mocy | Maksymalnie 7.0 W |
| Ochrona przed wnikaniem | IP67 |
| Odporność na wandalizm | IK10 |
| Wymiary (gł. x wys.) | 5.88 x 4.4 cale (149.35 x 111.76 mm) |
| Waga | 2.03 funta (0.92 kg) |
| Temperatura pracy | Refer to manufacturer's official specifications for exact range |
| Protokół łączności | Sieć Ethernetowa |
| Supported NVR | Turing SMART NVR: modele TR-MR(P). |
10. Informacje o gwarancji
Turing products are covered by a limited warranty. For specific warranty terms, conditions, and duration, please refer to the official Turing weblub kartę gwarancyjną dołączoną do produktu. Zachowaj dowód zakupu na wypadek roszczeń gwarancyjnych.
11. Obsługa klienta
If you encounter any issues or have questions not covered in this manual, please contact Turing customer support:
- Webstrona: Visit the official Turing webwitryna z odpowiedziami na często zadawane pytania, zasobami pomocy i informacjami kontaktowymi.
- Wsparcie techniczne: Contact details for technical assistance can typically be found on the manufacturer's webmiejscu lub w opakowaniu produktu.
12. Filmy produktowe
W danych produktu nie umieszczono żadnych oficjalnych filmów producenta, które mogłyby zostać umieszczone w niniejszej instrukcji.


