Refoss P11
Refoss Tasmota Smart Plug (Model P11)
Instrukcja obsługi użytkownika
1. Koniec produktuview
The Refoss Tasmota Smart Plug (Model P11) is a compact Wi-Fi enabled smart socket designed for advanced energy monitoring and home automation. It comes with Tasmota firmware pre-installed, offering direct integration with a wide range of smart home systems without the need for a proprietary hub or cloud service. This plug allows users to measure power consumption, voltage, current, and power in real-time, making it ideal for optimizing energy usage and managing connected devices.

Figure 1.1: Refoss Tasmota Smart Plug with its Tasmota web interface displayed on a smartphone.
Główne cechy:
- Pre-installed Tasmota Firmware: Ready to use out of the box with Tasmota, offering extensive customization and control.
- Monitorowanie energii: Real-time tracking of power consumption, voltage, current, and power for connected appliances.
- No Cloud Required: Operates locally, enhancing data privacy and system reliability.
- Szeroka kompatybilność: Integrates seamlessly with popular smart home platforms such as Home Assistant, ioBroker, MQTT, Alexa, Google Assistant, Philips Hue, Z-Wave, Domoticz, Homematic IP, and SmartThings.
- Zabezpieczenie przed przegrzaniem: Automatically shuts down to prevent damage from excessive temperatures.
- Wysoka moc znamionowa: Obsługuje do 16 Amperes and 3840 Watts, suitable for various household appliances.
- Kompaktowa konstrukcja: Mini form factor ensures it does not obstruct adjacent outlets.
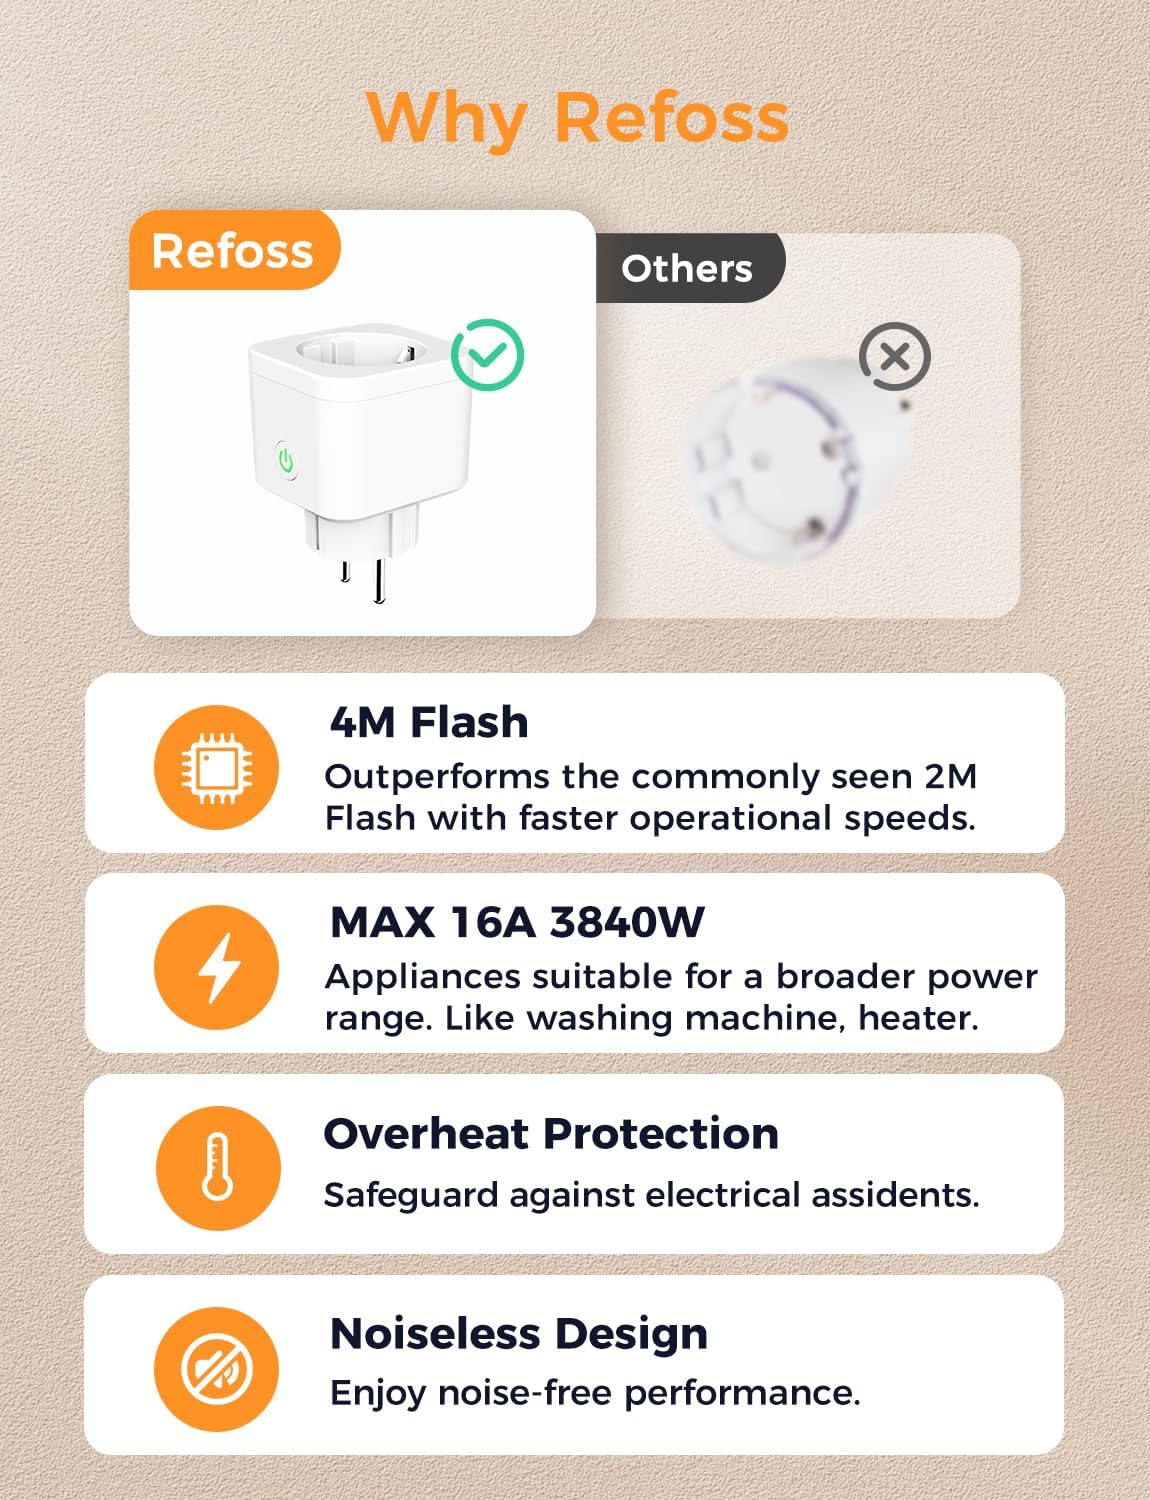
Rysunek 1.2: Kluczowe zaletytages of the Refoss Tasmota Smart Plug, including 4M Flash memory, 16A/3840W capacity, overheat protection, and noiseless operation.

Figure 1.3: The internal ESP8266 chip enables broad compatibility with smart home ecosystems like Home Assistant, MQTT, Alexa, and more.
2. Konfiguracja i konfiguracja początkowa
The Refoss Tasmota Smart Plug is designed for easy setup. Follow these steps to connect it to your Wi-Fi network and access its web interfejs.
2.1. Łączenie z Wi-Fi:
- Podłącz urządzenie: Insert the Refoss Tasmota Smart Plug into a power outlet.
- Szukaj Punkt dostępowy AP: On your smartphone or computer, search for Wi-Fi networks. You should find a network named "tasmota-XXXXXX-XXXX". Connect to this network.
- Dostęp Web Interfejs: After connecting, your device should automatically redirect to the Tasmota configuration page (usually 192.168.4.1). If not, open a web browser and manually navigate to http://192.168.4.1.
- Wprowadź informacje o sieci Wi-Fi: On the Tasmota web interface, select your home Wi-Fi network from the list and enter its password. Click 'Save'.
- Uzyskaj adres IP urządzenia: The device will restart and connect to your home Wi-Fi. The web interface will then display the new IP address of the device on your network. Make a note of this IP address.
- Control and Configure: You can now access the device's web interface using its new IP address to control and configure it.

Figure 2.1: Step-by-step guide for initial Wi-Fi setup and accessing the Tasmota web interfejs.
2.2. Aktualizacja oprogramowania sprzętowego:
It is recommended to keep your Tasmota firmware updated for optimal performance and security. Ensure you select the correct firmware type (4M) to avoid device malfunction.
- Tasmota Official Firmware: You can find official Tasmota firmware versions at http://ota.tasmota.com/tasmota/release/. When updating, select the firmware file with "4M" in its name (e.g., `tasmota-4M.bin.gz`). Updating with a 2M firmware will cause the device to crash.
- Refoss Official Firmware: Refoss also provides validated firmware versions in multiple languages on their support page: https://support.refoss.net/Support/Resource_Library.

Figure 2.2: Information on where to find and how to select the correct firmware for updates.
3. Obsługa inteligentnej wtyczki
Once configured, the Refoss Tasmota Smart Plug offers various functionalities through its web interface or integrated smart home platforms.
3.1. Basic Control:
From the main Tasmota web interface, you can toggle the plug ON/OFF, view current status, and access configuration settings.

Rysunek 3.1: Koniecview of the Tasmota web interface, including the main control panel and various configuration menus.
3.2. Monitorowanie energii:
The plug provides real-time data on energy consumption, voltage, current, and power. This data is accessible directly from the Tasmota web interfejs.

Figure 3.2: Real-time power monitoring displayed on the Tasmota interface.

Figure 3.3: The smart plug can track energy consumption for various appliances, such as a vacuum cleaner, providing detailed usage statistics.
3.3. Automation and Timers:
You can set up schedules and timers for automated control of your devices. This can be done via the Tasmota web interface or through integrated smart home platforms.

Figure 3.4: Tasmota's timer configuration interface allows for precise scheduling of device operation.

Rysunek 3.5: Example of using timers for daily routines, such as turning on lights in the morning and off at night.
4. Konserwacja
The Refoss Tasmota Smart Plug requires minimal maintenance. Regular firmware updates are recommended to ensure optimal performance and security.
4.1. Czyszczenie:
Przetrzyj urządzenie suchą, miękką ściereczką. Nie używaj płynnych środków czyszczących ani materiałów ściernych.
4.2. Temperature Calibration:
If the temperature reading appears unusually high, you can calibrate the temperature sensor using the Tasmota console command: ADCParam1 2, 4000,80000,4250,1.

Figure 4.1: The Tasmota configuration template, highlighting the GPIO settings and the temperature calibration command.
5. Rozwiązywanie Problemów
This section addresses common issues you might encounter with your Refoss Tasmota Smart Plug.
5.1. Device Not Connecting to Wi-Fi:
- Ensure you are connecting to the correct "tasmota-XXXXXX-XXXX" hotspot during initial setup.
- Verify that your Wi-Fi password is entered correctly.
- Make sure the plug is within range of your Wi-Fi router.
- Try resetting the device to factory settings (see 5.2).
5.2. Resetowanie urządzenia:
To reset the device to its factory settings, press and hold the power button on the plug for approximately 45 seconds. The device will restart, and you can then proceed with the initial Wi-Fi setup as described in Section 2.1.

Figure 5.1: Tasmota interface options for managing configurations, including resetting the device.
5.3. Overheat Protection Triggering Frequently:
- Ensure the connected appliance does not exceed the plug's maximum rating of 16A/3840W.
- Check for proper ventilation around the plug and appliance.
- Consider calibrating the temperature sensor as described in Section 4.2 if the temperature readings are consistently abnormal.

Figure 5.2: The smart plug's overheat protection feature, which automatically shuts down the device if it reaches a dangerously high temperature.
5.4. General Issues and Further Support:
Refoss has compiled information on common issues based on customer feedback, including failed firmware updates, temperature fluctuations, and automatic shutdowns. For detailed troubleshooting and support, scan the QR code below or visit the Refoss support page.

Figure 5.3: Scan this QR code for a PDF document detailing common issues and solutions, or visit Wsparcie Refoss.
6. Specyfikacje
| Atrybut | Wartość |
|---|---|
| Numer modelu | P11 |
| Marka | Refos |
| Wymiary produktu | Wymiary 5 x 5.7 x 6.3 cm |
| Waga | 105 gram |
| Tryb pracy | WŁ-WYŁ |
| Obecna ocena | 16 Amptutaj |
| Objętość operacyjnatage | 240 wolty |
| Typ złącza | Plug In (Type F) |
| Typ obwodu | 1-drożny |
| Tworzywo | Plastikowy |
7. Gwarancja i wsparcie
For warranty information and technical support, please refer to the official Refoss website or contact their customer service directly. The product includes a user manual in the box for additional guidance.
- Refoss Brand Store: Visit the official Refoss store on Amazon for product information and support resources: Refoss Store.
- Zasoby internetowe: Additional support and firmware updates can be found at support.refoss.net.