1. Wprowadzenie
This manual provides essential information for the safe and effective use of your Genmitsu 4th Axis Rotary Module. This module is designed as an upgrade for Genmitsu 4040-PRO, 4040 Reno, and 3030-PROVer MAX CNC machines, enabling advanced carving capabilities. Please read these instructions thoroughly before installation and operation.

Rysunek 1: Koniecview of the Genmitsu 4th Axis Rotary Module.
2. Główne cechy
- Enhanced Carving Capabilities: Enables carving from multiple angles and positions, supporting full rotary carving with appropriate software. This expands the range of complex parts with curved or angled features that can be produced.
- NEMA17 Planetary Geared Stepper Motor: Features a high-torque NEMA17 motor, providing increased force and precision for rotating workpieces compared to belt-driven rotary modules.
- Wszechstronne wymiary:
- Center Height: 50mm
- Wysokość całkowita: 86mm
- Material Lengths: 10-100mm (with tailstock), 10-200mm (without tailstock)
- Applicable Material Diameter: 2-50mm

Figure 2: Key dimensions of the rotary module.
- Precyzyjna kontrola: Achieves precise control with a 10:1 reduction ratio, offering a minimum angle of 0.1° and a maximum angular speed of 300° per second for high speed and accuracy.
- Uchwyt 4-szczękowy: Securely holds various material shapes and sizes.

Rysunek 3: Clamped material diameter range (2-50mm).
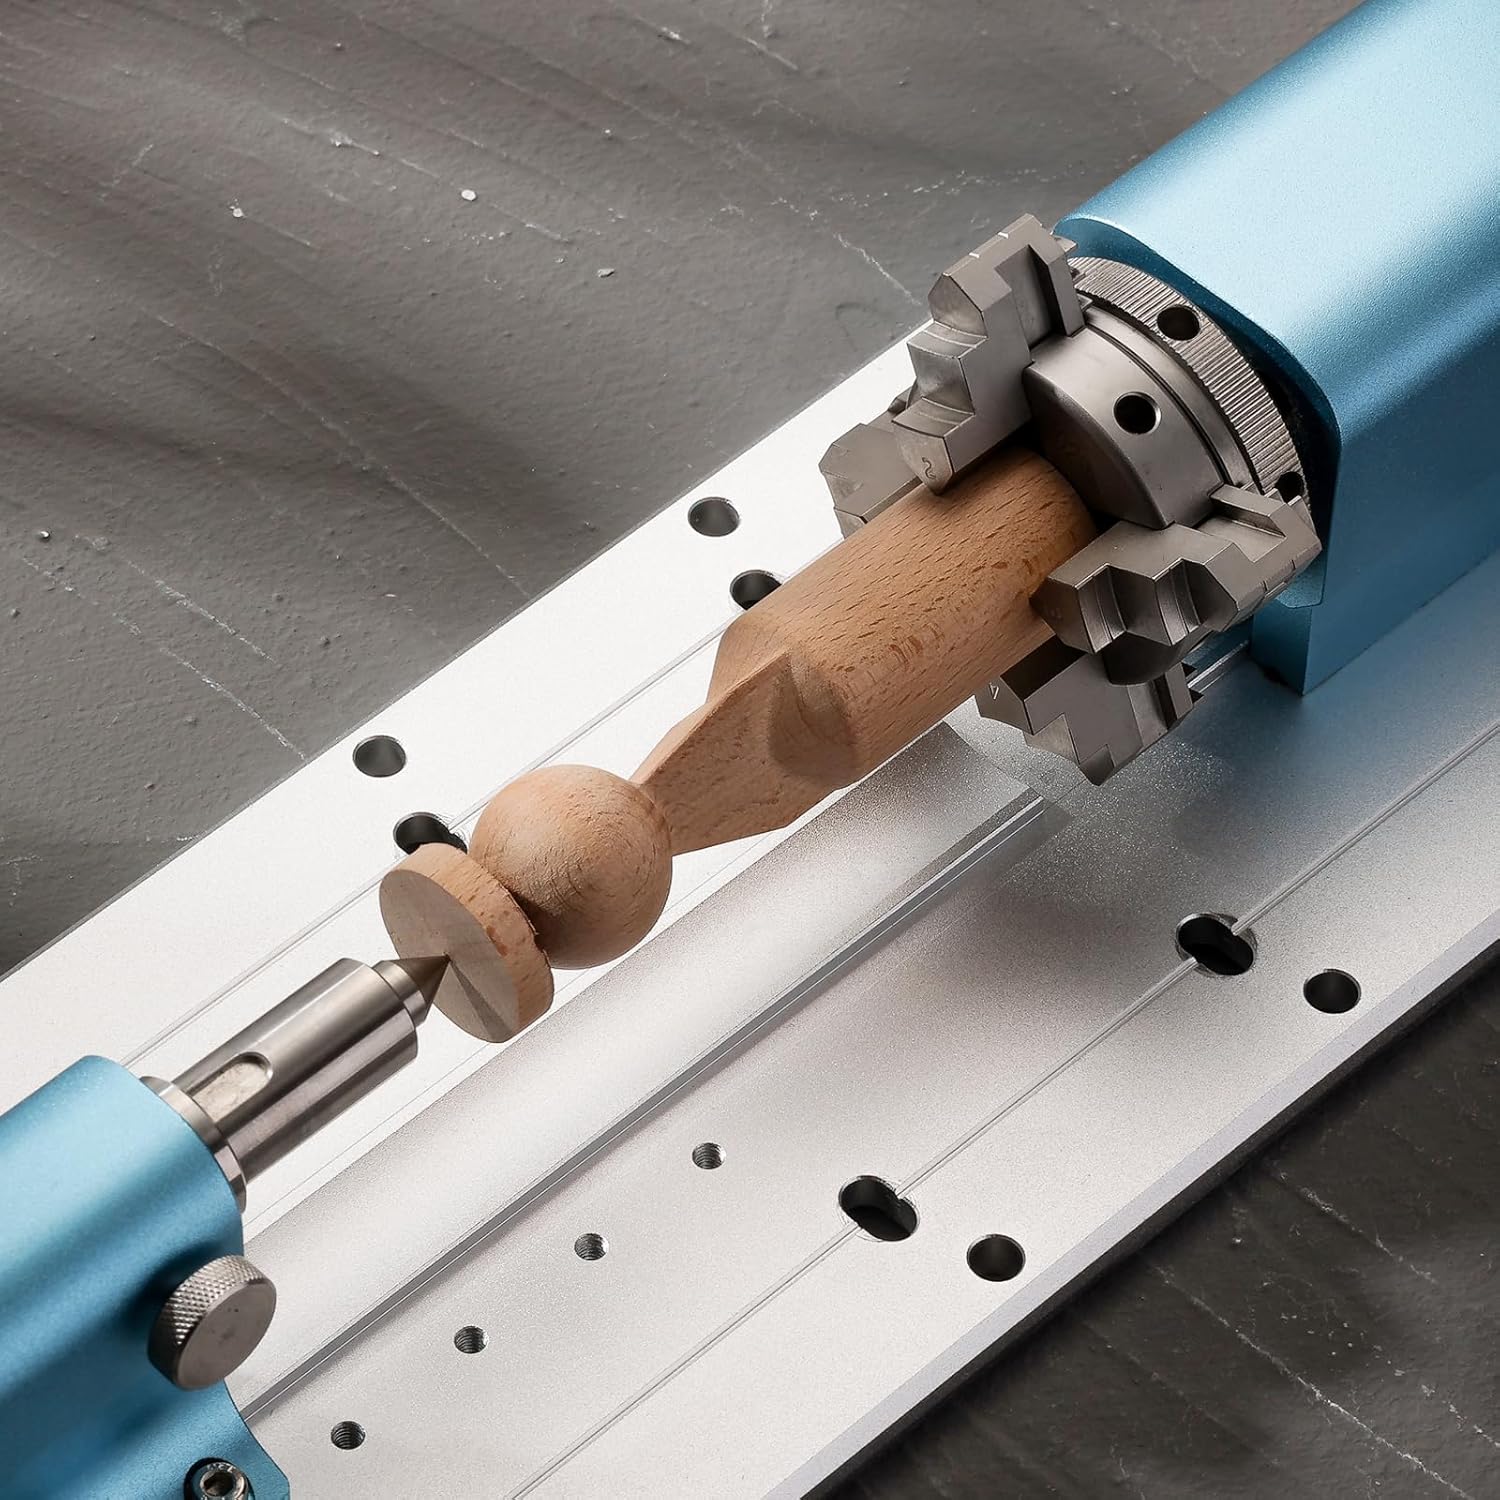
Figure 4: Chuck jaw configurations for forward (2-22mm) and reverse (18-50mm) mounting.
3. Konfiguracja i instalacja
The Genmitsu 4th Axis Rotary Module comes pre-assembled for ease of installation. Follow these steps to integrate it with your compatible CNC machine:
- Rozpakowywanie: Carefully remove all components from the packaging. Verify that all parts listed in the kit contents are present.

Figure 5: Kit contents including the rotary module, tailstock, and mounting hardware.
- Montowanie: Position the rotary module on the baseplate of your Genmitsu 4040-PRO, 4040 Reno, or 3030-PROVer MAX CNC machine. Align the module with the pre-cut holes on the baseplate and secure it using the provided screws. Ensure the module is parallel to the CNC's X-axis for accurate operation.
- Złączony: Connect the stepper motor cable from the rotary module to the designated 4th axis port on your CNC machine's controller.
- Offline Controller Requirement: For the 4040-PRO and 4040 Reno models, an offline controller (ASIN: B0C582HQ6Z) is required to send G-code for 4th axis operations. The 3030-PROVer Max typically includes an integrated offline controller. Ensure you have the necessary controller for proper functionality.
- Konfiguracja oprogramowania: You will need CAD/CAM software capable of generating toolpaths for rotary motion. Recommended options include Fusion 360 and Vectric. Configure your software to recognize and utilize the 4th axis.

Figure 6: The 4th Axis Rotary Module installed on a compatible CNC machine.
4. Działanie
Operating the 4th Axis Rotary Module involves preparing your workpiece, generating appropriate G-code, and executing the carving process.
- Mocowanie przedmiotu obrabianego:
- Open the 4-jaw chuck by rotating the adjustment ring.
- Insert your material (diameter 2-50mm) into the chuck. Ensure it is centered and securely clampwyd.
- If using the tailstock for longer materials (up to 100mm), adjust its position to support the free end of the workpiece. The tailstock can be adjusted along the baseplate in 20mm increments, with a fine adjustment range of 0-30mm.

Figure 7: Tailstock adjustment for supporting longer workpieces.
- G-code Generation: Use your chosen CAD/CAM software (e.g., Fusion 360, Vectric) to design your rotary carving project and generate the corresponding G-code. This G-code will include commands for the 4th axis rotation.
- Wykonanie:
- Load the generated G-code onto your offline controller.
- Ensure the CNC machine and rotary module are powered on and properly connected.
- Initiate the carving process from the offline controller. Monitor the operation closely.
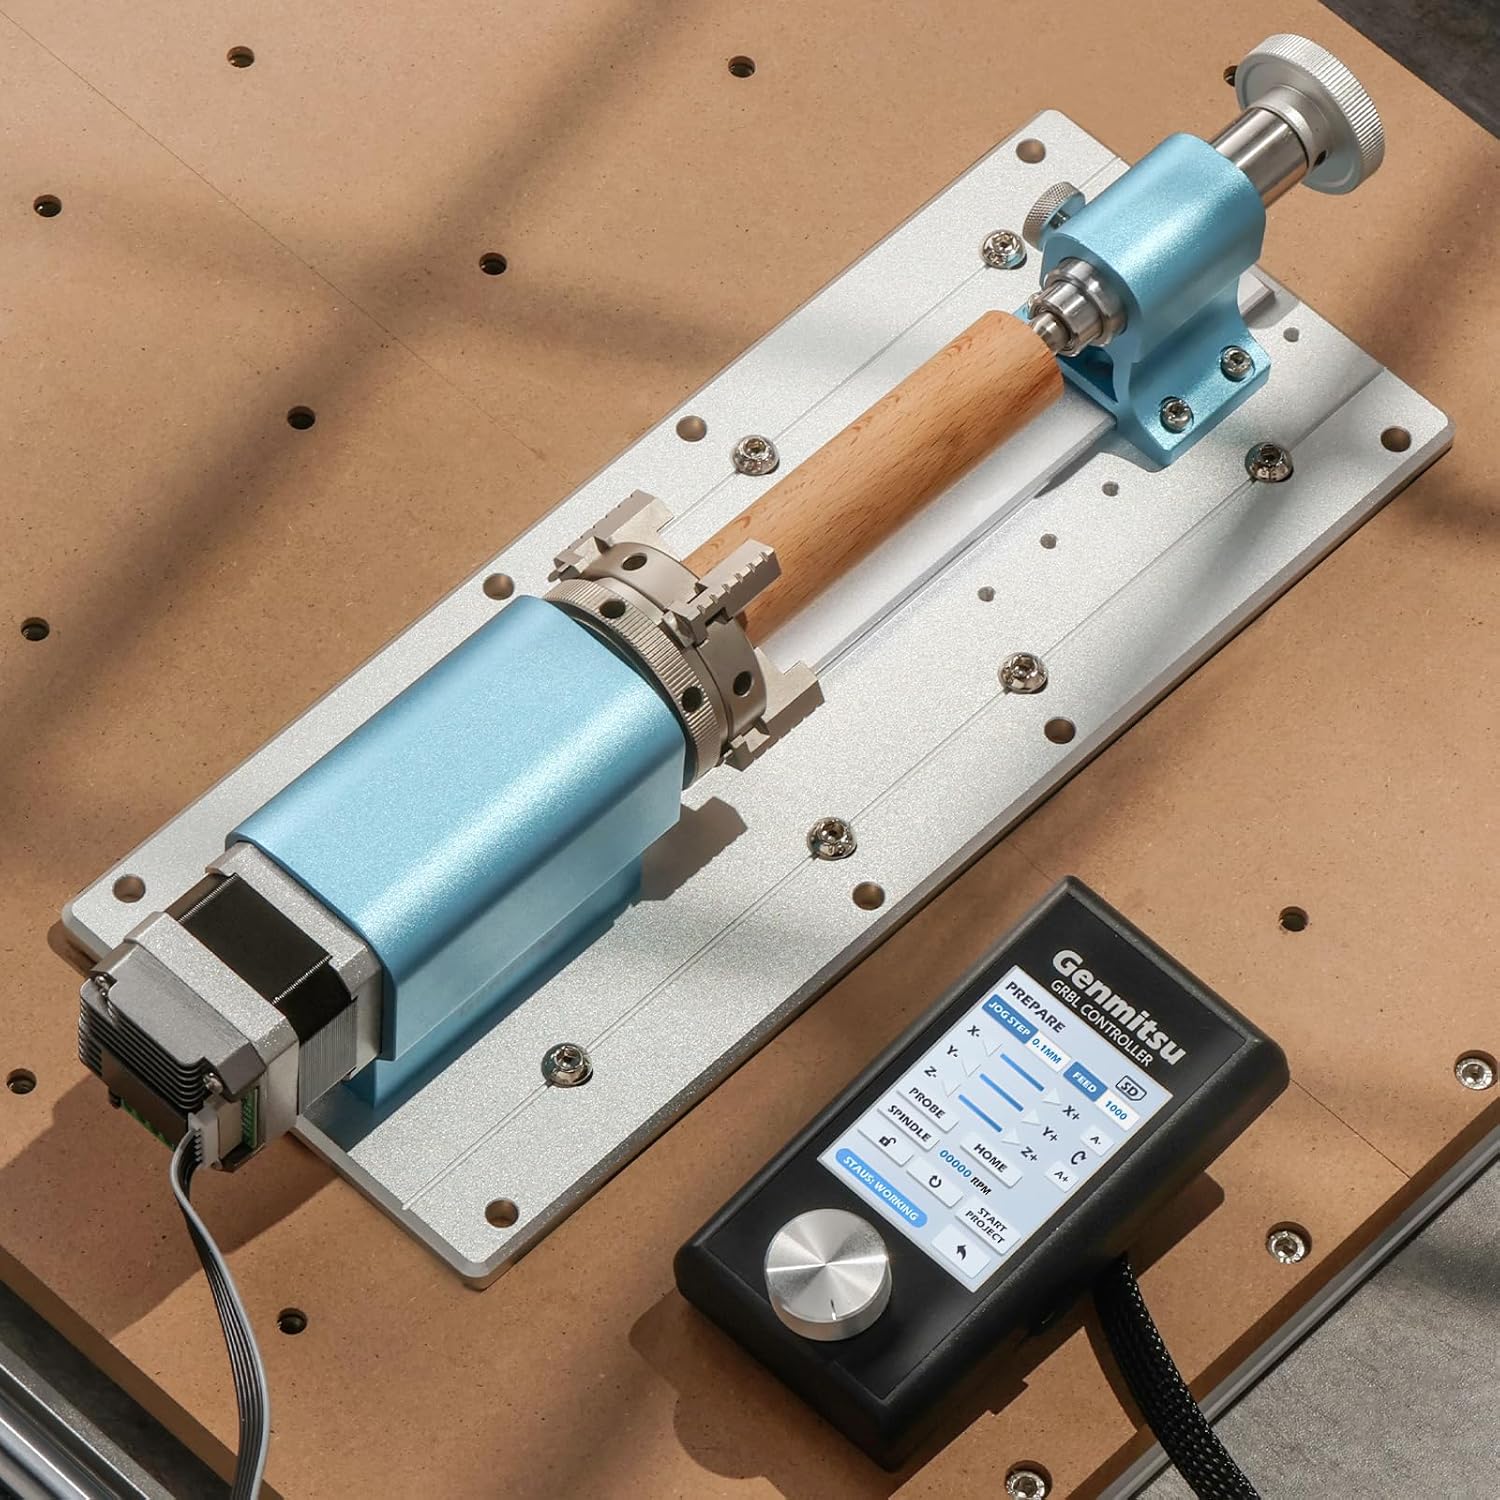
Figure 8: Rotary carving of a wooden piece using the module and an offline controller.
4.1. Operational Video
Video 1: Demonstration of carving with the Genmitsu 4th Axis Rotary Module on a Genmitsu 4040 Reno CNC machine. The video shows the module in action, carving a design into a cylindrical wooden workpiece.
5. Konserwacja
Regular maintenance ensures the longevity and optimal performance of your 4th Axis Rotary Module.
- Czyszczenie: After each use, clean the module, especially the chuck jaws and tailstock, to remove dust, debris, and wood chips. Use a soft brush or compressed air. Avoid using harsh chemicals that could damage the aluminum finish.
- Smarowanie: Okresowo należy nanosić niewielką ilość lekkiego oleju maszynowego na ruchome części uchwytu i mechanizmu śruby konika, aby zapewnić płynną pracę.
- Kontrola: Regularly inspect all screws and connections to ensure they are tight. Check for any signs of wear or damage to the motor, cables, or mechanical components. Replace worn parts as necessary.
- Składowanie: When not in use, store the rotary module in a clean, dry environment to prevent corrosion and dust accumulation.
6. Rozwiązywanie Problemów
This section addresses common issues you might encounter with the 4th Axis Rotary Module.
| Problem | Możliwa przyczyna | Rozwiązanie |
|---|---|---|
| Module not rotating or rotating incorrectly. |
|
|
| Workpiece slipping in chuck. |
|
|
| Inaccurate carving results. |
|
|
7. Specyfikacje
| Atrybut | Szczegół |
|---|---|
| Marka | Genmitsu |
| Nazwa modelu | 4th Axis |
| Tworzywo | Aluminium |
| Waga przedmiotu | 2.93 kilogramów (6.45 funty) |
| Wysokość środka | 50mm |
| Całkowita wysokość | 86mm |
| Material Length (with tailstock) | 10-100 mm |
| Material Length (without tailstock) | 10-200 mm |
| Applicable Material Diameter | 2-50 mm |
| Współczynnik redukcji | 10:1 |
| Minimalny kąt obrotu | 0.1° |
| Maximum Angular Speed | 300° na sekundę |
| Compatible CNC Machines | Genmitsu 4040-PRO, 4040 Reno, 3030-PROVer MAX |
| Required Controller | Offline controller (for 4040-PRO, 4040 Reno) |
8. Gwarancja i wsparcie
Aby uzyskać informacje dotyczące gwarancji, pomocy technicznej lub zapytań serwisowych, zapoznaj się z oficjalną stroną Genmitsu webOdwiedź stronę internetową lub skontaktuj się bezpośrednio z działem obsługi klienta. Zachowaj paragon zakupu na wypadek reklamacji.