
1. Ważne instrukcje bezpieczeństwa
Read and understand all safety warnings and instructions before operating this electric hoist. Failure to follow these instructions may result in electric shock, fire, serious injury, or property damage. Keep this manual for future reference.
1.1 Ogólne zasady bezpieczeństwa
- Zawsze należy nosić odpowiedni sprzęt ochrony osobistej (PPE), obejmujący okulary ochronne, rękawice i solidne obuwie.
- Ensure the work area is clear of obstructions, well-lit, and free from unauthorized personnel.
- Nie należy obsługiwać podnośnika będąc pod wpływem narkotyków, alkoholu lub leków.
- Inspect the hoist for damage before each use. Do not operate if damaged.
- Keep hands and body clear of moving parts and the load during operation.
1.2 Bezpieczeństwo elektryczne
- Connect the hoist only to a properly grounded power outlet with the specified voltage (220 V).
- Do not expose the hoist to rain or wet conditions.
- Nigdy nie należy używać przewodu zasilającego do przenoszenia, ciągnięcia lub odłączania podnośnika od zasilania.
- Upewnij się, że wszystkie połączenia elektryczne są solidne i nieuszkodzone.
1.3 Bezpieczeństwo podnoszenia
- Never exceed the rated load capacity of the hoist (125 kg for single cable, 250 kg for double cable).
- Ensure the load is properly balanced and securely attached to the hook.
- Do not lift people or objects over people.
- Unikaj nagłego ruszania i zatrzymywania się podczas podnoszenia lub opuszczania ładunku.
- Use the emergency stop switch immediately if an unsafe condition occurs.
2. Koniec produktuview
The VEVOR Electric Wire Rope Hoist PAYX250-2 is designed for lifting heavy objects in various environments such as garages, warehouses, and factories. It features a robust pure copper motor, a durable steel wire rope, and a wired remote control for safe operation.
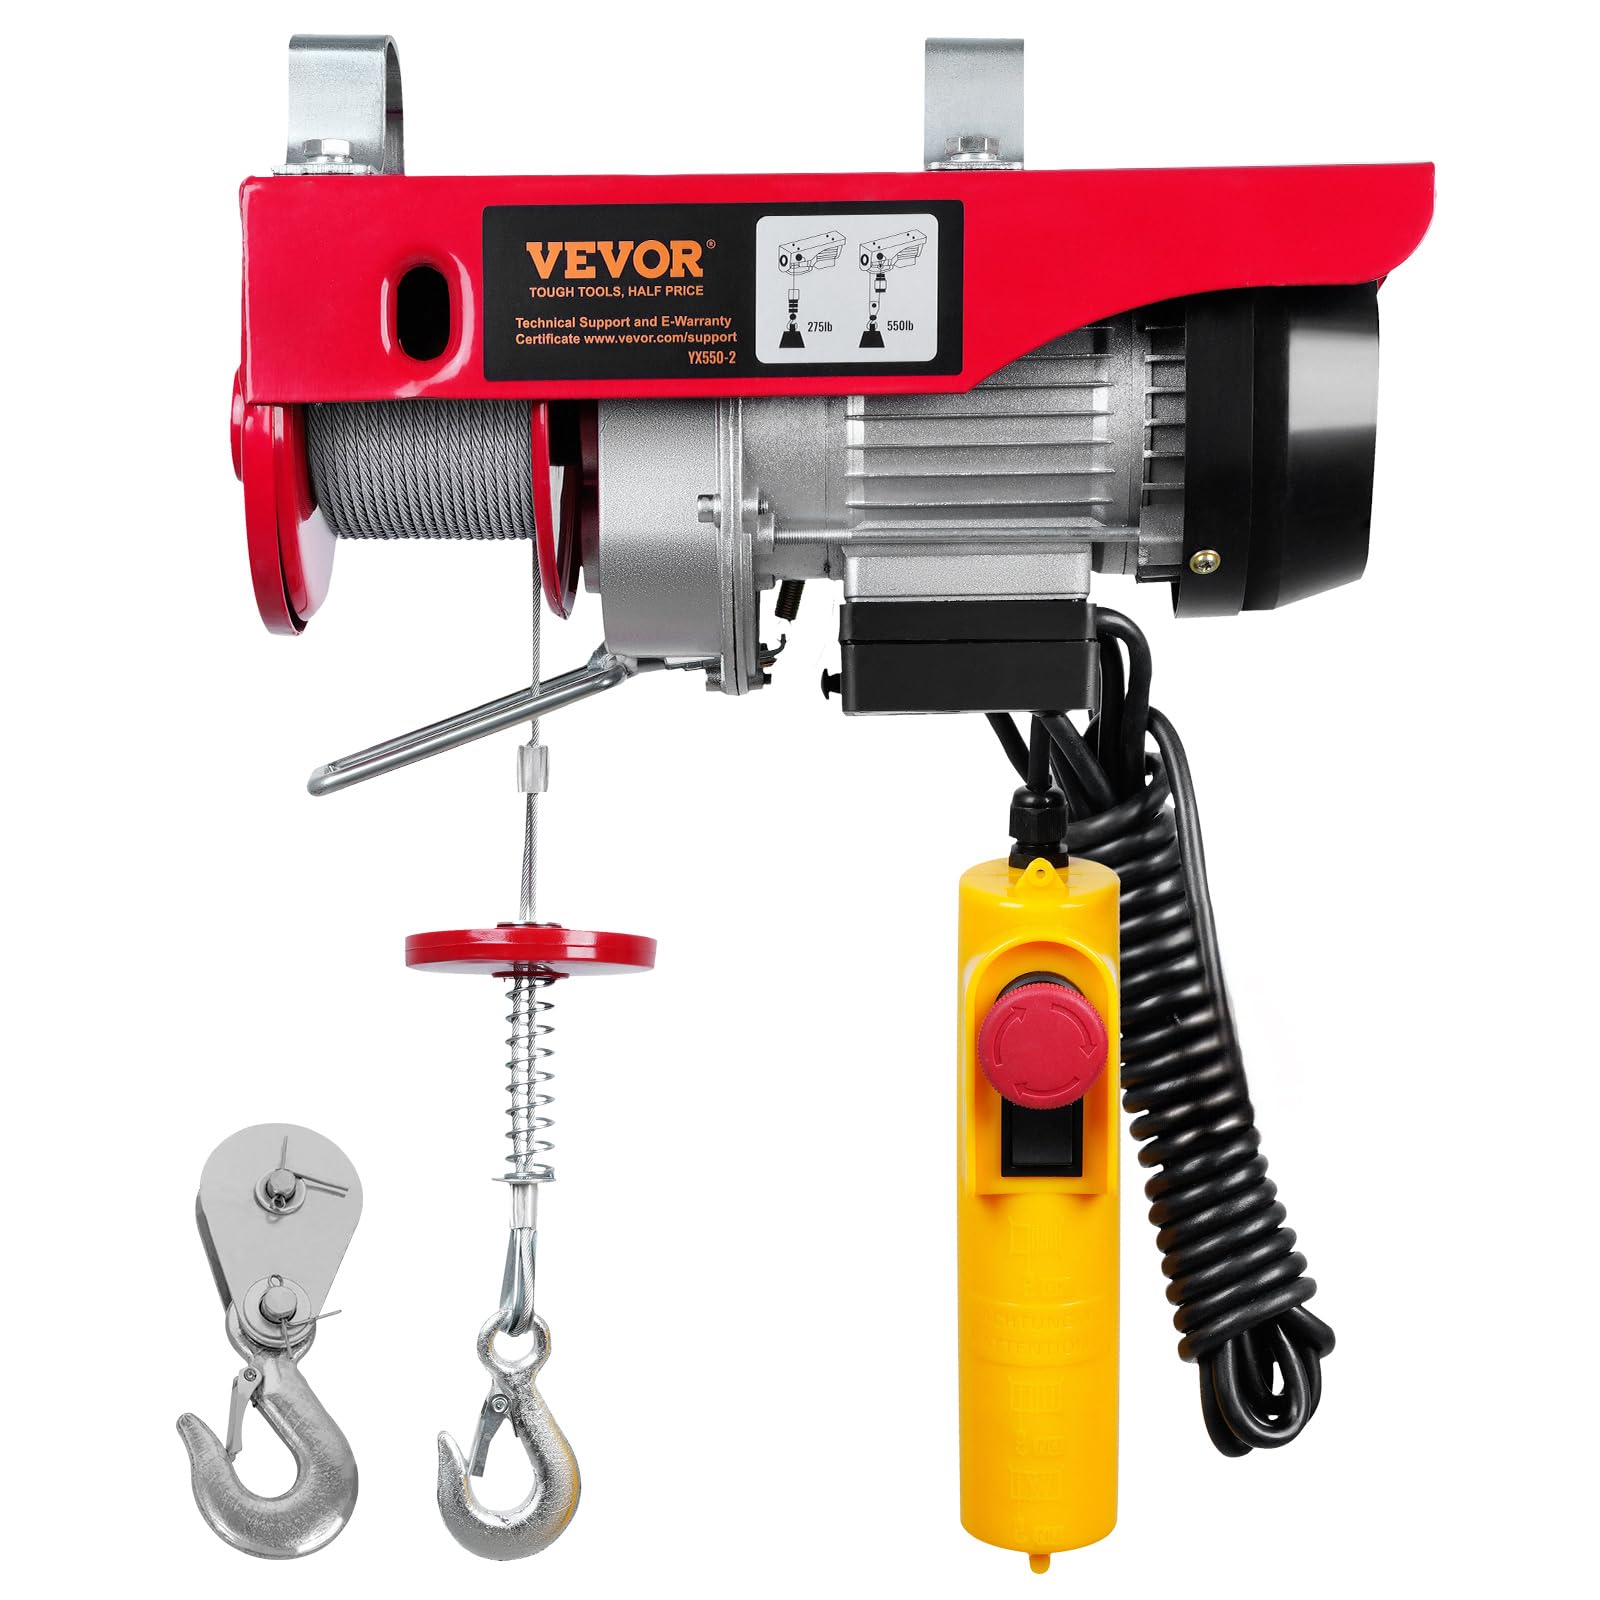
Rysunek 2.1: Główny view of the VEVOR Electric Wire Rope Hoist, highlighting its compact design and robust construction.

Figure 2.2: The electric hoist installed in a typical garage environment, demonstrating its application for lifting tasks.
2.1 Kluczowe komponenty
- Silnik: Pure copper motor with a cooling fan for efficient and prolonged operation.
- Lina stalowa: Durable braided steel cable (Φ 3 mm * L 12 m, 19 strands).
- Hak: Alloy steel hook for secure load attachment. Includes a double hook for increased capacity.
- Zdalne sterowanie: Wired remote with a 4m cable for safe operation from a distance, featuring an emergency stop button.
- Uchwyty montażowe: Two channel mounting brackets for easy installation.
- Funkcje bezpieczeństwa: Emergency stop switch and electromagnetic braking system to prevent accidental slippage and overturning.
3. Konfiguracja
Proper installation is crucial for safe and effective operation of the hoist.
3.1 Montaż wciągnika
- Select a sturdy overhead beam or crossbar capable of supporting the hoist's weight and the maximum intended load.
- Attach the two provided channel mounting brackets to the hoist.
- Securely mount the hoist to the chosen overhead structure using appropriate fasteners. Ensure the brackets are tightly fastened to prevent movement during operation.
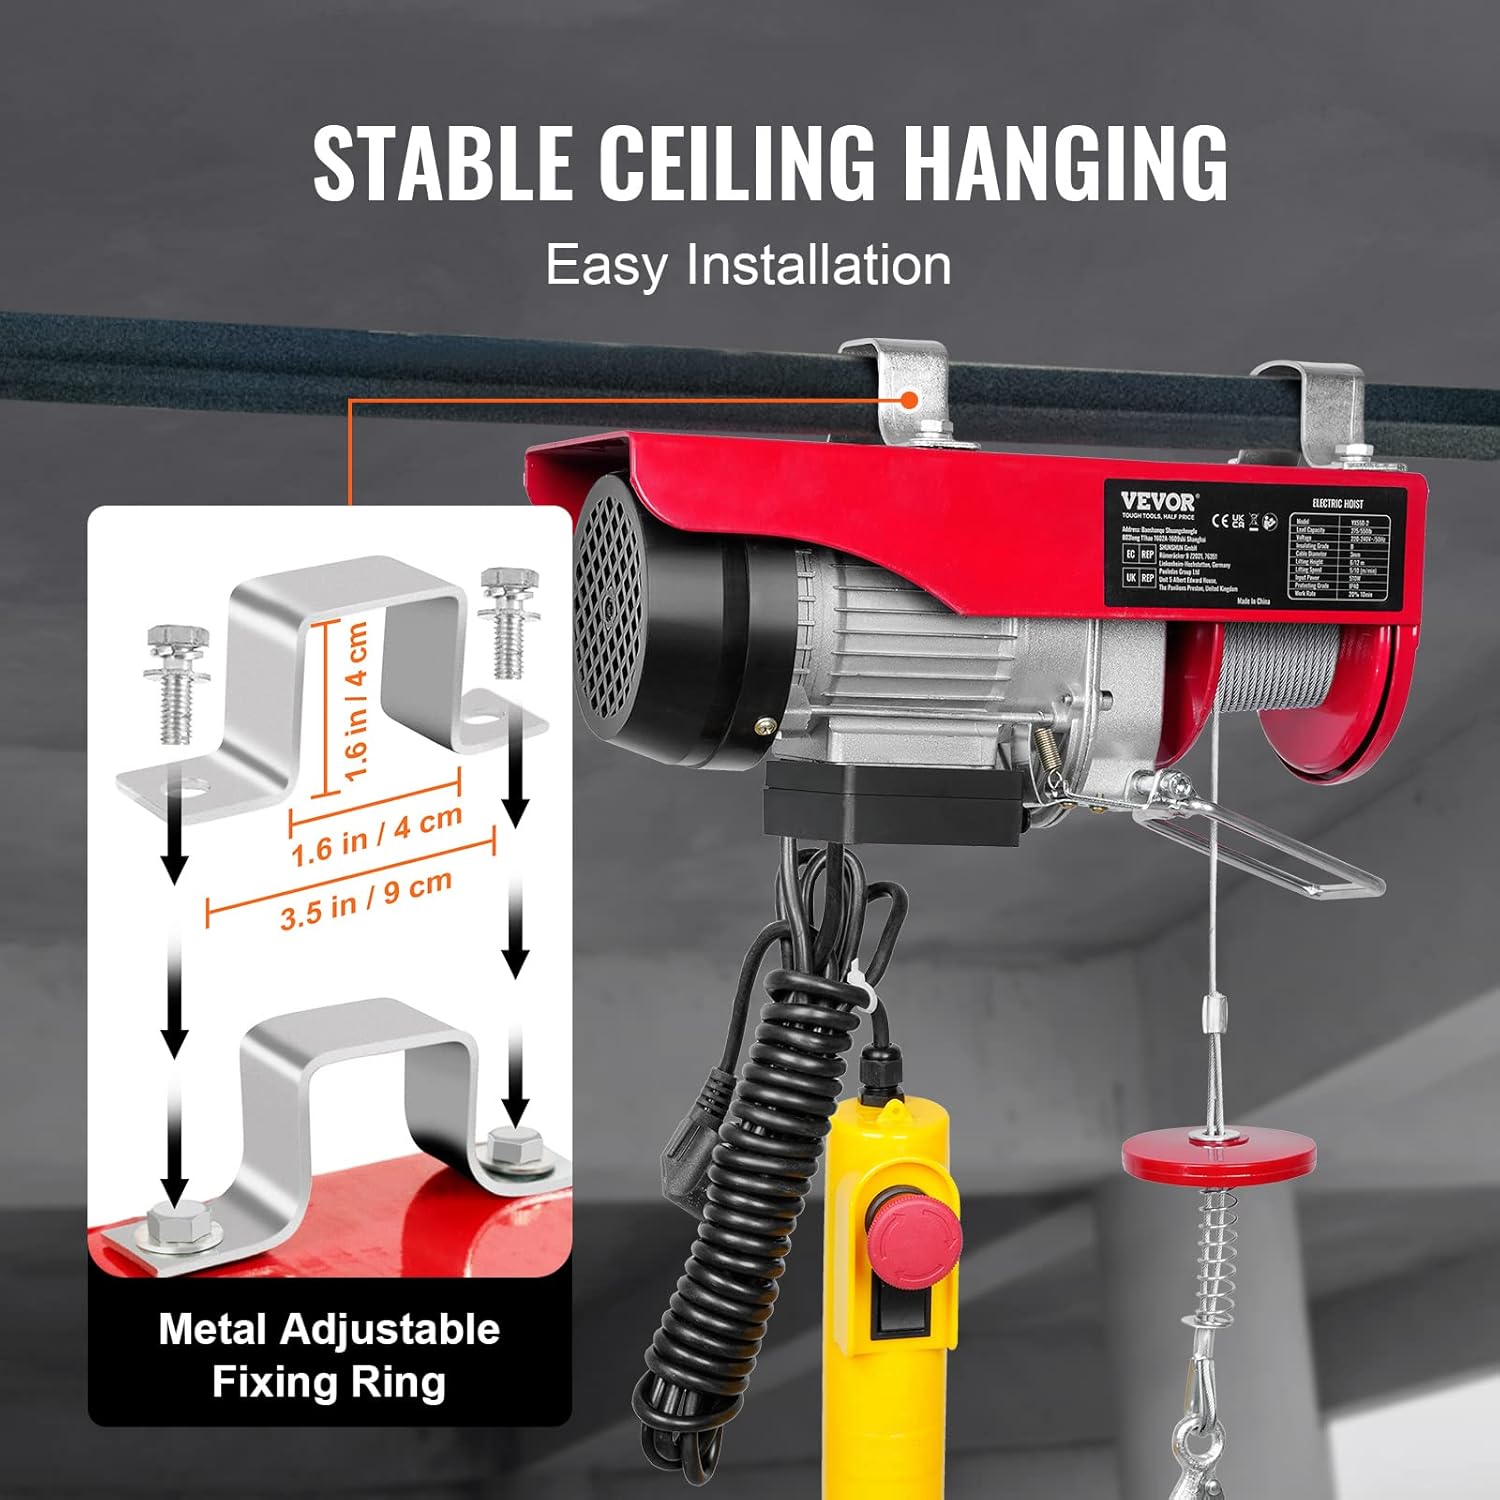
Figure 3.1: Illustration of the metal adjustable fixing rings (mounting brackets) and their dimensions for secure installation.
3.2 Podłączenie elektryczne
- Ensure the power supply matches the hoist's voltagWymagania (220V).
- Plug the hoist into a grounded electrical outlet. Avoid using extension cords if possible; if necessary, use a heavy-duty, grounded extension cord rated for the hoist's power requirements.
3.3 Cable Configuration (Single vs. Double Line)
The hoist can be configured for single or double line lifting, affecting its capacity and lifting speed.
- Single Cable: Provides higher lifting height and speed (40 ft/12 m, 33 ft/min) with a capacity of 125 kg.
- Double Cable: Achieved by using the provided pulley hook, which doubles the lifting capacity to 250 kg but halves the lifting height and speed (19.7 ft/6 m, 16 ft/min).

Figure 3.2: Comparison of single cable setup (left) for higher speed and height, and double cable setup (right) using a pulley hook for increased lifting capacity.
4. Instrukcja obsługi
Aby zapewnić bezpieczną i efektywną obsługę wciągnika elektrycznego, należy wykonać poniższe czynności.
4.1 Korzystanie z pilota zdalnego sterowania
The hoist is operated via a wired remote control, allowing you to maintain a safe distance from the load.
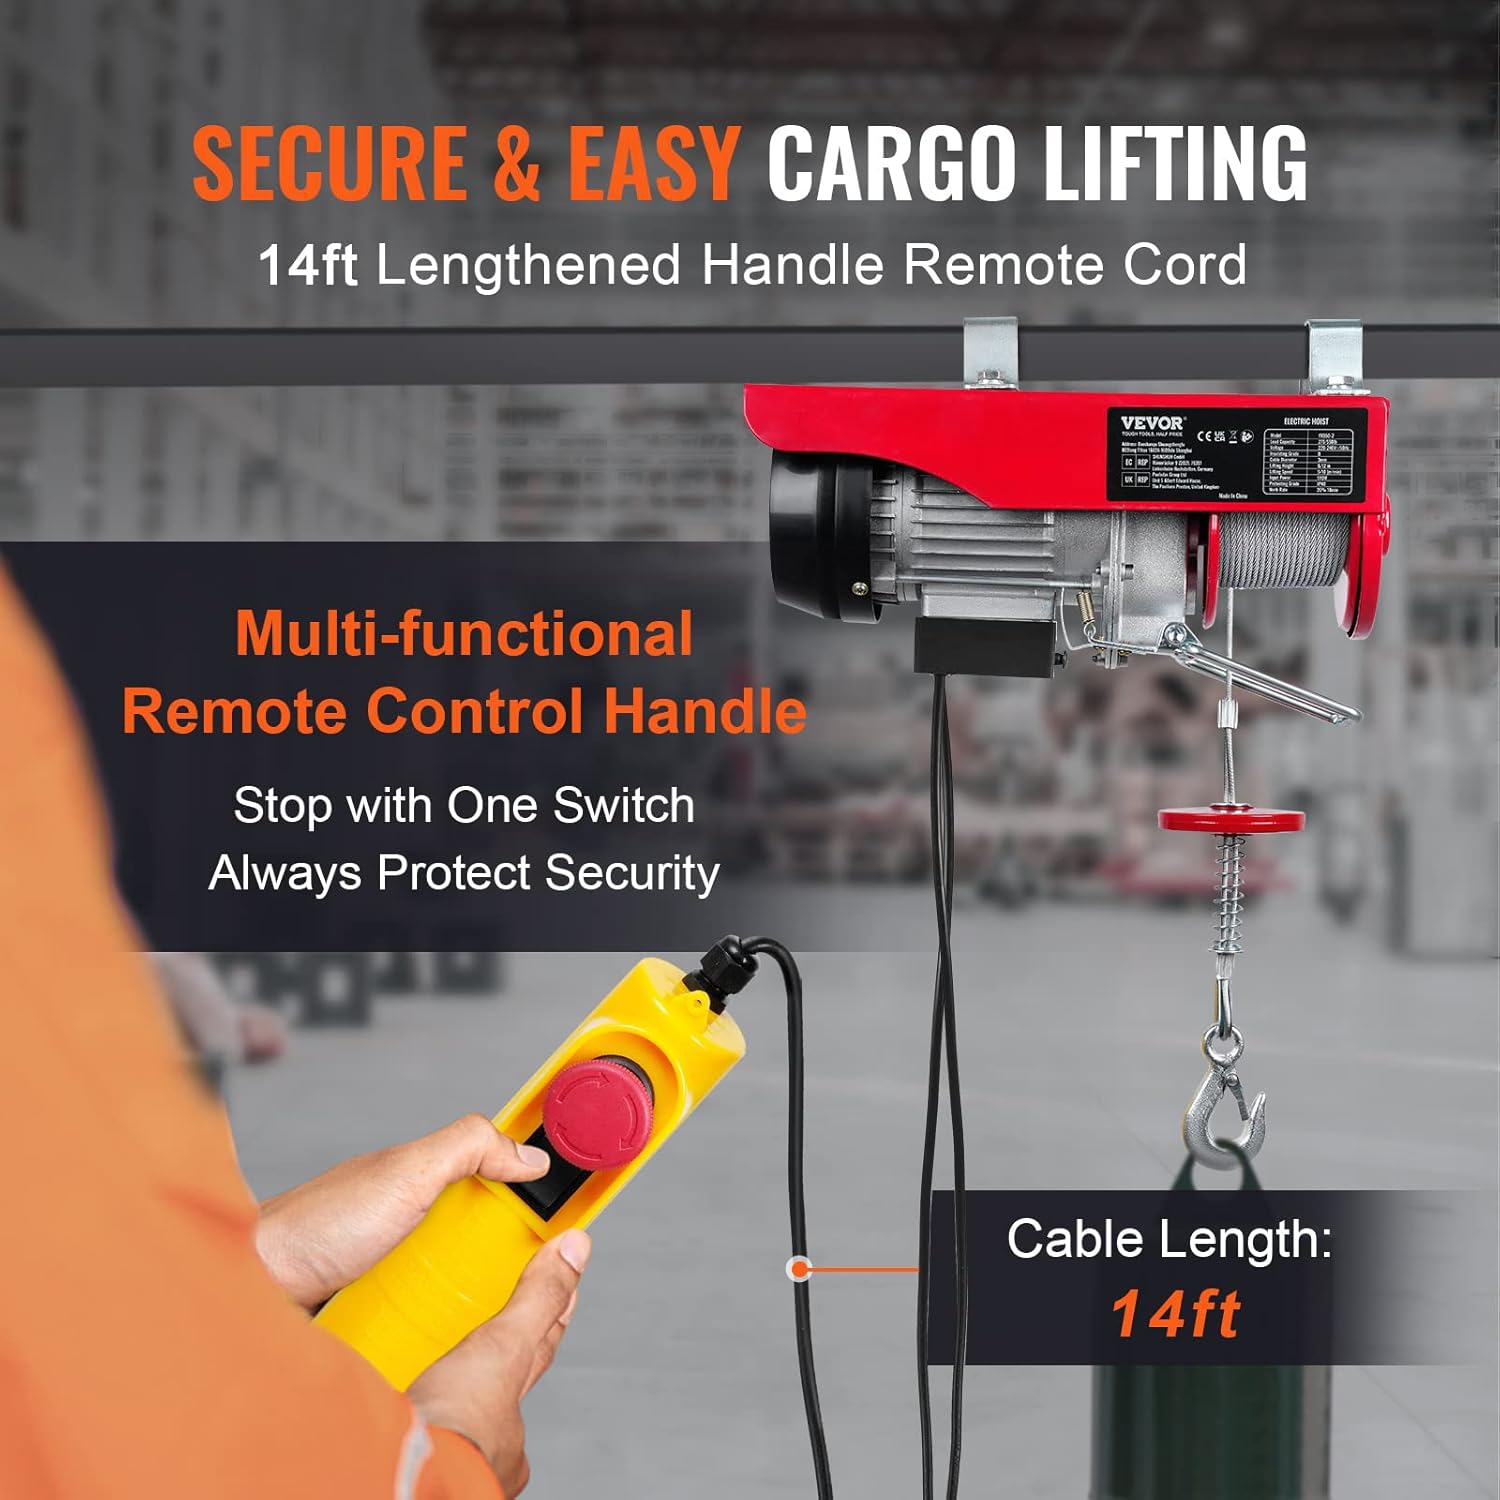
Figure 4.1: The multi-functional remote control handle with its 14ft (approx. 4m) cable, featuring an emergency stop button.
- Przycisk w górę: Press and hold to lift the load.
- Przycisk w dół: Press and hold to lower the load.
- Przycisk zatrzymania awaryjnego: Press the large red button to immediately stop all hoist operations in an emergency. Twist to reset.
- Always operate the hoist from a position where you have a clear view of the load and the surrounding area.
4.2 Procedury podnoszenia
- Before lifting, ensure the load is within the hoist's capacity and is securely attached to the hook.
- Slowly lift the load a few inches off the ground to check for balance and stability.
- If the load is stable, proceed to lift it to the desired height. Avoid swinging the load.
- When lowering, do so slowly and steadily. Guide the load if necessary, keeping hands clear.
- Nigdy nie pozostawiaj zawieszonego ładunku bez nadzoru.
5. Konserwacja
Regularna konserwacja gwarantuje długowieczność i bezpieczną pracę podnośnika.
5.1 Regularna kontrola
- Lina stalowa: Inspect the wire rope for kinks, fraying, corrosion, or broken strands before each use. Replace if any damage is observed.
- Hak: Sprawdź hak pod kątem odkształceń, pęknięć lub nadmiernego zużycia. Upewnij się, że zatrzask zabezpieczający działa prawidłowo.
- Silnik i obudowa: Inspect for any visible damage, loose fasteners, or unusual noises during operation.
- Electrical Cable and Remote: Check for cuts, abrasions, or damage to the power cord and remote control cable.
5.2 Czyszczenie i przechowywanie
- Keep the hoist clean and free from dirt, dust, and debris. Use a dry cloth to wipe down surfaces.
- Store the hoist in a dry, clean, and secure location away from moisture and extreme temperatures.
6. Rozwiązywanie Problemów
W tej sekcji znajdziesz informacje o typowych problemach i ich potencjalnych rozwiązaniach.
| Problem | Możliwa przyczyna | Rozwiązanie |
|---|---|---|
| Wciągnik nie działa | Brak zasilania Włączono zatrzymanie awaryjne Aktywowane zabezpieczenie przeciążeniowe silnika | Sprawdź podłączenie zasilania i gniazdko Zwolnij przycisk zatrzymania awaryjnego Allow motor to cool down, reduce load |
| Nietypowy dźwięk podczas pracy | Luźne elementy Brak smarowania Uszkodzenia wewnętrzne | Inspect for loose parts and tighten Skonsultuj się z wykwalifikowanym technikiem Discontinue use and seek professional service |
| Load slips or drops | Awaria hamulca Przeciążać | Discontinue use immediately and contact service Ensure load is within capacity |
If you encounter problems not listed here or if the suggested solutions do not resolve the issue, contact VEVOR customer support.
7. Specyfikacje
Technical data for the VEVOR Electric Wire Rope Hoist PAYX250-2.

Figure 7.1: Detailed product dimensions and a summary of key specifications.
| Parametr | Wartość |
|---|---|
| Numer modelu | PAYX250-2 |
| Lifting Load Capacity (Single Cable) | 125 kg (275 funta) |
| Lifting Load Capacity (Double Cable) | 250 kg (550 funta) |
| Lifting Height (Single Cable) | 12 metrów (40 stóp) |
| Lifting Height (Double Cable) | 6 metrów (19.7 stóp) |
| Lifting Speed (Single Cable) | 10 m/min (33 stóp/min) |
| Lifting Speed (Double Cable) | 5 m/min (16 stóp/min) |
| Moc silnika | 510 W |
| Tomtage | 220 V |
| Rozmiar kabla | Φ 3 mm * L 12 m (19 strands) |
| Wymiary produktu (dł. x szer. x wys.) | 350 × 135 × 160 mm (13.8 × 5.3 × 6.3 cala) |
| Waga produktu | 10.35 kg (22.82 funta) |
| Tryb sterowania | Przewodowy pilot zdalnego sterowania |
| Znamionowa prędkość obrotowa | 2800 obr./min |
| Moment znamionowy | 1.1 Nm |
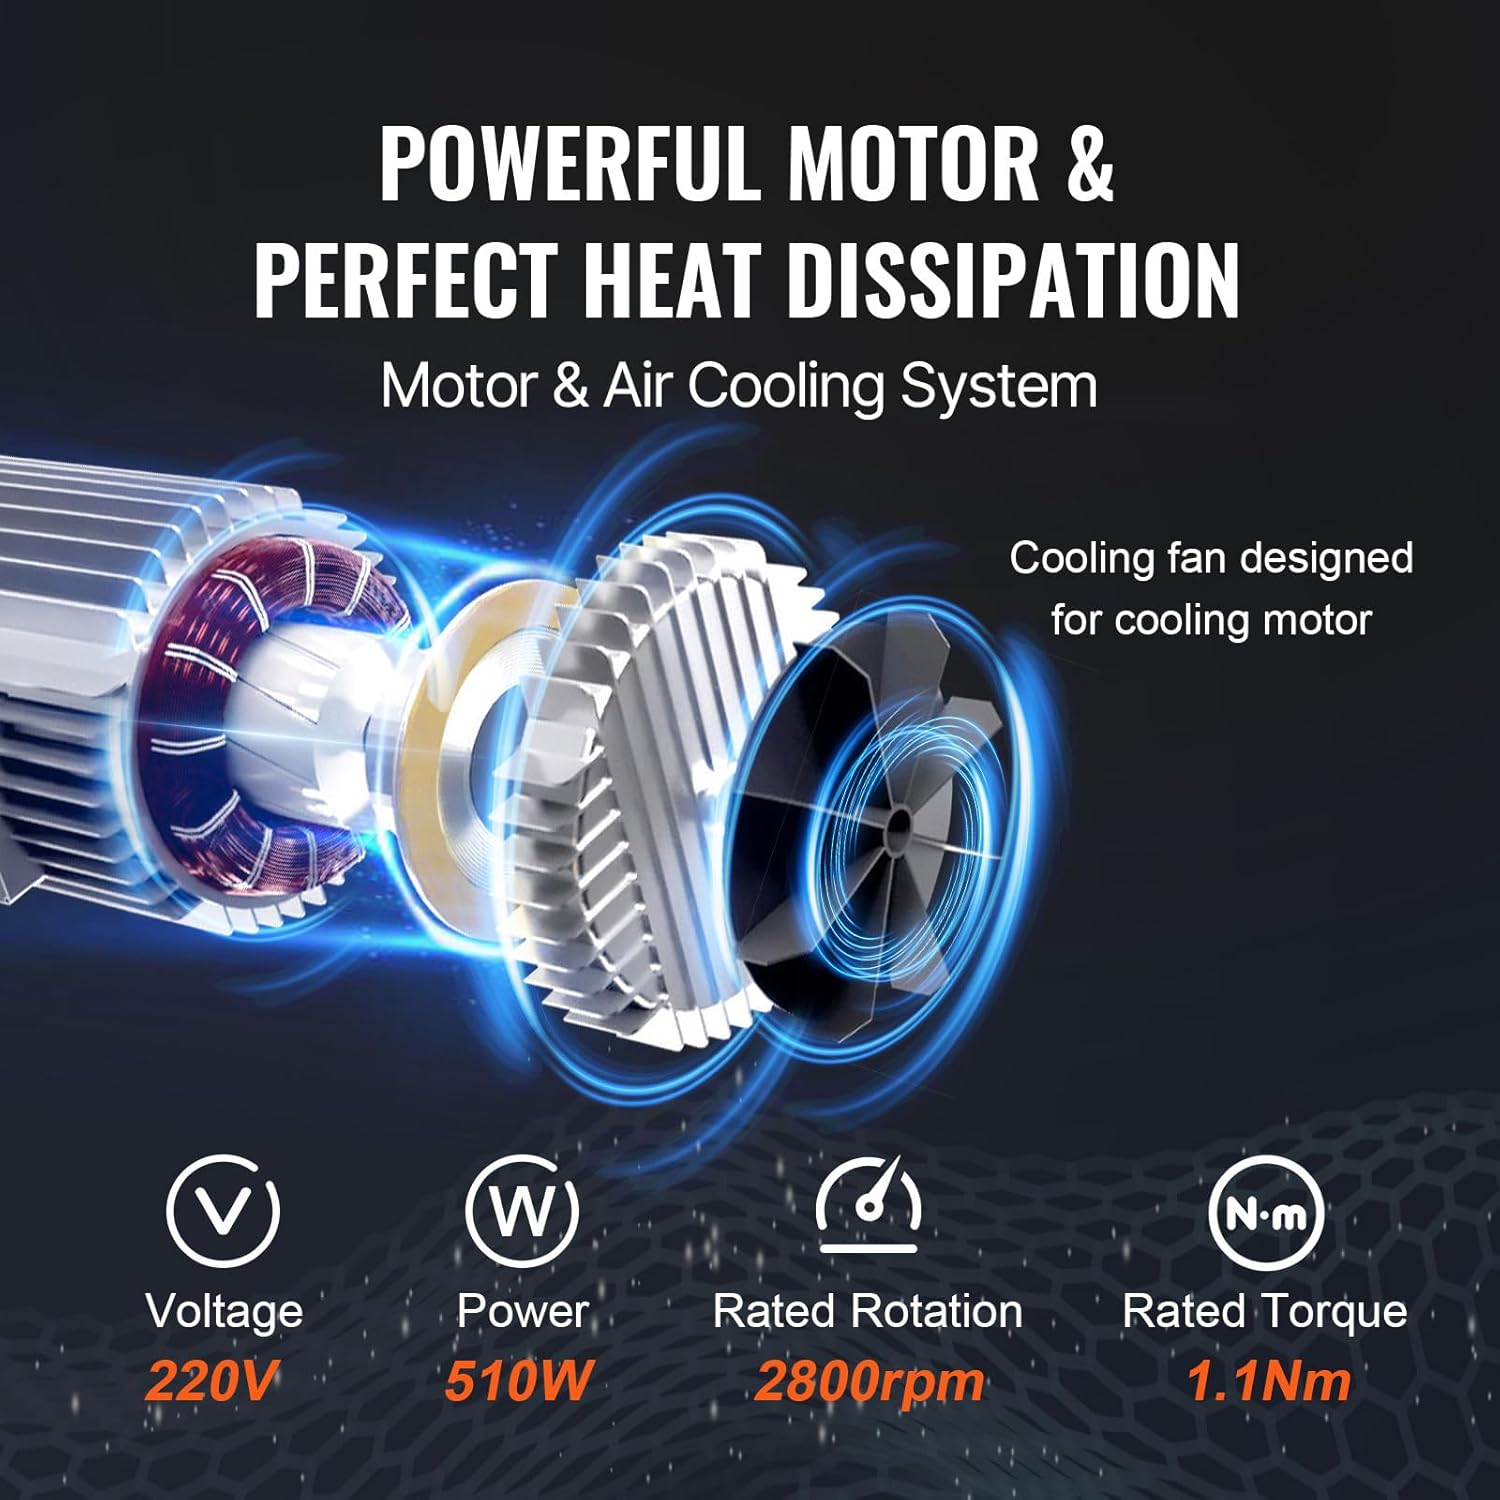
Figure 7.2: Diagram illustrating the internal motor components and the cooling fan designed for heat dissipation.
8. Gwarancja i wsparcie
Produkty VEVOR zostały zaprojektowane z myślą o trwałości i wydajności. Aby uzyskać informacje dotyczące gwarancji, wsparcia technicznego lub serwisu, zapoznaj się z kartą gwarancyjną dołączoną do produktu lub odwiedź oficjalną stronę internetową VEVOR. webZachowaj paragon jako dowód zakupu.