1. Wprowadzenie
The GAMDIAS HELIOS P2-1000G is a fully modular power supply unit designed for high-performance computing systems. It features 80 Plus Gold certification for energy efficiency, supports ATX 3.1 and PCIe Gen 5.1 standards, and incorporates 100% Japanese capacitors for enhanced reliability. This manual provides essential information for the safe installation, operation, and maintenance of your power supply.
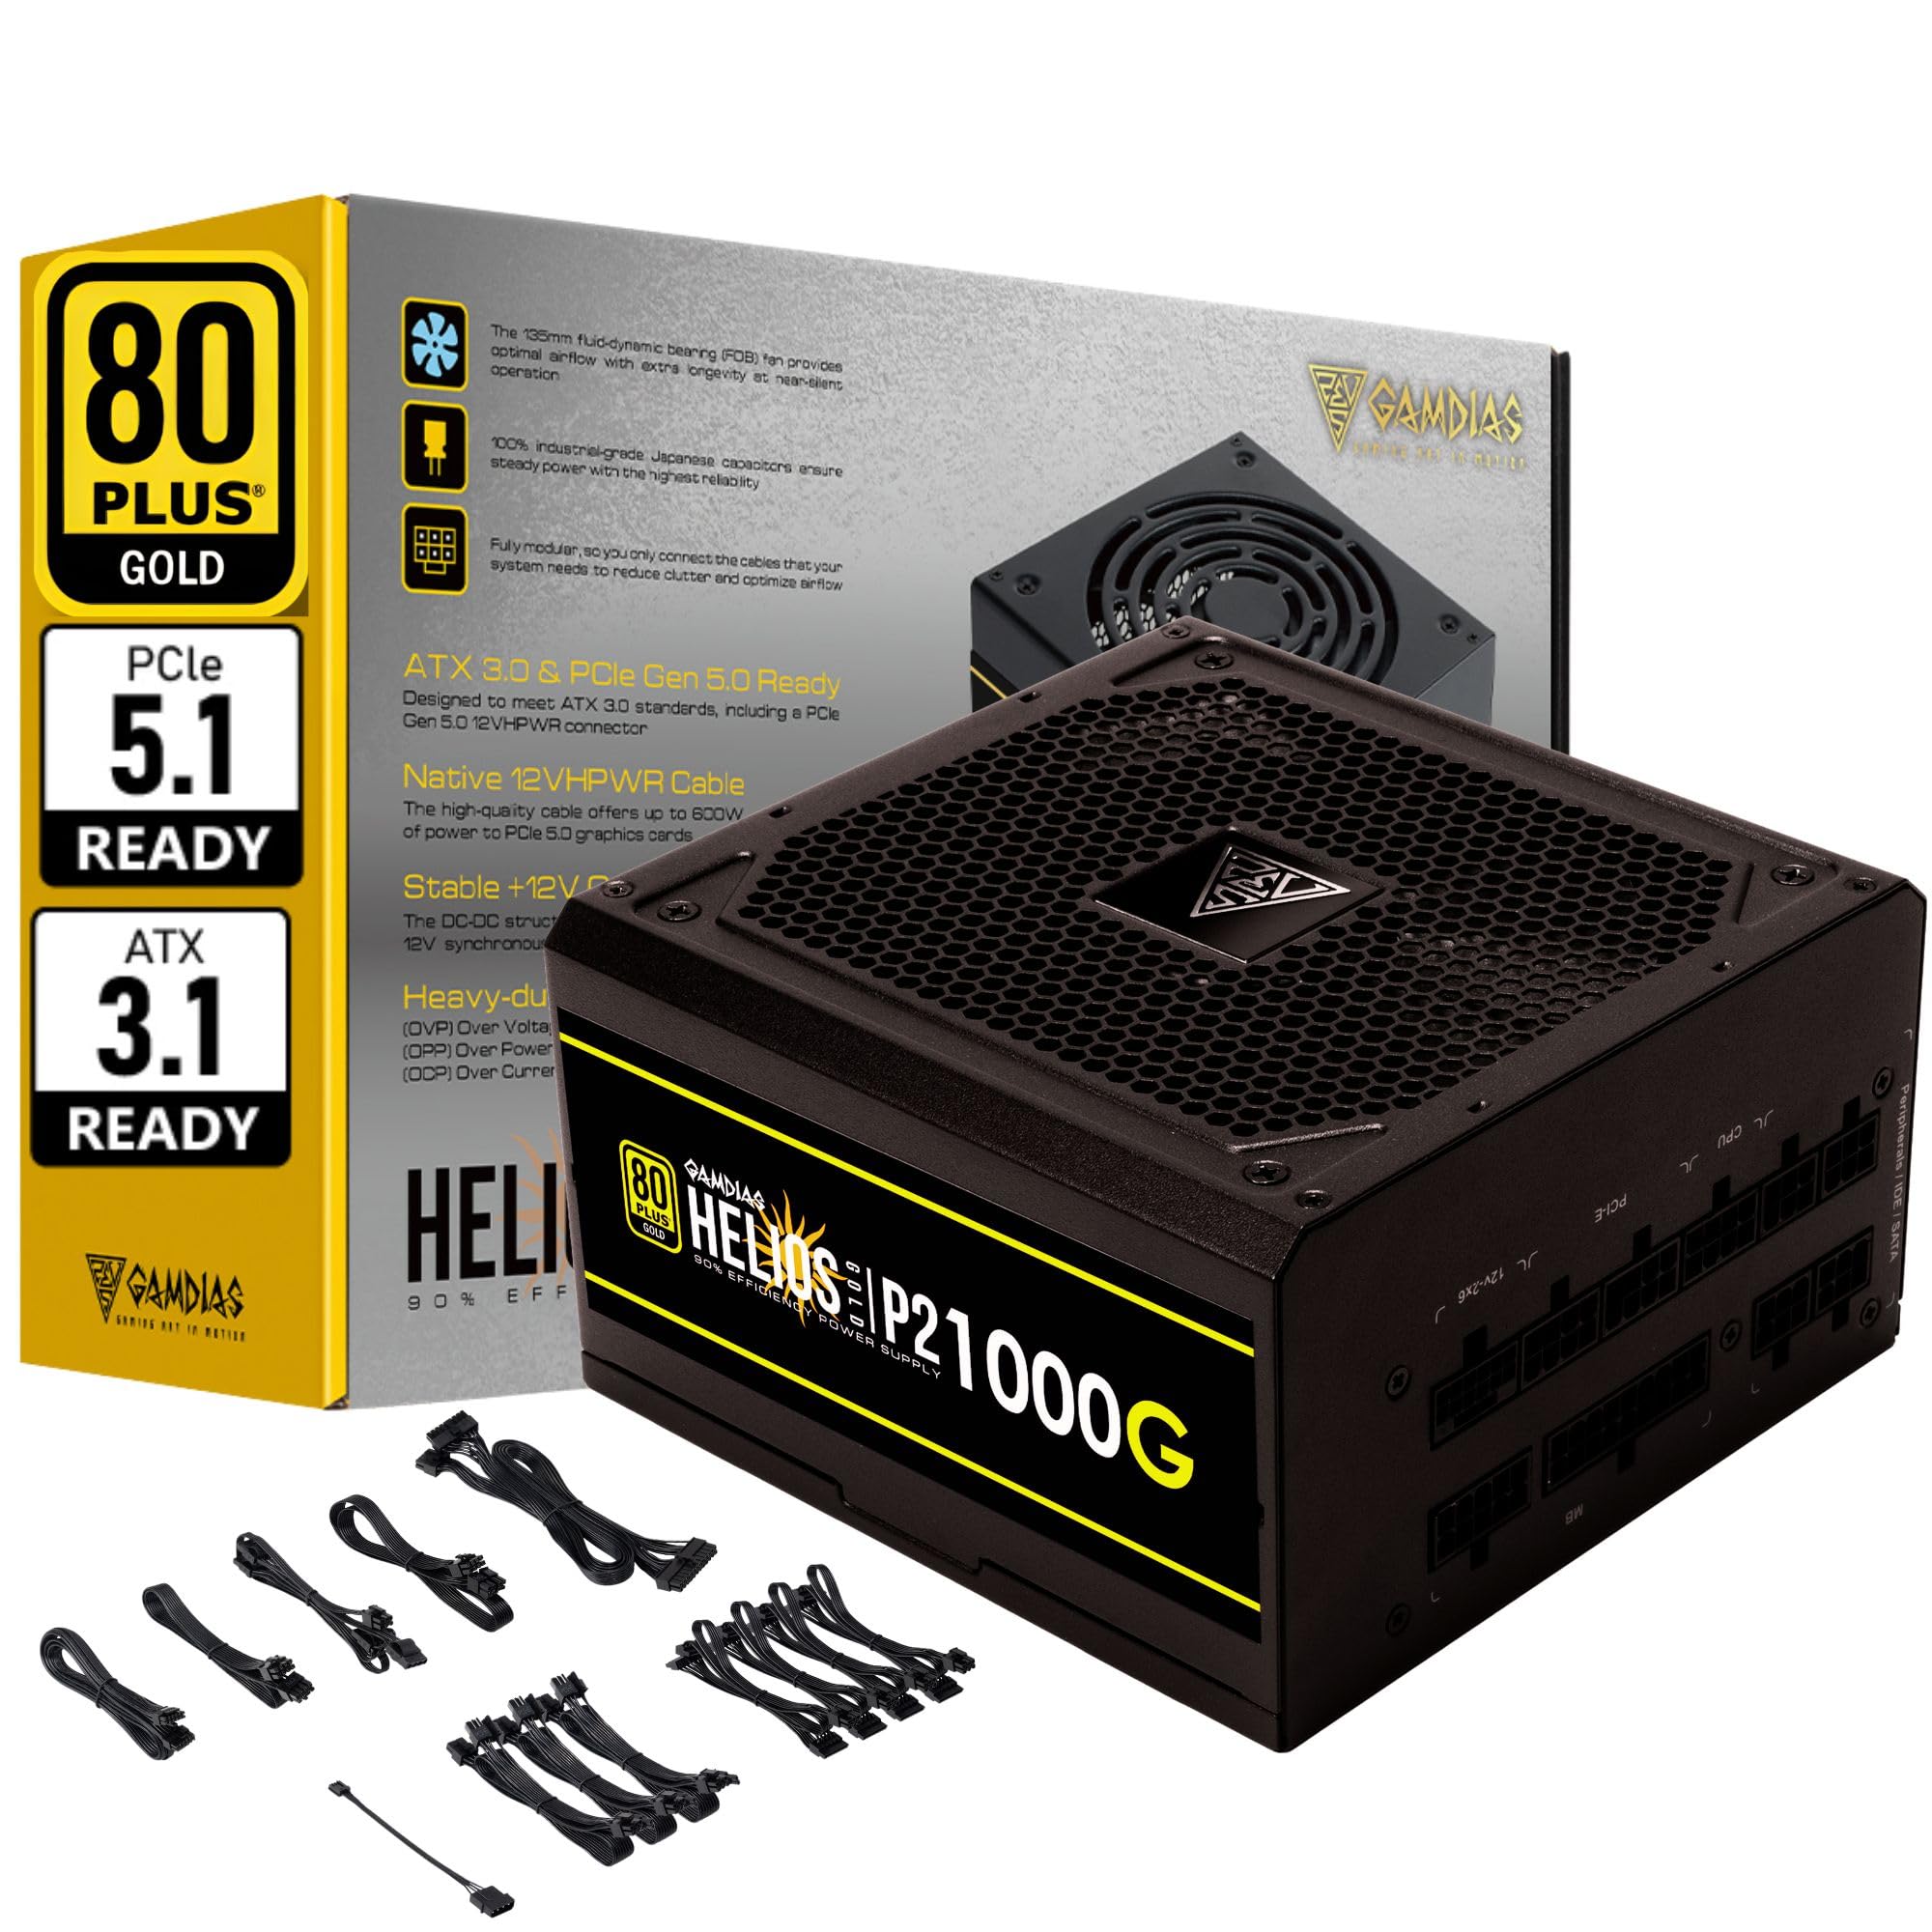
Obraz 1.1: Koniecview of the GAMDIAS HELIOS P2-1000G Power Supply.
2. Informacje dotyczące bezpieczeństwa
- Wysoka głośnośćtage: Zasilacz zawiera prąd o dużej objętościtage komponenty. Nie otwierać zasilacza casing. Wewnątrz nie ma żadnych części, które mogłyby być naprawiane przez użytkownika. Otwarcie urządzenia spowoduje utratę gwarancji i stwarza ryzyko porażenia prądem.
- Prawidłowe uziemienie: Ensure the power supply is properly grounded using the provided power cord.
- Wentylacja: Do not block the ventilation openings of the power supply. Ensure adequate airflow around the unit to prevent overheating.
- Środowisko: Unikaj instalowania zasilacza w środowiskach o dużej wilgotności, ekstremalnych temperaturach lub nadmiernym zapyleniu.
- Wyłączone: Always disconnect the AC power cord from the wall outlet before installing, removing, or cleaning the power supply or any connected components.
- Poprawna wartośćtage: Upewnij się, że zasilacz jest sprawnytage is sufficient for your system's components.
3. Zawartość opakowania
Sprawdź, czy w opakowaniu znajdują się wszystkie elementy:
- GAMDIAS HELIOS P2-1000G Power Supply Unit
- Modular Cable Set (including 24-pin ATX, CPU, PCIe, SATA, Molex, and 12VHPWR cables)
- Przewód zasilający AC
- Śruby montażowe
- Instrukcja obsługi (ten dokument)
4. Funkcje produktu
The HELIOS P2-1000G power supply incorporates several features designed for performance and reliability:
- 80 PLUS Gold Certified Efficiency: Achieves up to 92% efficiency at 50% load, reducing power consumption and heat generation.
- ATX 3.1 and PCIe Gen 5.1 Ready: Designed to meet the latest power standards, supporting next-generation graphics cards with up to 200% total power excursion.
- Native 12VHPWR Cable: Includes a native 16-pin (12VHPWR) PCIe connector capable of delivering up to 600W for PCIe 5.1 graphics cards.
- Quiet Operation with 135mm Dual-Ball Bearing Smart Fan: Features a high-quality 135mm fan with a dual-ball bearing design for durability and quiet operation. The smart fan control adjusts speed based on load to minimize noise.
- W pełni modułowa konstrukcja: Allows for connecting only the necessary cables, improving cable management and airflow within the PC case.
- Premium Japanese Capacitors: Built with 100% high-quality Japanese 105°C/221°F electrolytic capacitors for superior durability and power stability.
- Kompleksowe mechanizmy ochrony: Includes Over Current Protection (OCP), Over Temperature Protection (OTP), Over Voltage Protection (OVP), Over Power Protection (OPP), Under VoltagZabezpieczenie UVP i zabezpieczenie przeciwzwarciowe SCP gwarantują bezpieczeństwo systemu.
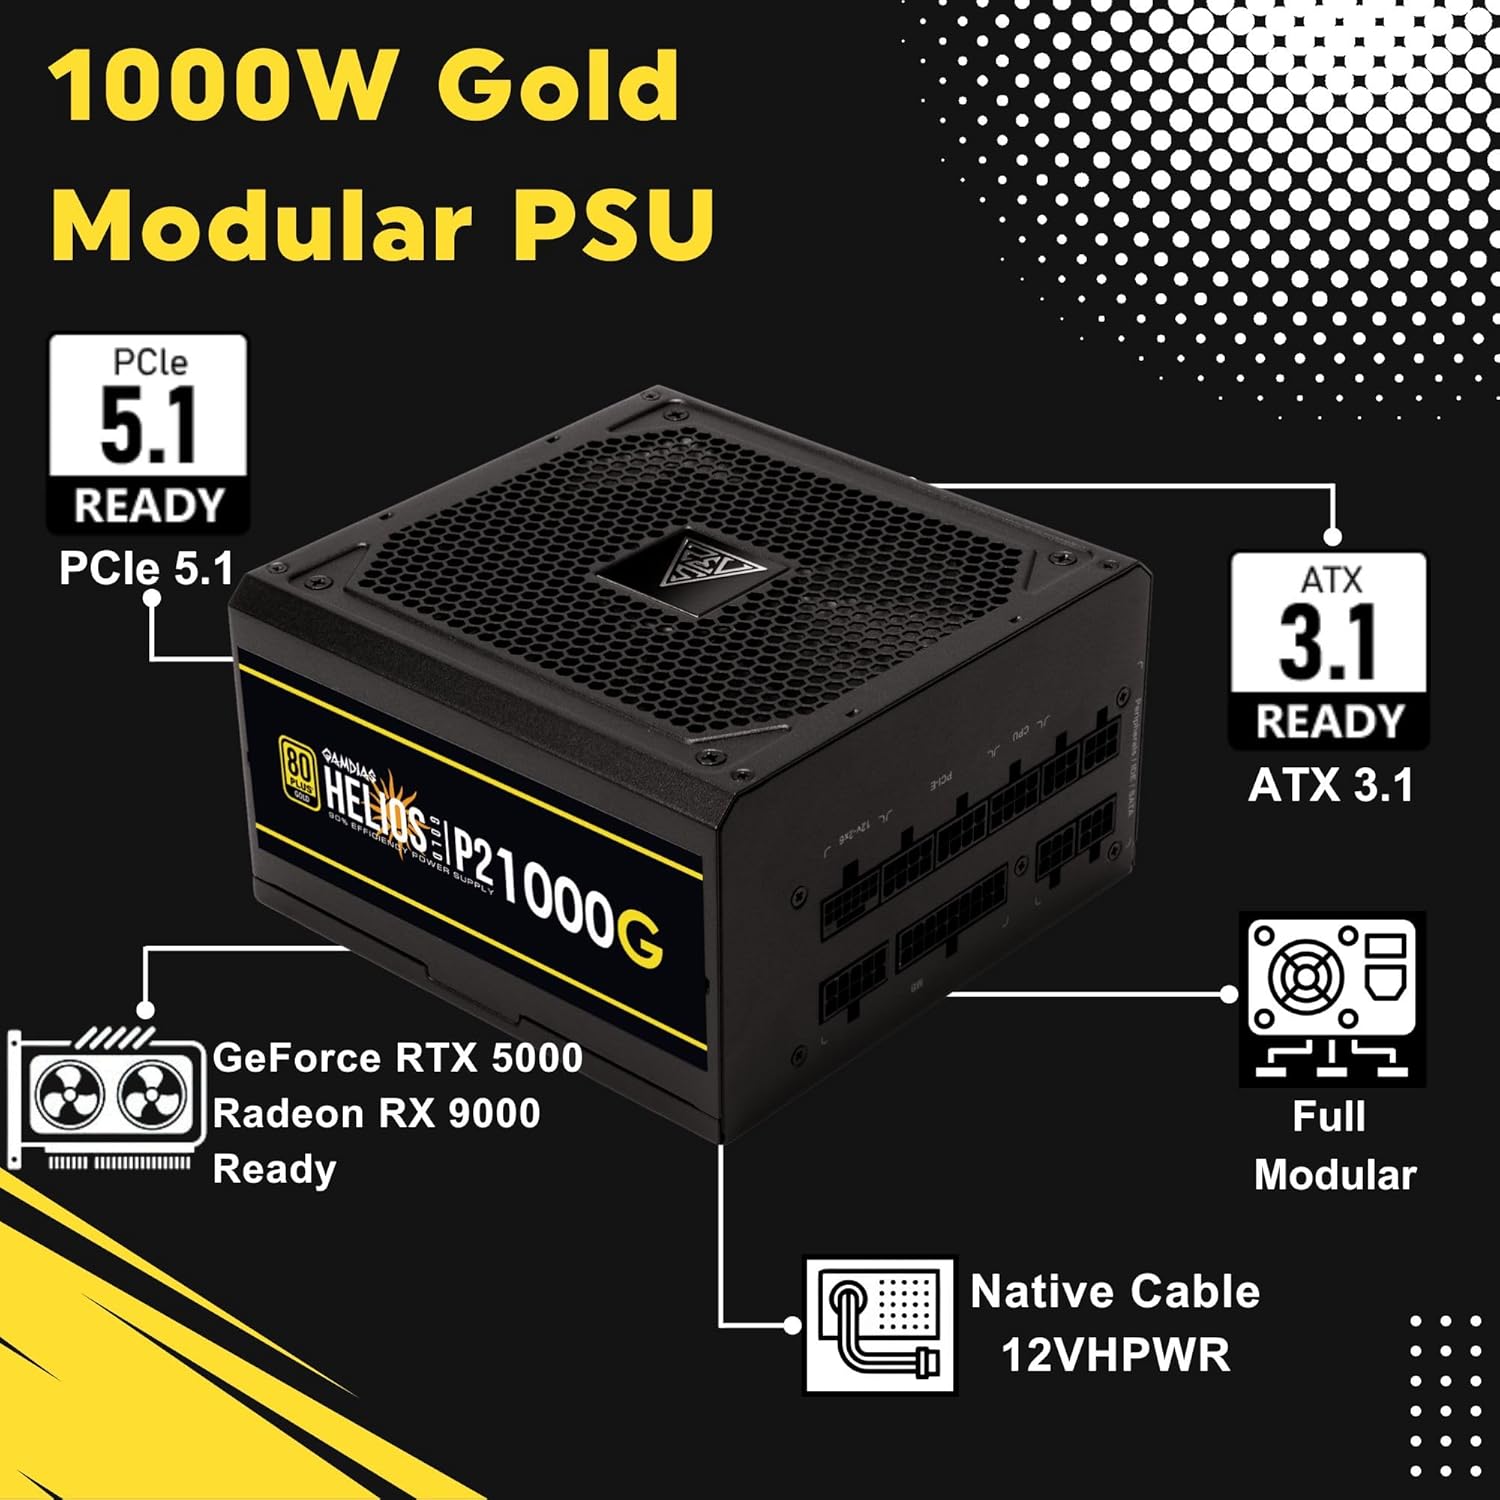
Image 4.1: Key features of the HELIOS P2-1000G, including PCIe 5.1 and ATX 3.1 readiness.

Image 4.2: The 80 Plus Gold certification ensures high energy efficiency.
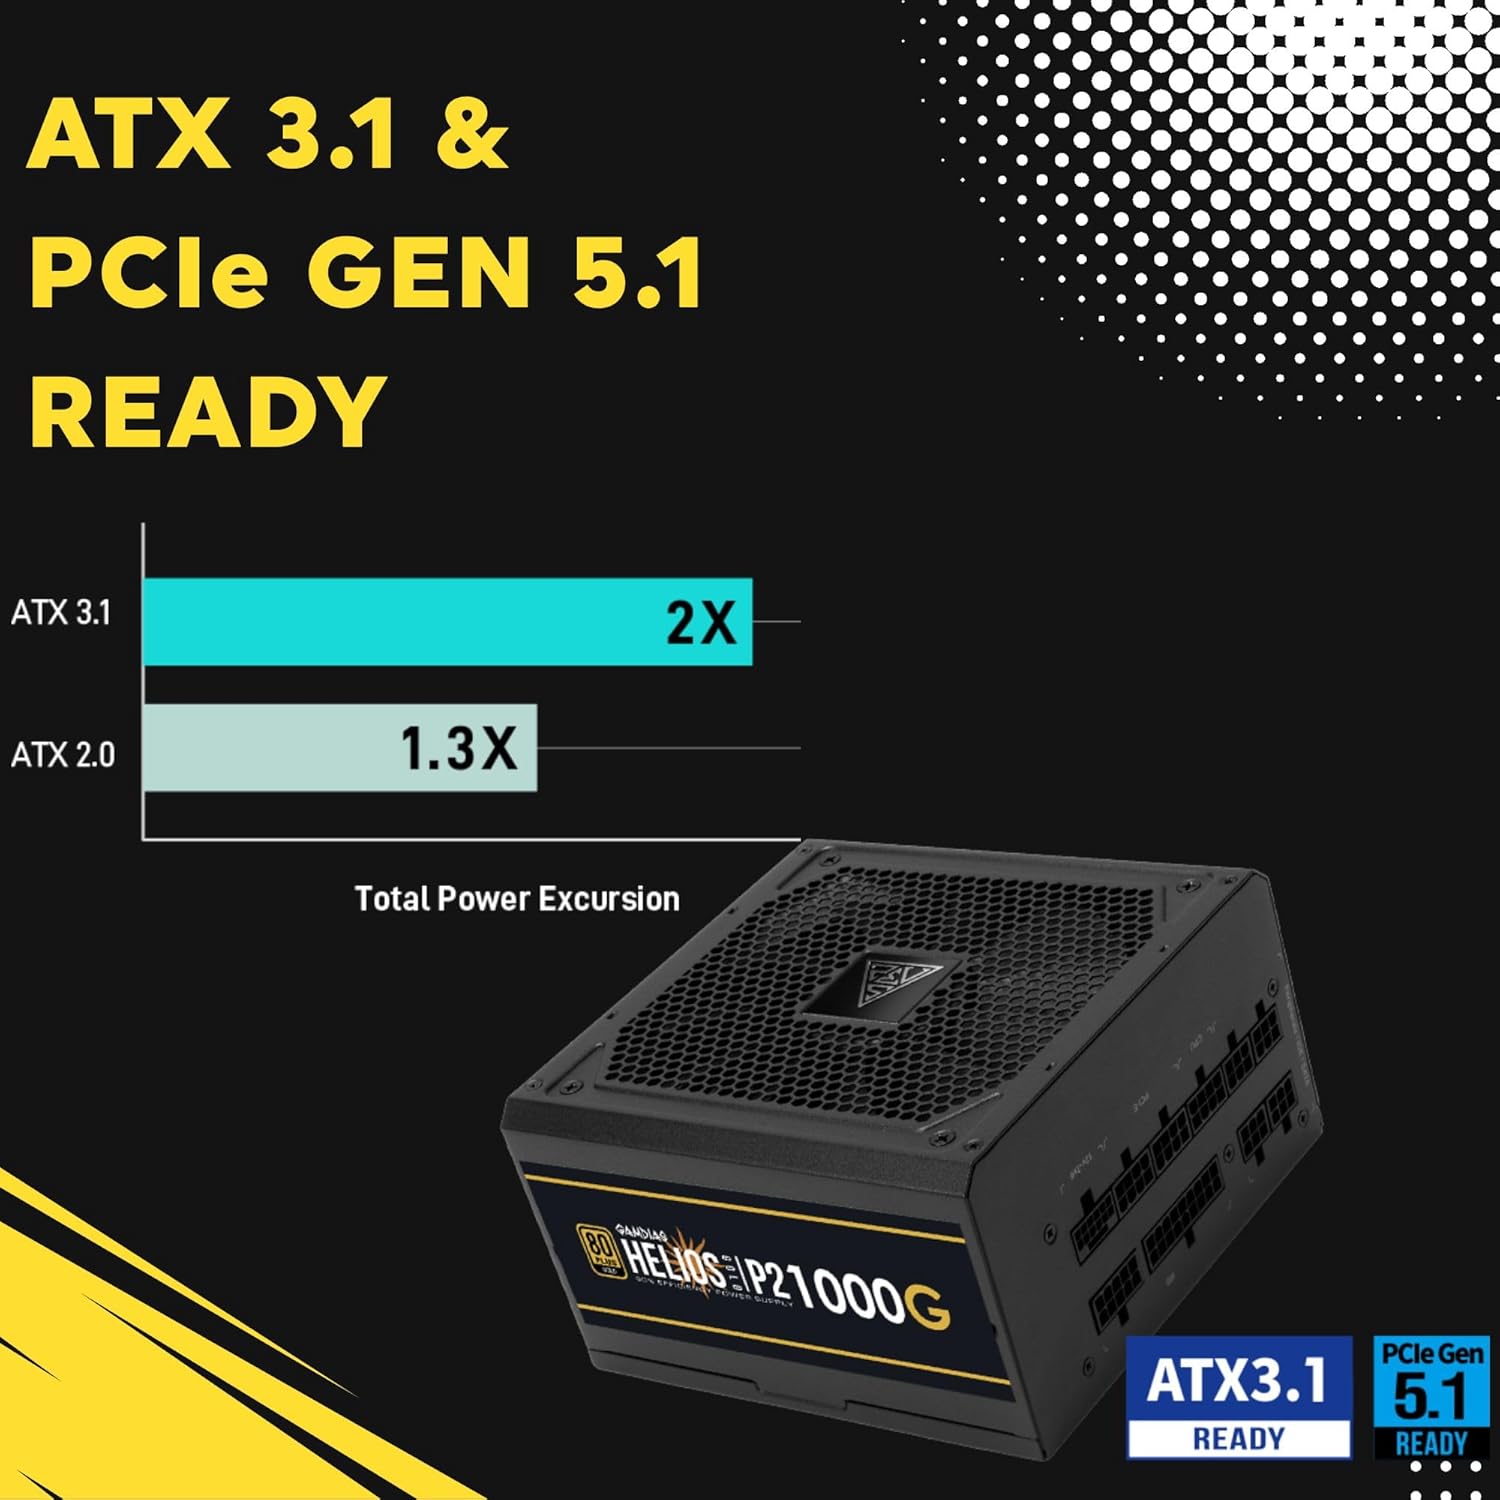
Image 4.3: The power supply is ready for ATX 3.1 and PCIe Gen 5.1, offering improved power excursion.

Image 4.4: Icons representing the various protection features integrated into the power supply.
5. Konfiguracja i instalacja
5.1 Fizyczna instalacja
- Przygotuj swój system: Upewnij się, że komputer jest całkowicie wyłączony i odłączony od gniazdka ściennego.
- Montaż zasilacza: Carefully slide the HELIOS P2-1000G into the power supply bay of your PC case. Ensure the fan is oriented correctly (typically facing downwards for bottom-mounted PSUs, or upwards if your case design requires it for optimal airflow).
- Zabezpiecz zasilacz: Za pomocą dołączonych śrub montażowych przymocuj zasilacz do obudowy komputera od tyłu.
5.2 połączeń kablowych
The HELIOS P2-1000G is fully modular. Connect only the cables required for your system components.
- 24-pinowy kabel ATX do płyty głównej: Connect the large 24-pin cable to the corresponding port on your motherboard. Ensure it clicks into place.
- CPU (EPS) Cable: Connect the 4+4-pin or 8-pin CPU cable to the CPU power connector(s) on your motherboard. High-end motherboards may require two 8-pin connectors.
- PCIe Graphics Card Cables:
- 12VHPWR Cable: For compatible PCIe 5.1 graphics cards, connect the native 16-pin 12VHPWR cable directly to the GPU. Ensure a firm connection.
- 6+2-pin PCIe Cables: For other graphics cards, connect the 6+2-pin PCIe cables to the GPU power connectors.
- Kable zasilające SATA: Connect SATA power cables to your SSDs, HDDs, and other SATA-powered devices.
- Kable peryferyjne (Molex): Podłącz kable Molex do wszystkich starszych urządzeń peryferyjnych, które ich wymagają.
- Przewód zasilający AC: Once all internal connections are made, connect the AC power cord to the power supply and then to a grounded wall outlet.

Image 5.1: The native 16-pin 12VHPWR cable for direct connection to PCIe 5.1 graphics cards.
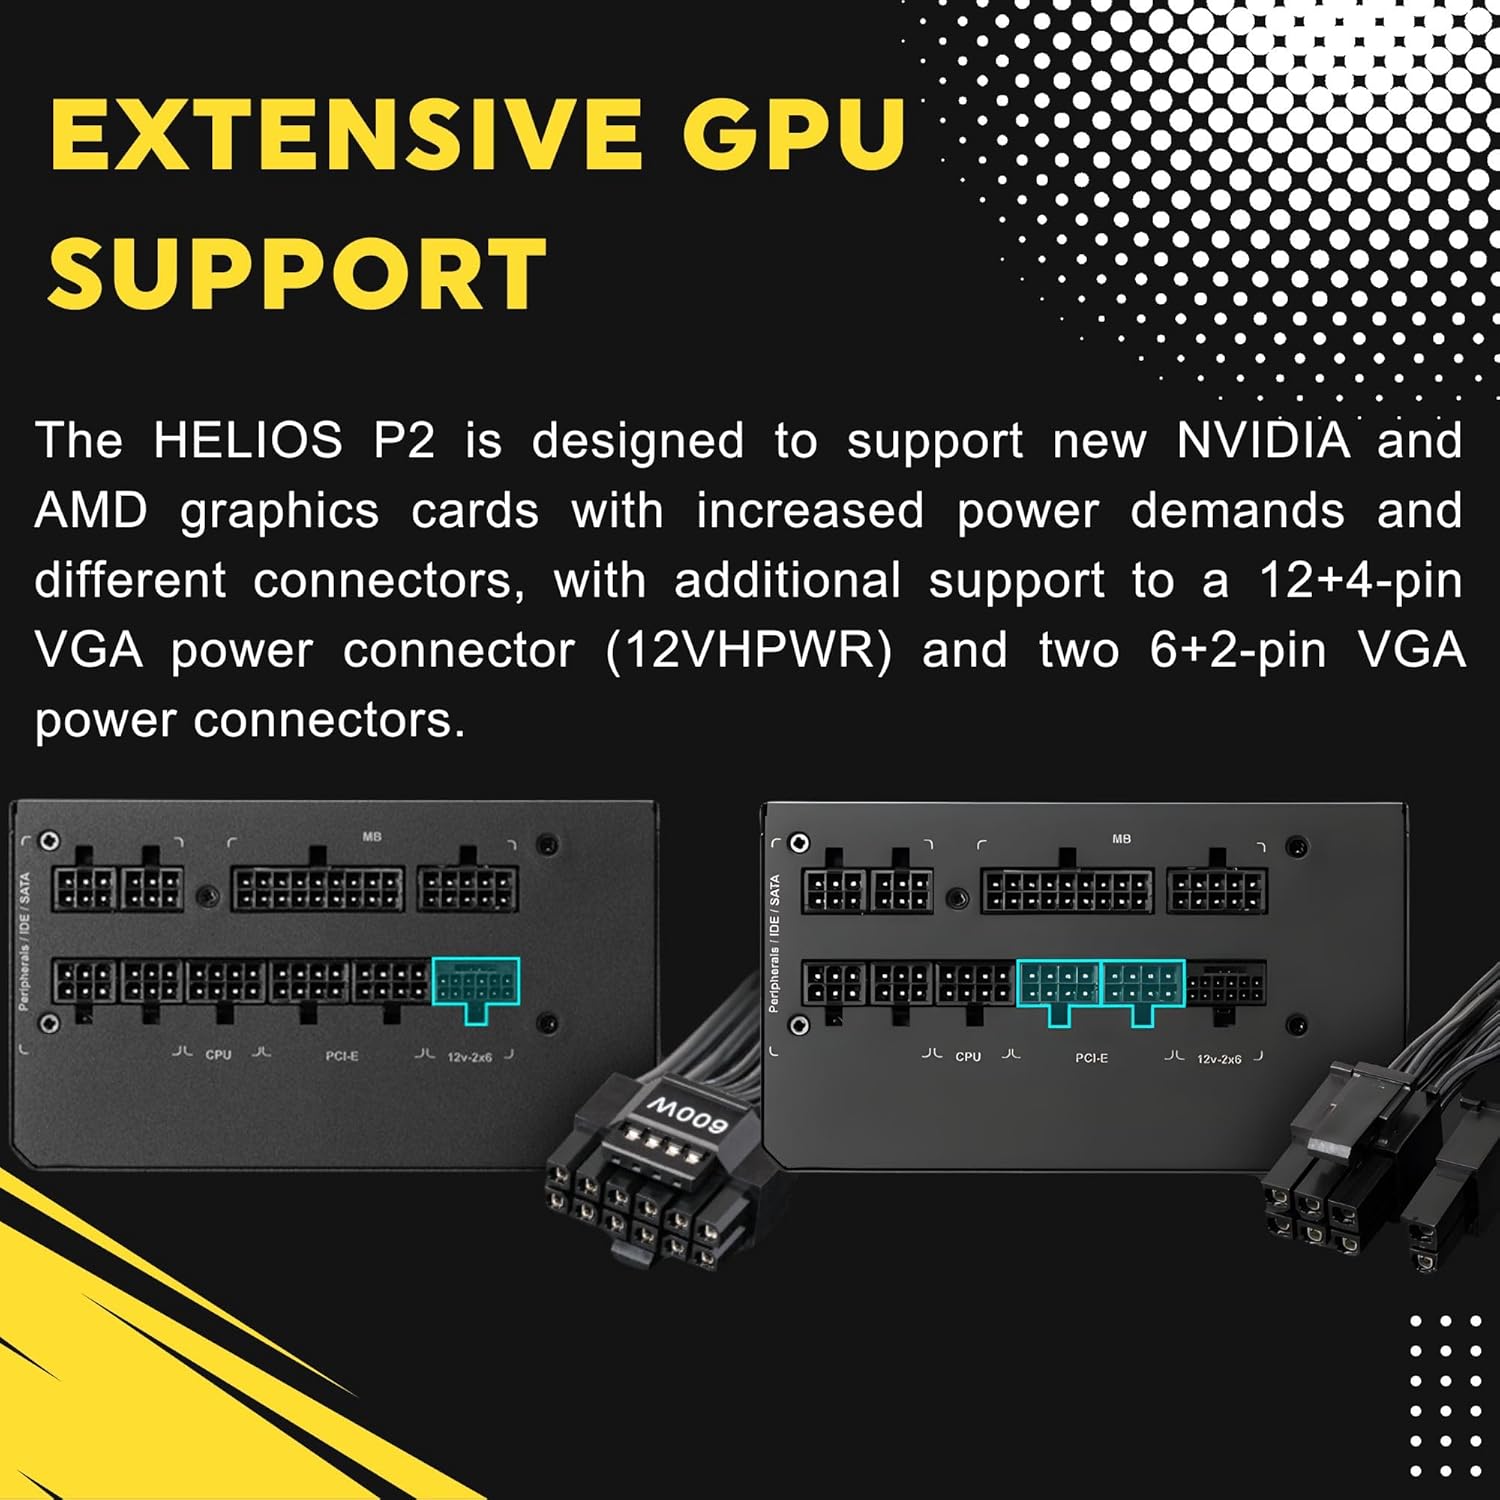
Image 5.2: Illustration of the fully modular design, showing various cable connections.
6. Instrukcja obsługi
6.1 Włączanie systemu
After ensuring all cables are securely connected, flip the power switch on the back of the power supply to the 'ON' (I) position. You can then power on your computer using the case's power button.
6.2 Inteligentne sterowanie wentylatorem
The HELIOS P2-1000G features a smart fan control system. The 135mm fan will adjust its speed automatically based on the power supply's load and internal temperature. This ensures optimal cooling while minimizing noise during lighter loads.

Image 6.1: Graph illustrating the smart fan's speed adjustment relative to power output.
7. Konserwacja
7.1 Czyszczenie
To maintain optimal performance and longevity, periodically clean the power supply:
- Odłącz zasilanie: Always unplug the AC power cord from the wall outlet and the power supply before cleaning.
- Usuwanie kurzu: Use compressed air to gently blow dust out of the fan grille and ventilation openings. Hold the fan blades to prevent them from spinning rapidly during cleaning, which can damage the bearings.
- Czyszczenie zewnętrzne: Wipe the exterior of the power supply with a soft, dry cloth. Do not use liquid cleaners or solvents.
7.2 Przechowywanie
If storing the power supply, keep it in a cool, dry environment, away from direct sunlight and extreme temperatures. Use its original packaging if available to protect it from dust and physical damage.
8. Rozwiązywanie Problemów
Jeśli masz problemy z zasilaniem, zapoznaj się z poniższymi typowymi procedurami rozwiązywania problemów:
- Brak zasilania:
- Upewnij się, że przewód zasilający jest prawidłowo podłączony do zasilacza i gniazdka ściennego.
- Check that the power switch on the back of the PSU is in the 'ON' (I) position.
- Verify all modular cables are firmly seated in both the power supply and the components.
- Sprawdź, czy gniazdko ścienne ma zasilanie, podłączając do niego inne urządzenie.
- Niestabilność/awarie systemu:
- Upewnij się, że wymagania dotyczące mocy Twojego systemu nie przekraczają wydajności zasilacza wynoszącej 1000 W.
- Sprawdź, czy połączenia kablowe nie są luźne, zwłaszcza te przy płycie głównej i karcie graficznej.
- Zadbaj o odpowiednią wentylację obudowy komputera, aby zapobiec przegrzaniu podzespołów, łącznie z zasilaczem.
- Głośny hałas wentylatora:
- The fan speed adjusts based on load. High system load will naturally increase fan speed.
- Check for dust accumulation in the fan or vents and clean as described in the Maintenance section.
If issues persist after performing these steps, contact GAMDIAS customer support.
9. Specyfikacje
| Funkcja | Specyfikacja |
|---|---|
| Nazwa modelu | HELIOS P2-1000G |
| Marka | GAMDIAS |
| Moc wyjściowatage | 1000 watów |
| Współczynnik kształtu | ATX |
| Certyfikacja efektywności | 80 PLUS złota |
| Metoda chłodzenia | Air (135mm Dual-Ball Bearing Smart Fan) |
| Typ złącza | ATX, PCI Express (Native 12VHPWR) |
| Kompatybilne urządzenia | Komputer osobisty |
| Wymiary produktu (dł. x szer. x wys.) | 12.8 x 8.27 x 4.13 cala |
| Waga przedmiotu | 7.28 funta (3300 gramów) |
| Data pierwszej dostępności | 19 kwietnia 2023 r. |
10. Informacje o gwarancji
GAMDIAS products are manufactured to the highest quality standards. For detailed warranty terms and conditions, please refer to the official GAMDIAS weblub kartę gwarancyjną dołączoną do produktu. Zachowaj dowód zakupu na wypadek roszczeń gwarancyjnych.
11. Obsługa klienta
If you require technical assistance or have questions regarding your GAMDIAS HELIOS P2-1000G power supply, please visit the official GAMDIAS support website or contact their customer service department. Contact information can typically be found on the GAMDIAS webmiejscu lub w opakowaniu produktu.