
1. Wprowadzenie
This manual provides comprehensive instructions for the installation, operation, and maintenance of your Splenssy 433MHz WiFi GSM Wireless Home Security Alarm System. Please read this manual thoroughly before installation and use to ensure proper functionality and safety. Keep this manual for future reference.
2. Zawartość opakowania
Sprawdź, czy w przesyłce znajdują się wszystkie wymienione poniżej elementy:
- 1 x Wireless Alarm Panel
- 1 x bezprzewodowy czujnik ruchu PIR
- 3 bezprzewodowe czujniki drzwi/okien
- 2 x piloty zdalnego sterowania
- 2 karty RFID
- 1 x Syrena przewodowa
- 1 x uchwyt czujnika PIR
- 1 x Zestaw śrub montażowych
- 1 x kabel ładujący USB
- 1 x zasilacz DC 5 V/1 A
- Batteries for sensors and remote controls (pre-installed or included separately)
- 1 x Instrukcja obsługi (angielski)
3. Specyfikacje
| Funkcja | Specyfikacja |
|---|---|
| Zasilacz | Prąd stały 5 V/1 A |
| Prąd roboczy | <120mA |
| Prąd czuwania | <80uA |
| Częstotliwość bezprzewodowa | 433MHz |
| Coded Mode | 1527 |
| standard bezprzewodowy | IEEE802.11b/g/n 2.4G |
| Alarm Panel Battery | Litowo-jonowy DC 3.7 V 500 mAh |
| PIR Sensor Battery | 3 baterie AAA 1.5 V |
| Door Sensor Battery | 1 x CR2450 3 V |
| Bateria do pilota zdalnego sterowania | 2 x CR2025 3 V |
| Głośność syreny | 110dB |
| Zakres temperatur | 0℃~55℃ |
| Zakres wilgotności | <80% RH (bez kondensacji) |
| Metoda kontroli | Remote, Smartphone App, RFID |
| Maksymalny zasięg bezprzewodowy | 100 Metres (open area) |
| Battery Average Life (Panel) | 72 Hours (standby) |
| Wyświetlacz | 2.4" TFT LCD Screen |
4. Informacje dotyczące bezpieczeństwa
- Sprawdź, czy zasilacz jest podłączony do odpowiedniego gniazdka elektrycznego.
- Do not expose the alarm panel to water or extreme temperatures.
- Trzymaj urządzenie z dala od silnych zakłóceń elektromagnetycznych.
- Replace batteries in sensors and remote controls as needed to maintain optimal performance.
- Nie próbuj samodzielnie demontować ani naprawiać urządzenia. Skontaktuj się z obsługą klienta, aby uzyskać pomoc.
5. Konfiguracja
5.1 Alarm Panel Installation
The alarm panel can be installed in two ways: wall-mounted or desktop placement.

Image: The alarm panel can be placed on a desktop using its integrated stand or mounted on a wall. The image shows both side and rear views of the panel's versatile placement options.
- Instalacja na komputerze: Simply unfold the stand at the back of the panel and place it on a flat, stable surface.
- Montaż na ścianie: Use the provided mounting screws and the PIR sensor holder (which can also be used for the panel) to secure the panel to a wall at a suitable height. Ensure the location allows for good Wi-Fi and GSM signal reception.
5.2 Instalacja czujnika
Czujnik ruchu PIR: Install the PIR sensor in a corner or on a wall where it can cover the desired area without obstructions. Avoid placing it directly facing heat sources or windows where direct sunlight or drafts might cause false alarms. Insert 3 x 1.5V AAA batteries.
Czujniki drzwi/okien: Install the two parts of the door/window sensor on the frame and the movable part of a door or window. Ensure the two parts are aligned and within 1cm of each other when the door/window is closed. Insert 1 x CR2450 3V battery.
5.3 Wired Siren Connection
Connect the wired siren to the designated siren port on the alarm panel. Ensure the connection is secure.
5.4 Włączanie i konfiguracja początkowa
- Connect the alarm panel to power using the USB charging cable and DC 5V/1A power adapter.
- The panel will power on automatically. Follow the on-screen prompts for initial setup.
- Insert a valid GSM SIM card (if using GSM features) into the designated slot on the panel.
- Połączenie Wi-Fi: Access the system settings on the LCD screen to connect the panel to your 2.4GHz Wi-Fi network. This enables app control and smart home integration.
5.5 App Connection and Smart Home Integration
Download the dedicated mobile application (available for Android and iOS) from your device's app store. Follow the in-app instructions to add your alarm system. This allows for remote control, parameter configuration, and accessory management.

Image: The alarm system can link to various smart home products, including smart speakers, cameras, and smart bulbs, all controllable via a smartphone application.
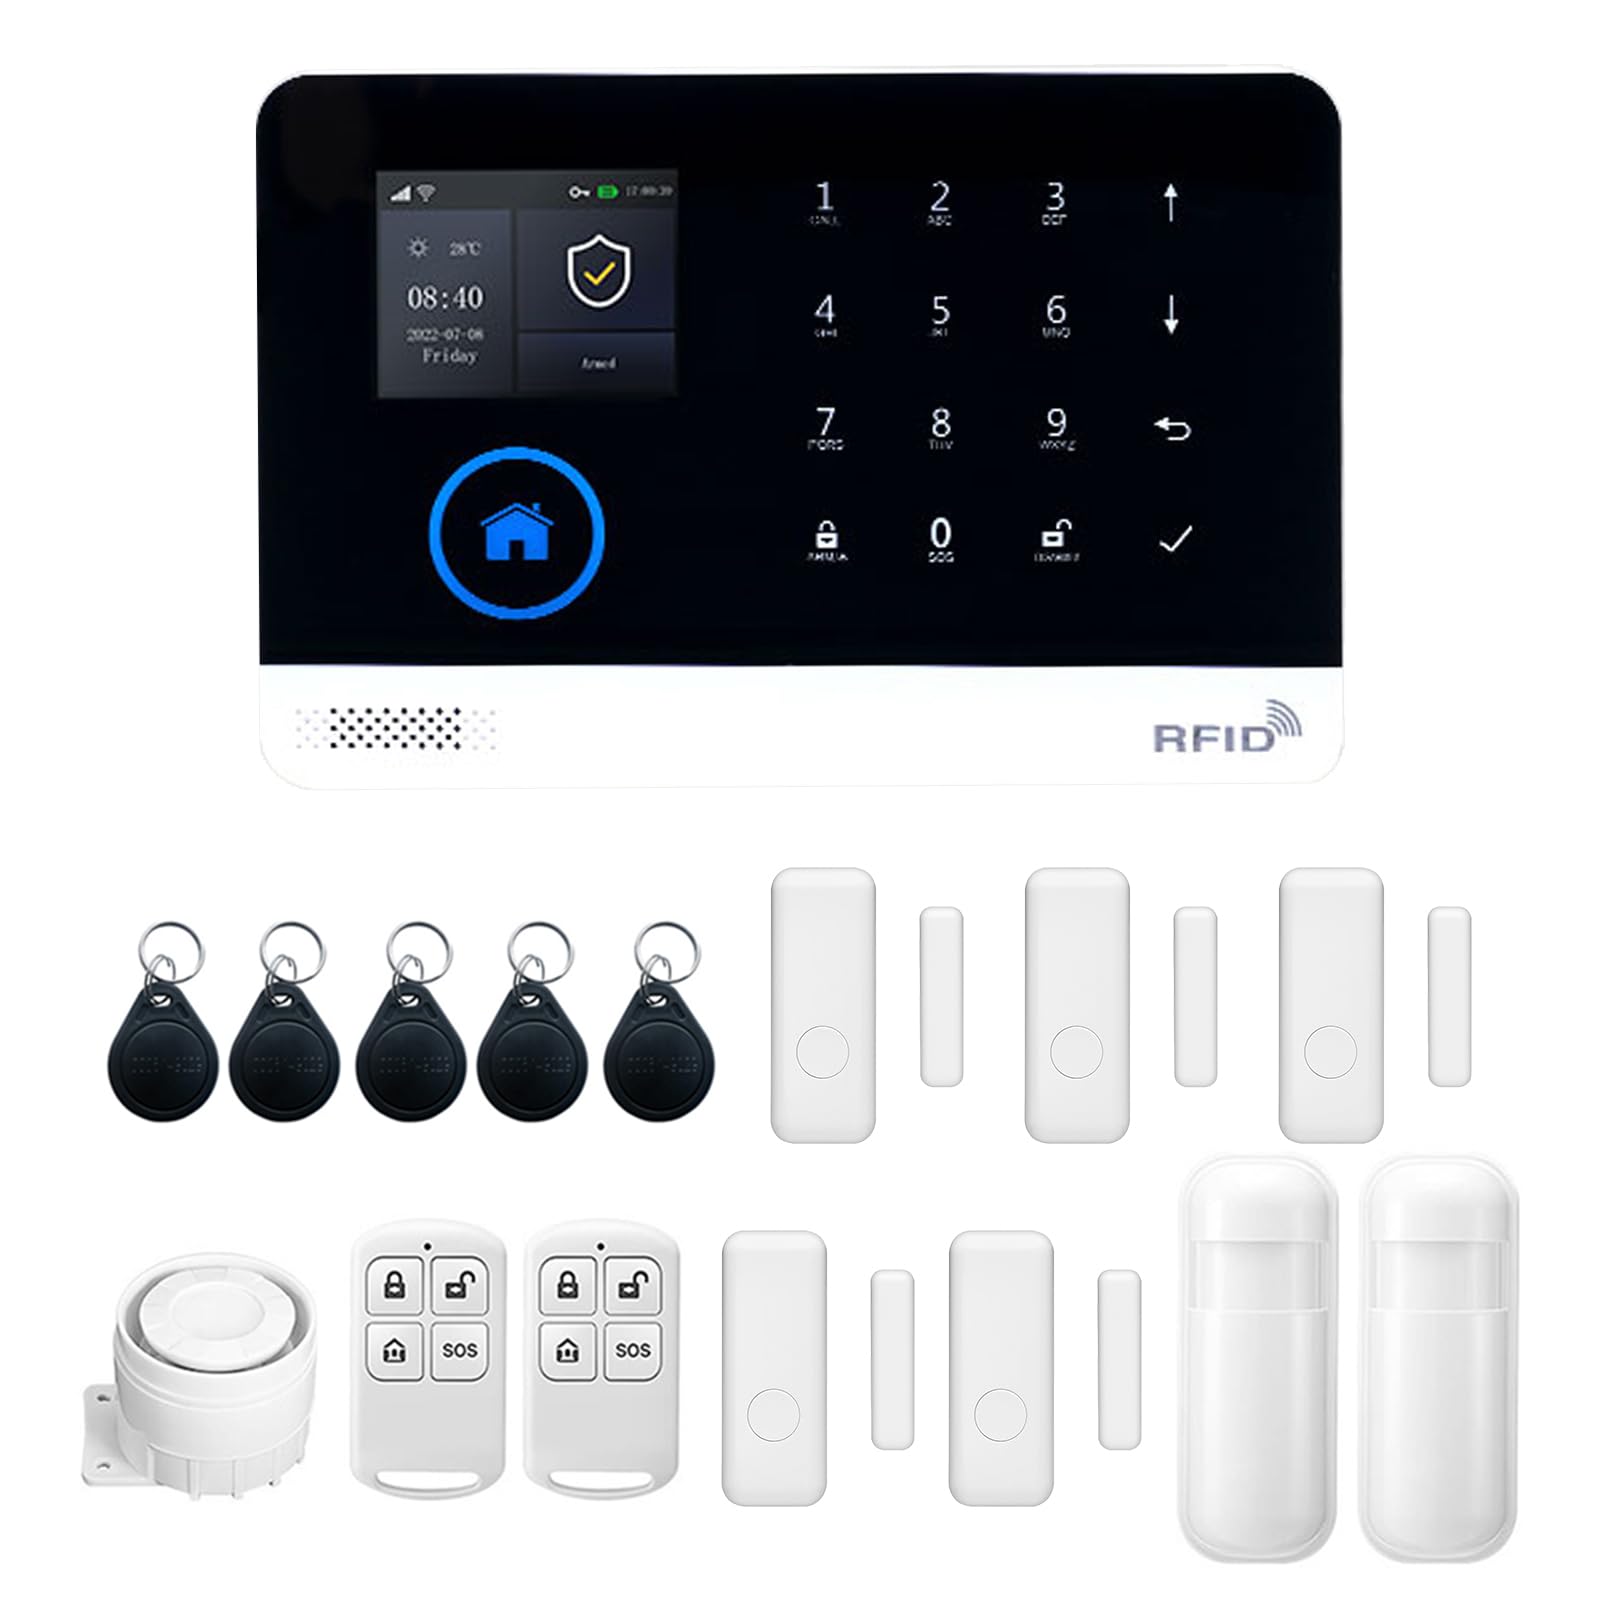
Image: The alarm panel supports eight defense areas and can link to a number of other wireless devices, offering various functions like intelligent prevention, ordinary zone, doorbell mode, and SOS.
6. Instrukcja obsługi
6.1 Uzbrajanie i rozbrajanie
System można uzbroić i rozbroić na kilka sposobów:
- Zdalne sterowanie: Press the arm/disarm buttons on the provided remote controls.
- Karta RFID: Tap an authorized RFID card on the panel's RFID reader.
- Aplikacja mobilna: Use the dedicated smartphone application for remote arming/disarming.
- Funkcja timera: Set scheduled arming and disarming times through the panel settings or mobile app.

Image: The alarm panel features a timer function for automatic arming and disarming, allowing users to set specific schedules, such as arming at 21:15 and disarming at 06:00.
6.2 Dwukierunkowy interkom głosowy
The alarm panel supports two-way voice communication. When an alarm is triggered or a call is initiated, you can communicate through the panel using your smartphone app.

Image: The system offers a two-way voice intercom feature, enabling communication between the alarm panel and a smartphone, useful for family members to stay connected.
6.3 Voice Control (Alexa Support)
The system supports voice control integration with compatible smart assistants like Amazon Alexa. Once configured through the mobile app, you can use voice commands to arm or disarm your system.

Image: The anti-theft alarm host supports Alexa voice control, allowing users to arm or disarm the system using voice commands through a smart speaker.
6.4 Ustawienia językowe
The alarm panel supports multiple languages. You can switch the display language through the system settings menu on the LCD screen. No restart is required after changing the language.

Image: The alarm panel supports 9 languages, including Chinese, English, German, Russian, Spanish, Polish, Greek, French, and Portuguese, allowing users to switch freely without restarting the device.
6.5 Adding/Managing Accessories
New wireless sensors, remote controls, or RFID cards can be added to the system via the mobile app or the alarm panel's settings menu. Refer to the on-screen instructions for pairing new devices.
6.6 Alarm Functions and Zones
The system features various defense areas and alarm types:
- Intelligent Prevention Area: For critical areas requiring immediate alerts.
- Strefa zwykła: Standard detection zone.
- Tryb dzwonka: Configures a sensor to act as a doorbell.
- Welcome Mode Prevention Area: For entry points with a welcome chime.
- Emergency Prevention Area: For specific emergency sensors.
- Left-behind Prevention Area: For monitoring items left behind.
- SOS Distress Function: Aktywuje alarm awaryjny.
Configure these zones and their behaviors through the system settings.
7. Konserwacja
7.1 Wymiana baterii
Regularly check the battery status of your wireless sensors and remote controls. Replace batteries promptly when low battery indicators appear on the alarm panel or app.
- Czujnik PIR: Replace with 3 x 1.5V AAA batteries.
- Czujnik drzwi: Replace with 1 x CR2450 3V battery.
- Zdalne sterowanie: Replace with 2 x CR2025 3V batteries.
The alarm panel has a built-in Li-ion battery for backup power during outages. This battery is designed for long endurance.

Image: The alarm panel features a low power consumption main board and a super long endurance built-in lithium battery, allowing it to dial phone calls and send SMS even during power outagt.j.
7.2 Czyszczenie
Przetrzyj panel alarmowy i czujniki miękką, suchą ściereczką. Nie używaj środków czyszczących ani rozpuszczalników o działaniu ściernym, ponieważ mogą one uszkodzić powierzchnie urządzenia.
8. Rozwiązywanie Problemów
- System się nie włącza: Ensure the power adapter is correctly connected and the power outlet is functional. Check the USB cable for damage.
- Czujniki nie odpowiadają: Check the batteries in the sensors and replace if necessary. Ensure sensors are within the wireless range of the alarm panel. Re-pair the sensor if needed.
- Brak połączenia Wi-Fi: Verify your Wi-Fi network is 2.4GHz. Ensure the Wi-Fi password is entered correctly. Check your router for issues.
- No GSM signal: Ensure the SIM card is correctly inserted and has an active plan. Check for network coverage in your area.
- Fałszywe alarmy: Review sensor placement to avoid environmental triggers (e.g., direct sunlight, drafts, pets). Adjust sensor sensitivity if applicable.
- Problemy z łącznością aplikacji: Ensure your smartphone has an active internet connection. Restart the app and the alarm panel.
9. Gwarancja i wsparcie
Ten produkt jest objęty standardową gwarancją producenta. Szczegółowe warunki gwarancji można znaleźć w karcie gwarancyjnej dołączonej do opakowania lub u sprzedawcy.
For technical support, troubleshooting assistance, or inquiries regarding your Splenssy Home Security Alarm System, please contact the retailer or manufacturer's customer service. Contact details are typically provided on the product packaging or the manufacturer's official webstrona.