
1. Wprowadzenie
This manual provides essential information for the safe and effective operation of your Apt RHINE 50 12/24 Volt 50 Amp Battery Charger. Please read these instructions carefully before using the device to ensure proper function and to prevent damage or injury. Keep this manual for future reference.
2. Instrukcje bezpieczeństwa
Always observe the following safety precautions when operating the battery charger:
- Bezpieczeństwo elektryczne: Ensure the charger is connected to a grounded outlet. Do not operate the charger with damaged cords or plugs. Avoid exposing the charger to rain or excessive moisture.
- Bezpieczeństwo baterii: Always wear eye protection and gloves when working with batteries. Batteries can produce explosive gases; ensure adequate ventilation. Do not smoke or allow sparks or flames near batteries.
- Zgodność: Use this charger only for 12V or 24V lead-acid batteries (WET, MF, CA/CA, EFB, GEL, AGM). Do not attempt to charge non-rechargeable batteries.
- Dzieci i zwierzęta: Przechowuj ładowarkę i baterie poza zasięgiem dzieci i zwierząt domowych.
- Wentylacja: Ensure the charger has proper ventilation during operation to prevent overheating. Do not cover the charger.
- Odłączenie: Always disconnect the AC power from the charger before connecting or disconnecting the battery clamps.
3. Zawartość opakowania
Sprawdź, czy w przesyłce znajdują się wszystkie elementy:
- Apt RHINE 50 Battery Charger
- Bateria Clamps (czerwony dla dodatniego, czarny dla ujemnego)
- Przewód zasilający
- Instrukcja obsługi
- Basic Tools (as indicated in product specifications)
4. Koniec produktuview
The Apt RHINE 50 is a robust battery charger designed for various 12V and 24V lead-acid batteries. It features a durable casing and clear indicators for monitoring the charging process.
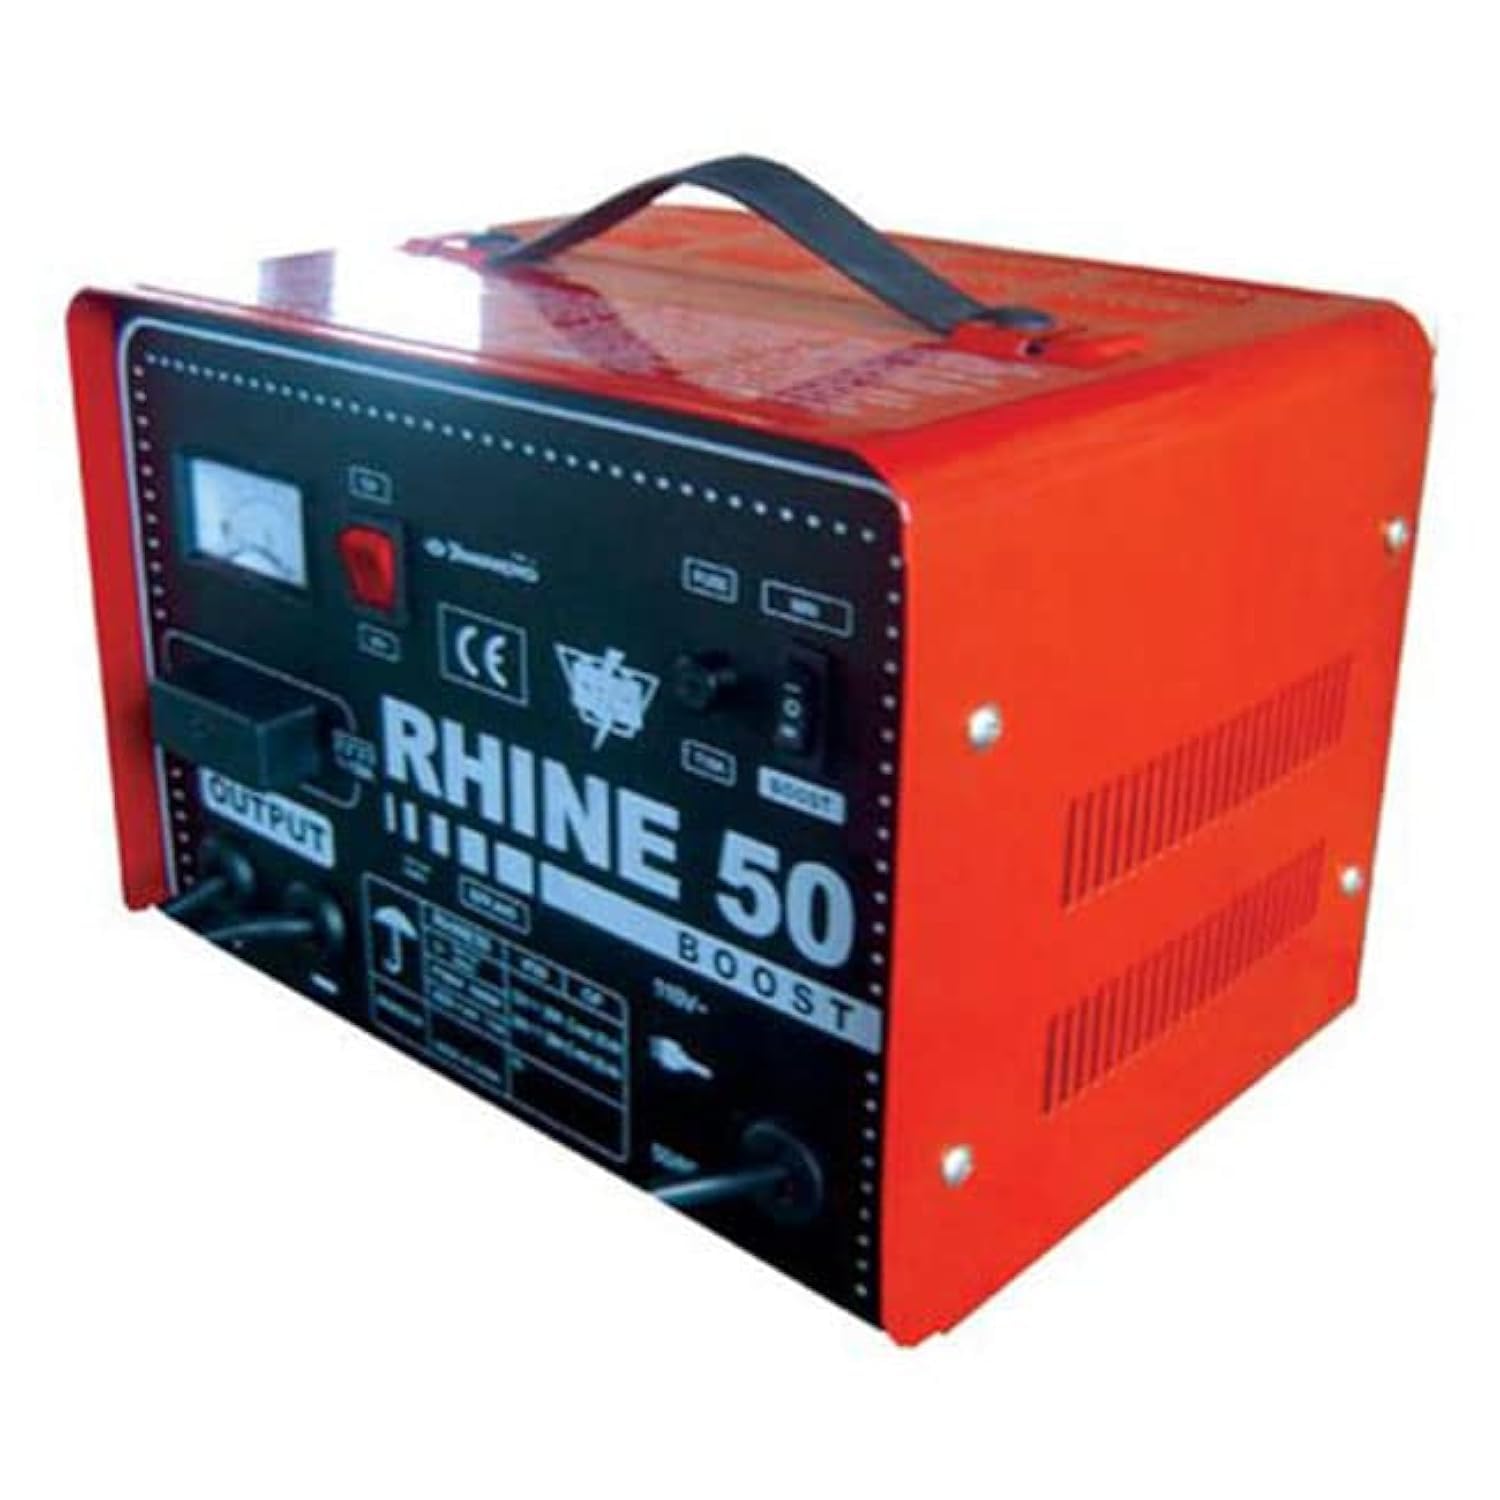
Rysunek 1: Przód view of the Apt RHINE 50 Battery Charger. The front panel includes an analog meter, power switch, fuse, voltage selector (12V/24V), boost switch, and output terminals. The charger features a red and black metal casing with a carrying handle.
Kluczowe elementy obejmują:
- Analog Ammeter: Wyświetla prąd ładowania.
- Przycisk zasilania: Turns the charger ON/OFF.
- bezpiecznik: Zapewnia ochronę nadprądową.
- Tomtage Selektor: Umożliwia wybór pomiędzy trybami ładowania 12 V i 24 V.
- Przełącznik wzmocnienia: Activates a boost charge function for deeply discharged batteries (use with caution).
- Zaciski wyjściowe: Connect to the battery using the provided clamps.
5. Konfiguracja
- Umieszczenie: Place the charger on a stable, flat surface in a well-ventilated area, away from direct sunlight, heat sources, and flammable materials.
- Przygotowanie baterii: Ensure the battery terminals are clean and free of corrosion. If charging a vehicle battery, ensure the vehicle is turned off and in park/neutral with the parking brake engaged.
- TomtagWybór: Przed podłączeniem ustaw głośnośćtage selector on the charger to match your battery's voltage (12 V lub 24 V). Nieprawidłowa głośnośćtage selection can damage the battery and charger.
- Podłącz akumulator Clamps:
- Podłącz CZERWONY (+) przewód dodatniamp do dodatniego (+) zacisku akumulatora.
- Podłącz CZARNY (-) przewód ujemnyamp do ujemnego (-) zacisku akumulatora.
- Zapewnij bezpieczne połączenie.
- Podłącz do zasilania: Plug the charger's power cord into a standard, grounded AC power outlet.
6. Instrukcja obsługi
- Rozpocznij ładowanie: Turn on the charger using the power switch. The ammeter will indicate the charging current.
- Ładowanie monitora: Observe the ammeter. The charging current will gradually decrease as the battery charges.
- Boost Function (if needed): For deeply discharged batteries, you may use the "Boost" function. Activate the boost switch. Monitor the battery closely during boost charging to prevent overcharging. Do not use boost for extended periods.
- Zakończenie ładowania: Charging is complete when the ammeter reading drops to a very low level or zero, indicating the battery is fully charged.
- Rozłączanie:
- First, turn off the charger using the power switch.
- Odłącz ładowarkę od gniazdka zasilania prądem zmiennym.
- Disconnect the BLACK (-) negative clamp z akumulatora.
- Odłącz CZERWONY (+) plus klamp z akumulatora.
7. Konserwacja
- Czyszczenie: Czyść zewnętrzną część ładowarki miękką, suchą ściereczką. Nie używaj rozpuszczalników ani środków ściernych.
- Składowanie: Przechowuj ładowarkę w chłodnym i suchym miejscu, gdy nie jest używana. Kable utrzymuj w stanie schludnym i zwiniętym.
- Kontrola: Okresowo sprawdzaj przewód zasilający i baterię.amps for any signs of damage. Replace damaged components immediately.
8. Rozwiązywanie Problemów
| Problem | Możliwa przyczyna | Rozwiązanie |
|---|---|---|
| Ładowarka nie włącza się. | No power from outlet; power switch off; blown fuse. | Check AC outlet; ensure power switch is ON; check and replace fuse if necessary. |
| No charging current indicated. | Incorrect battery connection; battery fully charged; severely discharged battery. | Verify correct polarity (+ to +, - to -); battery may not need charging; try boost function cautiously for deeply discharged batteries. |
| Ładowarka się przegrzewa. | Poor ventilation; prolonged boost charging. | Ensure adequate airflow around the charger; reduce charging time or discontinue boost. |
Jeśli problemy będą się powtarzać, skontaktuj się z obsługą klienta.
9. Specyfikacje
| Funkcja | Szczegół |
|---|---|
| Marka | Apt |
| Numer modelu | RHINE/RAYLEK50 |
| Numer części | RHINE/RAYLEK50 |
| Źródło zasilania wejściowego | AC |
| Objętość wyjściatage | 12V / 24V |
| Ampwymazać | 50 Amp (implied from product title) |
| Wymiary produktu | Wymiary 10 x 20 x 37 cm |
| Waga przedmiotu | 209 gramów |
| Zawarte komponenty | Tools (as per product data) |
| Wymagane baterie | NIE |
| Pierwsza dostępna data | 15 marca 2023 r. |
10. Gwarancja i wsparcie
For warranty information or technical support, please refer to the documentation included with your purchase or contact Apt customer service directly. Keep your proof of purchase for warranty claims.
You can visit the Apt store for more information: Apt Official Store